An invoice can be created either directly from a Site or Company Record. In most cases though, it would be required to create the invoice from site works completed by a site engineer. I.E. Directly from the Job Ticket.
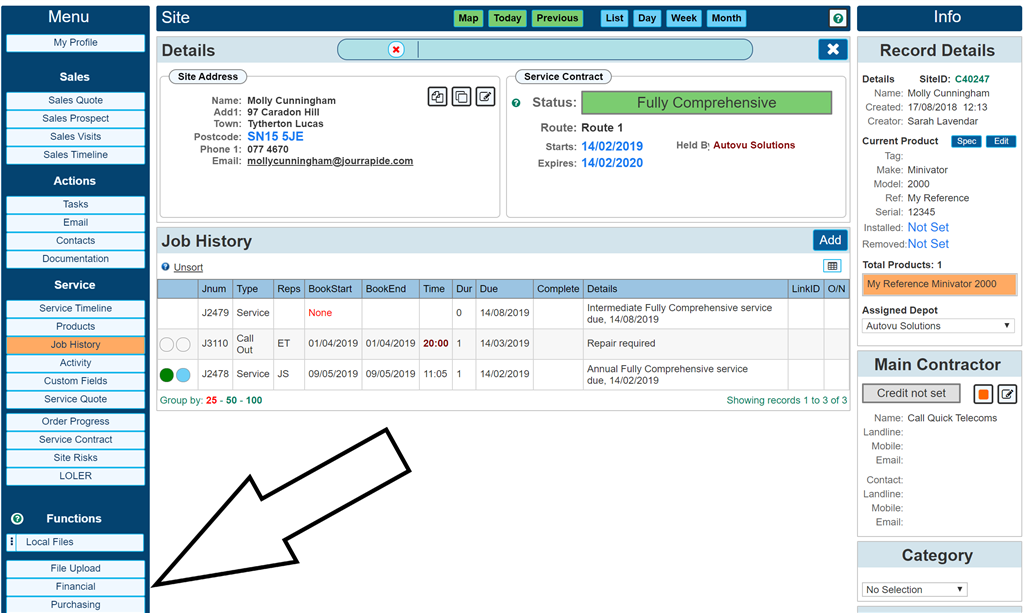
The below image shows the site record 'Financials' button. A similar button is available on a company record. This will take you directly the the financials page for this particular site.
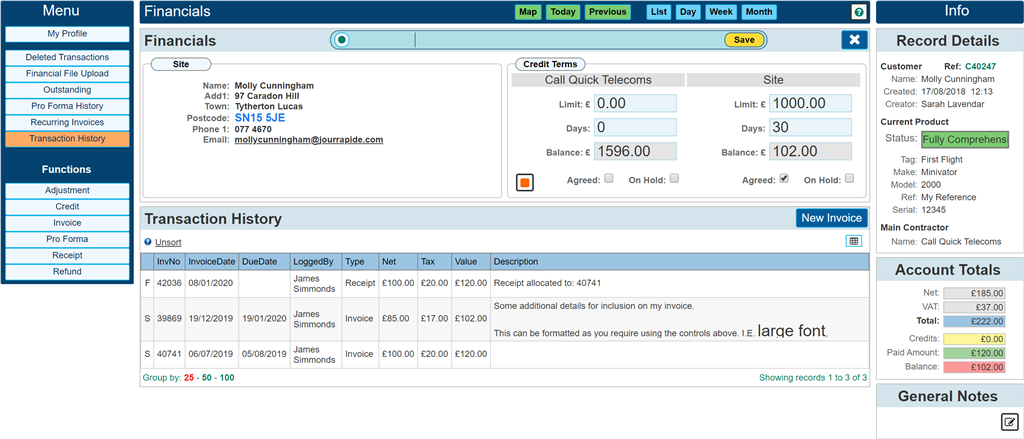
The below image shows an example Financials page for the given site. Credit terms can be set here within the details dialogue. Setting the Credit Limit will flag up a prompt should the account go over the entered value. Additionally the credit terms, I.E. how many days credit can be set for the customer. This is a global account value and once set, will be used to automatically set the Due Date for each new invoice created.
Clicking the button 'New Invoice' will open up a blank invoice.
To create an invoice directly from a Job Ticket, use the invoicing tab directly from within the job ticket page. This will automatically 'Link' this particular job ticket to an invoice. See below for an example job ticket.
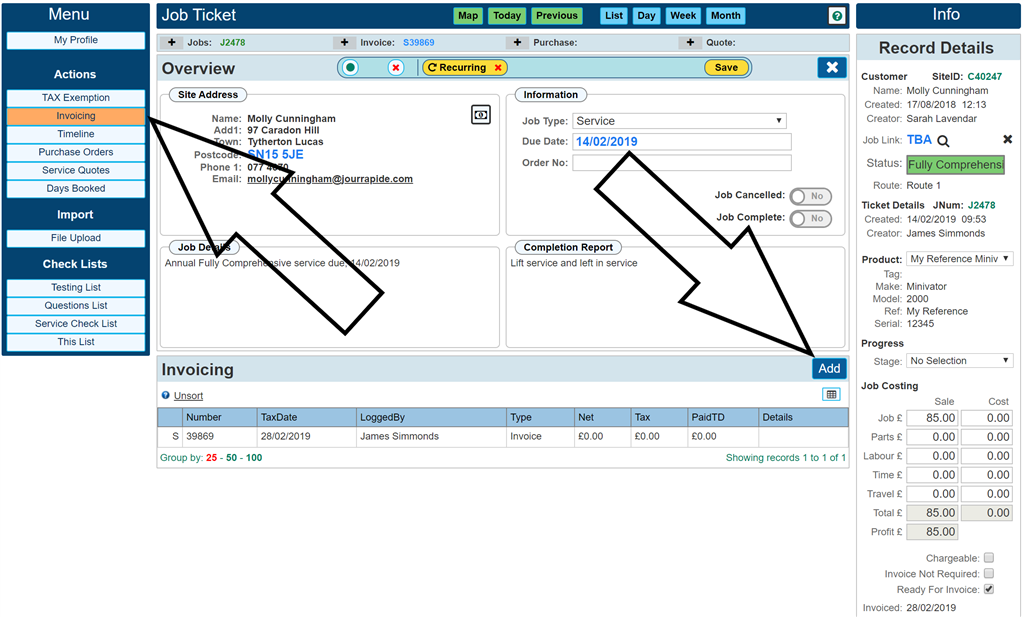
The above image shows an existing invoice within the grid. This can be clicked to be taken directly to the invoice. To create a new invoice simply click the 'Add' button. You may note we have priced up this visit within the panel on the right which allows for job costing. This information, including the job details can be used within the invoice. Multiple invoices can be created from the same job ticket where required. This may be useful for staging invoices, I.E. deposit invoice, first fix invoice, second fix invoice and completion invoice.
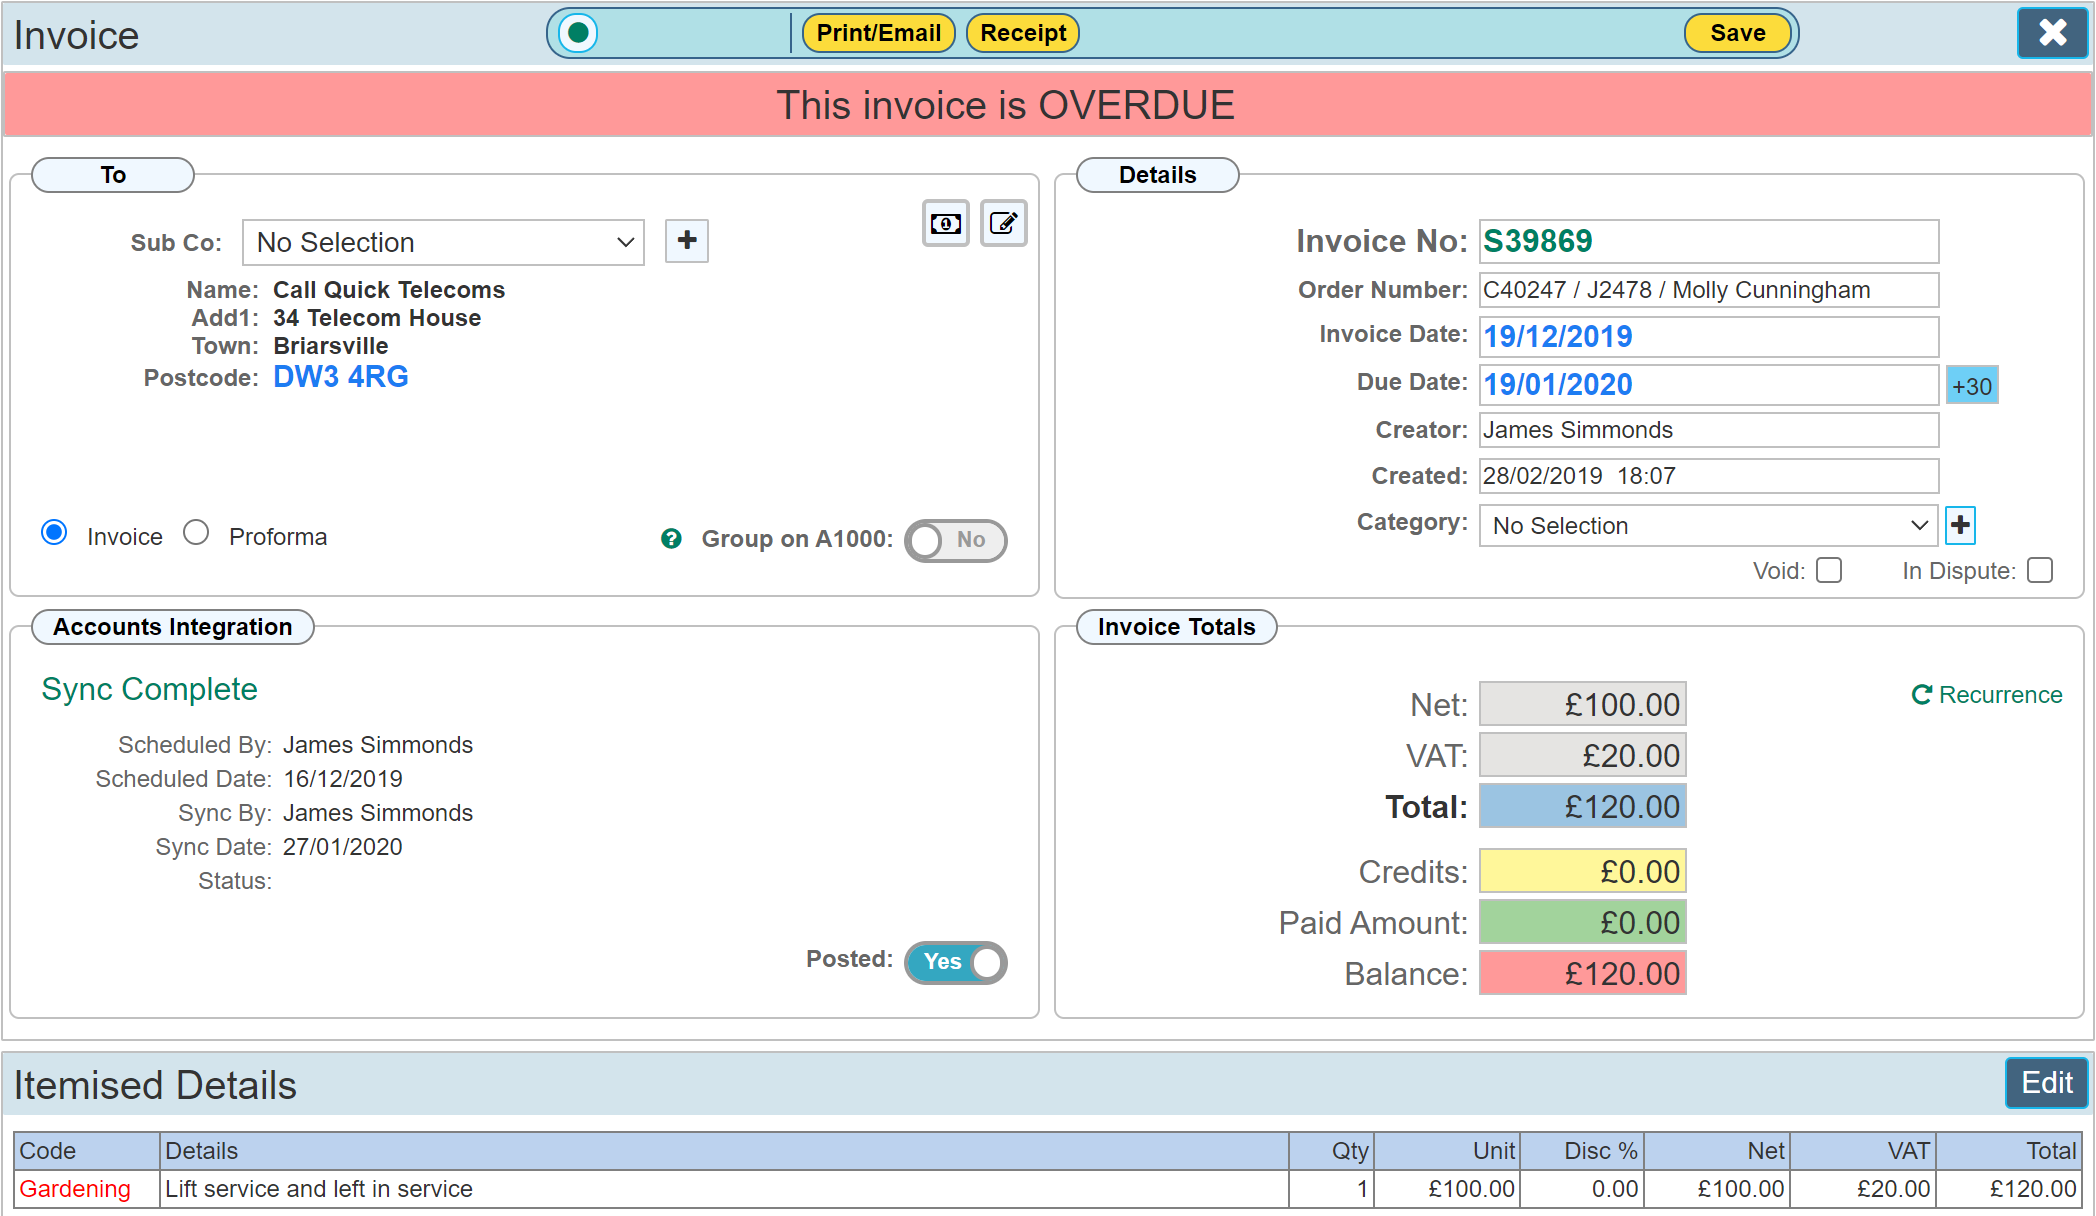
Using either of the methods above will ultimately result in the creation of an invoice. The below image shows a pre completed invoice. It is showing a prompt telling the user that this invoice is now overdue. This occurs when the current date is greater than the 'Due Date'.
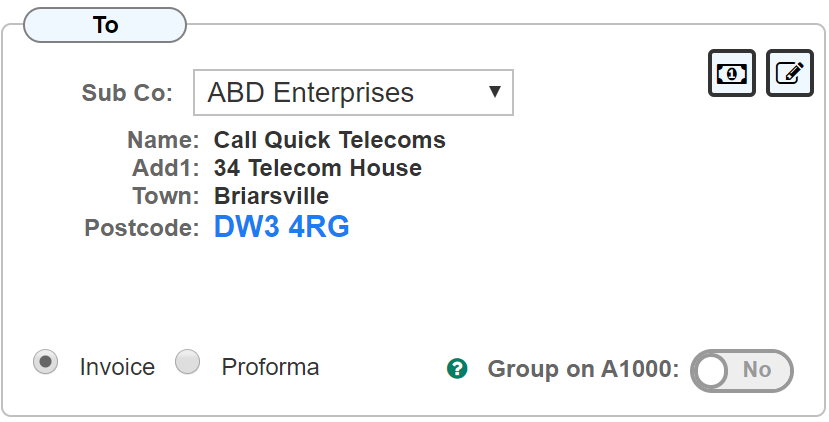
Invoice 'To' Panel
'Sub Co' Drop down list
This option will be available depending on which package you have a subscription for.
After saving the invoice for the first time, the option to define a 'Sub Company' for the address to invoice can be set. The below image shows this option set.
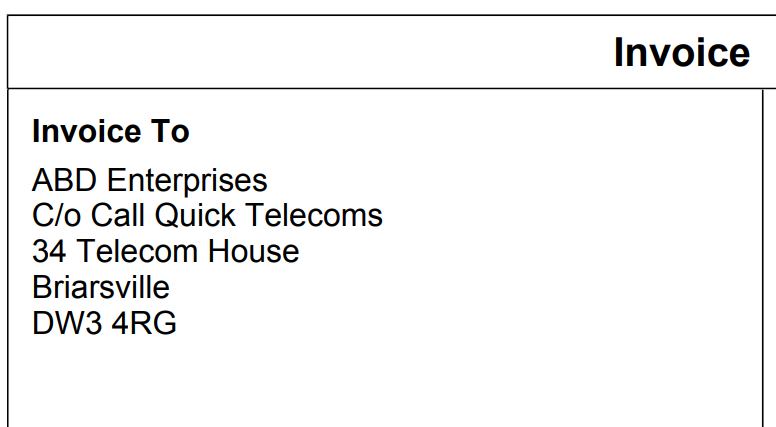
When the invoice is created and a PDF generated, the invoice will show as per the image snippet below.
The idea behind this is that many companies invoice one company but in the 'Care of' another. I.E. a managing agent for another client. Depending on which financials package you use, this detail can be cascaded down via the API.
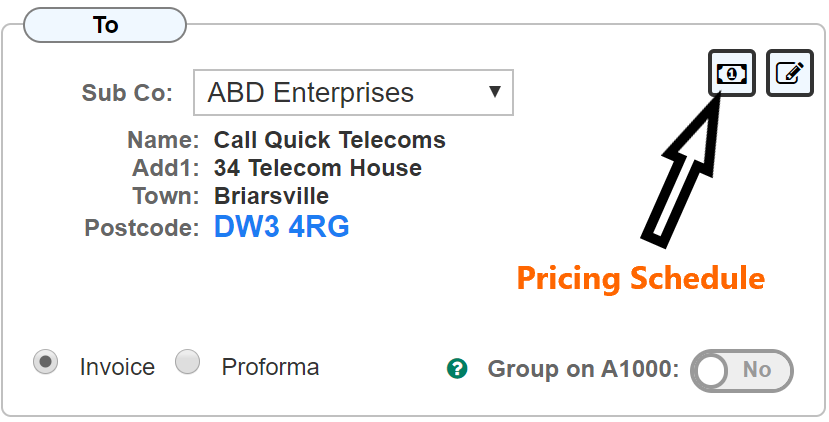
Pricing Schedule
The option to include a series of individually named and priced values that are applied to a given main contractor can be created and will be available within each invoice created. The headings / titles of these can be set up in the Custom Values section. Once set up, the values can easily be maintained within any invoice for that Main Contractor.
The idea behind this feature is to include a set of common prices for standard items that are often used within your company but prices for these may vary from one managing agent to another. So for example, using the managing agent 'Call Quick Telecoms' within any site will show a pricing schedule of the same prices each time the schedule is opened whereas another managing agent can has a different price for each of the fields.
The below image shows the Pricing Schedule opened by clicking the LH Button at the top right of the Invoice To panel. These are just example headings, you can create as many as you require with whatever title you wish.
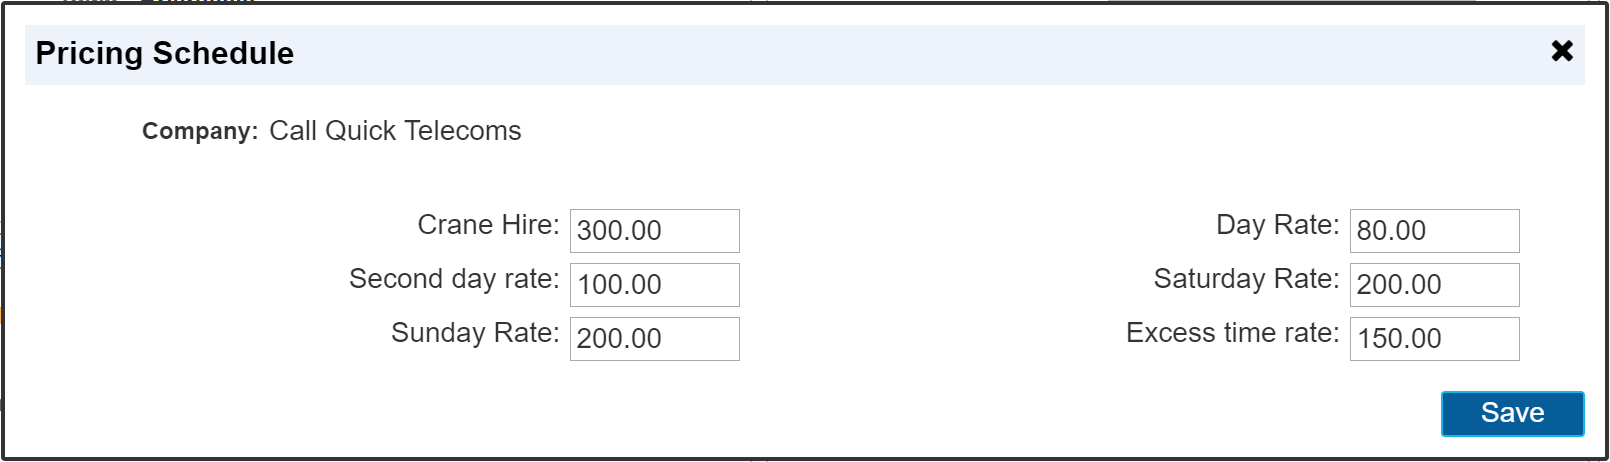
N.B. The pricing Schedule dialogue is not available when the managing agent is set to 'Same As Site'. It is only available when a managing agent has been selected. I.E. It needs a managing agent to attach the prices to.
If you are in the 'Company Record' for a managing agent, the details are also available there. Ideally, you would go to each managing agent record to set up the pricing for each item. It is also possible to edit the prices from any site record however, in many instances it is decided (your company decision) that the 'Save' button is disabled on site records to prevent unauthorised editing of the prices. I.E. The save button can be switched on or off depending which user is viewing.
|
If you return to a previous invoice and see the 'Invoice To' address shown if RED, this means that the managing agent originally assigned has been deleted from the system since this invoice was originally created.
|
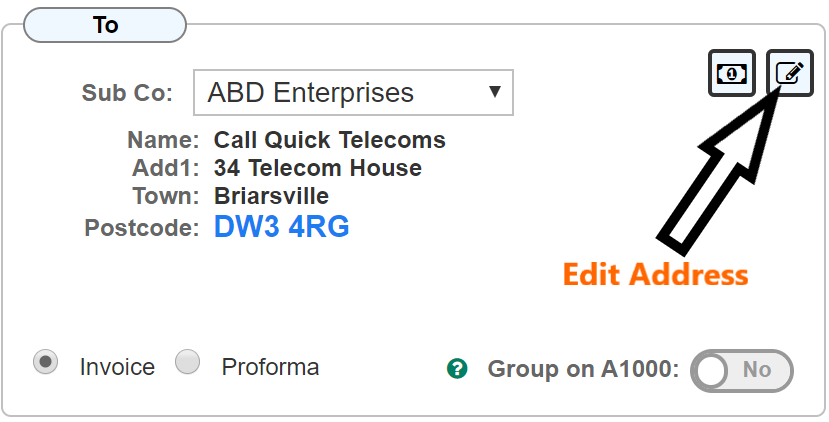
Edit address
When a new invoice is created, the invoice 'To' address is pre completed with either the site address or main contractor should a main contractor be selected for this particular site. After this point, the invoice to address will remain the same should the main contractor be later changed on the main site record.
To edit the Invoice To address at any time, click the 'Pen' icon at the top far right of the Invoice To panel to open up an address edit dialogue box.
Invoice / Pro Forma
A pro forma can be created where required which does not show in the financial calculations for the site. As a pro forma is not an invoice, as such, the values do not show in the financial calculations for the site. AutoVu makes it easy to convert a pro forma to an actual invoice. Either toggle the radio button to Invoice or simply create a receipt for this pro forma. Either way, the pro forma (if one is created) will automatically become an invoice. Please note: pro forma's that have been receipted and turned into an invoice can no longer be turned back into a pro forma.
Group on A1000
This small feature is designed for use with accounts sync. By default, all invoices are created within their own account on your financials package through the accounts sync API. If you would prefer a particular invoice type to be grouped within a single account on your financials package, this button allows you to do just that. A single account 'A1000' is created within your financials package for all invoices with this toggle set.
This feature is particularly useful for highly repetitive invoicing on small amounts that do not warrant their own account in your financials. It is a choice you can make depending on your company type. Otherwise simply ignore this control.
'Details' Panel
Invoice No
Each invoice created within AutoVu is automatically generated and is unique, each one created is prefixed with an 'S'. By default, invoicing starts at S1000 and each new invoice created increments by one. Should you wish invoicing to start at a higher number when first using the system, this can be arranged by contacting our team through the ticket support system. Please note: the 'S' prefix cannot be changed.
Order Number
The order number field is automatically pre populated with information from the job ticket or site record depending on circumstance of how the invoice was generated. It can however be edited or removed and will remain that way upon saving the invoice.
Order Number Field Auto Completion Rule:
If the invoice was created directly from a site I.E. not from a Job Ticket, the site 'C' number and site name will appear.
If the invoice was created from a Job Ticket, the site 'C' number, site name and Job ticket 'J' number will appear.
If the job ticket has an 'Order Number' recorded, this number will be displayed instead of the site and job ticket details.
Invoice Date
On creating an invoice directly from the site or company record, the invoice date will default to todays date. Clicking on the date will open a dialogue for you to edit the date. For invoices created from a Job Ticket, the invoice date will default to the completion date of the job (this is usually the last day booked for the work). Again this can be edited where required by clicking on the date.
Due Date
The due date can be automatically set based on the financial account details shown above in the transaction history view using the 'Credit Terms (days) field. By default, the due date will show the same date as the invoice date. Setting the credit terms for the account will allow the system to automatically add the correct number of days to the due date based on the invoice date each time a new invoice is created.
In the absence of credit terms, we have included a handy +30 days button which for many invoices would be correct. Clicking this simply adds 30 days to the invoice date and inserts it as the due date. Please Note: multiple clicks of this button will make no difference. I.E. it will stay at +30 days.
Creator / Created fields
These 2 fields are read only and record who created the invoice and on what day / time this happened.
Related Job
When an invoice is created from a Site / Job Ticket, this field will be visible. It records the link between this invoice and any job ticket within that site product. On our above example, this shows J2478. this is a clickable link and if clicked, takes you back to the job ticket that it is linked to. Clicking the spy glass opens a dialogue that allows you to link this particular invoice to an alternative job ticket, or create the initial link should the invoice be created directly from the site instead of its corresponding job ticket. (The cross symbol to the right of this field simply removes the link)
Category
This field is a user defined drop down list allowing you to add a category to each invoice created. The idea here is to allow you to group certain types of invoices into the same category. When viewing the invoices within the Transaction History', it is then easier to see all the invoices that are selected as a given category. This field can be ignored should categories be of no importance.
Void
By marking an invoice as 'Void' removes its value from the Account Totals section. It also removes the value from all reports. 'Void' is often used should the invoice become a 'Bad Debt' rather than simply deleting the invoice, marking it Void gives some flexibility to 'Un Void' the invoice should the need arise at a later date.
In Dispute
If a client is querying an invoice which may mean the due date passes. Marking an invoice 'In Dispute' allows you to easily locate these within a report.
'Accounts Integration' Panel
This panel is active if you are utilising the accounts integration process.
Schedule Sync
Clicking this button schedules this particular invoice for sync to your financials package. Unless this button is clicked, the invoice will not sync.
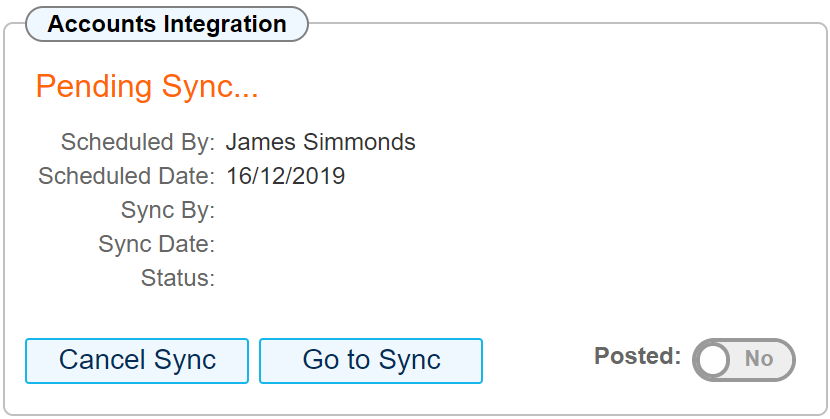
Once the Schedule Sync button is pressed, the dialogue will change as above to show who requested the sync and on what date. This will remain that way until the sync has taken place and subsequently show the image below.
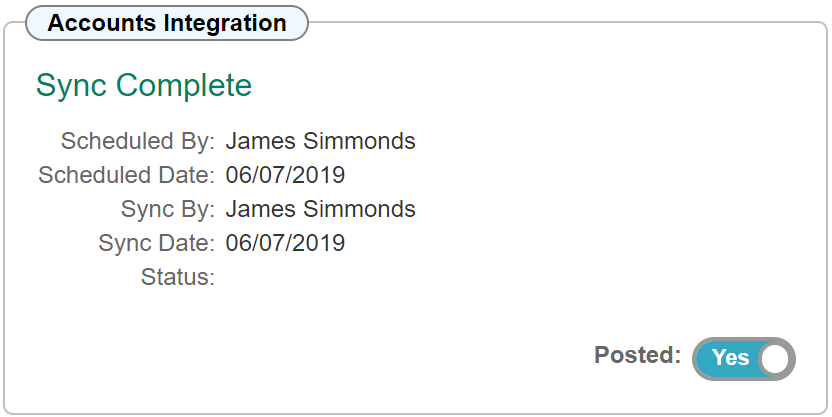
Posted
This flag records the fact that your invoice now appears within your accounting package. It is set automatically when you use the accounts sync feature, for invoices manually copied from AutoVu into your financials will require you to manually set this flag.
This flag is used in your reporting allowing you to identify all invoices that have been posted to your financials software. I.E. all the same details shown on this particular invoice have indeed been copied across and appear on your financials software.
'Invoice Totals' panel
This panel is read only and details the values recorded within the itemised details editor.
Recurrence
Recurring invoices can be set from within this panel. See the section 'Recurring Invoices' for details about how this works.
'Itemised Details' panel
Clicking the 'Edit' button opens up the itemised details editor. This is where each individual detail line is entered onto your invoice.

Code
This drop down list allows you to select which nominal code is linked to this particular invoice line. The nominal codes are set up in the Chart Of Accounts within the Settings > Custom Values section of AutoVu. This is required should you wish to use the accounts sync feature.
Description
The description field allow you to enter details for each item of the invoice. You may simply type these in directly, or double click within the field to open up the Job Ticket details panel (not applicable on 'Company Records')

Once this has been double clicked, the below dialogue will appear.
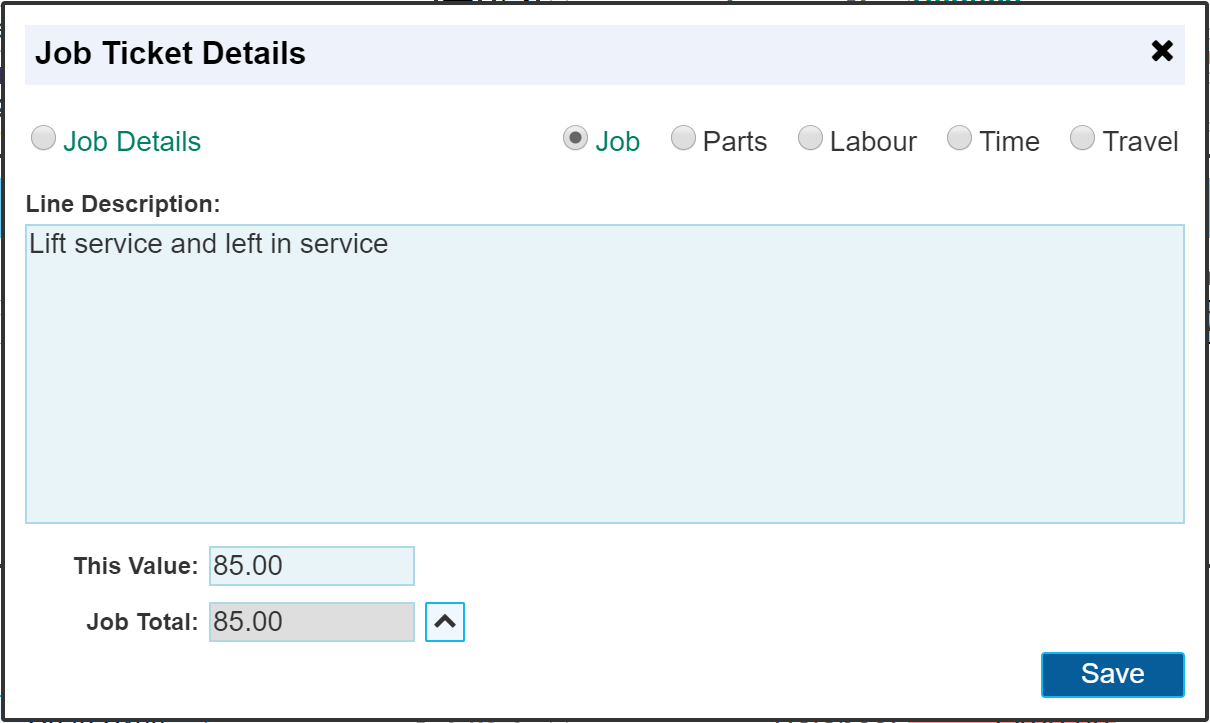
This dialogue allows you to use details from the job ticket to directly insert the job ticket text and value into your invoice for a given job ticket field.
Each job ticket field can be selected using the radio buttons 'Job', Parts', Labour', 'time' and 'Travel'. When you see one of these radio buttons where the title is coloured 'Green', it means that a value exists within that field.
Only one field can be inserted at a time. This would mean creating a separate invoice detail line for each detail section of the job ticket.
The individual radio button to the left labelled 'Job Details' enters the details of the job whereas the button 'Job' enters the completion report details. Both buttons use the same Job Value field to determine the value. The reason for this differentiation is that some companies prefer to invoice using the description about what they are going to do, whereas other companies like to detail what they did. The option is there for both methods.
The value of each section of the job ticket costing section is shown within the 'This Value' field. I.E. it will show only the value of the selected radio button which corresponds to a value field within the job ticket. The total costing of the job is shown within the 'Job Total' field and can be pushed into the 'This value' field (if required) by clicking the 'Up Chevron'. This is useful should the total amount for the job be required.
Should you further edit the details, the details will remain in their edited state on subsequent double clicking of the details line within the itemised details editor. If you wish to default back to the original job ticket text, simply delete all the text in the details column of the Itemised Details editor and the full job ticket details will reappear on opening the Job Ticket Details panel.
Once saved, whatever it says within the Job Ticket Details panel will be inserted into the Itemised Details 'Description' field and 'Unit Price field.
Editing the VAT rate
By default, the detail lines editor will apply VAT at the current rate set in your company settings. It will automatically be applied when clicking the 'Save' button, which also closes the dialogue. You can force the system to update the VAT values immediately by clicking the 'Calculator' icon shown in orange at the far right of each detail line.
The VAT rate or value can be edited by double clicking the VAT rate field as shown below.

Once this has been double clicked, the dialogue below will open allowing you to edit the VAT rate.
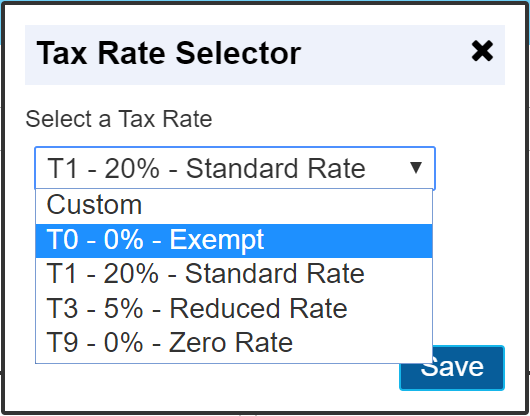
Selecting 'Custom' allows you to enter your own VAT values. I.E. the field becomes active allowing you to type in a figure for VAT.
Selection any of the other rates tells the system to calculate VAT for that row based on the percentage value selected.
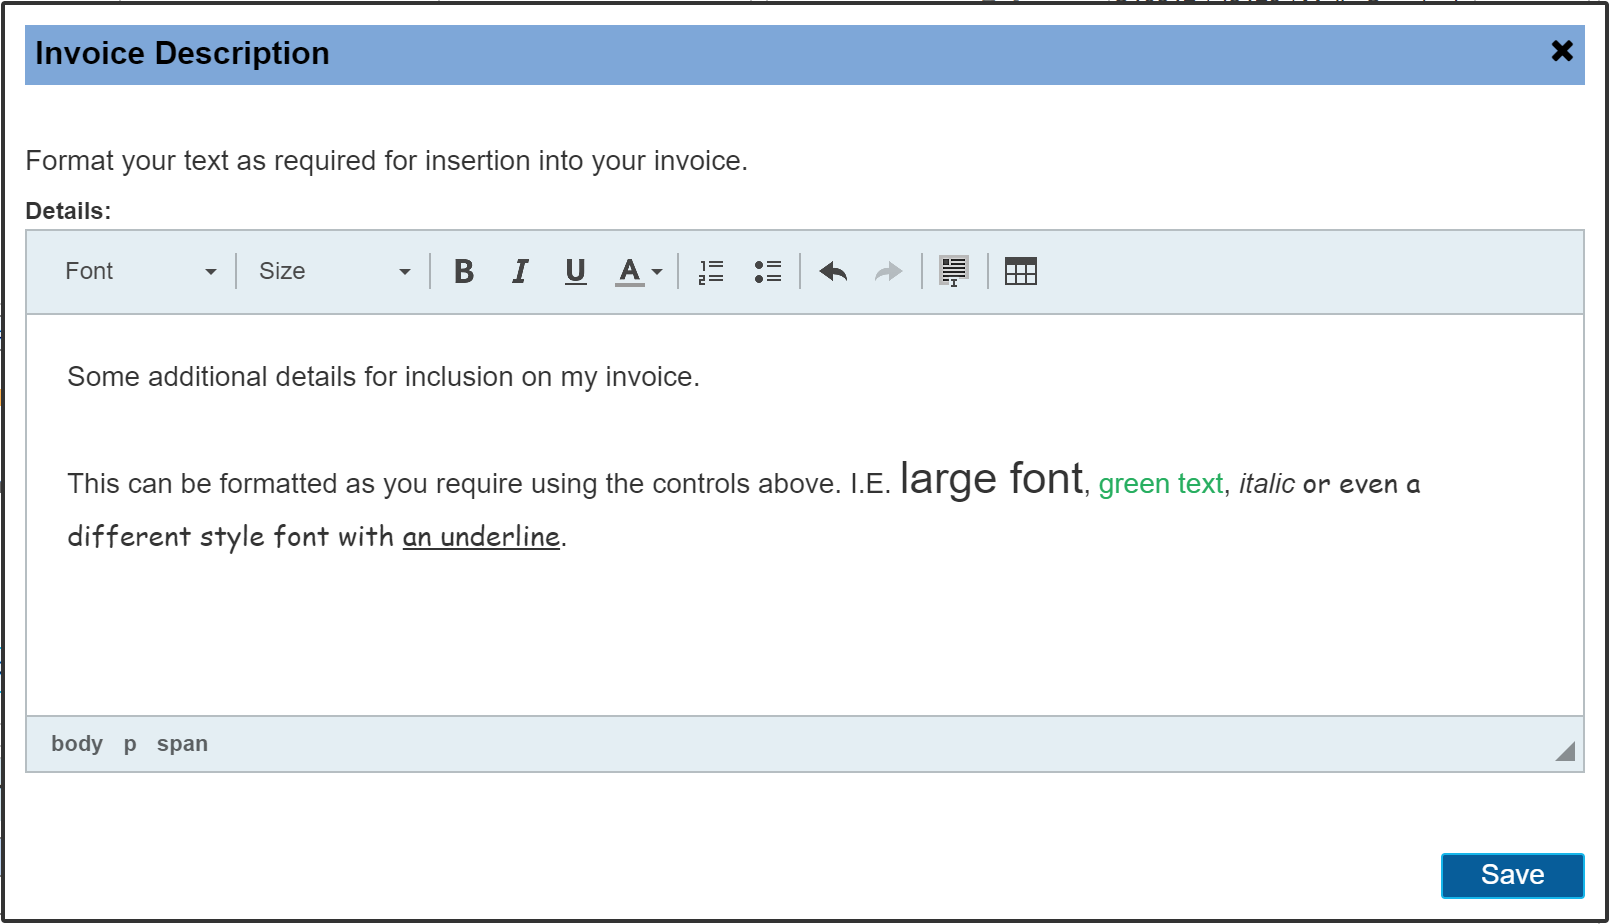
'Description' Panel
An additional 'Description' panel can be used to detail anything additional that you wish to enter into your invoice. This is a basic 'Text Editor' allowing you to format your text as you wish using the controls available on the form.
The Action Bar
The action bar across the top of the invoice page allows a number of functions that can be performed.

The 'Green' Dot
Depending on where the invoice originated, this button may be green for a site related record, or orange for a company related record. Clicking this allows you to navigate to the related Site or Company record.
The 'Red' cross
This function allows you to delete the current invoice. The button will disappear once the invoice has been sent as shown in the print dialogue, the toggle labelled 'Sent' will be set to 'Yes' as soon as the invoice has been emailed to someone. This is a safety feature to prevent accidental deletion of a document that someone has already received and may refer to at some point in the future.
This can be overridden by opening the print dialogue and then resetting the 'Sent' toggle back to 'No', saving the document then refreshing the page to allow the delete function to show. Navigating away from the invoice and re-opening it will have the same effect.
Print / Email
The Print / Email dialogue allows you to create a PDF and email it.
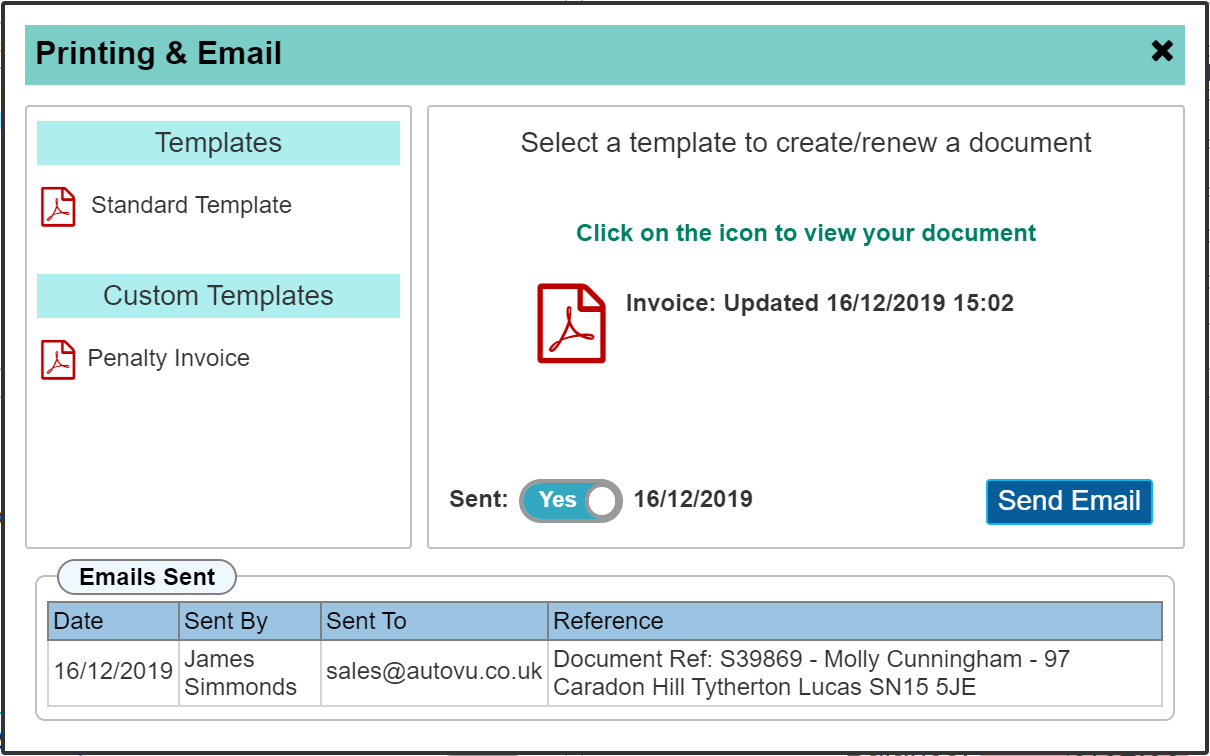
The above dialogue shows a PDF that has been previously created and emailed out. The 'Sent' toggle indicates this fact along with the date this was done. The PDF is shown in the centre panel along with the date and time this was created. Clicking the PDF in the centre panel will open it for inspection.
Generating a PDF
When opening the Printing & Email dialogue for the first time, the PDF will not have been generated. Clicking 'Standard Template' will generate the PDF which will show in the centre panel as above.
In our example above, there is an additional button labelled 'Penalty Invoice' AutoVu allows for any number of 'Custom' templates to be created for varying scenarios. Visit the 'Document Designer' section to find out more about this. When first using AutoVu and the invoicing section, only the 'Standard Template' will exist utilising the default style invoice template that we will have supplied. Document designer allows you to edit the template to suite your own company preferences including adding your own logo etc.
Re-Generating the PDF
Having created the invoice and subsequently 'Generating' the PDF, it may be necessary to further edit the invoice. In this situation, it will be necessary to 'Re-Generate' the PDF. This can be done by simply clicking the 'Standard Template' icon again. The centre panel will show the newly created PDF along with the new date and time it was created.
Send Email
When you are ready to send the invoice to your Customer, clicking the 'Send Email' button will direct you to the built in email client for AutoVu with the invoice already attached ready for sending. Visit the section 'Sending Email' for further information about emailing from AutoVu.
Receipt Button
The 'Receipt' button shown in the ribbon bar will appear once the invoice has been saved. Clicking this will open the receipt dialogue box as shown below.
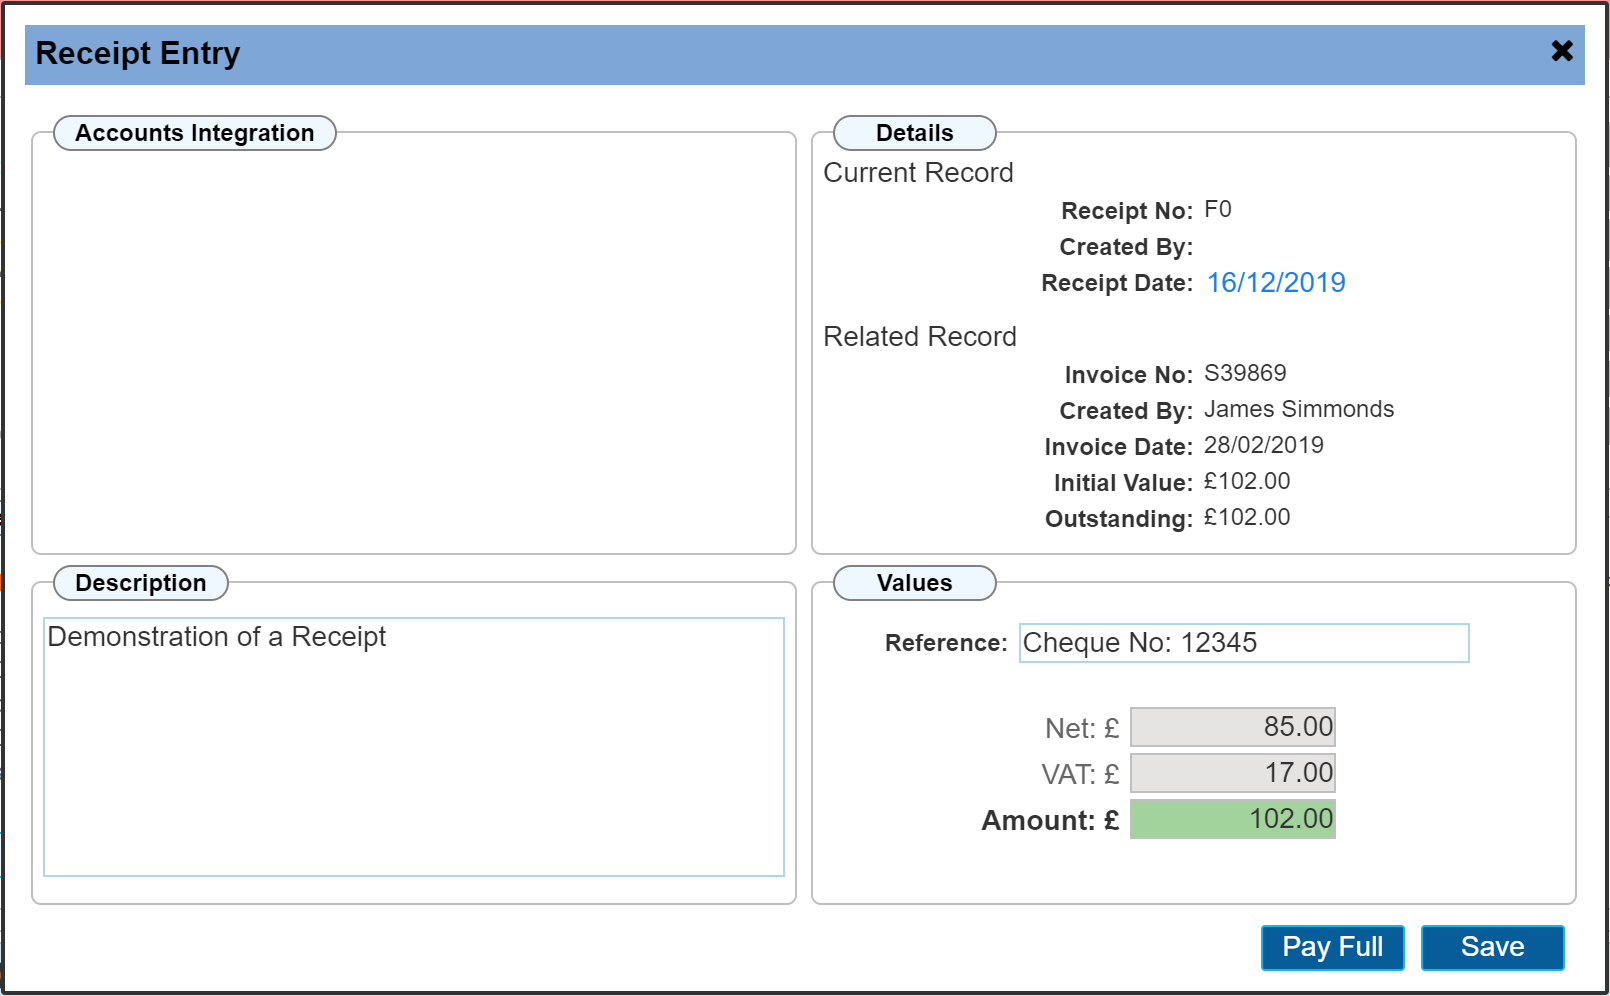
In this example, we have clicked 'Pay Full' which simply updates the 'Amount' field to the total amount due. Part payments can be done by entering any amount less than the total. Once this dialogue is saved, a receipt number will be allocated that is automatically assigned by the system and is unique. It will be prefixed with the letter 'F'. Please note: The receipt prefix cannot be changed.
Printing
Receipts can also be printed in the same manner as detailed above for invoices. A print icon will appear at the bottom left of the dialogue once it has been saved.
Accounts Integration
If using the accounts integration feature, receipts would not normally be created within AutoVu. It is expected that payments for invoices are initially recorded through your accounting software via 'Bank Feeds' or similar tools that your financials have to offer. These payments can then be synced back to AutoVu automatically creating a receipt. This will occur only if the invoice had been paid in full. A report can be created showing all part or non payments.