The Document Editor encompasses all aspects of written documentation within one easy to use interface. The basic template on first use includes automatic insertion of the name, address, document reference and the users sign off signature. The basic template can be changed to suite requirements plus any number of 'Custom' templates can be created and stored for later use.
Opening the editor
Within each Site or Company record, documentation can be created based on the type of document you require The Menu buttons within the LH menu are labelled as follows;
Company Records
Documents - All Company written documentation (Suppliers and Managing Agents)
Site Records
Sales Quote - All sales related documentation for full product sales including AutoQuote
Documentation - General documentation
Service Quote - Service department documentation, primarily used for parts quotations.
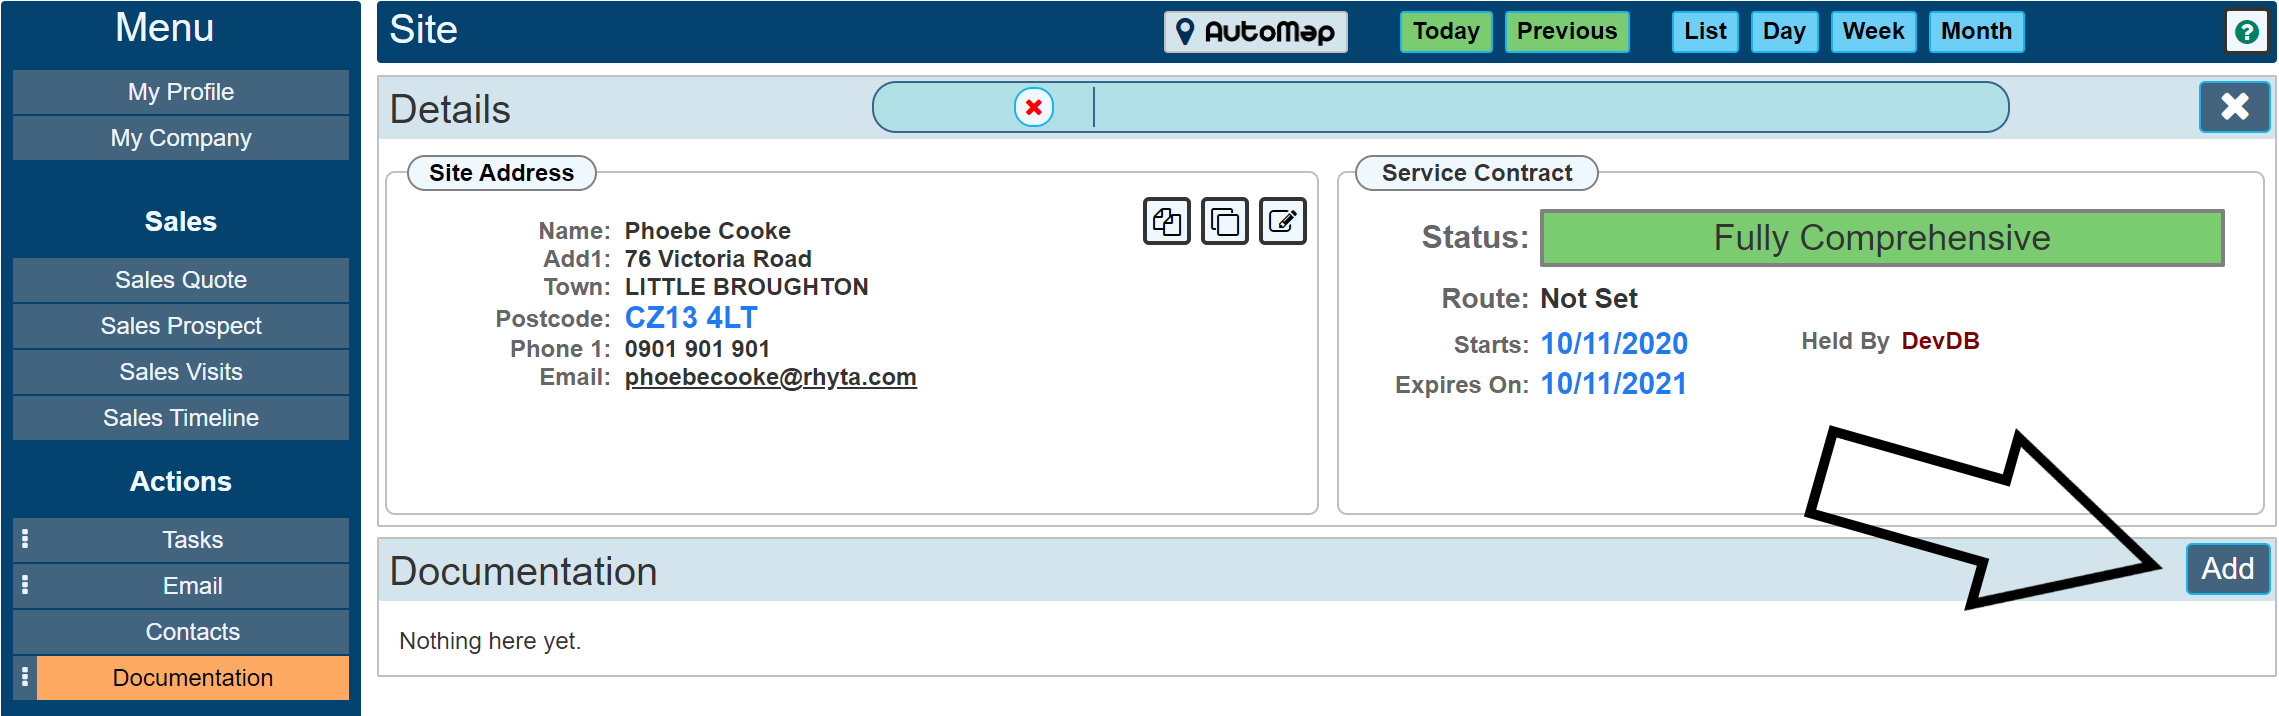
To create a new document, click the relevant documentation button in the LH menu, the grid will open with an Add button to create a new document. The below image shows this option after clicking the 'Documentation' button within the LH menu on a Site Record.
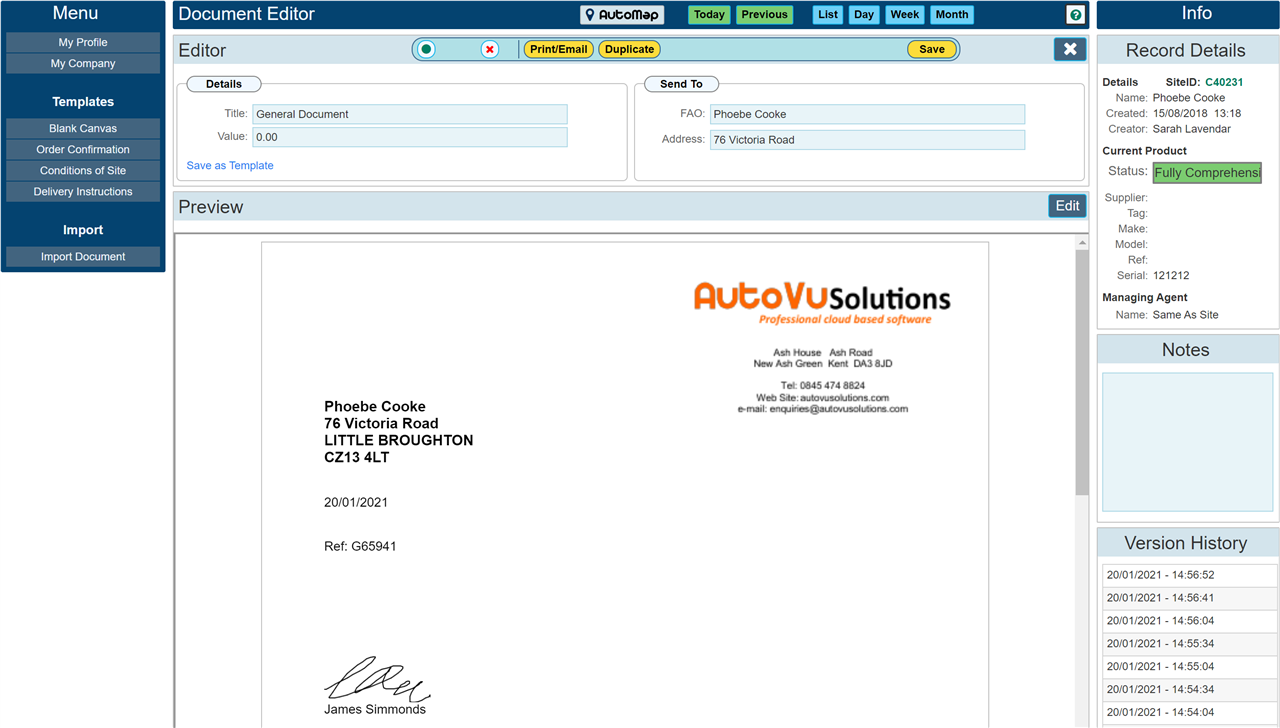
On clicking the 'Add' button, the documentation editor will open. In the example below we show a basic template as it would be without any customisation when first using the system. The preview screen allows you to see what the document may look like prior to creating the final PDF. The preview will update as you begin editing the document. Your letter head will show in place of the one in our example.
|
Where required, select your Template before editing the document. Changing Templates resets the document text to that of the new Template. I.E. it will not include any edits you may have made on an existing Template.
|
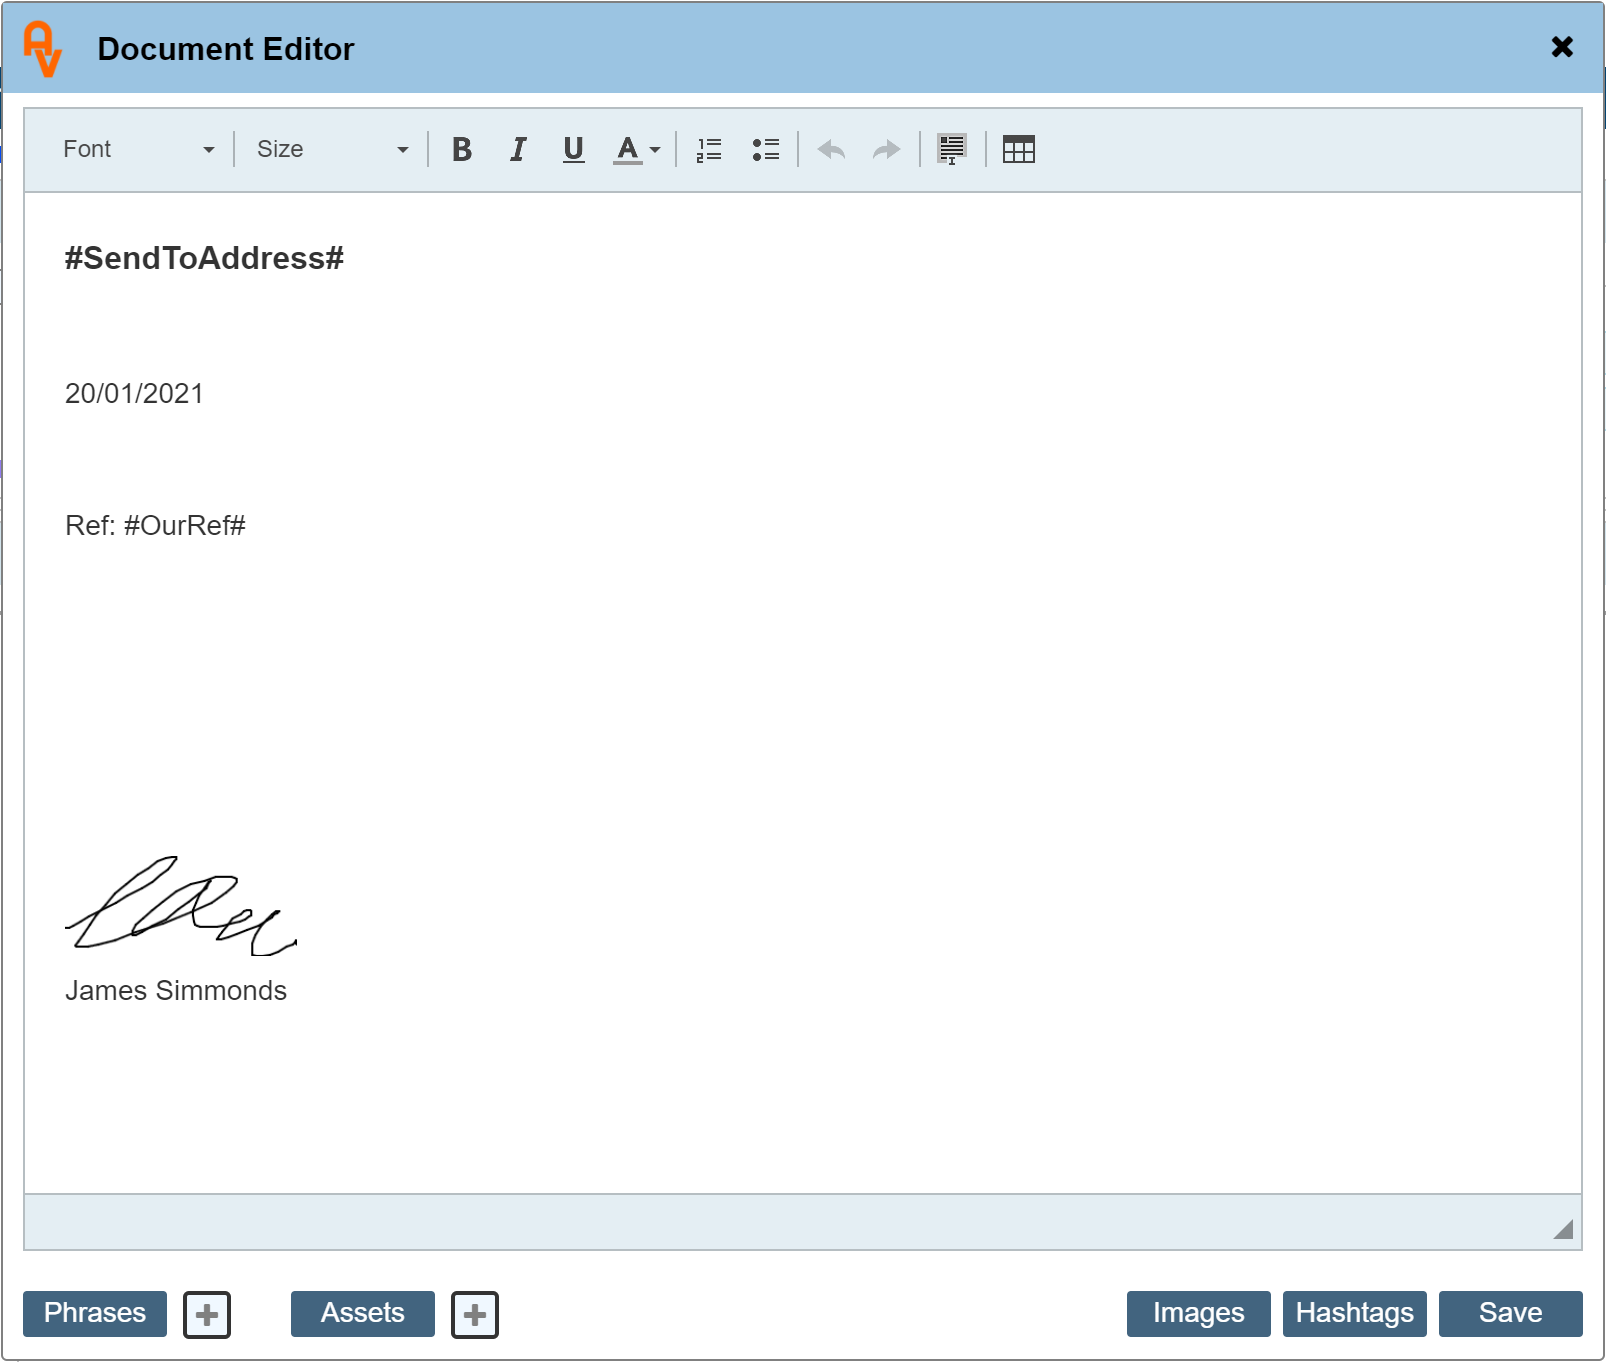
Clicking the 'Edit' button to the top right of the preview pane will open the document for editing. The image below shows the document editor open ready for you to begin editing the document.
Within the editor top ribbon bar you can change the font style and size, create bold, italic or underlined text, change the colour of the text, create bullet or numbered lists and form a table design which allows you to position things on the document. Also included are indent plus text alignment left, right, centre and justified.
Phrases
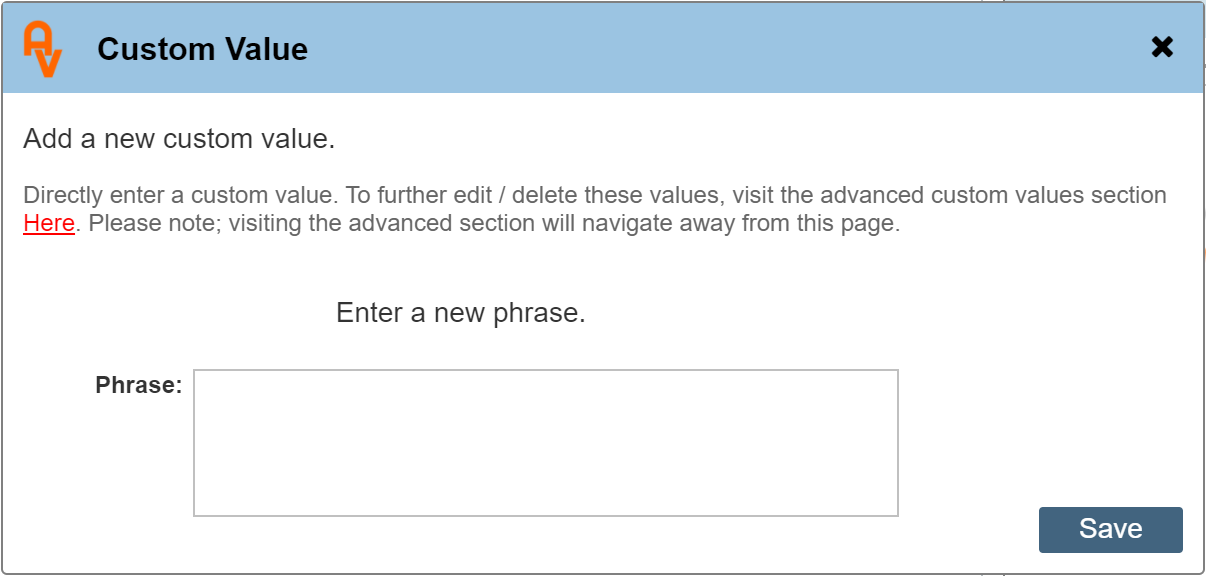
Each of the document editor areas, I.E. Sales Quotes, Service Quotes, Standard Documents and Company Documents has its own set of standard phrases. Initially, this will be an empty list. You can see this by clicking the 'Phrases' button. The '+' button allows you to directly enter a phrase. Clicking the button highlighted red 'Here' will navigate you to the custom values section allowing you to further edit / delete these values. You may not have access to this area if your system administrator has restricted it.
Enter a phrase then click 'Save'. When you re-open the phrases panel, the new phrase will be included. When the phrases panel is open, clicking on a phrase will insert the phrase at the current 'Cursor' position. If you have not positioned the cursor, the phrase will be inserted at the top of the document.
|
After opening the Phrases or Assets panel, position your cursor at the position you wish the text to be inserted.
|
Assets
The assets section is common across all of the editors, it allows you to insert details of assets recorded within the Asset register. The below image shows the Asset dialogue;
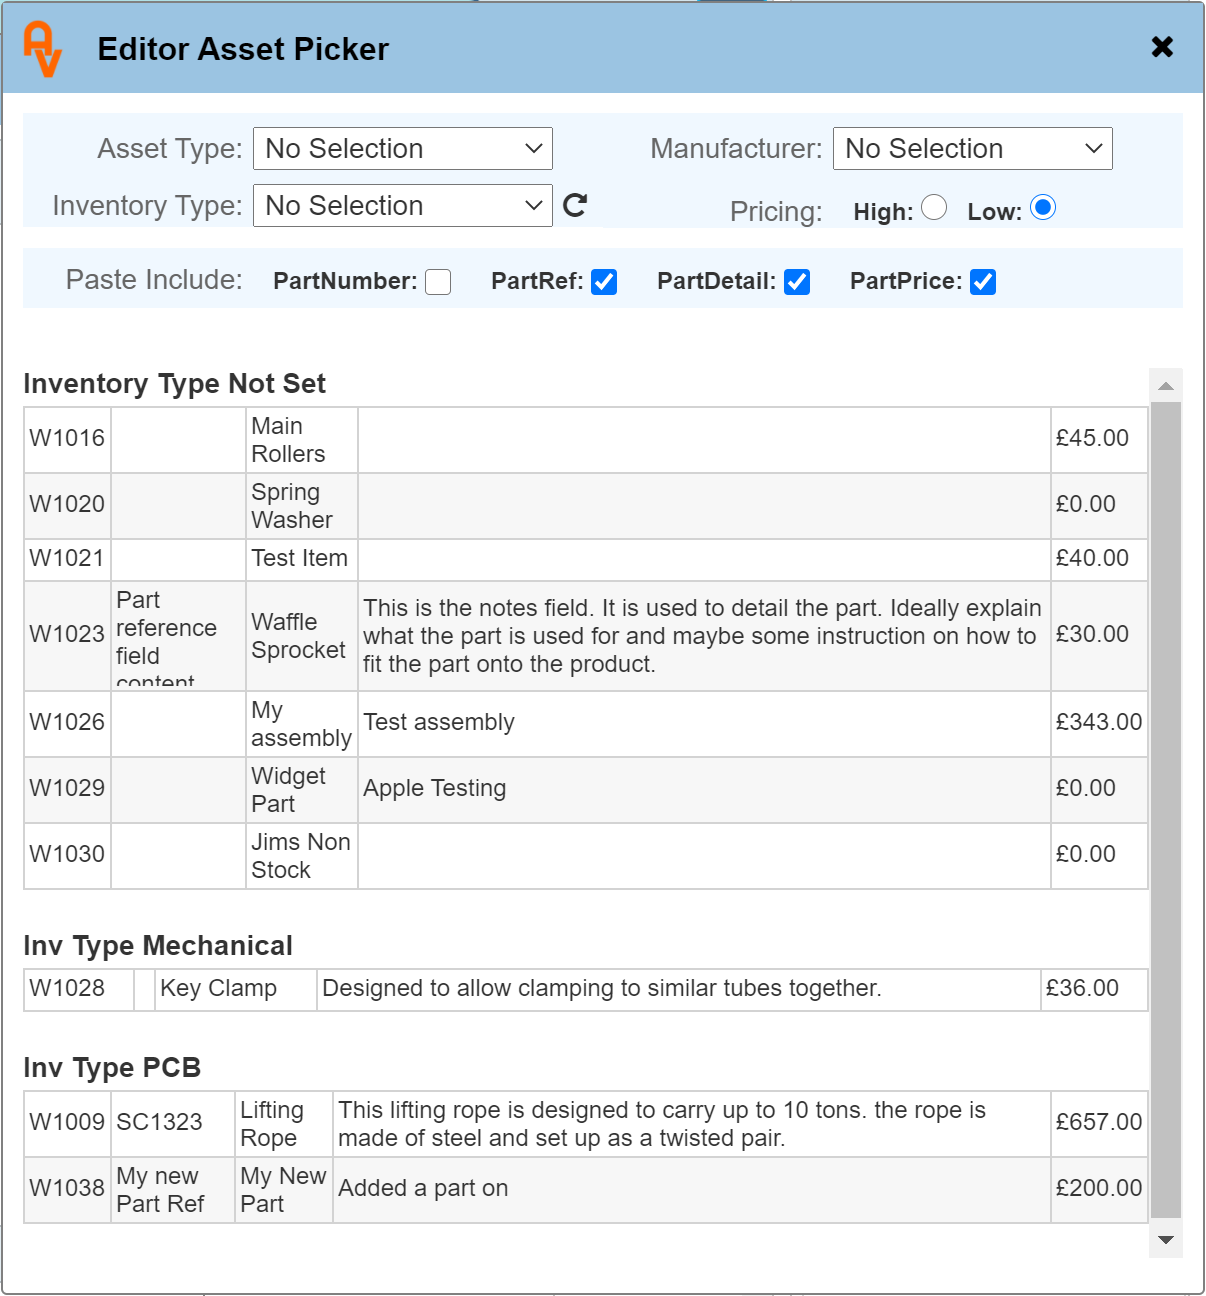
Clicking on an entry within the table will insert it at the cursor position on your document.
The filters at the top of the dialogue are for limiting the table to those items that match the criteria you have selected. There may be several hundred assets in your register, the filters are there to help you find the ones you are looking for. The table grid is naturally sorted into Inventory types. You can learn more about Assets in the Assets How To Guide.
Paste Includes
This section of the Asset picker determines exactly what will be pasted into your document. Check the items to include during paste.
Clicking the '+' symbol next to the Asset button
This allows you to directly add an asset to the asset register. The below image shows the 'Add Asset' dialogue.
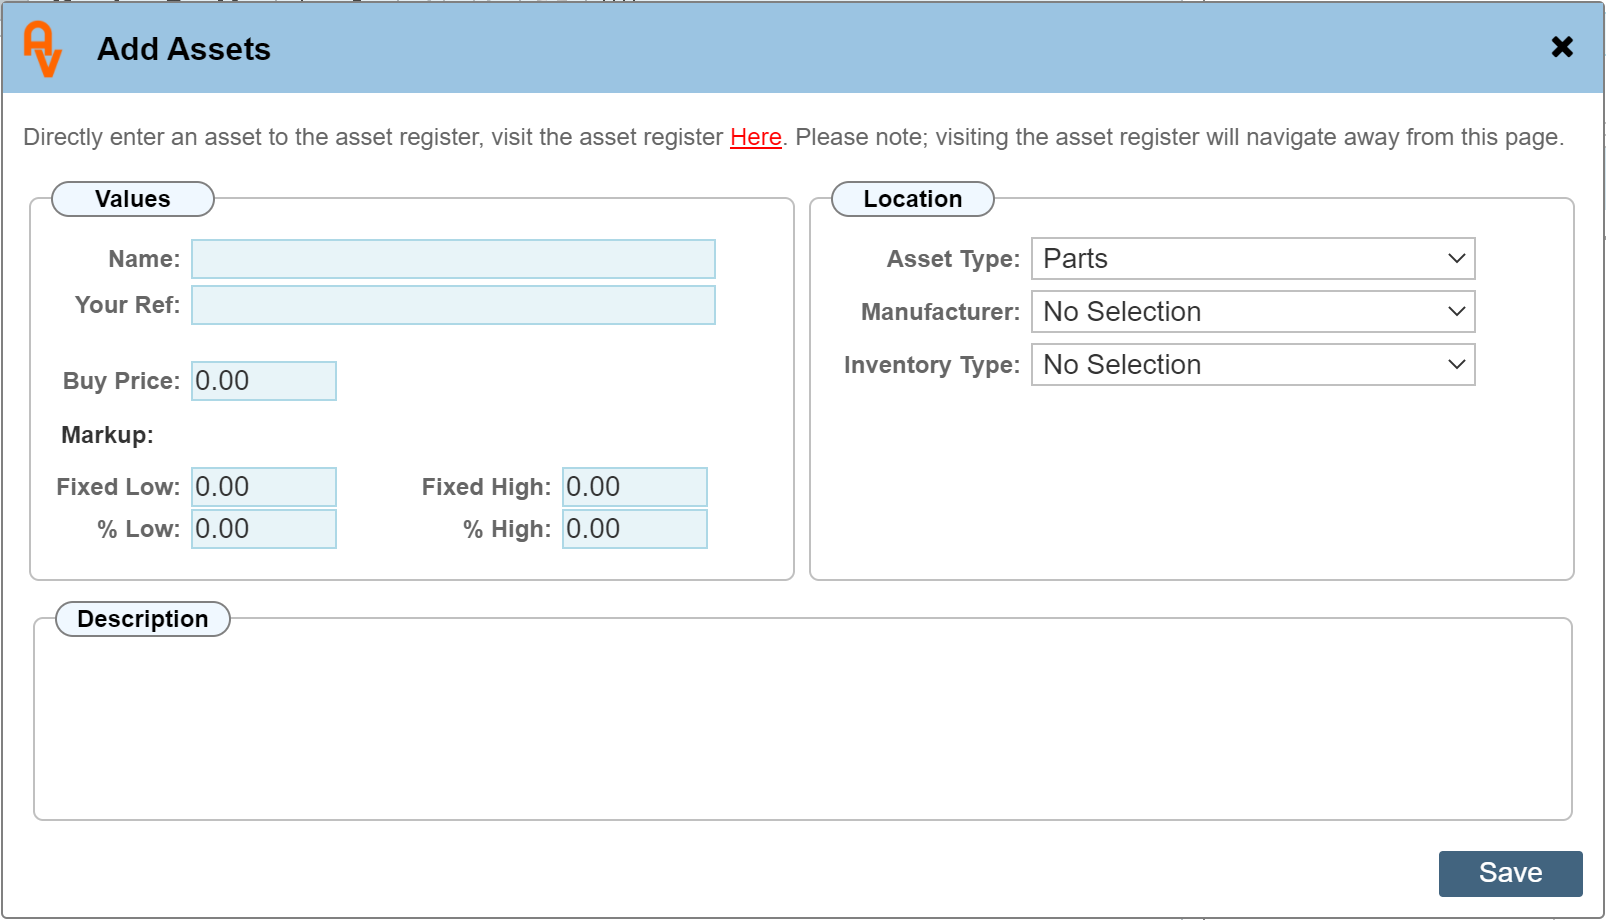
This is not an exhaustive collection of asset features, but it includes the options that can be shown on the Asset Picker. Enter the details as required and click 'Save' to include the new Asset in your Asset Register.
Images
Images can be uploaded and inserted directly within the editor and shown within the final PDF.
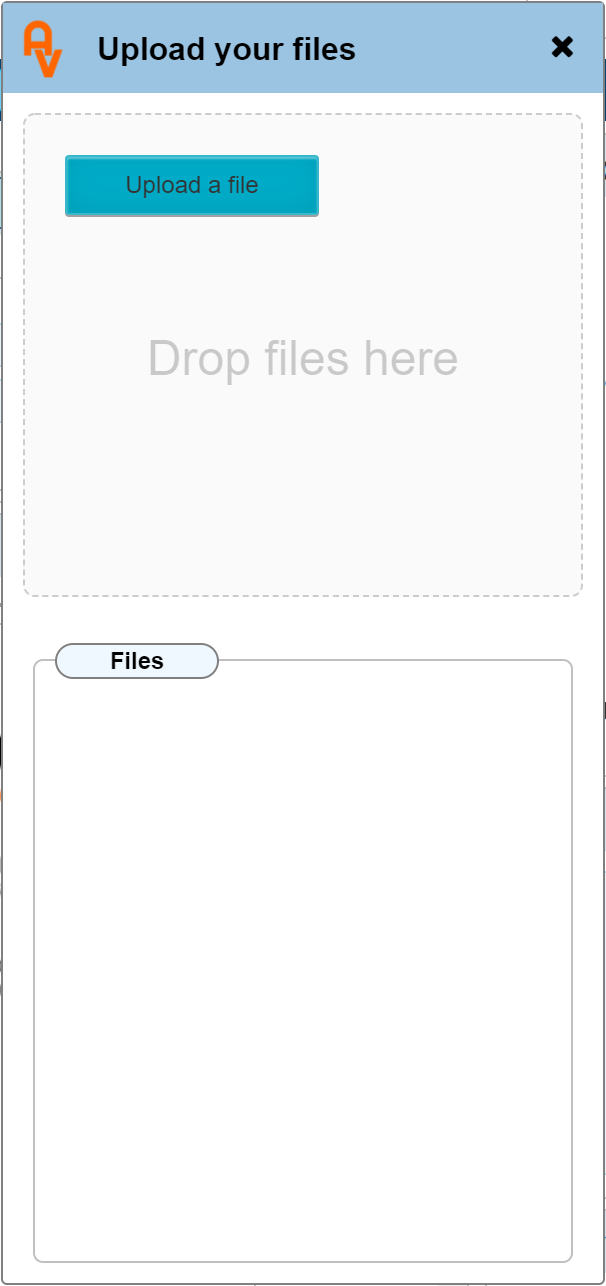
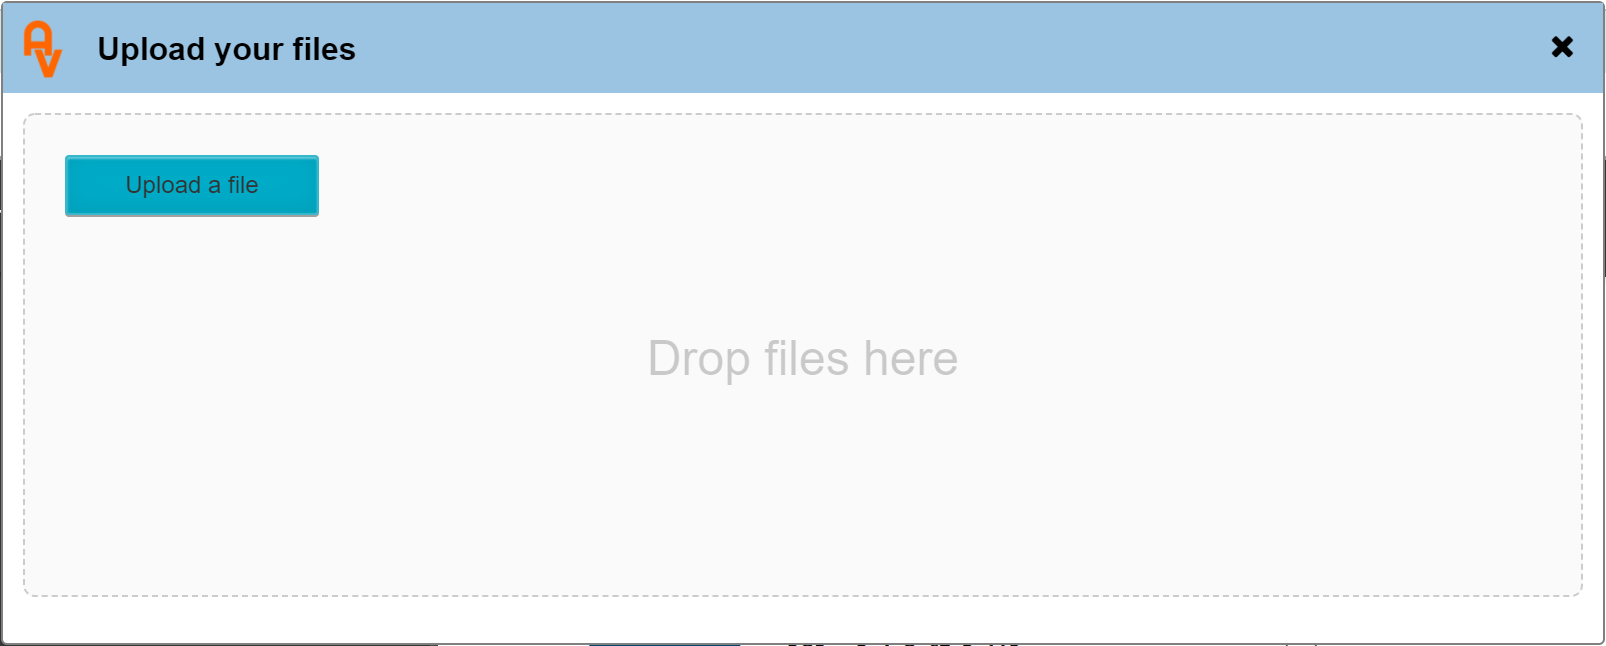
To add an image to your document, click the 'Images' button. As shown below, drag 'n' drop files directly to the dialogue or click 'Upload a file' to search for one directly. Please note: The file uploader is looking for local files stored or your computer (not a network drive) of type 'Image'.
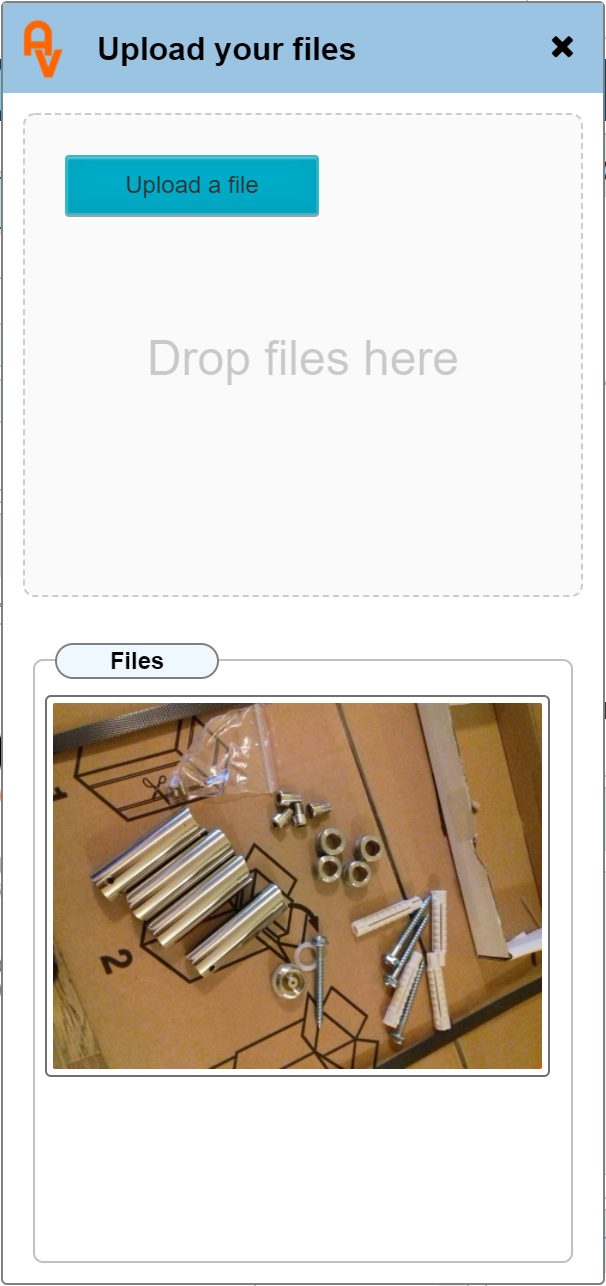
Once a file has been uploaded, the dialogue will show it in the section labelled 'Files'. Below is an example after we have uploaded an image. (you may upload several images as required)
Once the file has been uploaded, to insert it into your document, Drag it to the editor and drop it in the required location. (Left click over the uploaded image, hold down the left button and move your mouse while still holding down the left button and release the left button once the mouse pointer is positioned within the document editor)
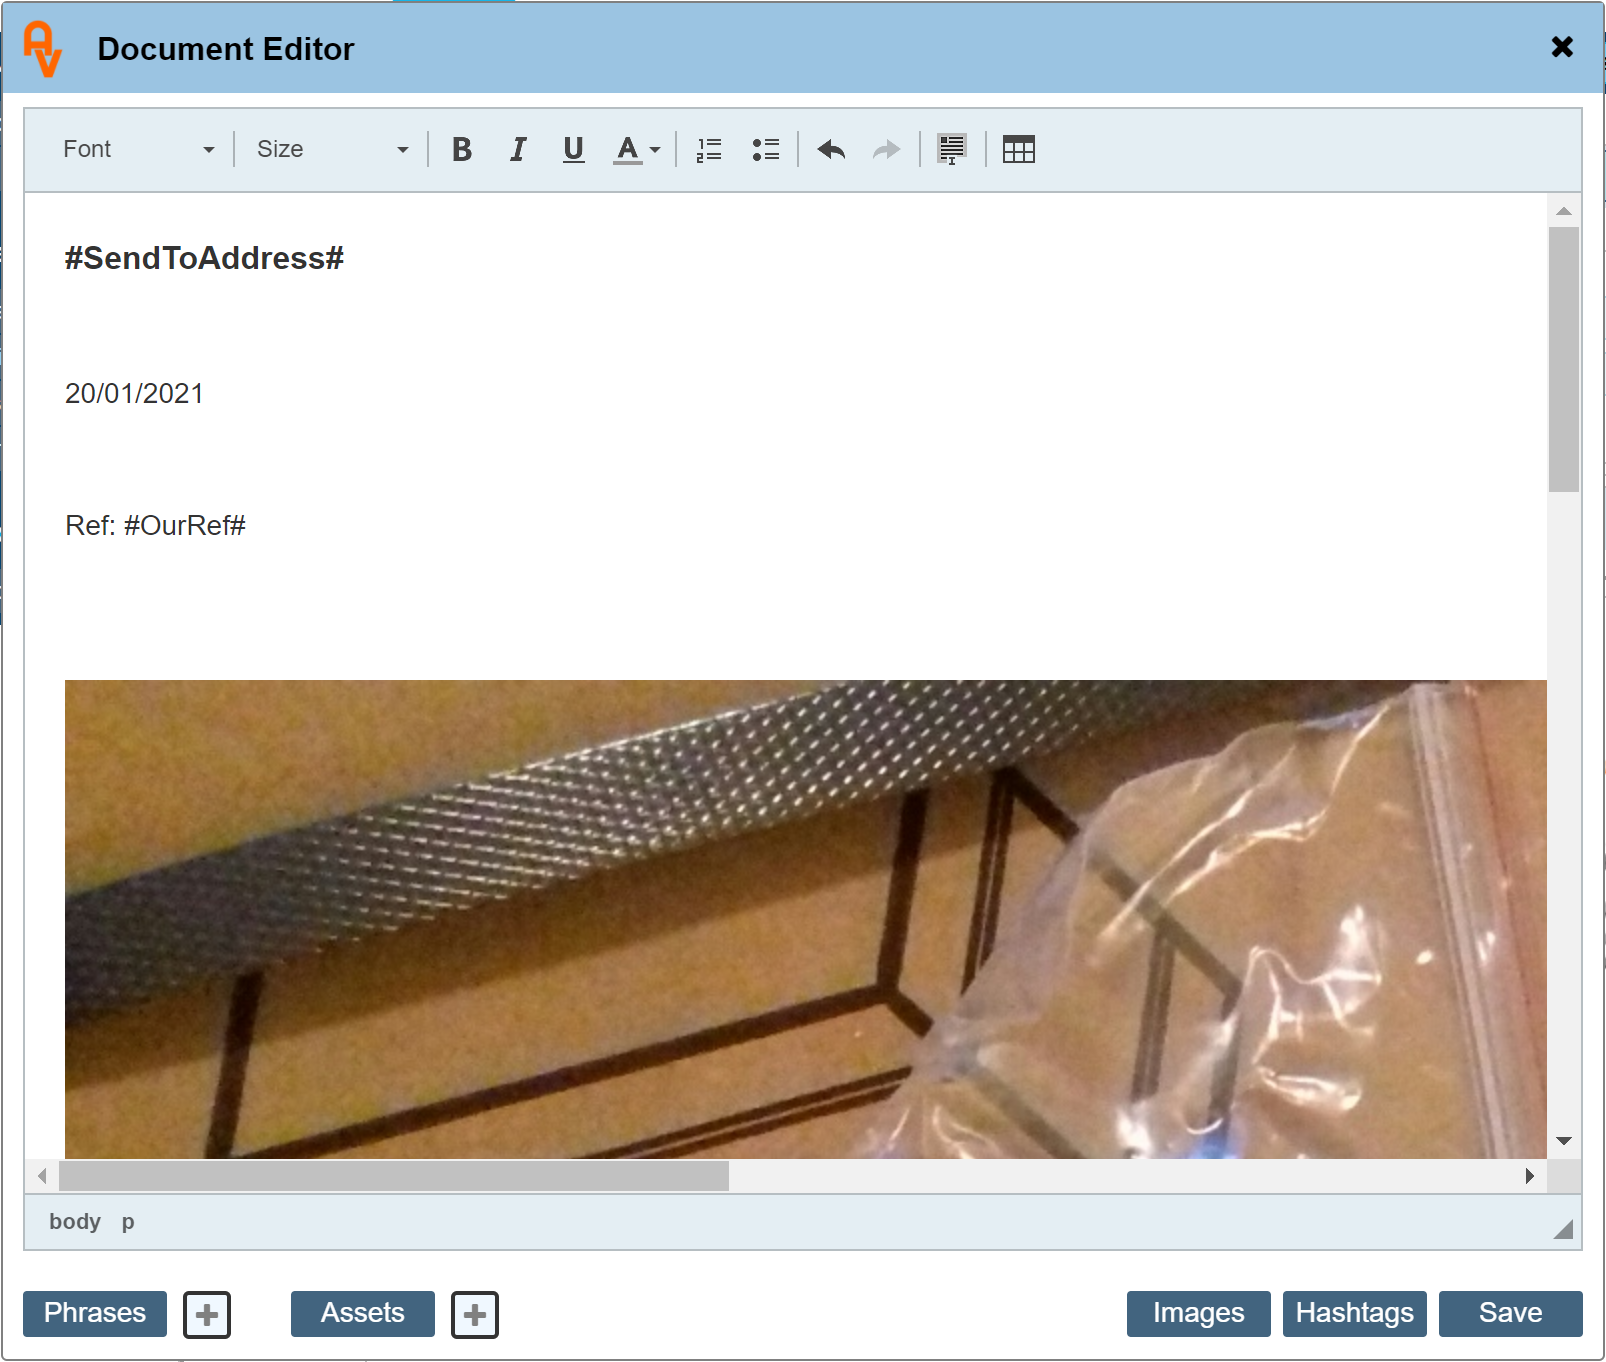
The below image shows the Document Editor once the image has been inserted.
Depending on the size of your image, you may be required to 'Resize' the image once it is in the Document Editor.
To resize the image, either double click the image, or Right click and select 'Image Properties'
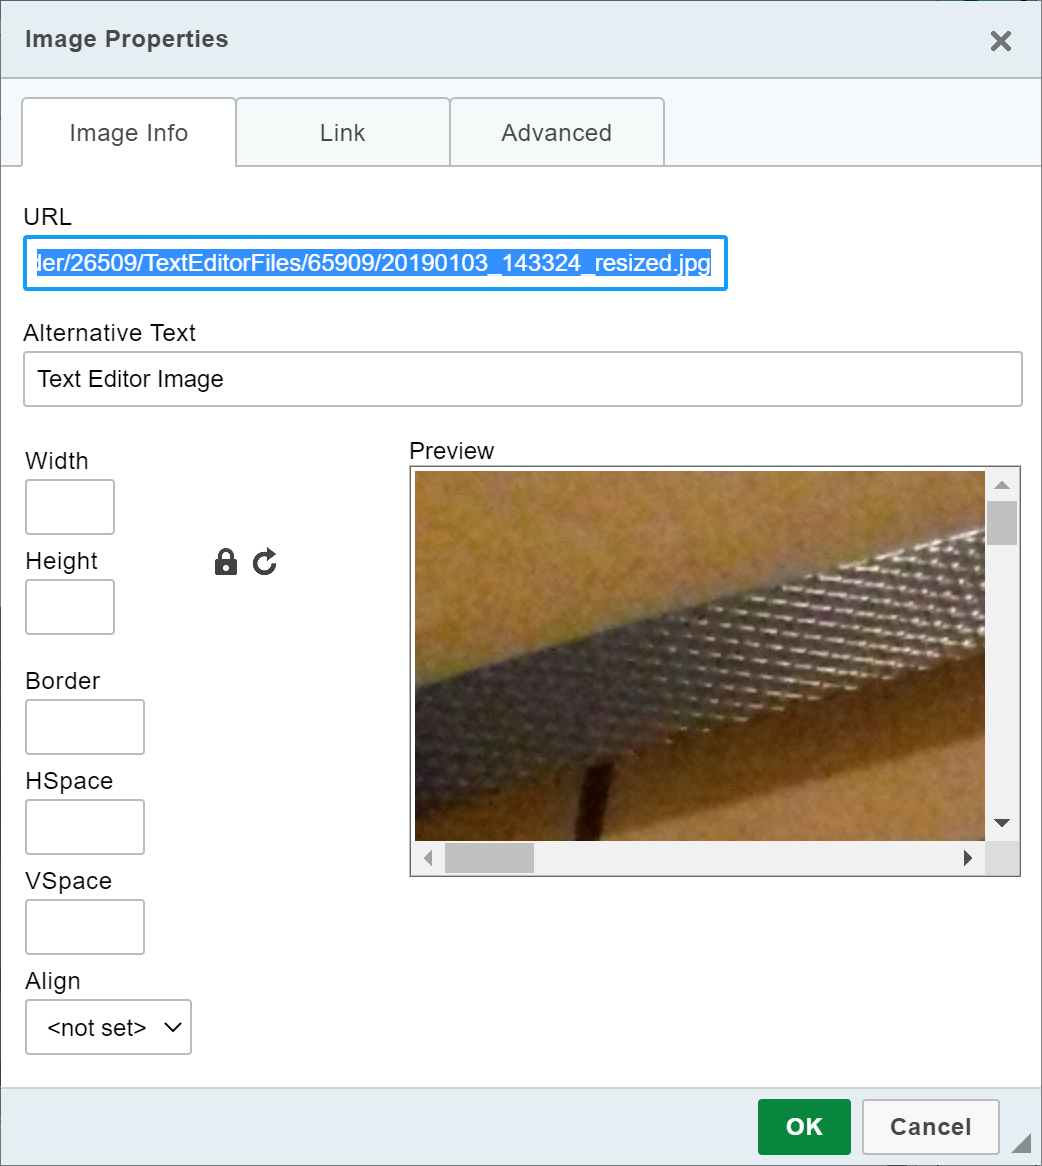
There are a number of settings in this dialogue, the main one regarding the size is the 'Width' and 'Height' boxes. The trick here is to maintain the aspect ration (the height / width proportions). If you concentrate on only the 'Width' of the image and enter a number. This number is measured in either 'Pixels' or 'Percentage' click into the 'Width' box and enter a single number, in our example we will enter 200 in the 'Width' box and nothing in the height, then click OK.
|
It is important to note that the box labelled 'URL' is important to leave as it is. Deleting / Editing this will remove the picture from your document.
|
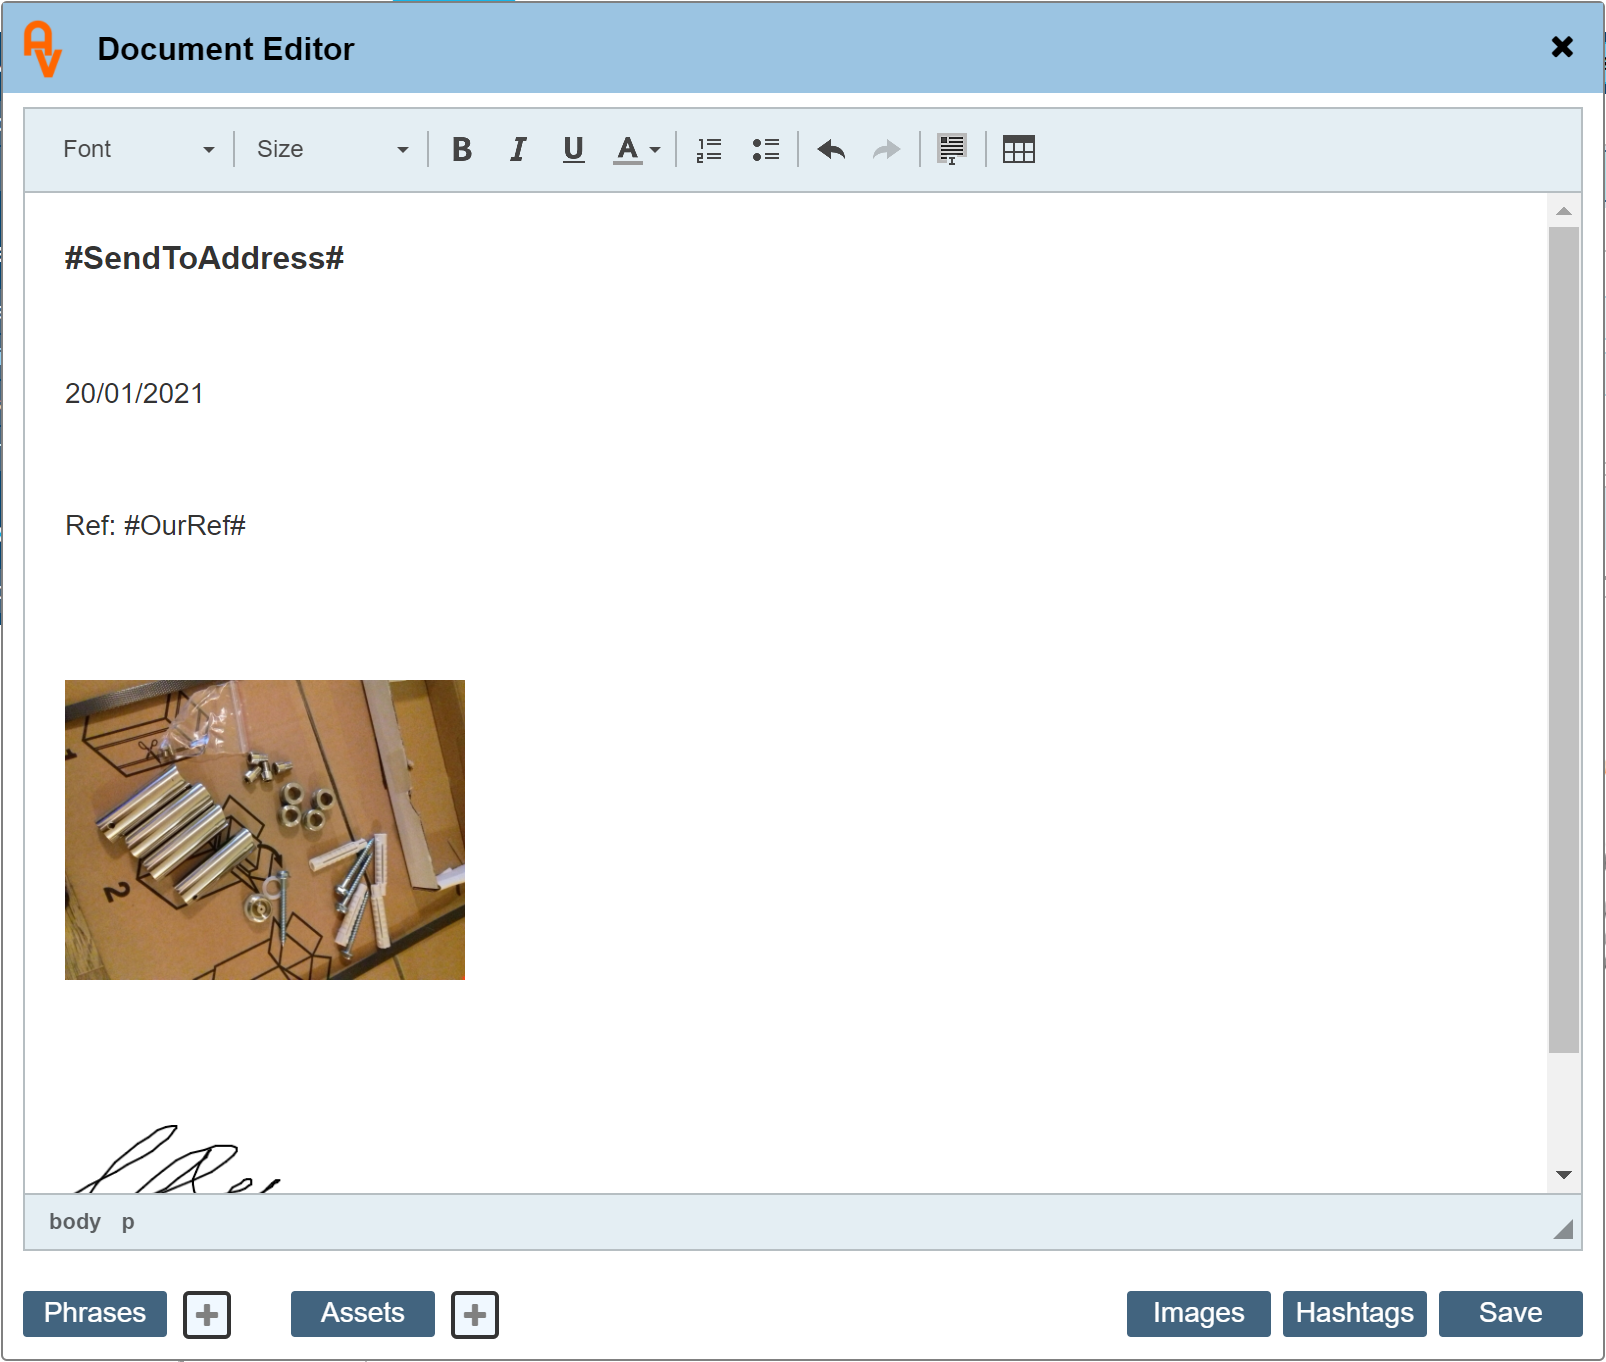
Our Document Editor now shows the resized image. Once you have got used to the measurement process, I.E. measured in 'Pixels' you can then begin to get the images to the size you require, a bit of trial and error works well here.
While the image 'Align' drop down is set to 'Not Set', the image will be placed within its own line on the document. Setting the 'Align' drop down of the image properties will position the image either to the left (as it is now) or to the right. The difference being that you can enter text to the left or right of the image after setting the 'Align' property.
A greater level of flexibility and positioning of images can be created by adding a 'Table' to the document and insert the image into one of the table cells. This is the preferred method of positioning pictures within a document.
|
To resize an image by percentage (of the page) enter the number followed by the % sign.
|
#HashTags#
The Document Editor uses #HashTags# to swap in the relevant data from your database into the document. While the document is in 'Edit Mode', the #HashTags' will be visible. You may edit these #HashTags# to suite the requirement of the document. For example, removing the #HashTag# named #SendToAddress# will remove the address from the preview and subsequent PDF.
There are a number of additional #HashTags# that you may use and can be viewed by clicking the 'Hashtags' button shown at the bottom right of the editor window.
#HashTags# that can be used on any document
| #DisplayName# |
Usually the site main contact name at the top of the address dialogue or the name of the managing agent. If the 'FAO' name is changed within the 'Send To' address on the details bar at the top of the editor window, the #DisplayName# will update to show this name instead.
|
| #SendToAddress# |
Who the document is addressed to. By default this will be either the site address, or if a Managing Agent has been selected this address will show. For Company Records, the main address will show. Editing the 'Send To' address will change this default behaviour.
|
| #OurRef# |
The automatically generated and unique document number prefixed with a character that identifies what type of document has been created. Click the 'Question Mark' button shown on every page of the database to identify what the prefix codes are. This button is located to the right of the List, Day, Week, Month navigation buttons on the main diary page.
|
| #TodayDate# |
The current date that the document was created.
|
| #RegardingAddress# |
If the document is created from the site, with a managing agent selected. E.G. you may be referring to a site address on behalf of your Managing Agent. The #RegardingAddress# will contain the name and address of the current site.
|
| #Signature# |
The document creators name and signature. If you have not created a signature within your profile, this will be omitted to only show your name.
|
| #PageBreak# |
Forces a page break when the final PDF is created.
|
#HashTags# that can be used within Site Records
| #CNum# |
The site 'C' number reference. This is a unique identifier within Workforce Manager to identify the site. Often, the #CNum# hash tag is inserted next to the #OurRef# hash tag for further clarification of the document reference.
|
| #TagName# |
The location tag as shown in the Product Manager that identifies where in the property your product is located.
|
| #ProductRef# |
The Reference identification code as detailed within the Product Manager.
|
| #ProductMake# |
The Make of the product selected, as detailed within the Product Manager.
|
| #ProductModel# |
The Model of the product selected, as detailed within the Product Manager.
|
| #SerialNumber# |
The Serial Number of the product selected, as detailed within the Product Manager.
|
| #MakeModel# |
The Make and Model of the product combined into one.
|
| #ContractName# |
The name of the service contract currently selected.
|
| #ContractStart# |
The date the service contract starts.
|
| #ContractExpiry# |
The date the service contract expires.
|
| #ManagingAgent# |
The name of the Managing Agent selected on the site record.
|
Not all #HashTags# will display including the data designated to it within the Preview window since the document may or may not have been created at that time. When the PDF is created, the information will be correct in the final PDF document.
Entering / editing the text within the editor window will immediately reflect within the preview window once the save button has been clicked.
Auto Save Feature
The document will be saved every few minutes in the background automatically. This prevents losing all of your document changes should you close the editor without clicking save. It also preserves your document in the unfortunate situation of losing internet connection.
The Details and Send To Panel

Title:
Give your document a title, this will show on the site record when viewing all the created documents. If you leave the title as it is pre set by Workforce Manager, you will see a list of all documents with the same title. Renaming these will allow you to quickly identify the contents of the document without having to actually go into each one to read it.
Value:
An indicative amount based on the contents of your document. For general documentation you can leave this as zero as it will be irrelevant but for quotations, enter the total price of the quote. Again, this is useful to see on the documents overview when on the Site Record.
Save as Template
Within the LH menu, you may create several custom Templates (LH Menu detailed further down this guide). If you have created a document design here within the Document Editor that you wish to use for different Sites / Customers, you have the ability to save the current document design as a Custom Template. The Document design can be as simple or elaborate as you wish. Below is an example of the Template creator dialogue;
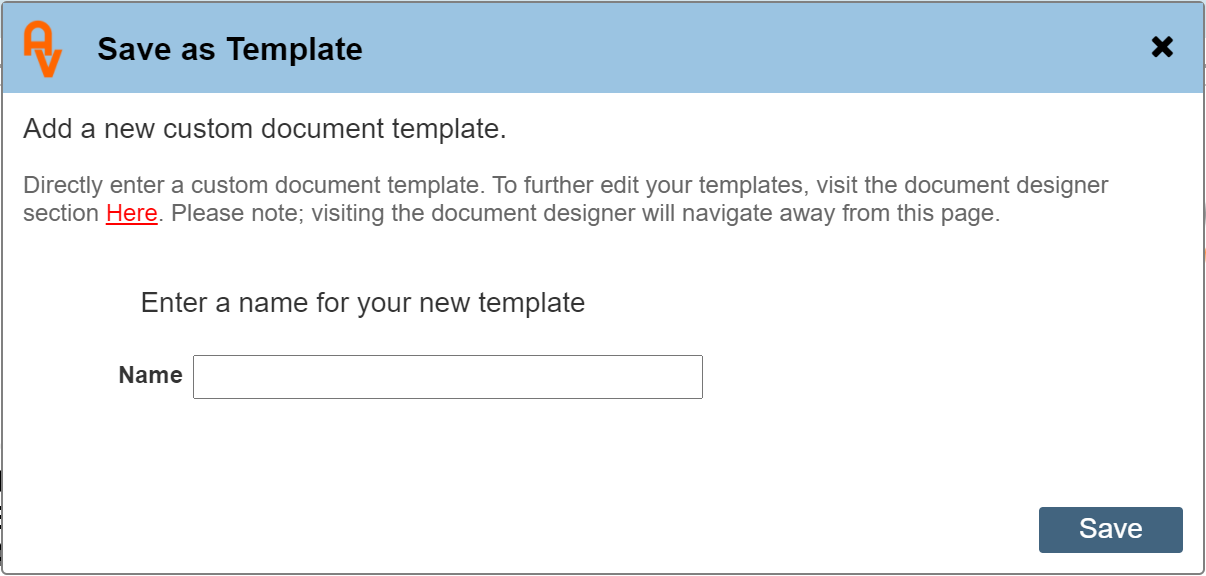
Enter a Template Name and click 'Save' to immediately insert a new custom template to the same design as the current preview. You may or may not have access to this feature depending on the permissions set by your system administrator.
All custom Templates and standard forms are stored / located in the 'Document Designer' section of workforce Manager. This area allows further editing / deleting of Templates and can be found within the settings section. You may or may not have access to this location. Clicking the Here button on the dialogue panel will attempt to navigate you to the Document Designer admin area.
FAO: and Send To:
Clicking the text within either of these pale blue boxes will open an address dialogue box as shown below;
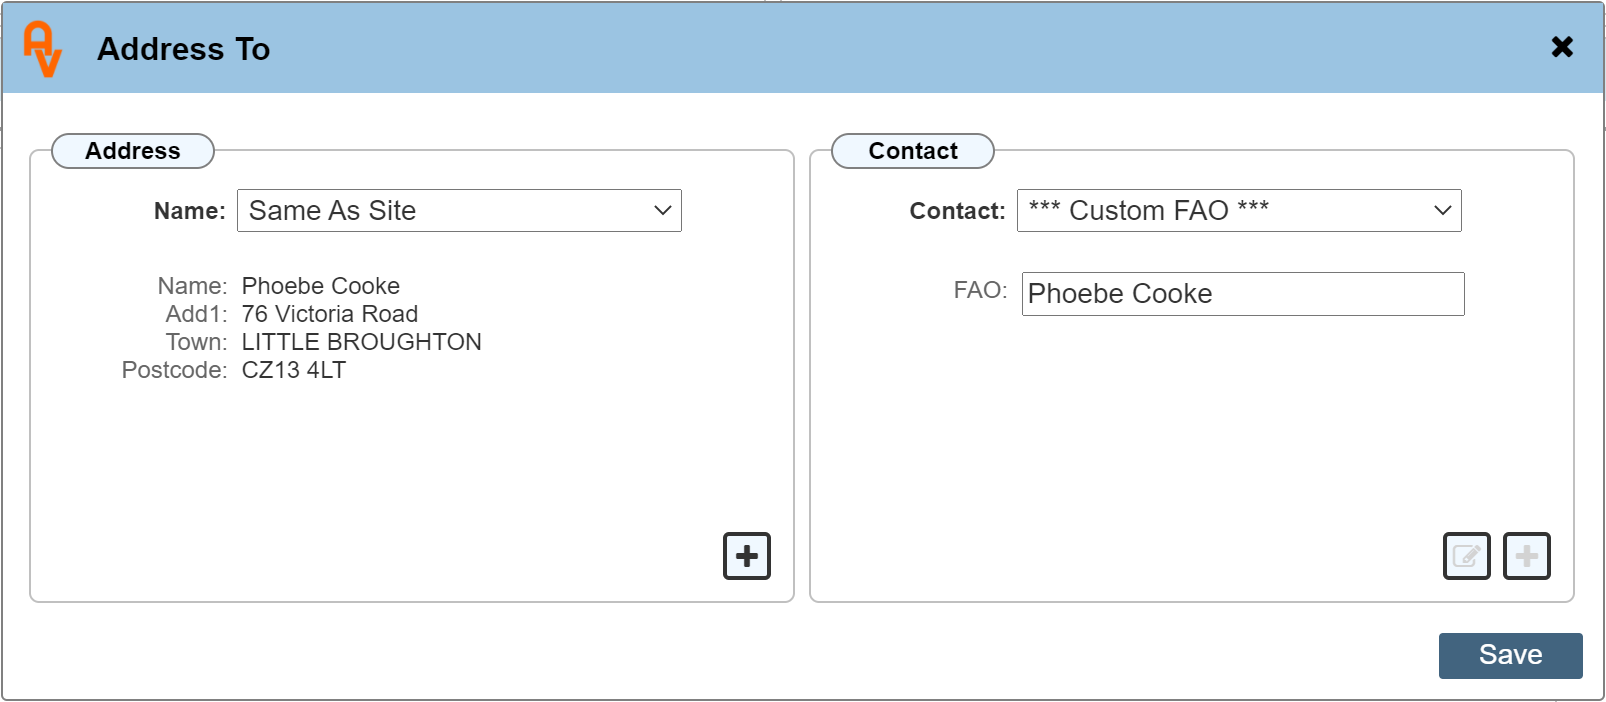
The Name drop down list allows you to select either the site address or any other Managing Agent. The Contact drop down list allows you to select from any contact previously created for either the Site of the Managing Agent, depending on which address you selected. A custom contact may also be inserted directly.
You may add additional Managing Agents and Contacts directly from this dialogue without leaving the document using the '+' buttons.
Once these details have been updated, your document preview will update accordingly.
X Button (on the top ribbon bar)
This button allows you to delete the document. Once the document has been emailed / marked as sent, the delete function is no longer available. This is to prevent accidental deletion of documents that may already have been sent to someone. I.E. do not delete a document that someone has already received. You may override this function by opening the Print/Email dialogue and deselecting the toggle 'Sent', re-saving the document and refreshing the page to re-enable the delete button. We purposely make this difficult to prevent deleting something that should not be deleted.
If the delete option is available, you will be required to enter a PIN as set up by your company system administrator. Below is an example of the delete pin dialogue.
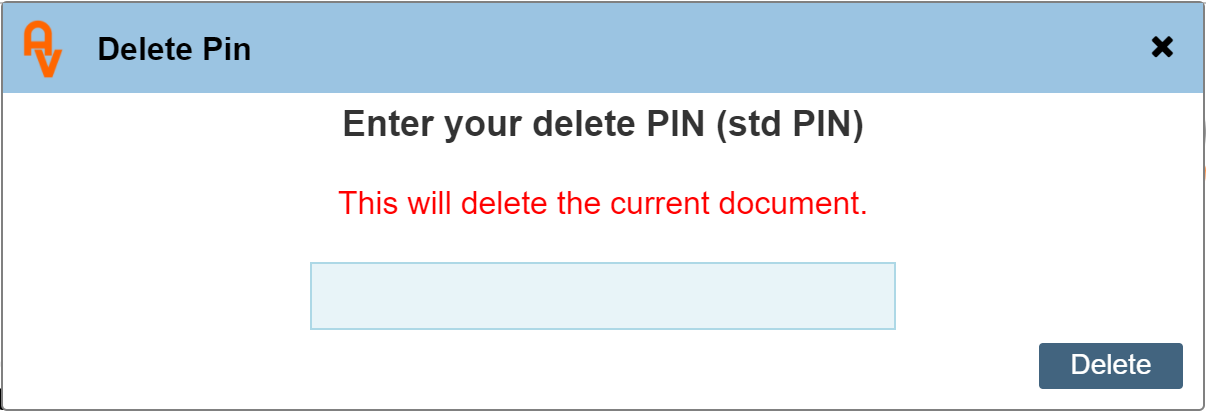
The are two types of PIN. The standard PIN allows deletion of documents created by the user that created them. If you are attempting to delete a document created by another user, you will be required to provide the Admin PIN.
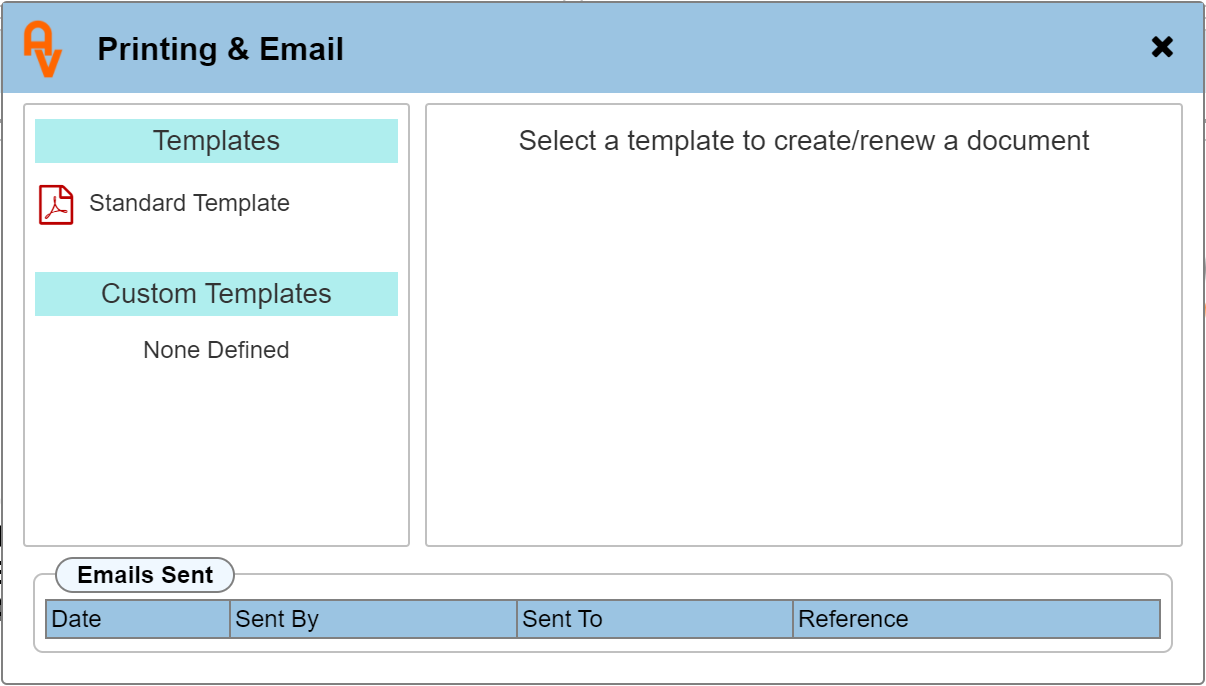
Print/Email
The Print/Email dialogue allows you to create a PDF document based on your current preview.
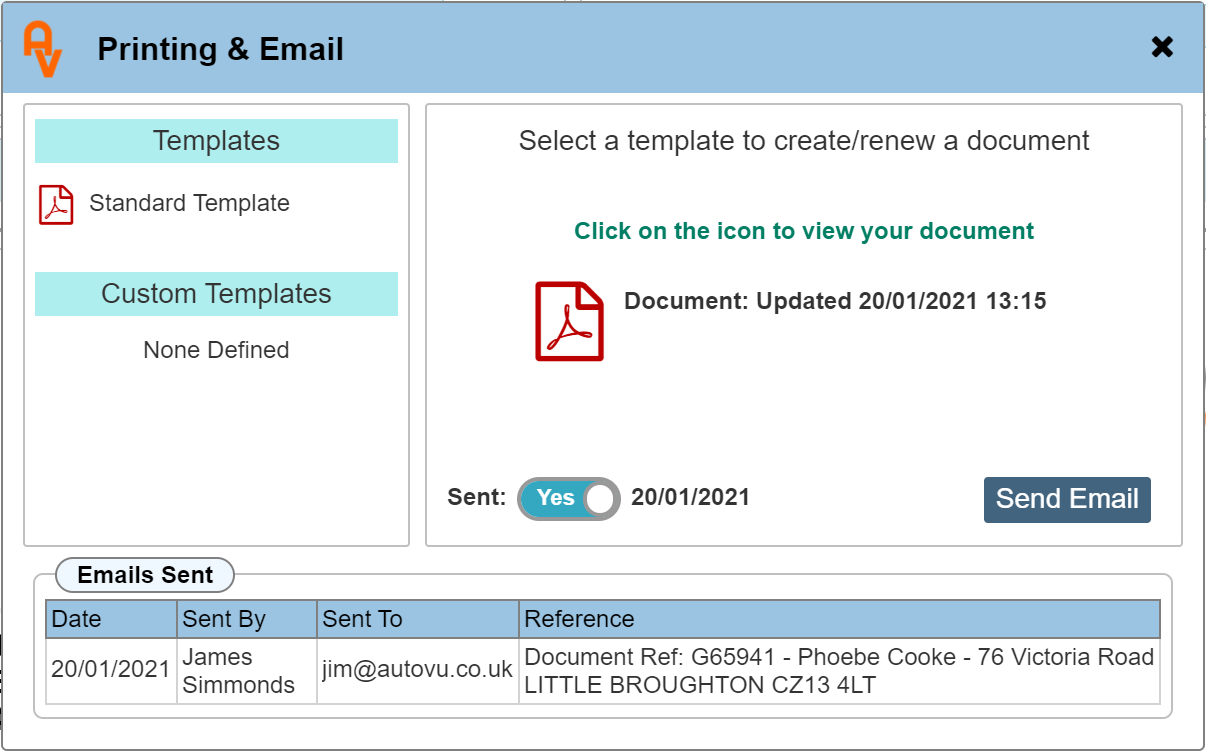
On first opening the Print/Email Dialogue, you must first create the PDF by clicking 'Standard Template' See below image of the dialogue;
Once you have created a PDF, the dialogue will update to show the actual document, as below;
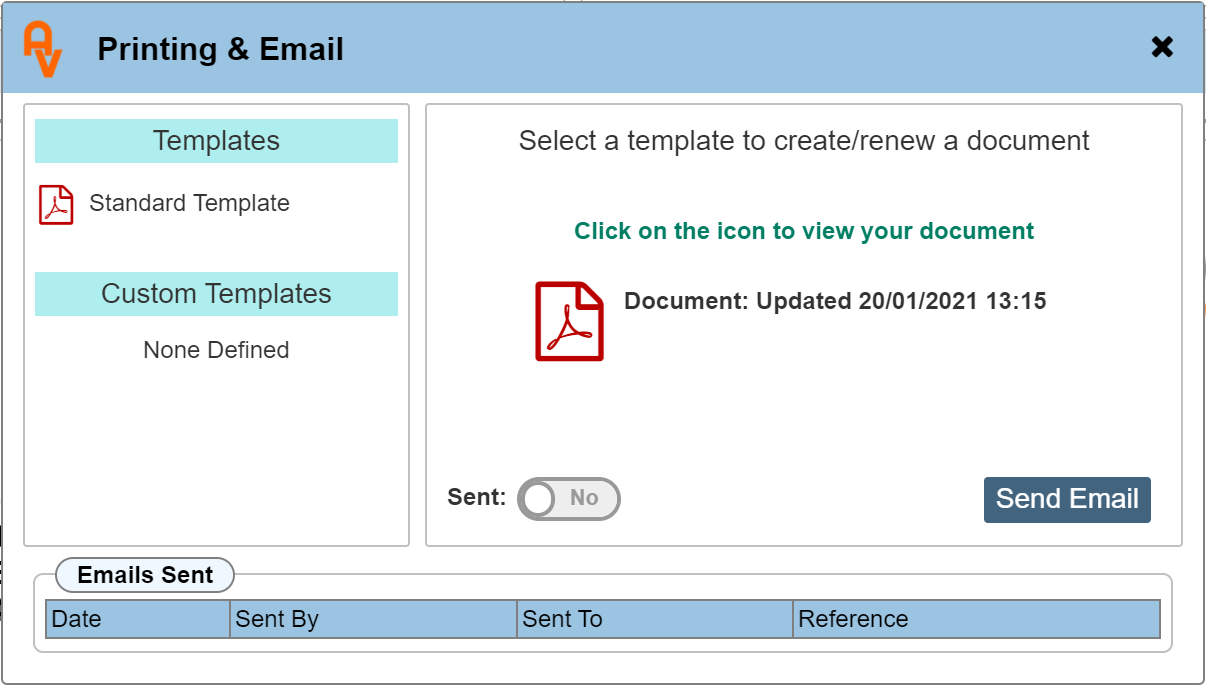
Clicking on the newly created PDF will open the document for viewing, or printing. Each time the PDF document is renewed (clicking the 'Standard Template button) the date and time the PDF was created will update accordingly.
|
It is important to note: The PDF will remain the same as the last time it was generated. I.E. if you continue to make further edits, the existing PDF will not automatically include these. Click the 'Standard Template' button to refresh / renew the PDF. Clicking 'Send Email' will automatically renew / refresh the PDF.
|
Sent:
The sent button will automatically be toggled to 'Yes' if you use the email function. You may manually set this switch if the document is printed and posted.
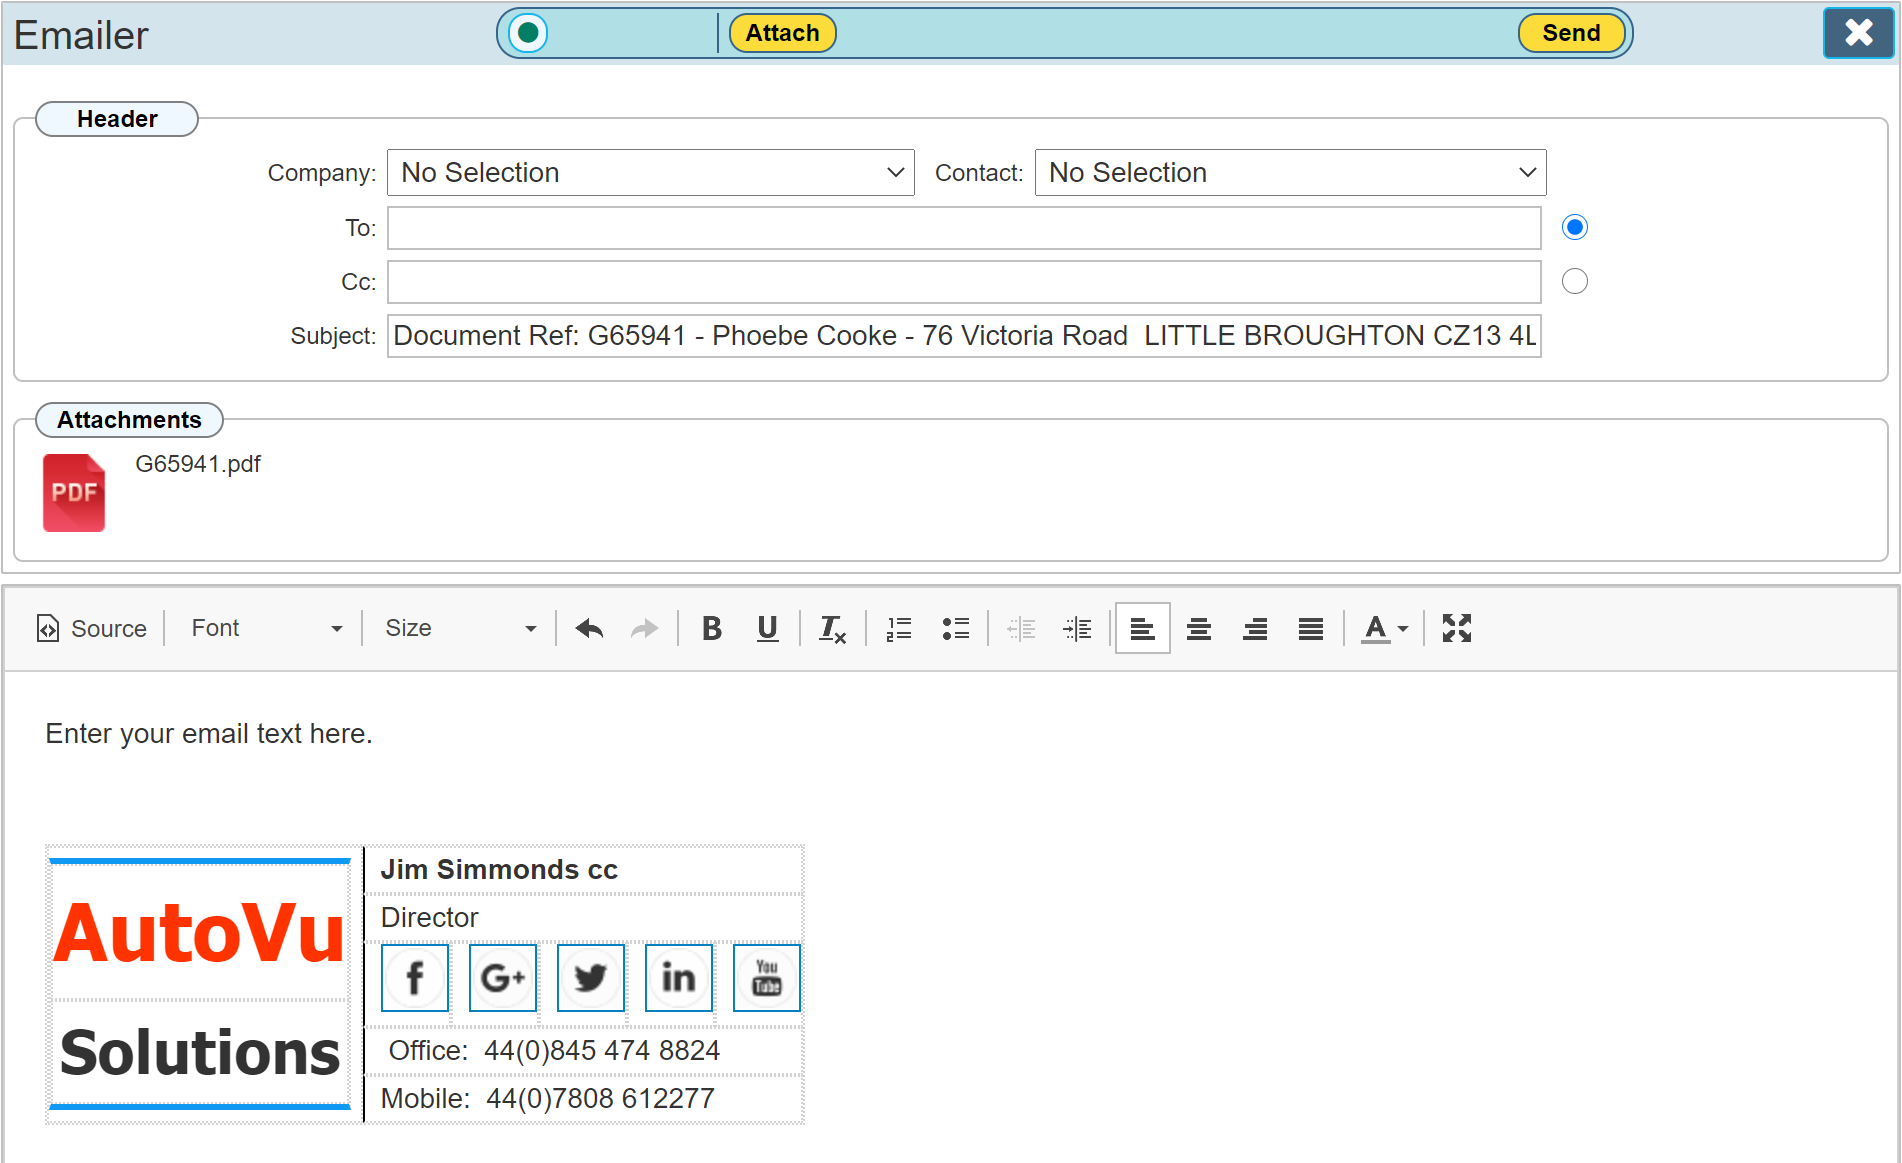
Send Email
Clicking on the 'Send Email' button will navigate you to the emailer page. The emailer functions are covered in another How To guide, below is an example of the Emailer page. You may attach further documents / images where required.
Once the document has been emailed, you will be returned back to the Document Editor. On re-opening the Print / Email dialogue, you will see that the dialogue shows that the document has now been emailed. See below image. All emails sent for this record are also shown within the relevant Site or Company Record.
Duplicate
You may wish to create an exact copy of the current document. This is useful if a quotation has been raised and the customer has asked for a slight change. Instead of re-creating the document from scratch, you can duplicate the quote as a new document, preserving the original.
Clicking the 'Duplicate' button opens a dialogue asking you to confirm;
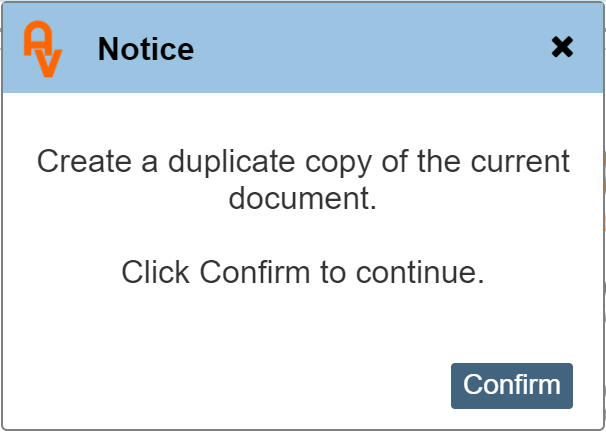
Clicking confirm will create a duplicate copy of the current preview and navigate you back to the Site or Company record in order to select the duplicate document. The duplicate will be identified in the documents pane with a date and time the duplicate was created. Once you open the duplicate to edit, remember to re-name the new document title as once the duplicate has been saved, the title will be what ever it is you have called it in the 'Title' box.
LH Menu
The LH menu stores your custom templates, blank canvas for simply resetting your document to an empty document (you can customise the Blank Template within the Document Designer section), the PDF import feature and where a sales document has been created, the AutoQuote functions. (see the AutoQuote 'How To' guide to learn more about AutoQuote)
Templates
Blank Canvas
Selecting a Blank Canvas re-loads the standard template. The standard template can be edited to your own design within the advanced Document Designer section within the Settings of Workforce Manager.
Custom Templates
Once you have created some custom templates either directly within the Document editor or in the Advanced Document Designer, these will show here for this specific Document type. I.E. Custom templates are specific for each of the sections, Company Documents, Standard Documents, Sales Quotes and Service Quotes.
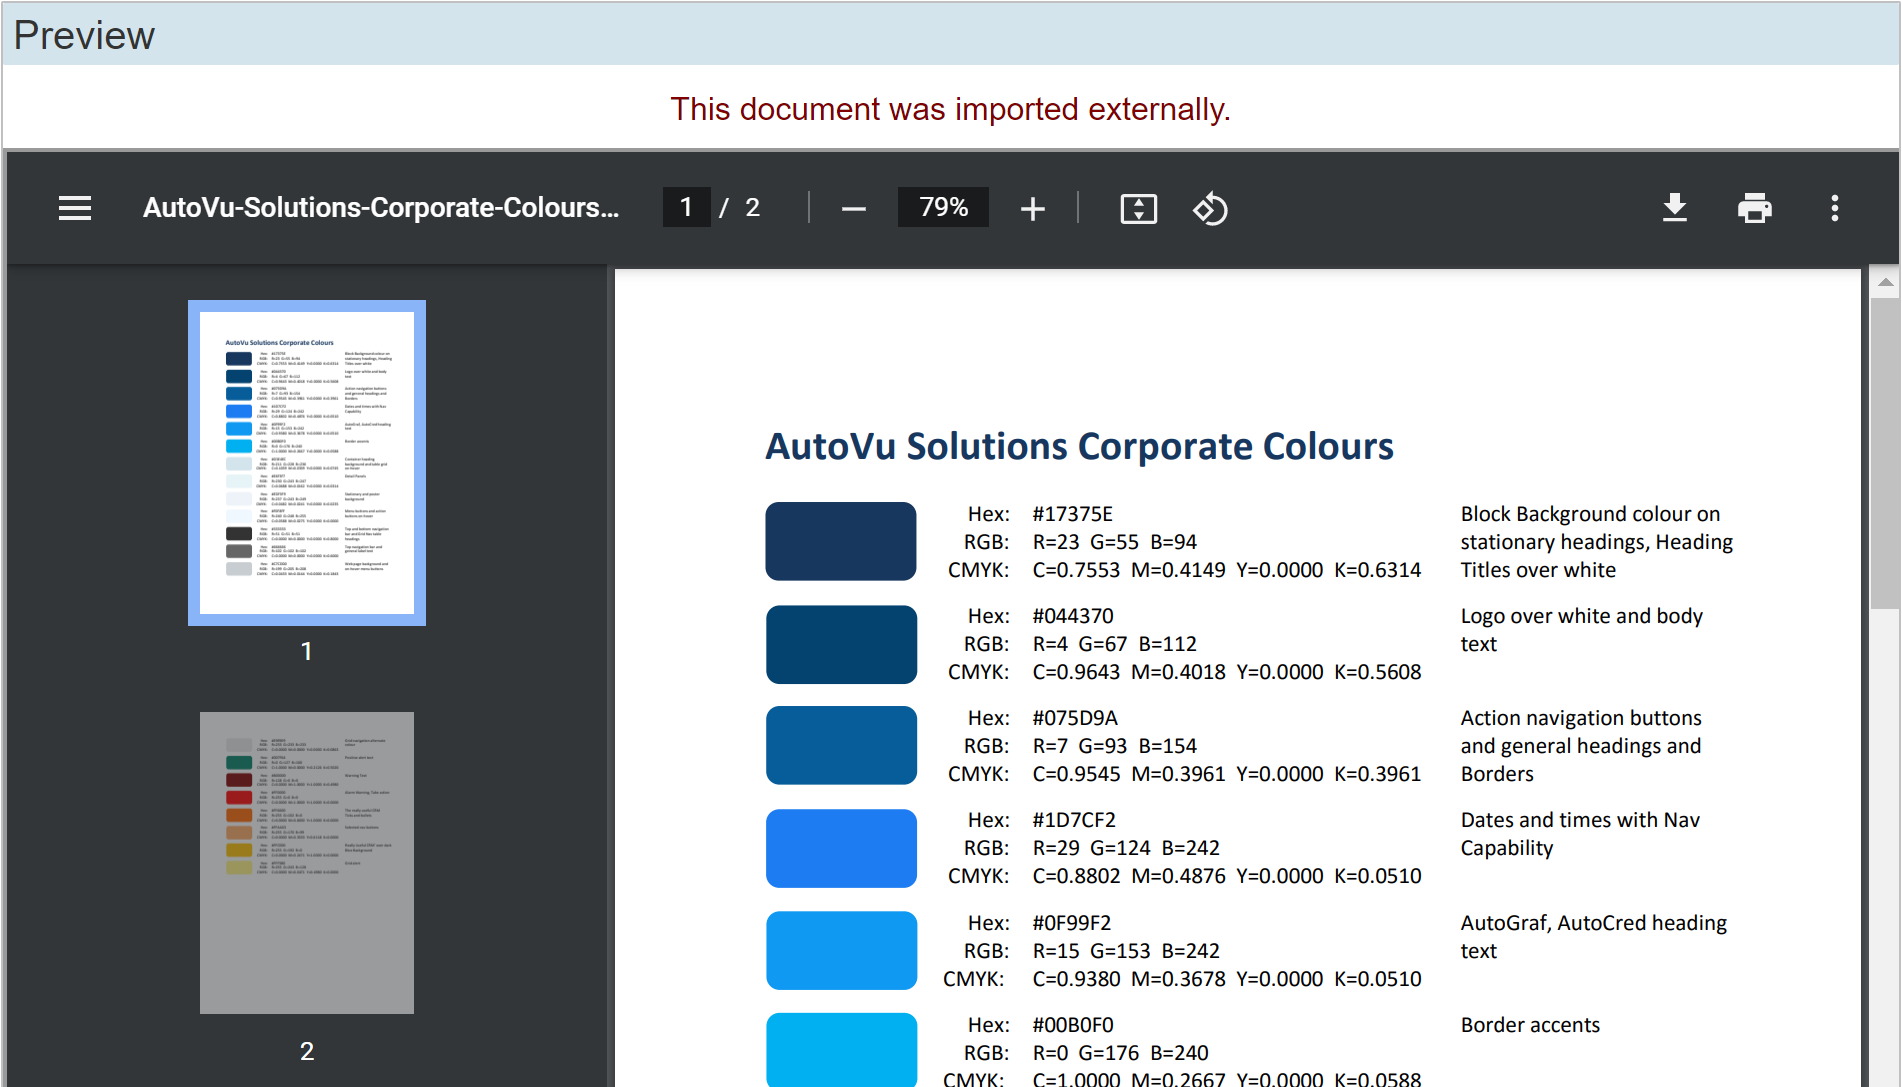
Import Document
Clicking the Import Document' menu button allows you to override the editor functions by uploading an existing PDF. The image below shows the 'Import Document' dialogue. Either click 'Upload Files' and search for your document within your filing system, or drag and drop a local document onto the file uploader.
Once the file has uploaded, close the upload dialogue then the preview will change to show the imported document. The below example shows our corporate colours document imported directly into the Document Editor preview.
Please note: If you click any of the template documents, the selected template will then replace the imported one. Once the document is marked as sent, the editing features will be turned off. I.E. the templates menu will disappear preventing accidental overwriting of the document.
RH Menu
Notes Panel
This panel allows you to enter notes about this document. they are not utilised anywhere within the PDF document.
Version History
Each time the editor is opened and the document is saved (including AutoSave) the previous version of the document is saved, along with the date and time this occurred. This feature is used when you have accidentally deleted some text and closed the editor.