The AutoQuote system is an additional feature of the Document Editor. In its default format, all that is required within the editor is the #AutoQuote# hash tag. Once AutoQuote has been started, the preview will automatically show all the AutoQuote sections as you complete them. You may if you wish, tailor the AutoQuote template to your own design, but by default, the system will automatically generate the AutoQuote for you.
Getting Started
Create a sales quote from the Site Record by clicking the LH menu button 'Sales Quote' If you have the AutoQuote feature applied to your account, the Document Editor will open as shown below. In the LH menu are the AutoQuote functions.

Winning Quote
When opening the text editor from either the 'Sales Quote' button on the site record, you have the option to select the quote as the 'Winning Quote. This selection will show in the list of quotes prepared for this sit within the Site Record. The purpose of this is to provide a means of showing which of possible several quotes sent to your client is the one they have actually accepted. Winning Quote will automatically be selected from the sales prospect dialogue when clicking the 'Won' button if there is only one quote created for this client / product. In the event of there being 2 or more quotes for the same client, you will be required to select to winning quote manually by visiting the text editor / appropriate quote and checking the 'Winning Quote' check box as shown above.
Starting AutoQuote
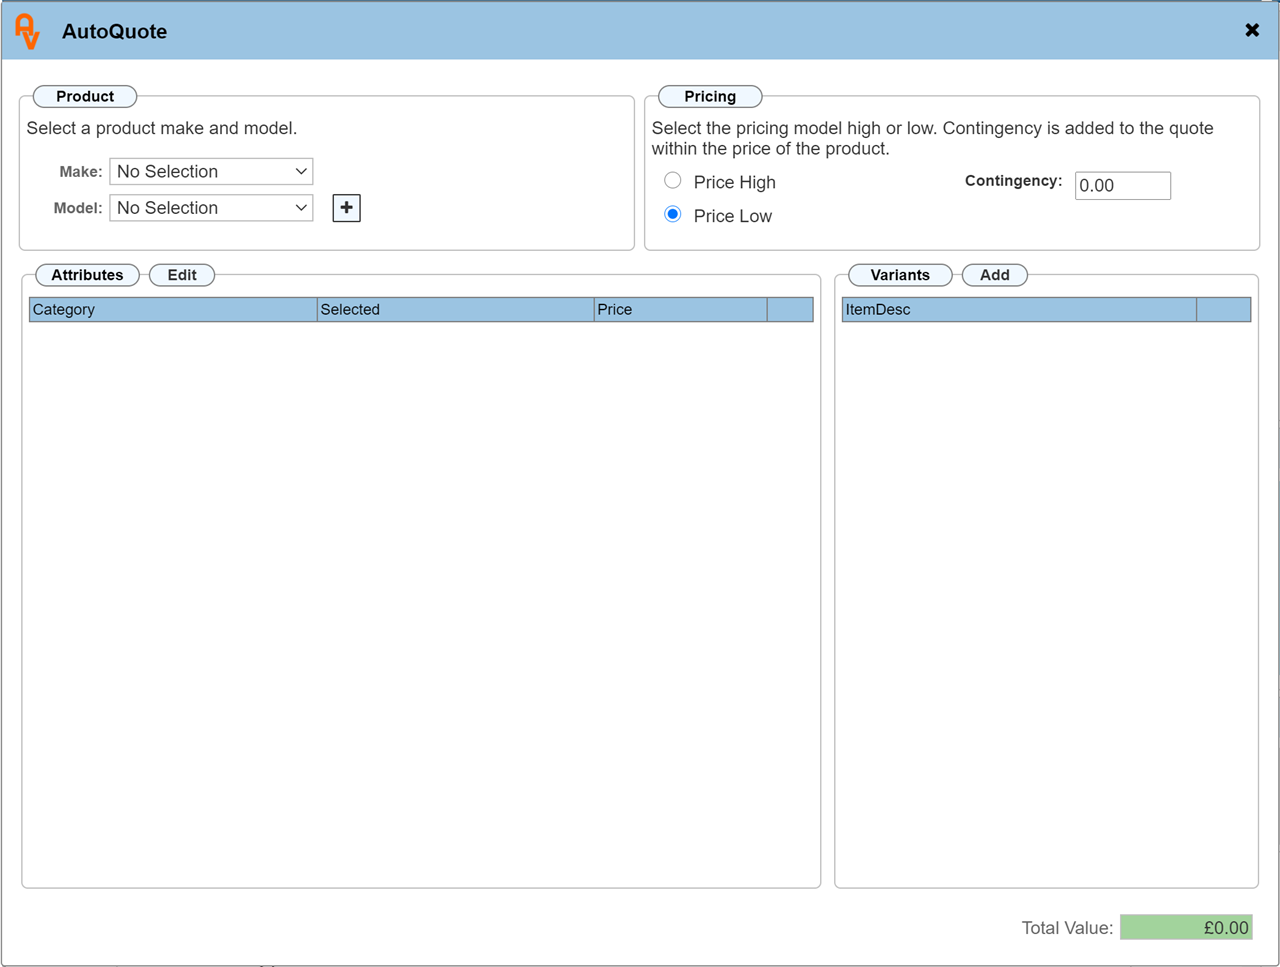
Click the LH menu button labelled 'Start AutoQuote' to open the AutoQuote attribute and variant picker. The example below shows the AutoQuote Dialogue.
Attributes / Variants
The method used within AutoQuote is to select a series of Variants that are linked to an Attribute in order to build up the specification of your quoted product.
To explain Attributes and Variants in a little more detail, we will use an example product of a domestic stairlift. Stairlifts are supplied for either the LH side of the stairs or the RH side of the stairs. There may be many different seat fabric colours to choose from. The length of the rail that the lift runs on can be varying lengths. Each of these differentiators is an attribute, the variants are the options available for each differentiator.
Here is an example: The lift seat fabric colour as classed as the 'Attribute', each of the colours are classed as the Variants. This means one of the attributes could be called 'Seat Fabric Colour', then you can create several variants that apply to this attribute called Red, Yellow, Blue etc.
If you have not set up any products at this stage, you can either create these in the Products section by clicking the Products tab on the top menu bar, or you may create them directly within the AutoQuote. See further down this guide for details on how to add new products with attributes and variants.
First, we will create an AutoQuote based on our example product.
In the dialogue as shown above, we will select our example product by selecting via the Make and Model drop down lists, the below image shows the Attributes section filled with all those we have created for this tutorial.
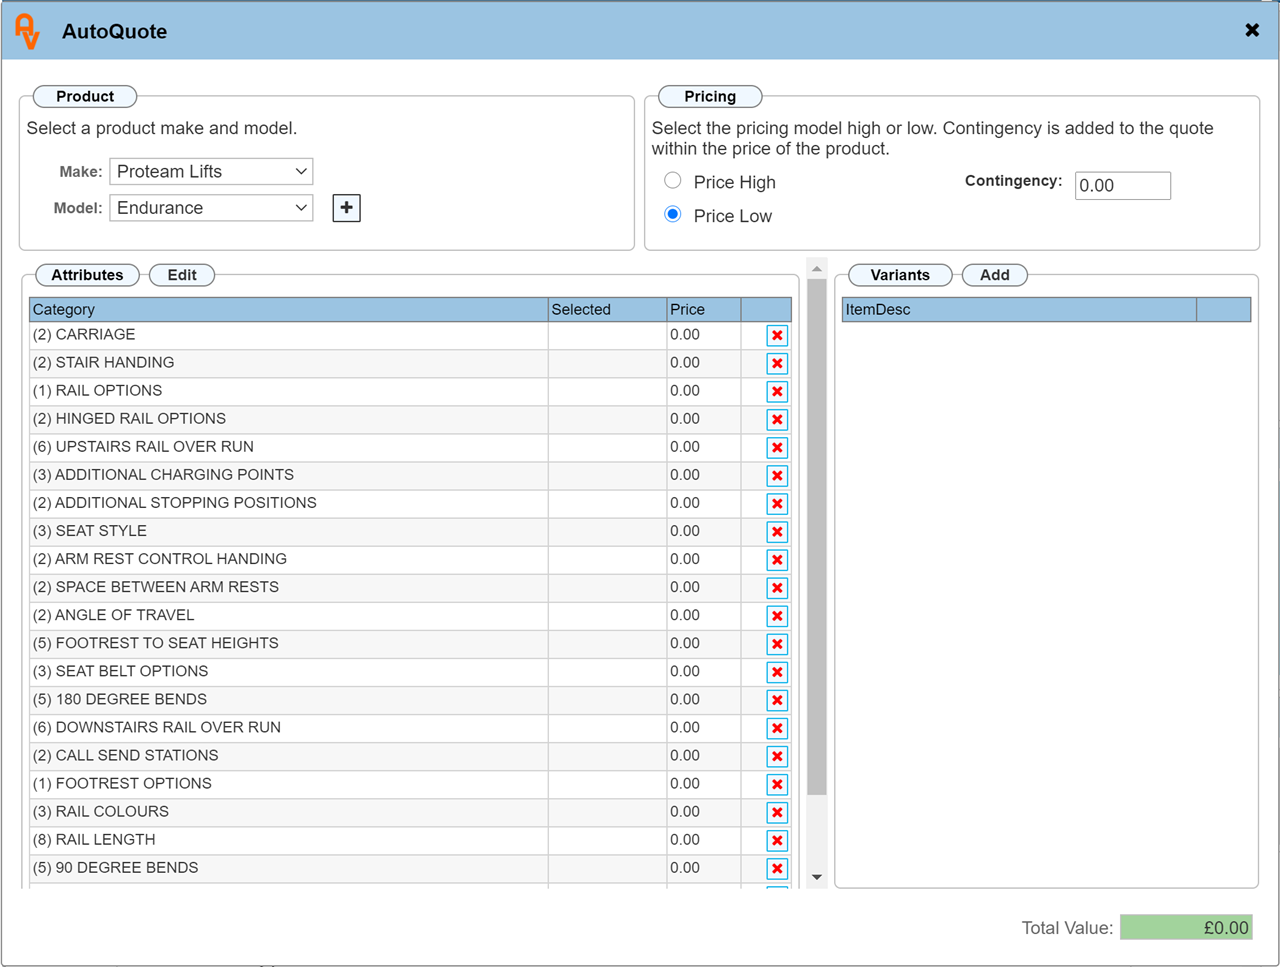
In brackets next to each Attribute shows a number. This indicates how many variants are available within. Click each attribute and select from the variants which to apply to your quotation. The below image shows several attributes /variants selected.
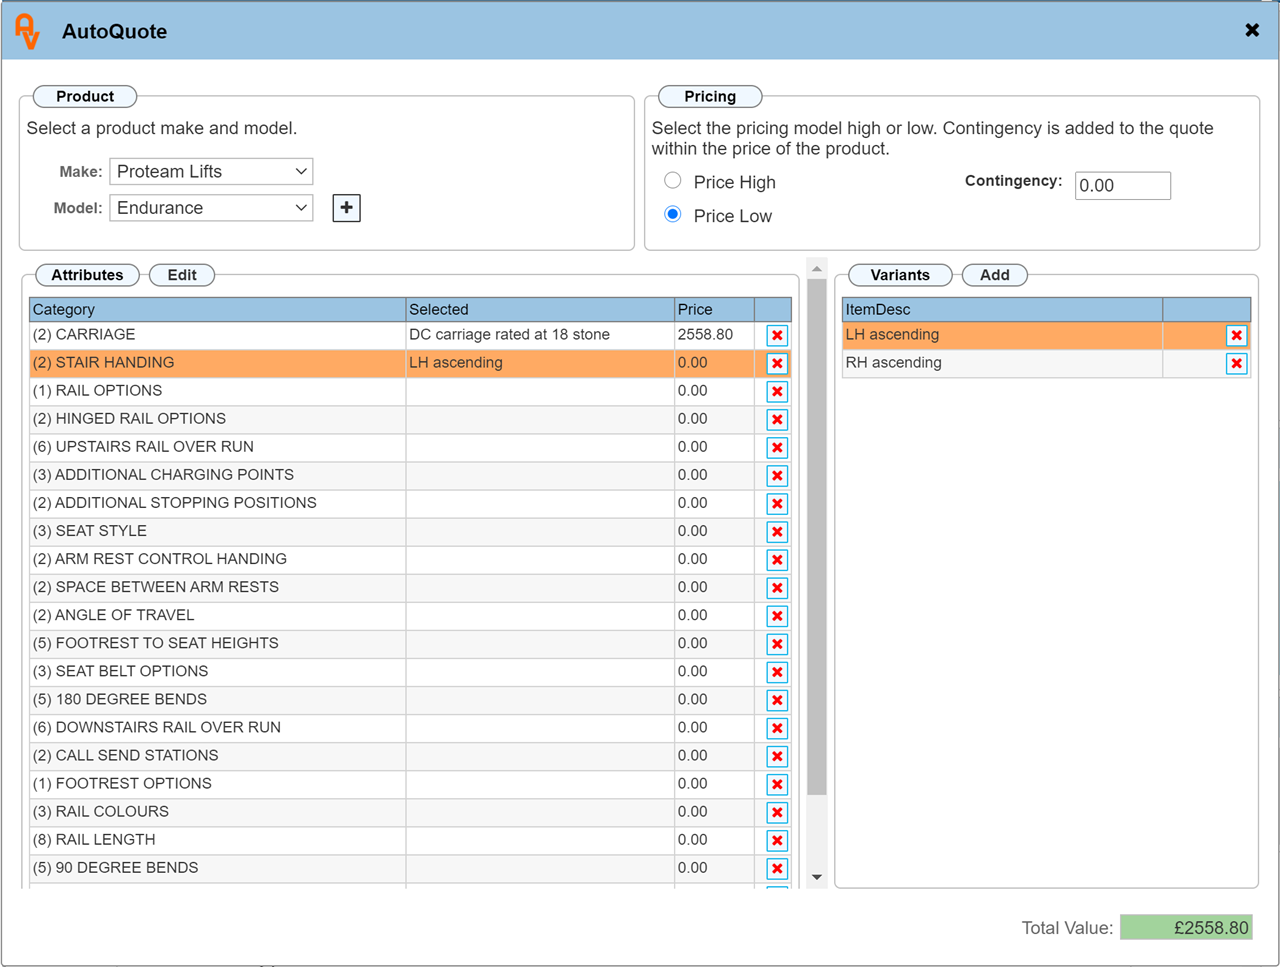
As you go through each attribute and select a variant, the variant name will show in the selected column along with the sales price associated with it.
If you make a mistake selecting a variant, click the red cross in the attributes panel for the item that needs removing. You will be prompted to confirm this.
Pricing
Each variant can be assigned two prices. We call them Price High and Price Low. The price high and low radio buttons toggle the pricing of all attributes between the high sales price and the low sales price. The total value will update accordingly if you toggle the radio buttons.
The contingency option allows you to 'roll in' an additional cost to the price of the quotation. When the final quotation is produced, the value of each variant is not shown, only the total price of the product.
Updating the Preview
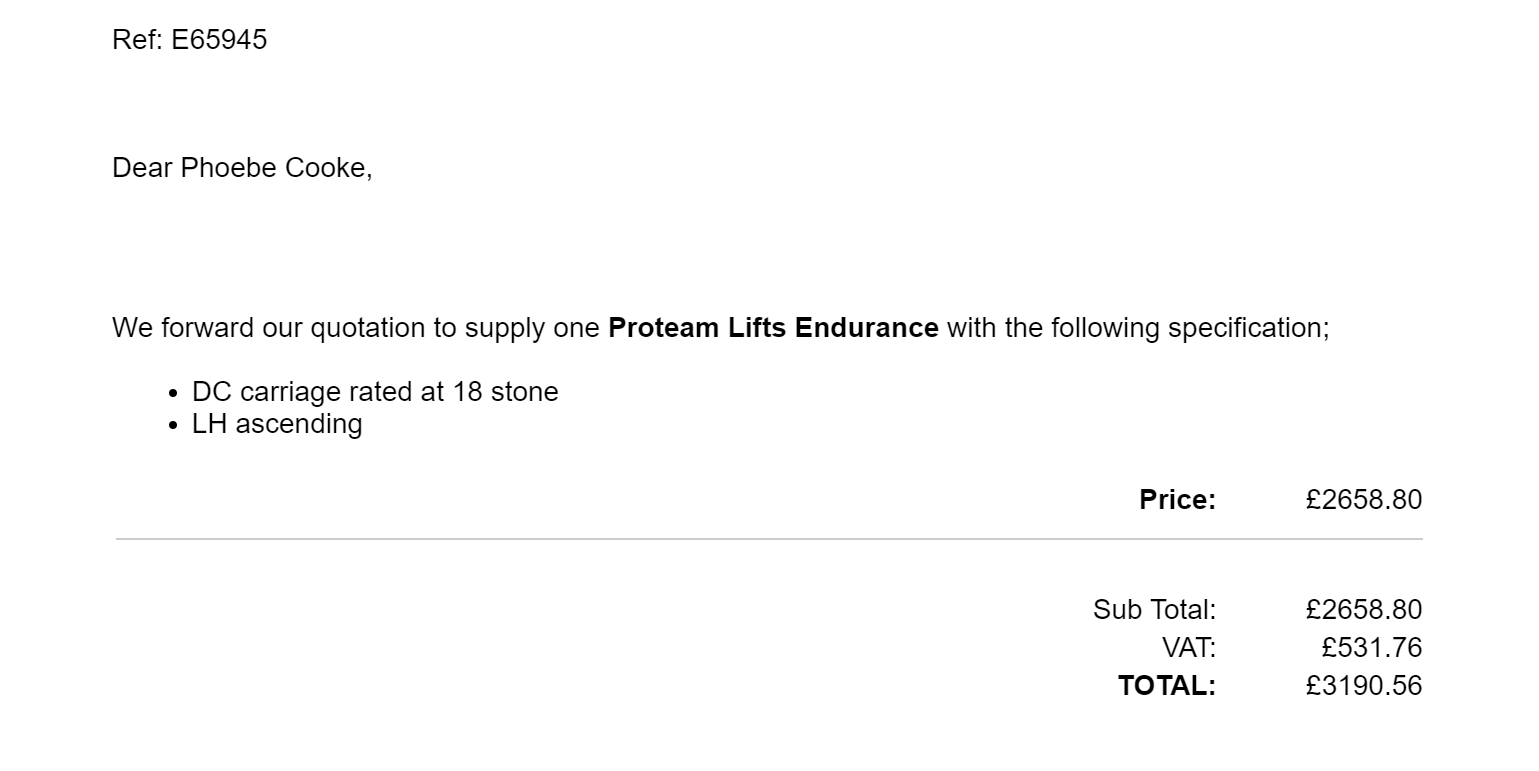
Closing the AutoQuote dialogue will automatically update the document preview. The example snippet below shows out sample AutoQuote as it currently stands.
Adding detail to your quote
There are 4 automatically created sections that you can utilise. Plus you can create sections of your own. First we will look at the automatically created sections, these are all optional and do not necessarily have to form part of your quote.
Please note: Although it is possible to simply input details directly to the text editor, the pricing on each section in this instance will simply be text and will not form part of the automated pricing features that can be utilised when creating Purchase Orders, Invoices or assets derived from this quote. For this reason, we would recommend creating each section of your quote via the sections mechanism where the pricing of each is recorded.
Warranty
Introduction
Product Notes
Closure
The Warranty section allows you to include details regarding the service contract that you may offer, the below image shows the warranty dialogue open ready for you to select options.
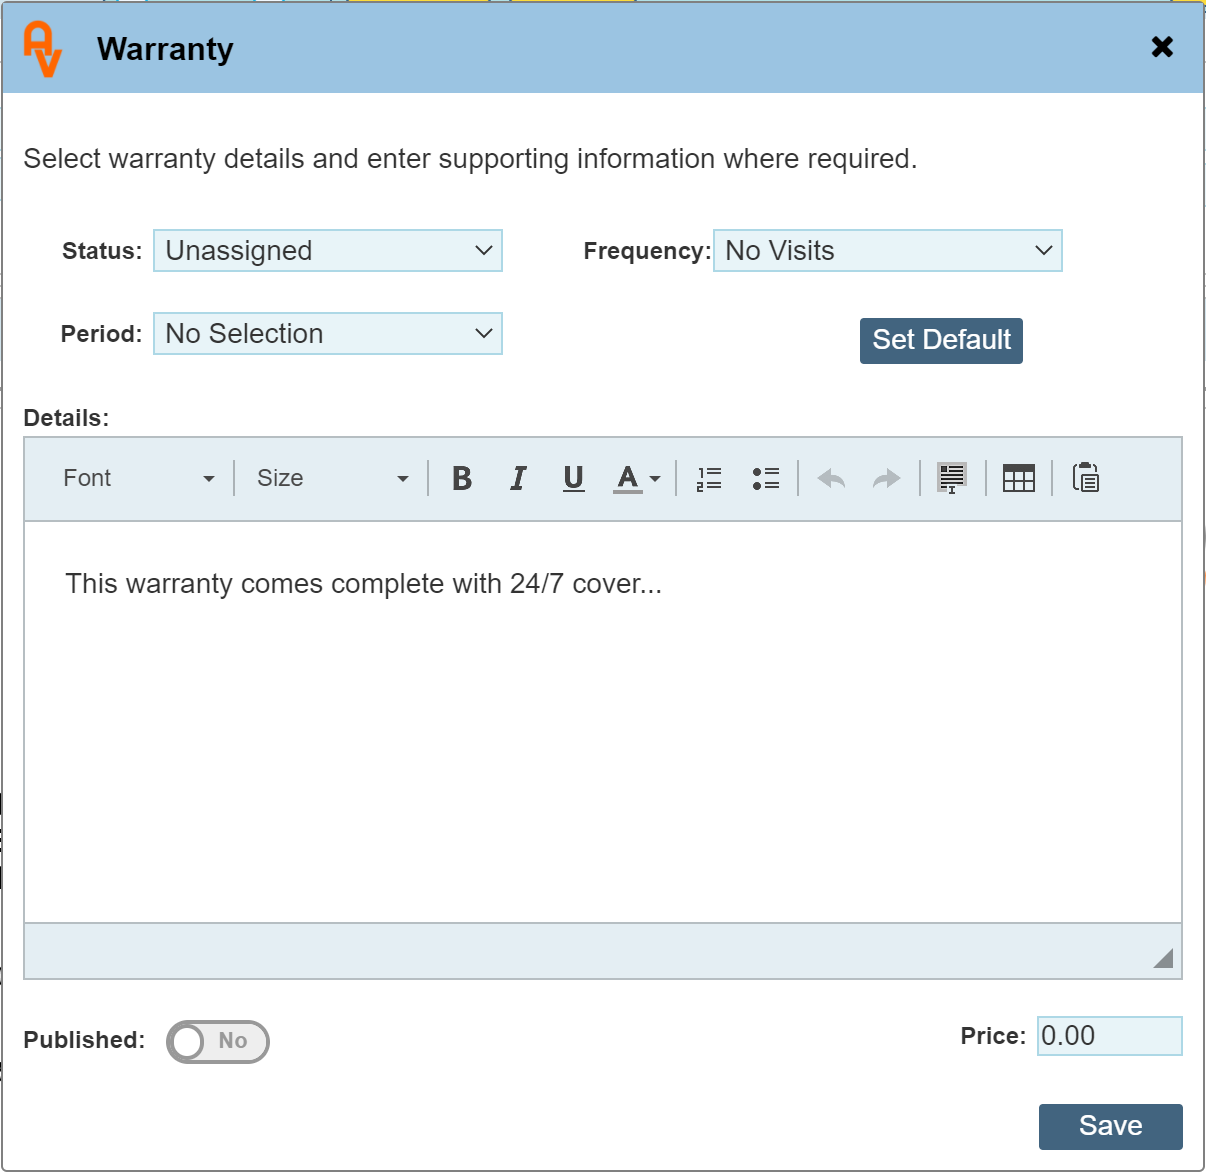
Status
Select from warranty contract types that you have previously set up in the custom values section.
Period
The length of time that the warranty is active
Frequency
The number of service visits per year that are included
Set Default
The text within the dialogue by default will be empty. If you populate the dialogue box with text and click the button 'Set Default', each time you open the dialogue for a new quotation, the dialogue text will be pre inserted. (This is per log on user, I.E. another user creating a quotation can save their own dialogue text as default)
Published
Tells the Document Editor to include this section within the quote
Price
The total cost of the warranty / Contract
Below is an example of the warranty dialogue completed.
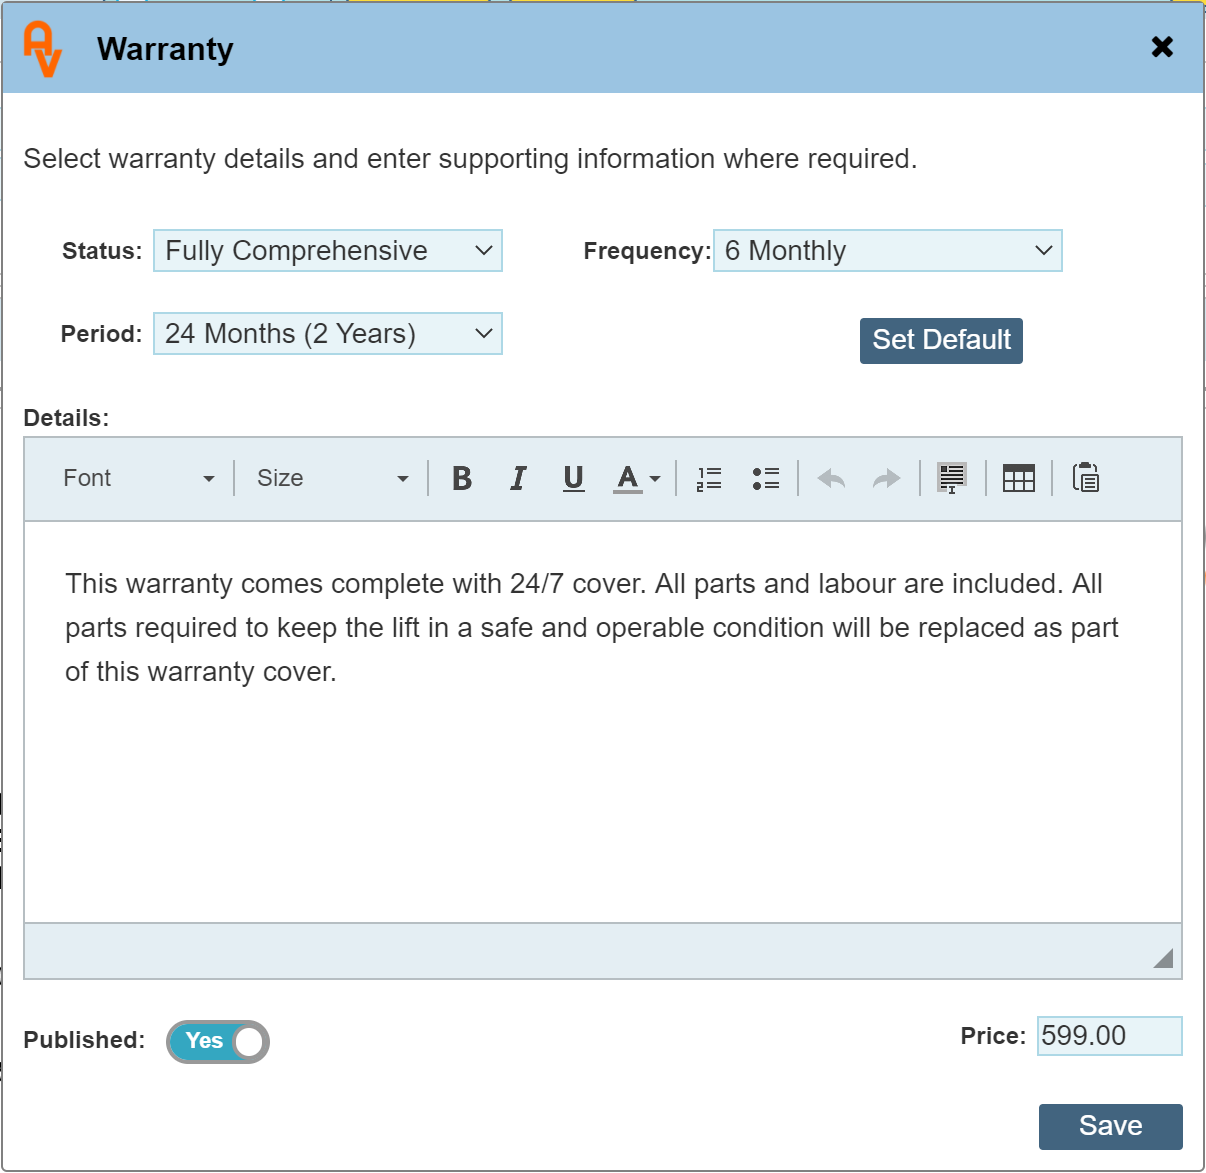
Once the dialogue is closed (and marked as published), the preview will update to include the details.
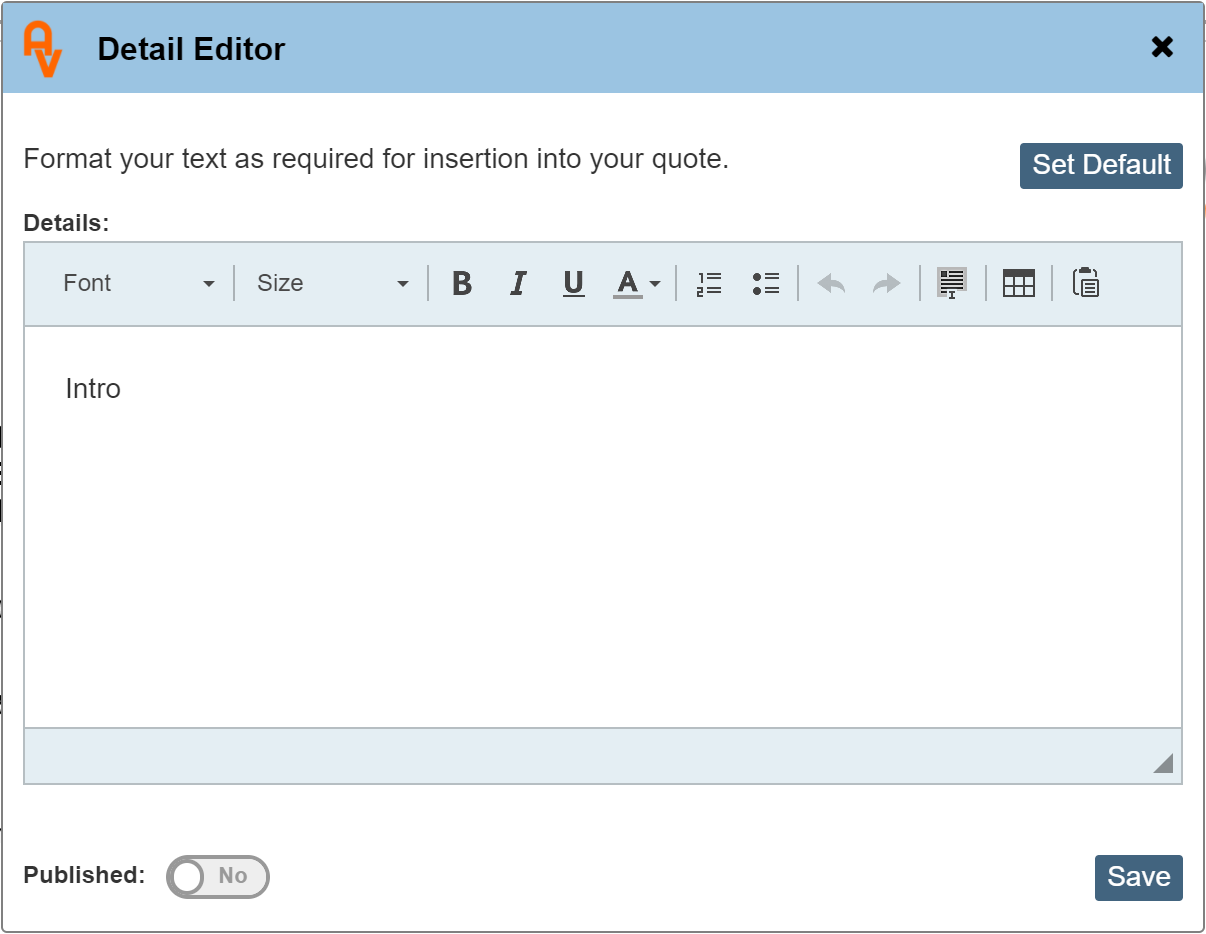
Introduction
This dialogue enters text into your quotation just above the product specification. Toggling the 'Published button tells the Document Editor to include the text in your quotation. Set Default makes this dialogue remember the text you entered for the next quotation you create.
Product Notes
This dialogue is exactly the same as the Introduction dialogue except it will insert the text just after the product specification but before the product price.
Closure
This dialogue is exactly the same as the Introduction dialogue except it will insert the text just after the TOTAL price.
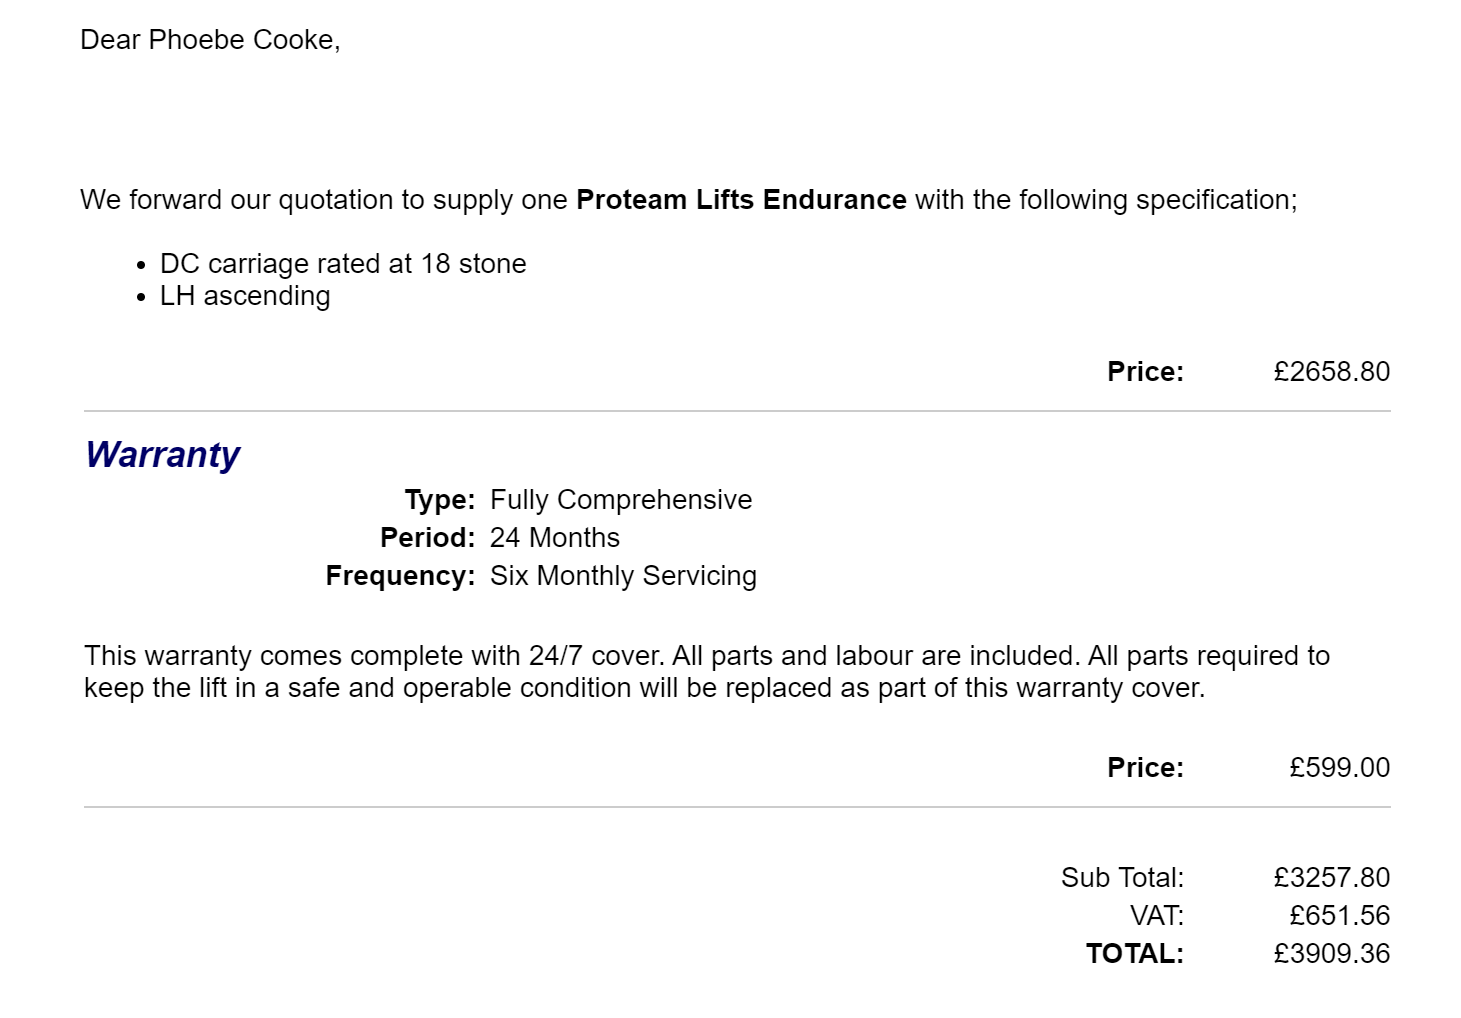
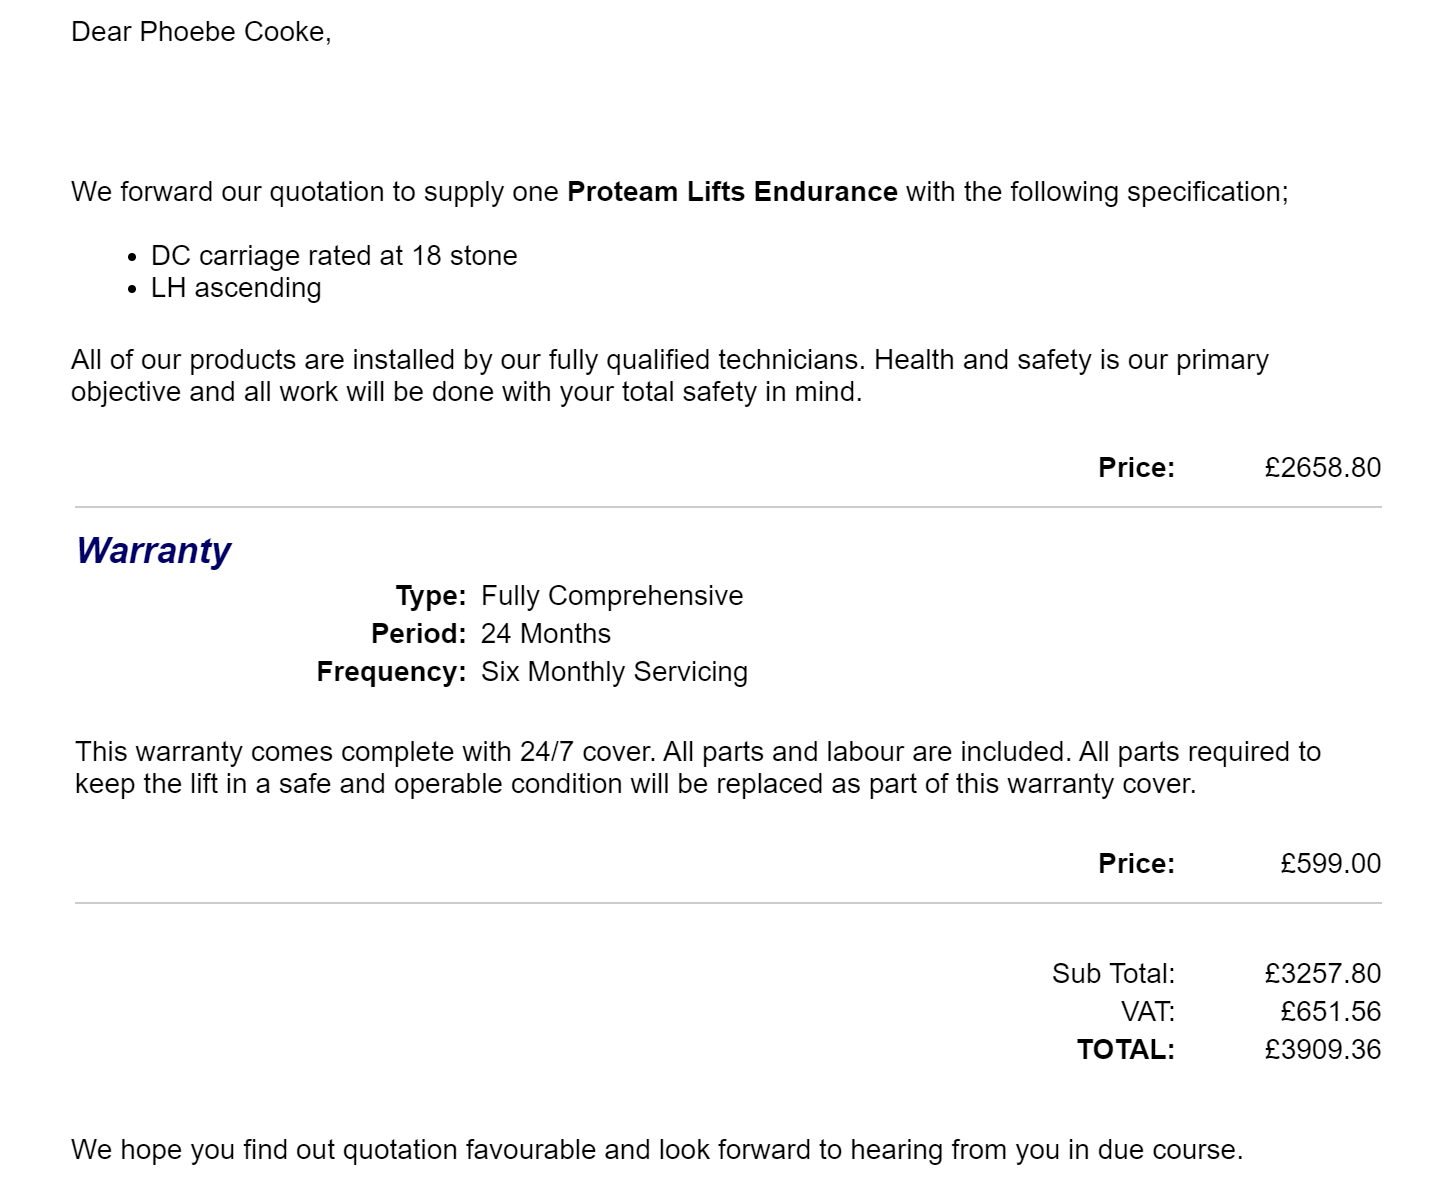
So far, we have included the Warranty, Product Notes and a closure statement, the below document snippet shows the preview text with these details included;
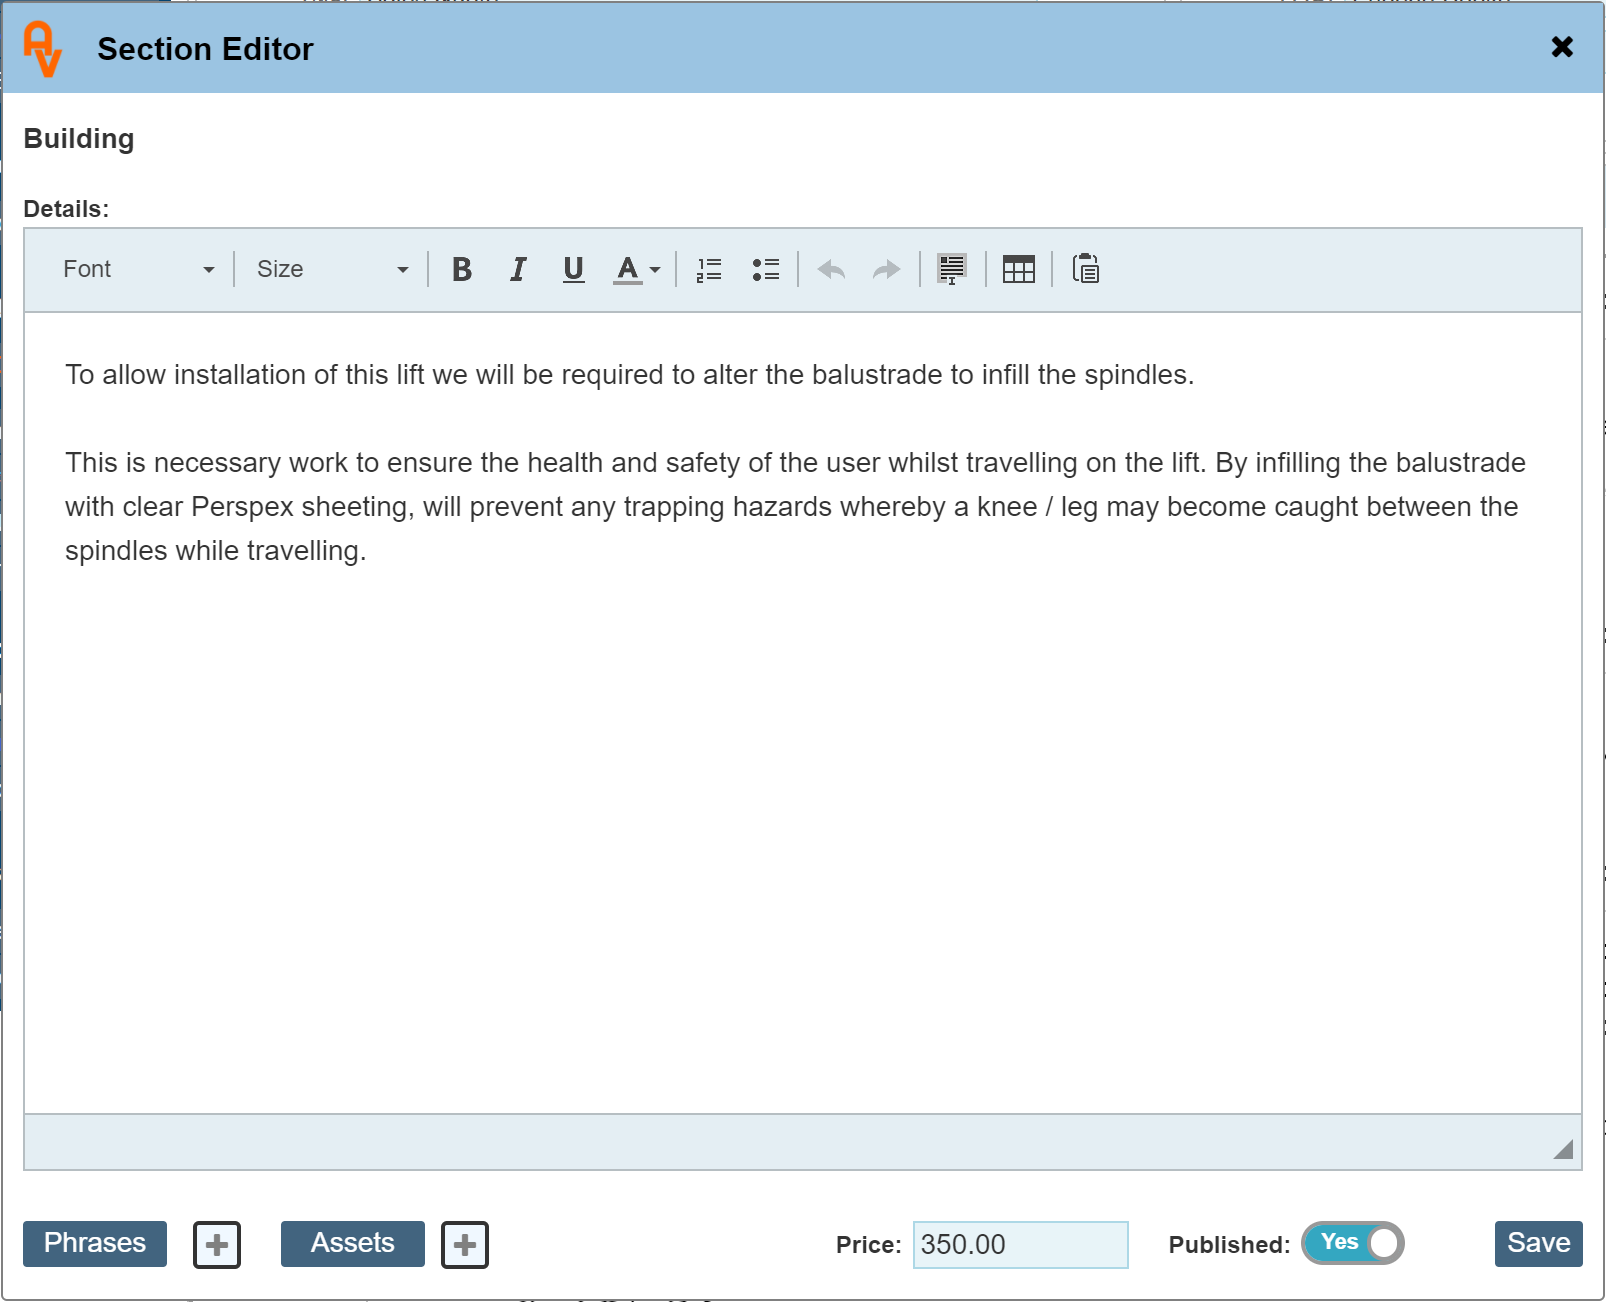
We can continue to build on this quotation by including 'Custom' sections. Our example shows we have already set up 3 custom sections labelled 'Building', Plumbing' and 'Electrical'. Further in the guide we will discuss adding your own custom sections. Below is an example of the 'Building' section that we have pre-populated with text for this example.
The Phrases and Assets buttons will be covered further in this guide.
Once you have written the detail for each custom section that you want to include in your quote, toggle 'Published' and close the dialogue to insert it into your Document Editor Preview.
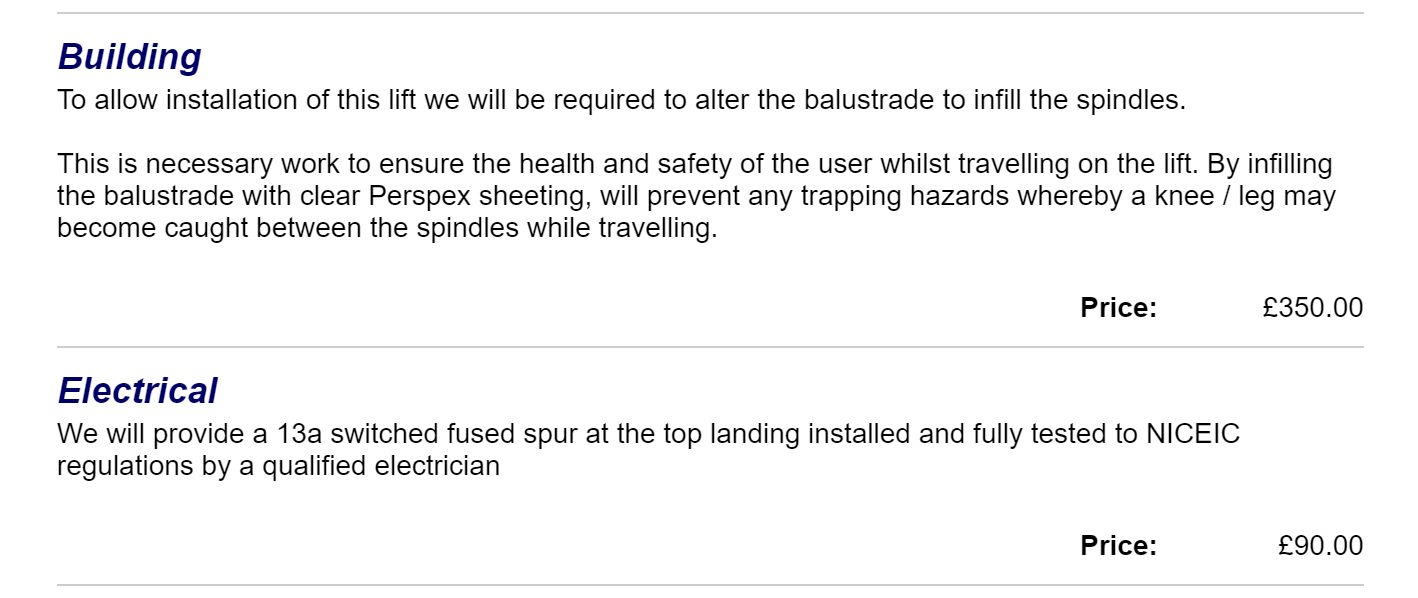
The below snippet shows the Building and electrical sections on your quotation;
Risk Assessment
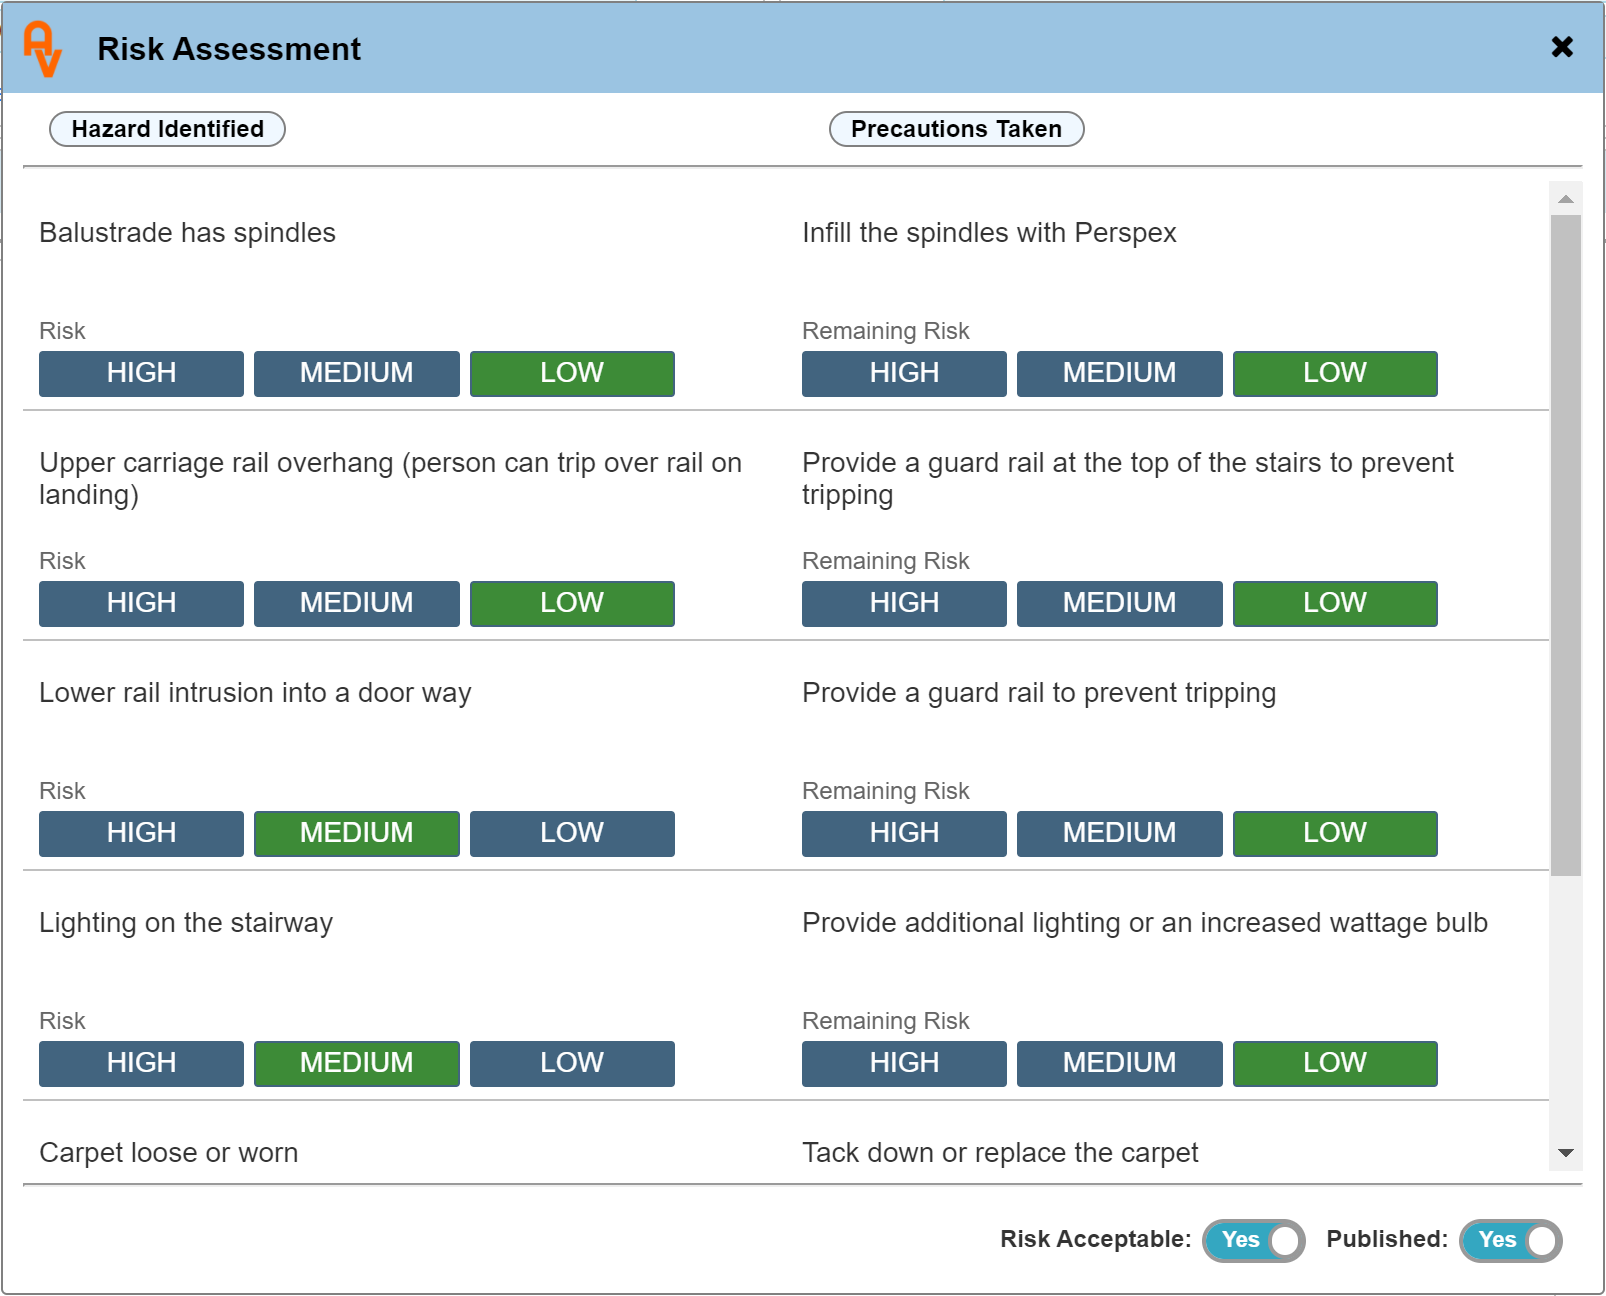
Each product type has its own risk assessment to reflect the particular risks associated with it. AutoQuote can include the risk assessment form directly. The below dialogue shows the risk assessment having each section completed.
Terms and Conditions
The final inclusion allows you to insert your companies terms and conditions of sale, this is a pre populated section created in Document Designer within the Workforce Manager Settings area.
The Finished Document
You may view what the current PDF would look like by clicking the below PDF icon. This will open the PDF to show exactly what we have selected within our example AutoQuote.
Derived Documentation
Once an AutoQuote has been created, it is possible to create sales invoices, purchase orders and also create an asset inserted into your stock. Much of the information used to create each of these documents is derived directly from the AutoQuote. The detail lines of sales invoices and PO's can be tailored to either insert the product detail line or omit it. I.E. when you create a product spec, it may not be necessary (or appropriate) to show some of this detail on the purchase order, likewise some detail will not be necessary on the sales invoice. This information is outlined further in this guide referred to as 'Adding a Variant'.
Nominal codes (or products and services codes in your accounting packages) are also included in the derived documentation should they have been set at the time of creating the product specification. (See the Products Section by clicking the 'Products' main menu button on the top menu bar and select / create products with sales and purchase nominals)
Adding a derived Purchase Order
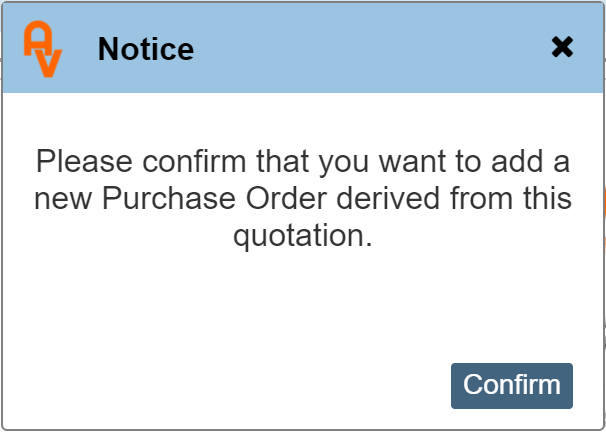
Clicking the 'Add' button shown within the RH menu column under the 'Derived Documentation' section will prompt you to confirm your action.
Once you have confirmed this, all of the details recorded within your AutoQuote will be used to automatically create a purchase order made out to the supplier of the product selected, see the below example showing a PO created directly from our example AutoQuote. You will be navigated to the PO.
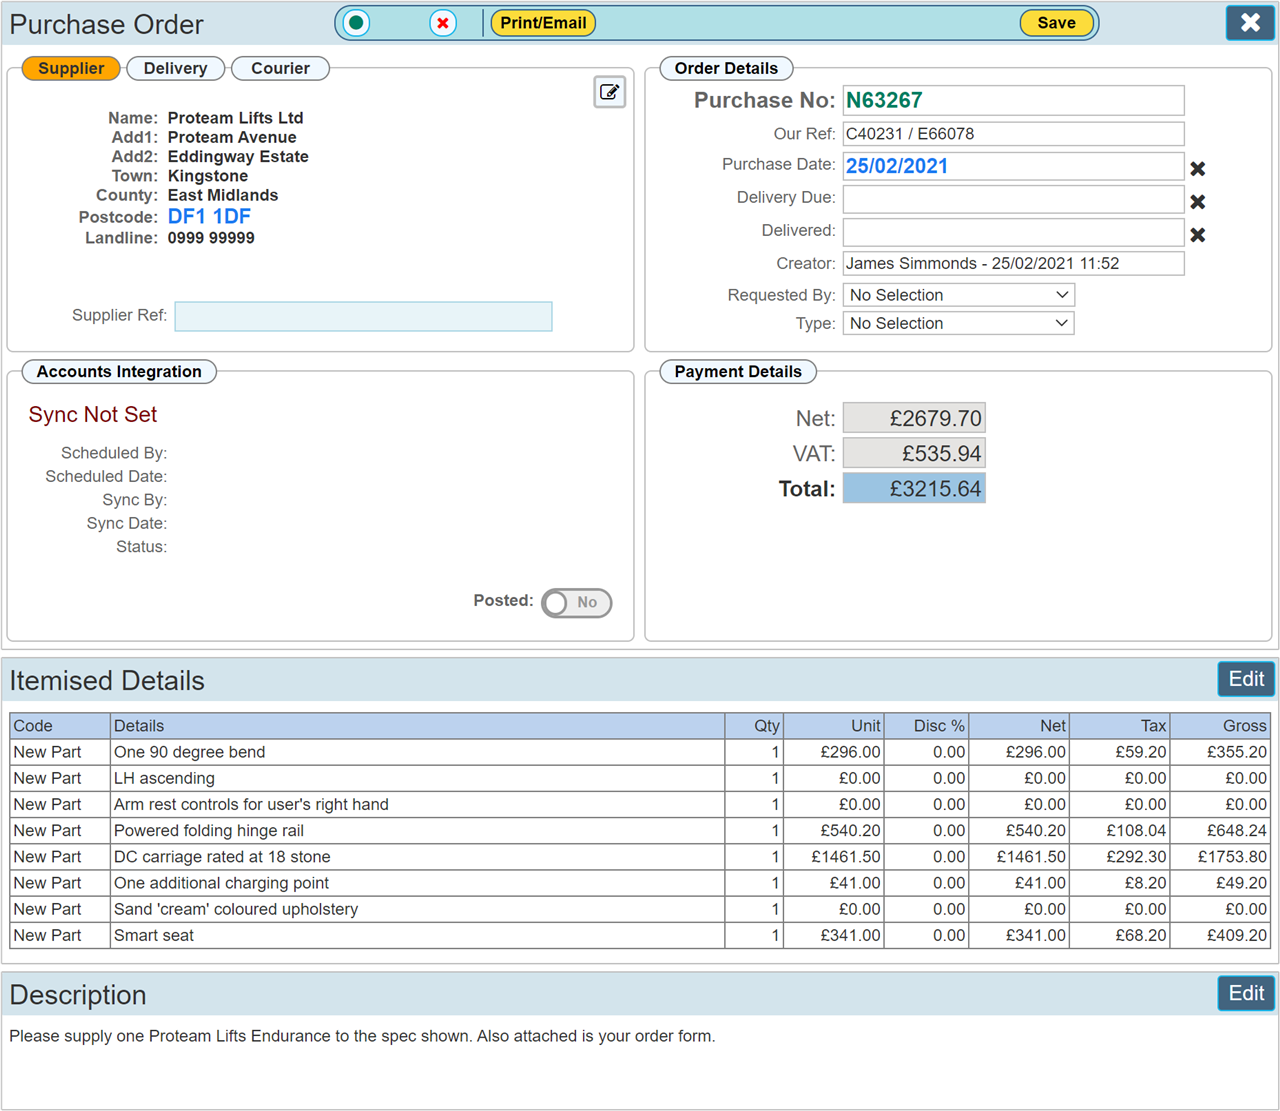
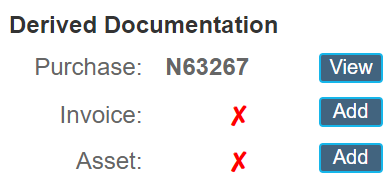
You may of course further edit the PO once created. The RH column on the AutoQuote page will also indicate that a derived document had been created for this PO, as it will for other items created.
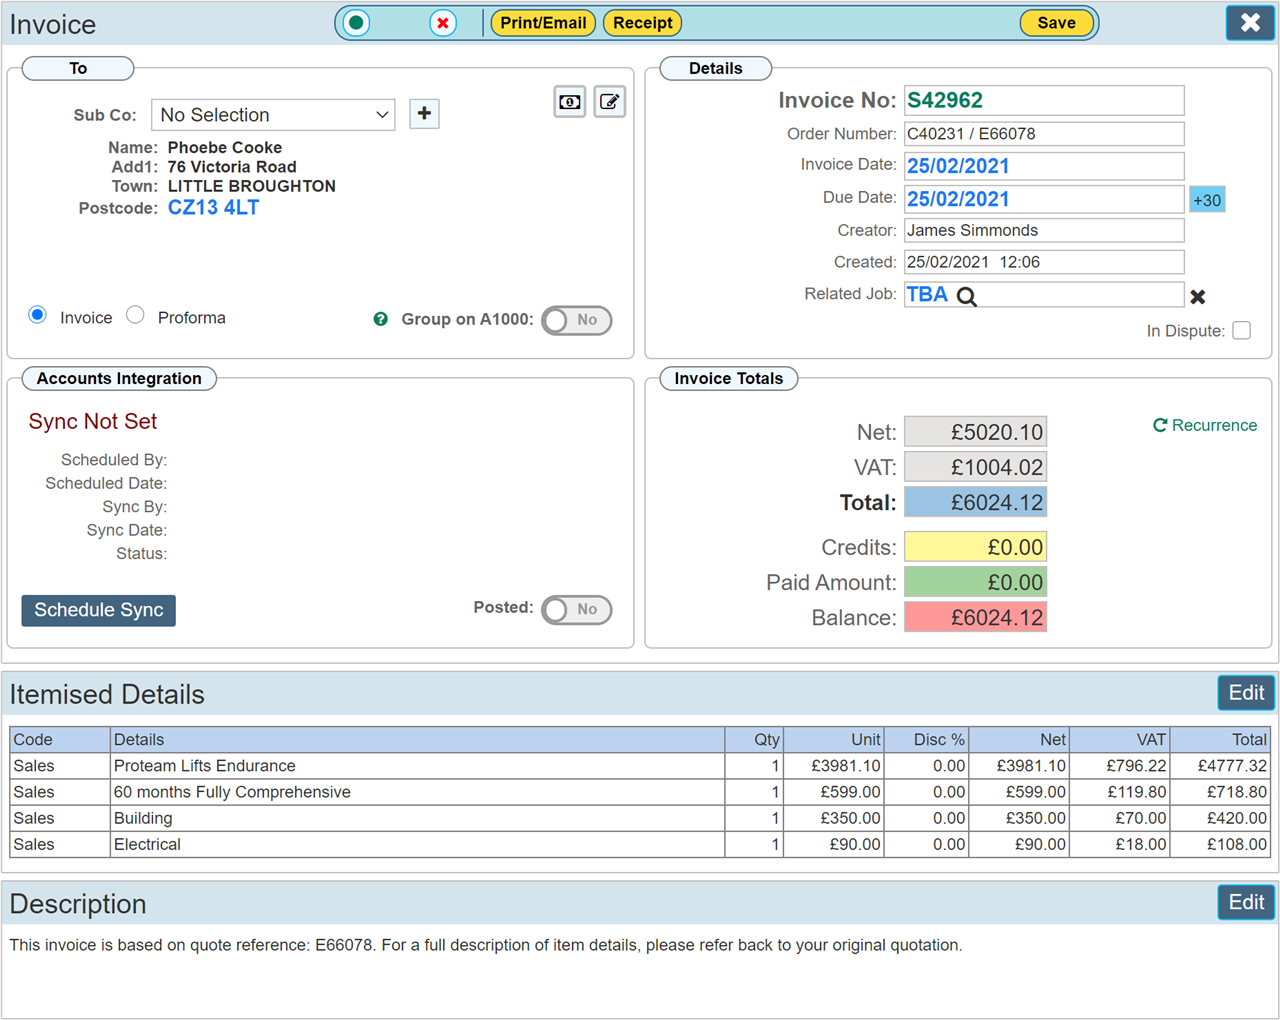
Below is an example of a derived sales invoice showing the details indicated within your AutoQuote.
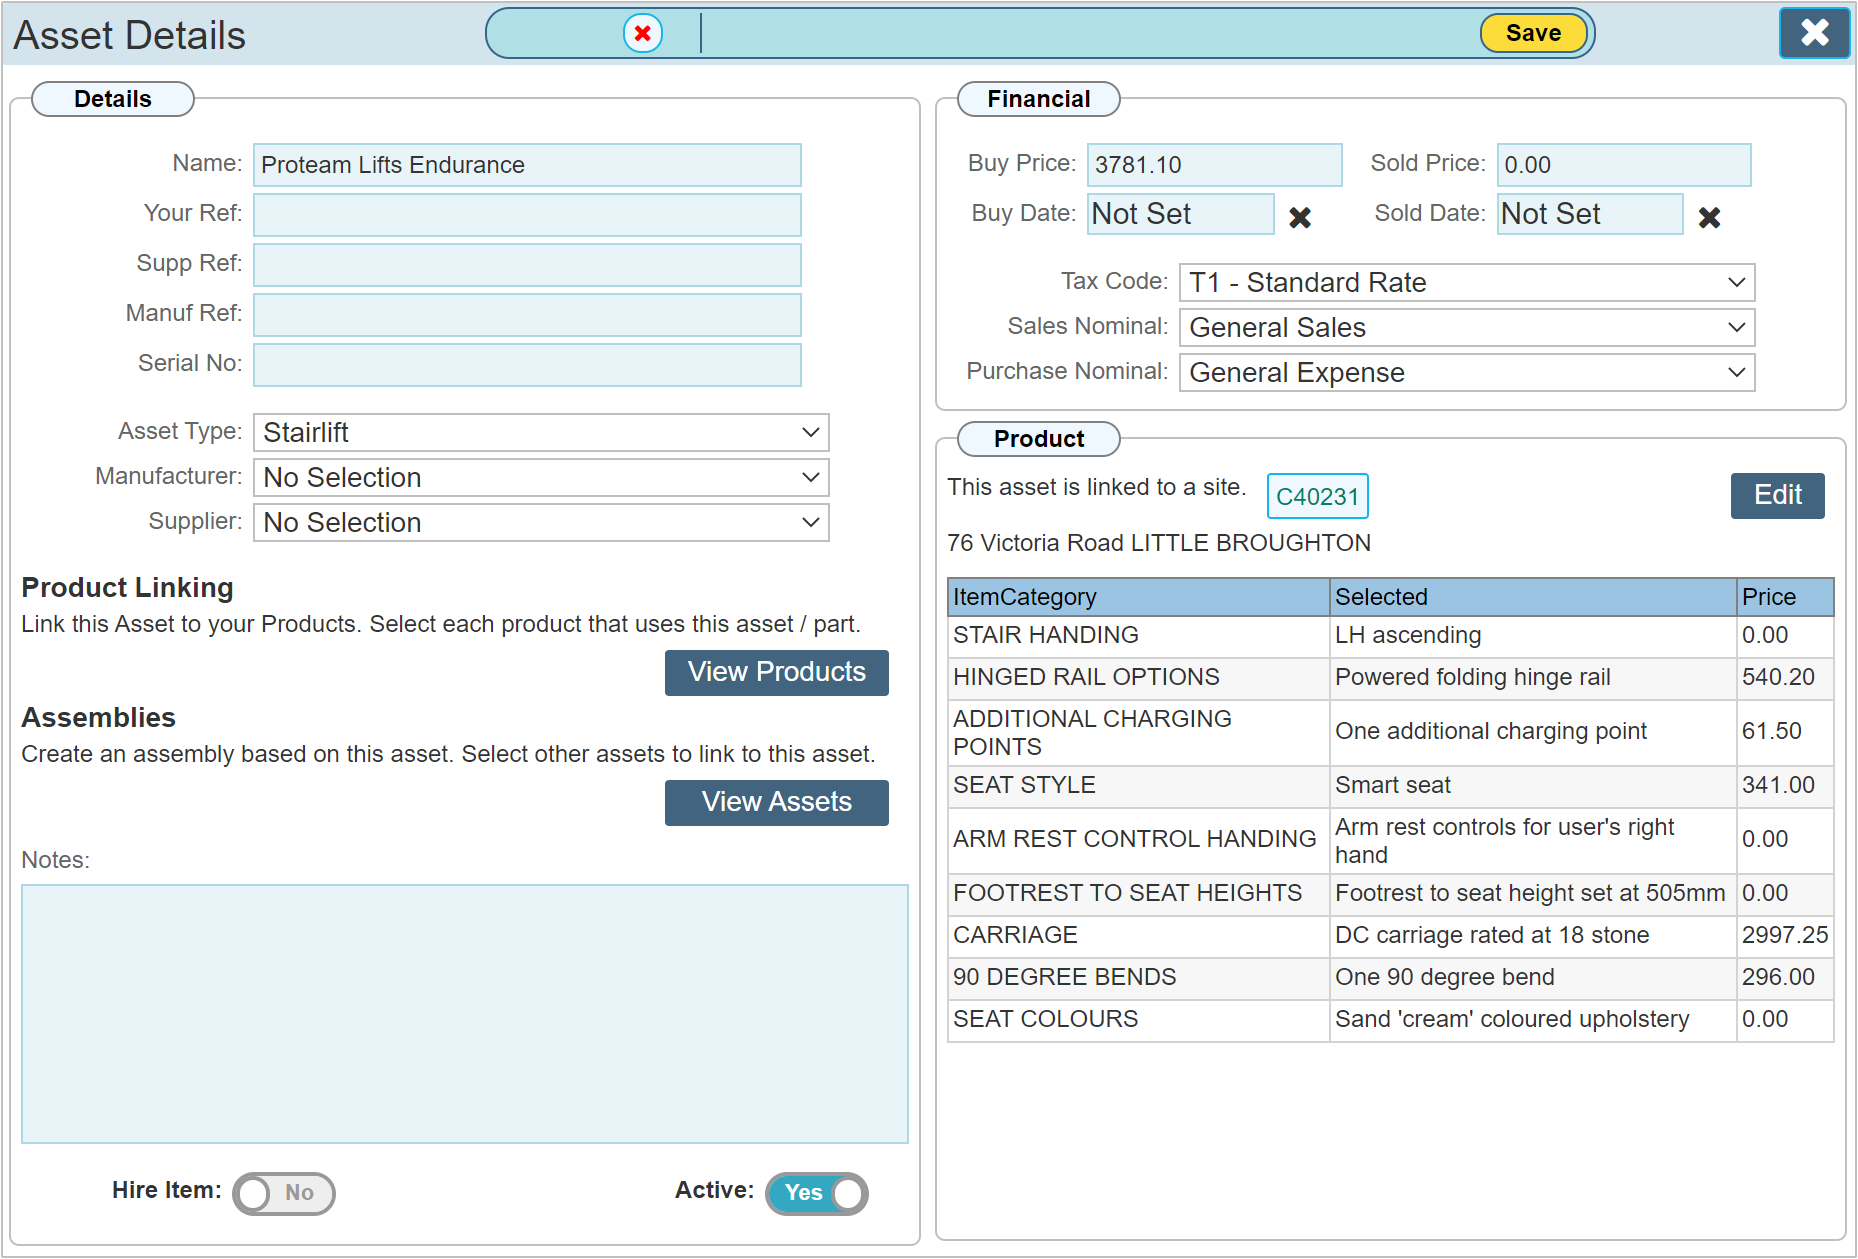
Below is an example showing a derived asset created directly from the AutoQuote.
Although the ability exists to create an asset directly from the quotation, it is not usually required to do this if the product is to be purchased, then delivered or installed directly to site. I.E. It would not be an asset to your company having sold it to a customer. There may be legitimate reasons to create an asset at this stage, I.E. At times the product was bought, but subsequently the customer no longer required the produce before you had delivered / installed.
|
Do not create an Asset derived from a quotation unless it is considered a stock item.
Quote items destined to be delivered / installed on site / to a customer are not required to be created as Assets.
|
Advanced options
The above, details how to use the basic functions of AutoQuote with the default template. Below we explore the advanced features of AutoQuote.
Adding a New Product
When first using AutoQuote, you may not have set up any products. Ideally, these would be set up in the Products Section, you may however create them directly from AutoQuote.
Open the AutoQuote dialogue by clicking 'Start AutoQuote'. Within the 'Product' panel locate the + symbol next to the Model drop down list. Click this to open the 'Product Details' dialogue as shown below.
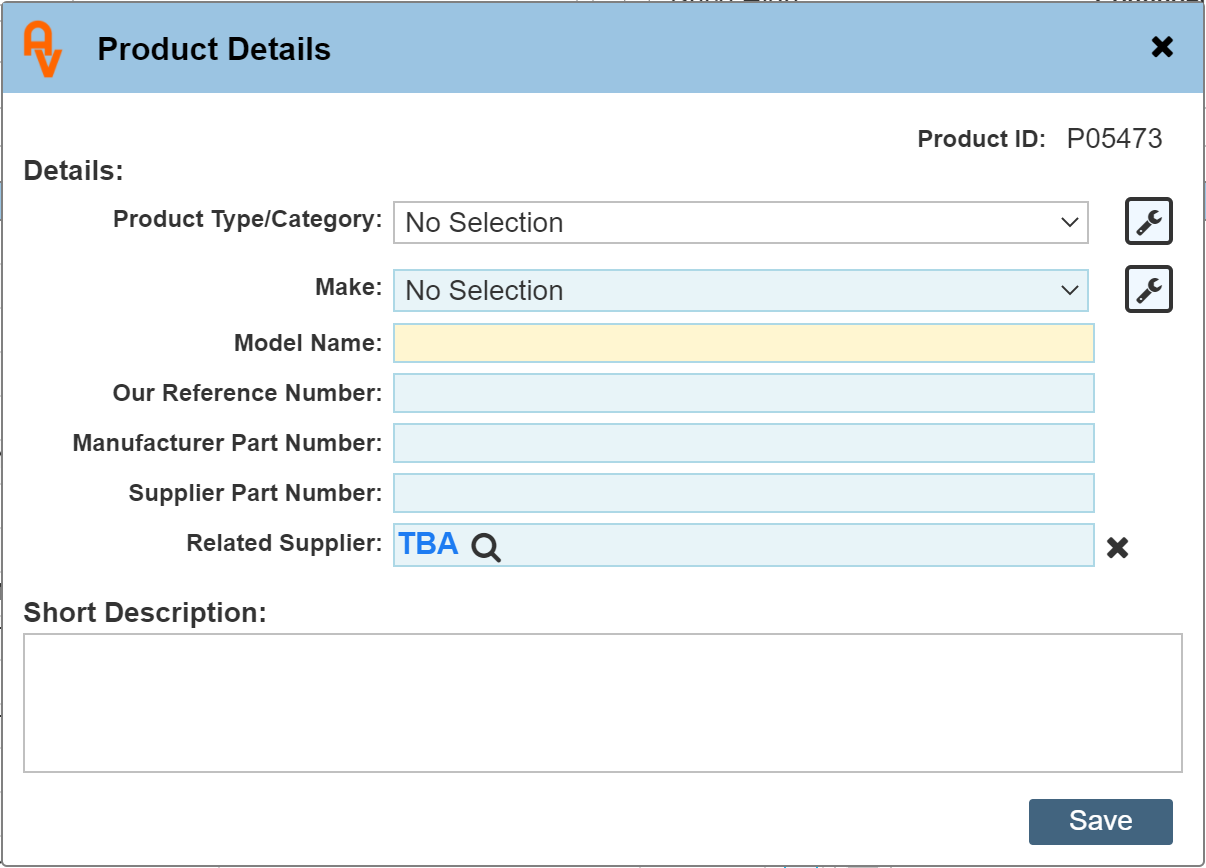
The advanced details regarding this dialogue are covered within the Products How To guide, for this tutorial, we will assume some knowledge exists regarding this dialogue.
Product Type/Category
This drop down lists each of the product types currently up up on the system. Essentially, a product type is the mechanism used to determine which list of AutoQuote Attributes to use. I.E. for our example product above, we selected a 'Proteam Lifts - Endurance' (a made up name), this product is a stairlift and is linked to the 'Stairlift' Product type.
Once a product type has been created, your products are linked to them so that each time you open AutoQuote and select a particular make and model, the correct list of attributes are shown. The product type is also linked to Service Check Lists as used by your service technicians whilst out on site using the mobile App. The Product Type in this scenario is used to determine which set of product service questions are prompted to the technician.
You may add a product type directly from the AutoQuote.
Make
Each product is associated with a Make, this is essentially the manufacturer of your product, never the supplier. You may add a product make directly from here by clicking the 'Spanner' icon.
Model Name
The name as given by the manufacturer for this product.
Our Reference
If you use your own references for each product, enter this here.
Manufacturer Part Number
The reference number given by the Manufacturer (if known).
Supplier Part Number
The reference number given by your Supplier (if known).
Related Supplier
This allows you to link this product to a supplier record within Workforce Manager (recommended).
Short Description
Describe where required what this product is / does.
Editing the Attributes List
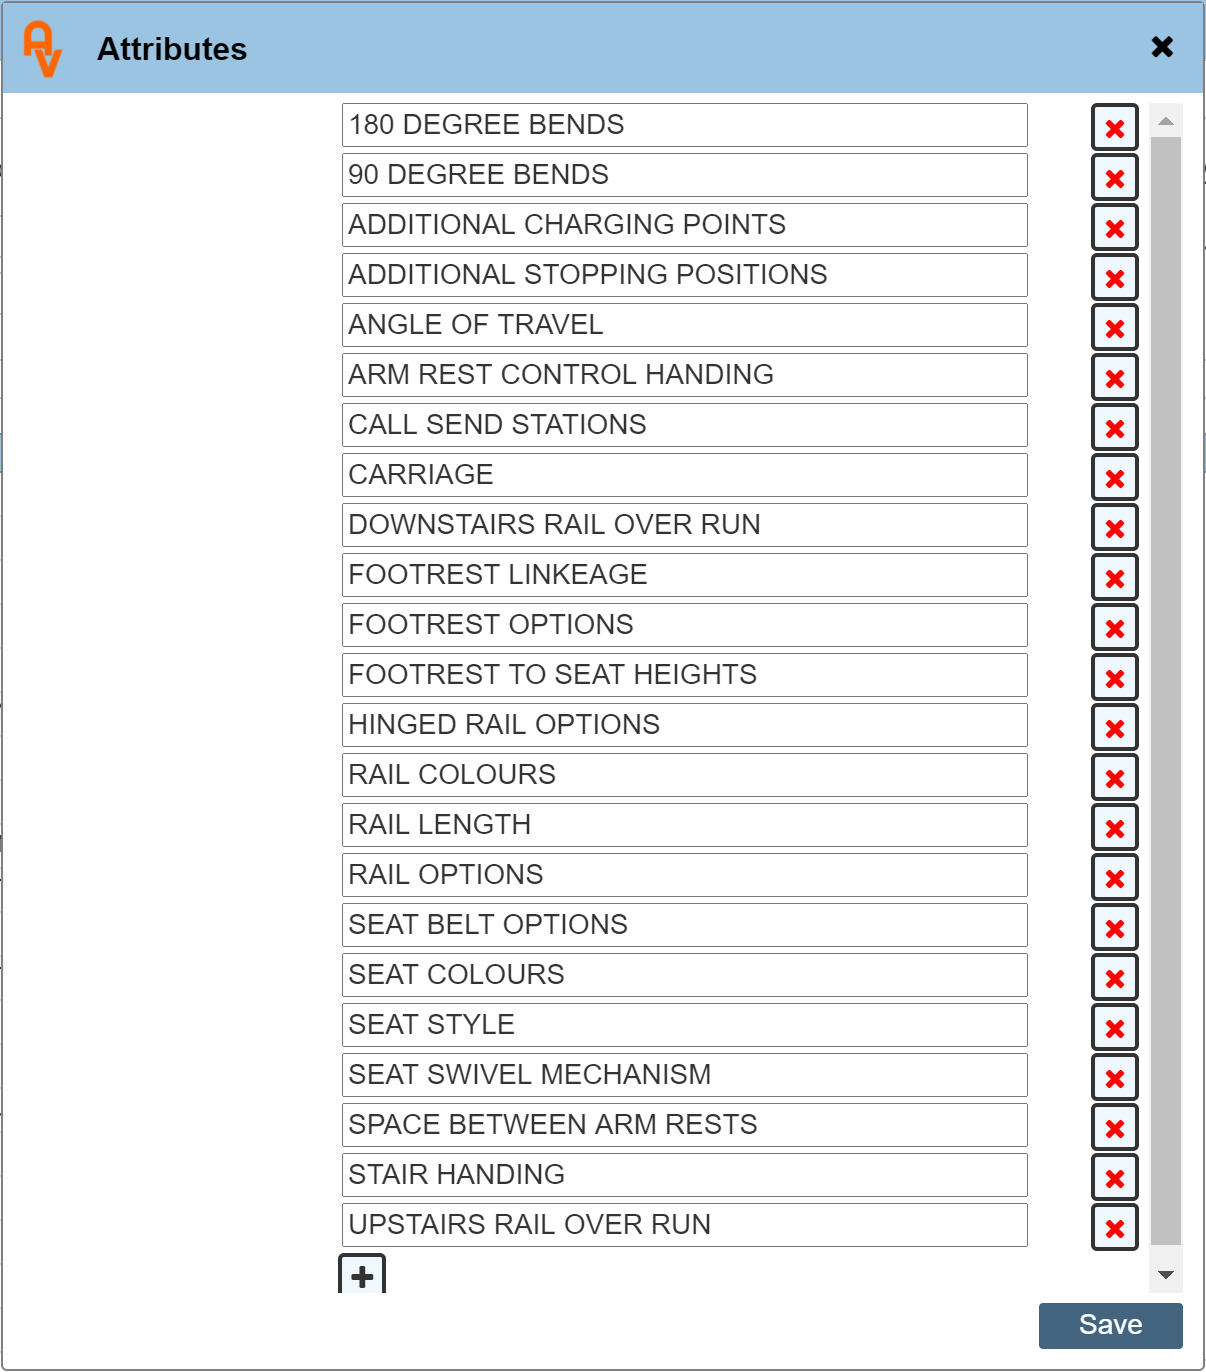
Once a product make and model has been selected, the list of available attributes is shown within the Attributes panel. This list can be edited by clicking 'Edit' as shown at the top of the panel. Below is our example attributes panel in edit mode.
There may not be any attributes in your panel when first getting started. Clicking the + symbol shown there at the bottom of our list will allow you to add an new attribute. A blank line will appear allowing you to type in your new attribute name.
Click 'Save' to save your new attribute. This new attribute will be applied to the Product Type assigned to the current product and will be available within any new AutoQuote you may create that has a product using the same Product Type.
You may 'Delete' an attribute, but unless you have just added it, we strongly advise against deleting an attribute in case it has been used previously within another AutoQuote in the past. The rule of thumb here is that if the Attribute shows that there are some Variants assigned to it (the number in brackets on the main Attributes List), DO NOT DELETE IT.
|
Do not delete an attribute if variants have been assigned to it. It may have been used in previous AutoQuotes.
|
Adding a Variant
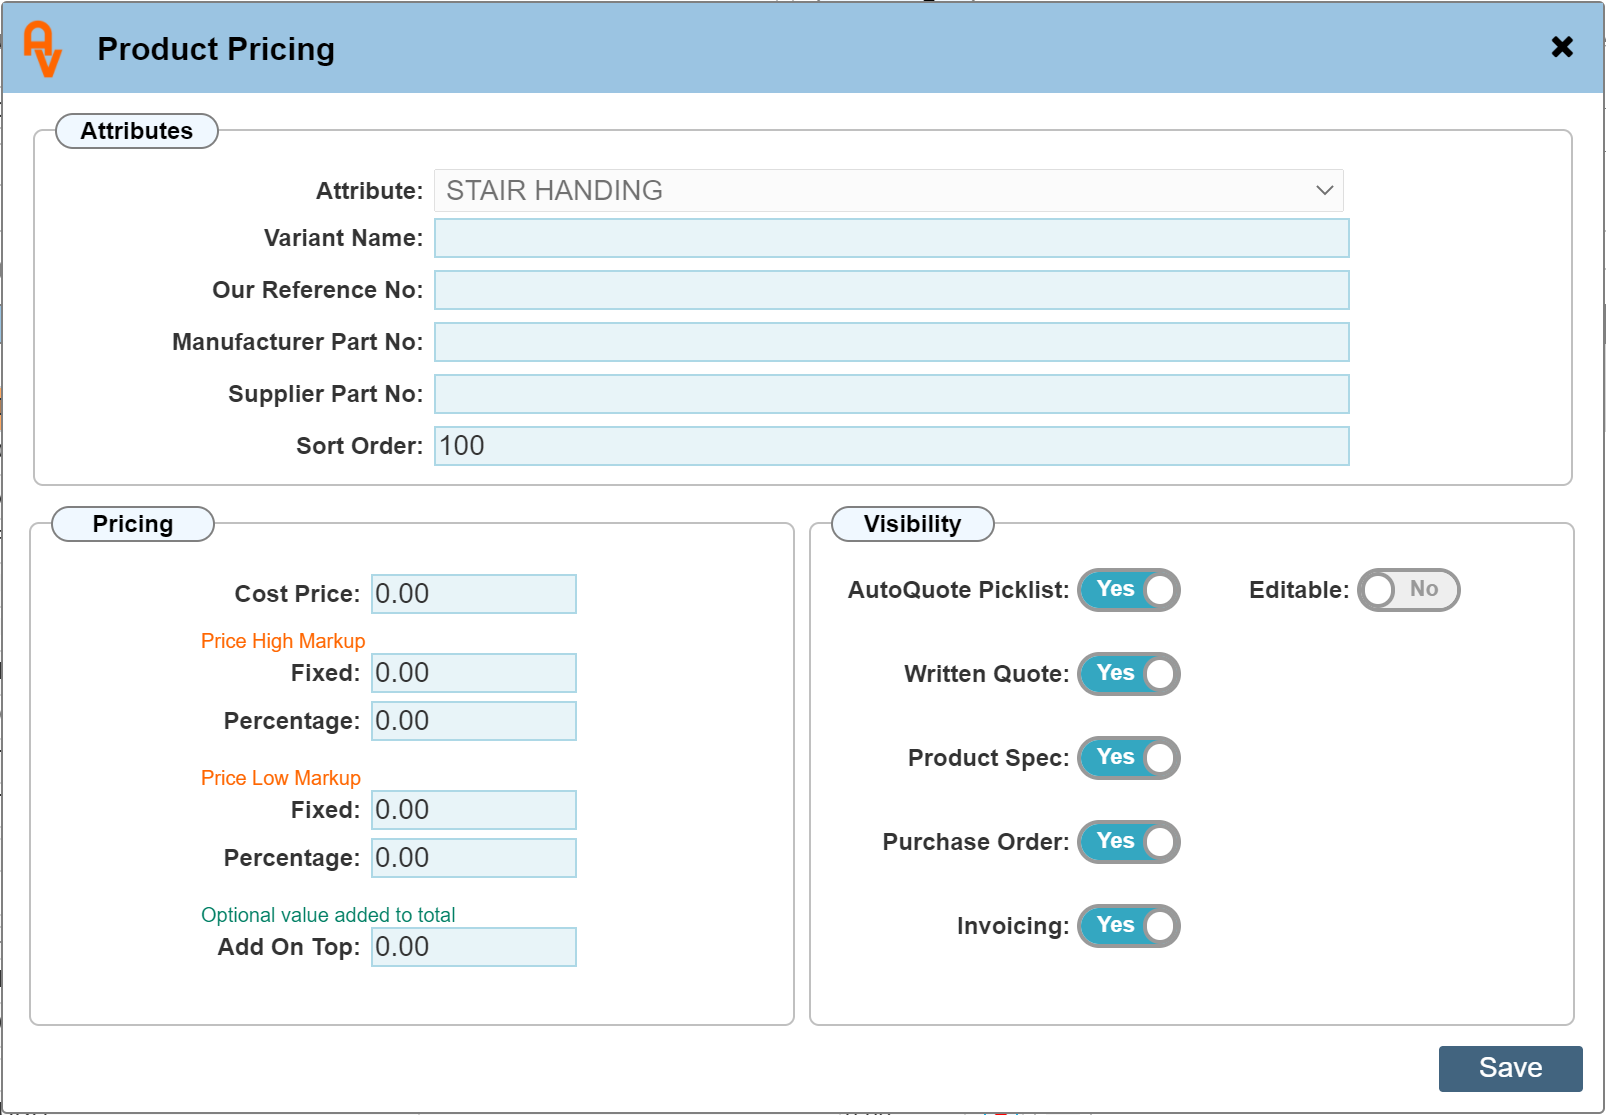
Once an attribute has been selected, you may add additional Variants to it by clicking the 'Add button at the top of the variants panel. The below dialogue shows the options available for adding variants.
The options here are covered more thoroughly within the Products Section. We will discuss the main options here.
Variant Name
Give this variant an suitable name. I.E. in the above dialogue example, the greyed out 'Attribute' name for this variant is 'STAIR HANDING'. this would mean we are going to add a variant of either 'LH' or RH'.
Sort Order
Entering a number here simply makes sure the sort order of your variants is listed exactly how you want them. You may leave this as it is, should this not be a requirement.
Cost Price
This is the price of this variant option should one apply. in this example, the cost of a LH lift over a RH lift one would assume does not make a difference to the price. further, the handing of the lift in question would be covered in the main item price. It is OK to leave the pricing section with zero's if no cost applies.
Mark Up
The mark up section allows you to state how the sale price of your products / asset variants is calculated. Some companies use a fixed price mark-up modal, whereas others use a percentage mark-up. Enter the values as required. If you happen to add both a fixed mark-up and a percentage mark-up, the percentage value will override the fixed. I.E. Percentage mark-up takes precedence over fixed.
Add On Top
Even though the mark-Up price covers the general pricing of your product, the Add On Top figure is simply an additional amount that you add. I.E. This may be an item that you have priced up with a percentage value from a sales point of view, but you also want to include a fixed additional amount, I.E. installation costs.
|
The 'On Top' Price can be considered as the labour cost required to apply this variant.
|
Visibility
The visibility panel details where this variant will be shown throughout the various sections within Workforce Manager. The option for AutoQuote cannot be deselected when adding a variant from the AutoQuote dialogue.
Editable
If you select the 'Editable' toggle, when selecting a variant that has the 'Editable' toggle set, you will be prompted to edit the string before it is selected. E.G. in our example AutoQuote, there is an attribute called 'Rail Length' there are options for rails lengths up to a given length, priced accordingly. Once the variant has been Saved, the below image shows the editable variant dialogue after clicking the variant within the variants panel.
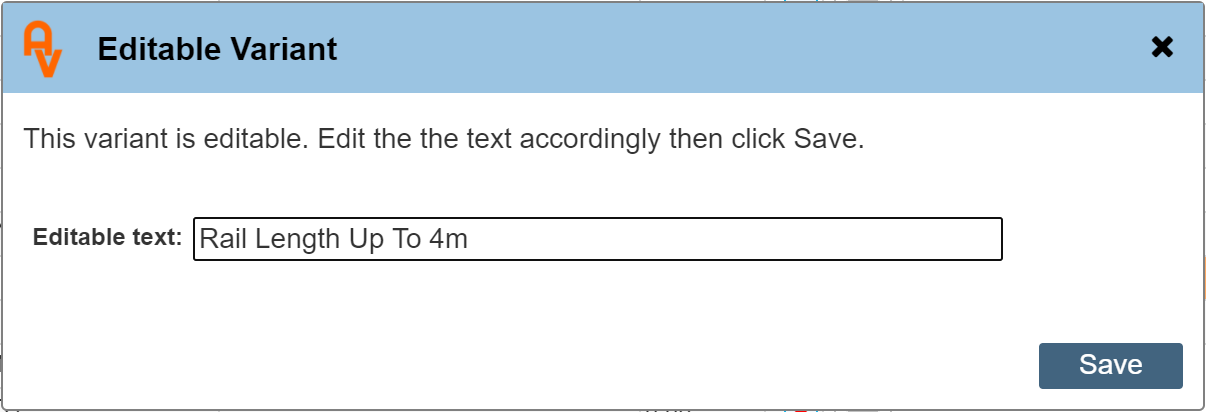
Edit the text to show the precise details required. Click Save to include the edited variant within your quote.
Deleting a Variant
The red cross to the right of each variant allows you to delete the variant from its attribute. As with deleting the Attributes, great care must be taken to make sure this variant has not been used in an AutoQuote previously.
|
Do not delete a Variant unless you are 100% sure it is OK to do so. It may have been used in previous AutoQuotes.
|
It is important to note that it is possible to set the system to prevent deleting Attributes and Variants from the AutoQuote page. Contact us through support if you wish us to do this.
Add a new Section
In our example, we have already created 3 custom sections. 'Building', 'Plumbing' and 'Electrical'. You may of course create sections named exactly what you wan them to be, depending on your business type.
To add a new section, click the 'Add' button shown in the LH menu next to the 'Sections' title.
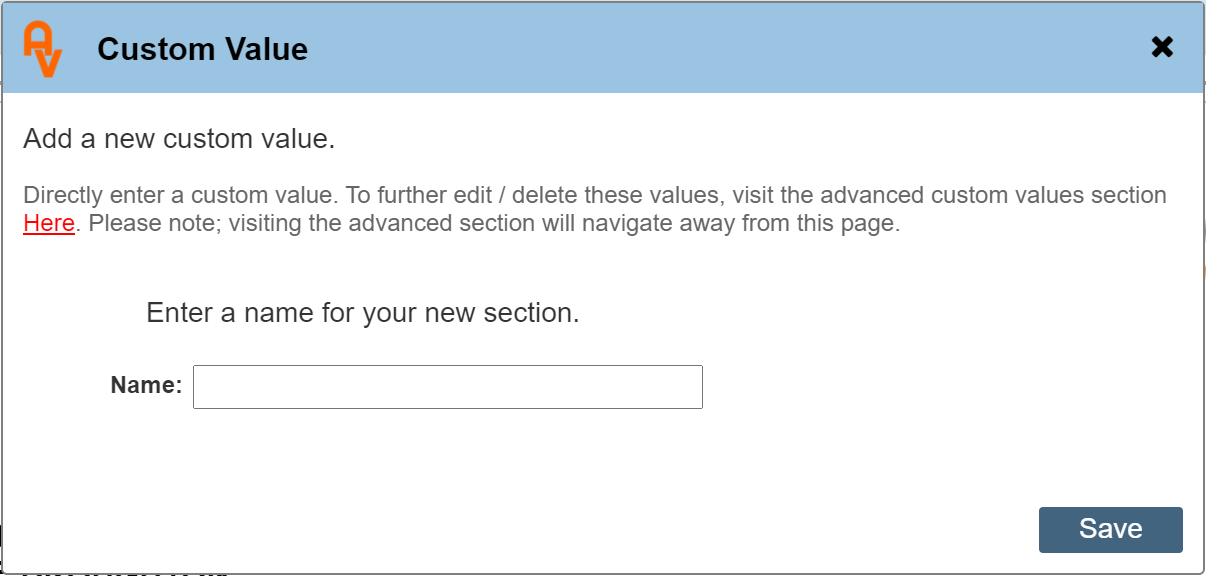
Enter a section title and click save. This will then insert the new section into the LH menu.
Advanced #HashTags#
A basic AutoQuote based on our automated template can be easily created without any input from you, other than making sure the #AutoQuote# hashtag exists within yous initial sales quote prior to starting AutoQuote (this is also provided automatically)
It is possible to create your own templates positioning the elements as you prefer.
The #AutoQuote# hashtag is simply replaced with a series of individual hashtags in the background. You can use these individual hashtags directly, but you must make sure to not use the #AutoQuote# hashtag as this will override your custom template.
here is a list of custom hashtags that you can use within the 'AutoQuote' template as shown in the settings > Document Designer > Standard Templates section.
Note: Tags used that do not contain any data when the quote is created will be replaced with a blank space. I.E. you will not see them if the section was not included in your quote.
Block Level Tags
| #HeaderNotes# |
Used to show the details entered into the Introduction section of AutoQuote.
|
| #MakeMode# |
The make and model name.
|
| #ProductBlock# |
Lists all the variants selected one underneath each other.
|
| #WarrantyBlock# |
If the warranty section is set 'Published' this tag includes the details.
|
| #AllSections# |
When you add a custom section, this groups the block of sections together.
|
| #SubTotals# |
The sub totals block at the bottom of the quote.
|
| #FooterNotes# |
The closure notes.
|
Item level tags - The individual component items that make up your AutoQuote
| #CNum# |
The site 'C' number reference.
|
| #MakeName# |
The make of the product.
|
| #ModelName# |
The model name of the product.
|
| #ProductPrice# |
The total price of the product / variants selected.
|
| #Contingency# |
The value of contingency added.
|
| #CombinedProductPrice# |
The value of the product plus the value of the contingency.
|
| #WarrantyStatus# |
The selected warranty contract name.
|
| #WarrantyFrequency# |
The selected warranty frequency.
|
| #WarrantyPeriodMonths# |
The total warranty period in the number of months.
|
| #WarrantyPeriodYears# |
The total warranty period in the number of years.
|
| #CustomPeriod# |
A custom value in months (number) when the custom number of months option is set within AutoQuote Warranty period.
|
| #WarrantyDetails# |
The warranty notes.
|
| #WarrantyPrice# |
The warranty price.
|
| #TotalSectionPrice# |
The total price of all the sections.
|
| #TotalQuotePrice# |
The total price of the whole quote (excluding Tax).
|
| #TotalTAX0# |
The total tax using Tax rate 'T0 Exempt' as set in your general settings of Workforce Manager.
|
| #TotalTAX1# |
The total tax using Tax rate 'T1 Standard Rate' as set in your general settings of Workforce Manager.
|
| #TotalTAX3# |
The total tax using Tax rate 'T3 Reduced Rate' as set in your general settings of Workforce Manager.
|
| #TotalTAX9# |
The total tax using Tax rate 'T9 Zero Rate' as set in your general settings of Workforce Manager.
|
| #TotalQuoteIncTAX0# |
The total value + tax using Tax rate 'T0 Exempt' as set in your general settings of Workforce Manager.
|
| #TotalQuoteIncTAX1# |
The total value + tax using Tax rate 'T1 Standard Rate' as set in your general settings of Workforce Manager.
|
| #TotalQuoteIncTAX3# |
The total value + tax using Tax rate 'T3 Reduced Rate' as set in your general settings of Workforce Manager.
|
| #TotalQuoteIncTAX9# |
The total value + tax using Tax rate 'T9 Zero Rate' as set in your general settings of Workforce Manager.
|
| #SelectedPartsList# |
The selected variants list. Shown each variant underneath each other.
|
| #SelectedPartsString# |
The selected variants list. Shown in a comma separated string one after each other.
|
| #SerialSelectedPartsList# |
The selected variants list including the variant serial number. Shown each variant underneath each other.
|
| #SerialSelectedPartsString# |
The selected variants list including the variant serial number. Shown in a comma separated string one after each other.
|
|
#ProductTable#
|
The selected Attribute and its selected variant shown in a table format.
|
| #ProductType# |
The name of the product type associated with the current make / model.
|
| #RiskStatements# |
The risk statements table.
|
| #RiskStatus# |
The status of the risk, I.E. 'Proceed' or 'Do Not Proceed'
|
The custom sections can be detailed individually where required. To do this, you must follow the next series of hashtags with the custom section name plus a closing hash # I.E. if we have a custom section called 'Electrical' then a tag in the following section would be inserted into your document as #Section_Electrical#
| #Section_ |
The whole section detail including the Heading, Details and the Price.
|
| #SectionHeading_ |
The section Heading.
|
| #SectionText_ |
The section Text.
|
| #SectionPrice_ |
The section Price.
|
Please note: For AutoQuote to insert data into the document editor, one of 7 particular hash tags must be present in your document. Below is a list of hash tags where at least one is shown in your AutoQuote template. Primarily, these all relate to the Product Block / Variants selected. The #AutoQuote# tag is used where our factory standard template is to be used. DO NOT USE #AutoQuote# tag in conjunction with any other AutoQuote HashTag.
#AutoQuote#
#ProductBlock#
#SelectedPartsList#
#SelectedPartsString#
#SerialSelectedPartsList#
#SerialSelectedPartsString#
#ProductTable#