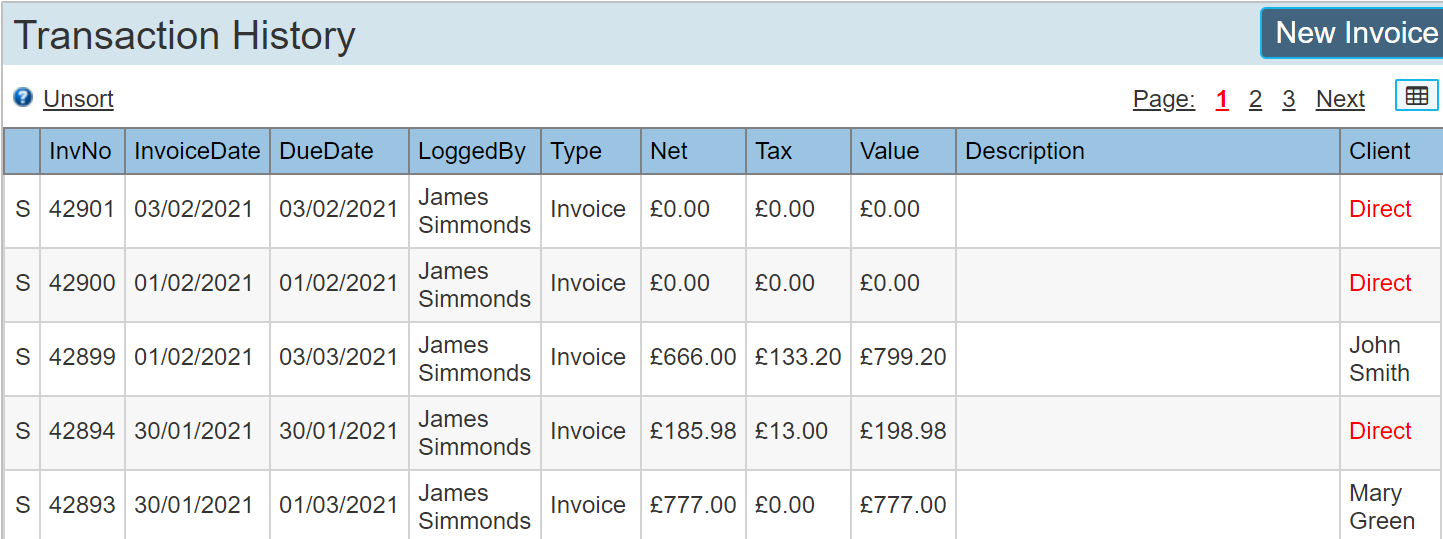
Group invoices are created directly from the Managing Agent account. Invoices created from a site can be viewed from its associated Managing Agent account, but cannot be converted to a 'Group Invoice'. You can see the difference between Managing Agent direct invoices and Site related invoices in the transaction history panel. The right hand column headed 'Client' will show 'Direct' it the invoice was created directly from the managing agent account, or it will show the clients name if it was created from a site.
Create a Group Invoice
To create a group invoice, there must first be a job ticket assigned 'Group Invoice'. The below example shows a Job Ticket Booking Form with the group invoice toggle selected. You may equally visit the actual 'Job Ticket' and toggle the switch directly from there. In this instance, the site for 'Mary Green' has been assigned to the Managing Agent, 'ABD Enterprises', which we will use as our example company for group invoicing.

Once a number of job tickets have been allocated as 'Group Invoice', they will appear in the associated Managing Agent account within the financials section.
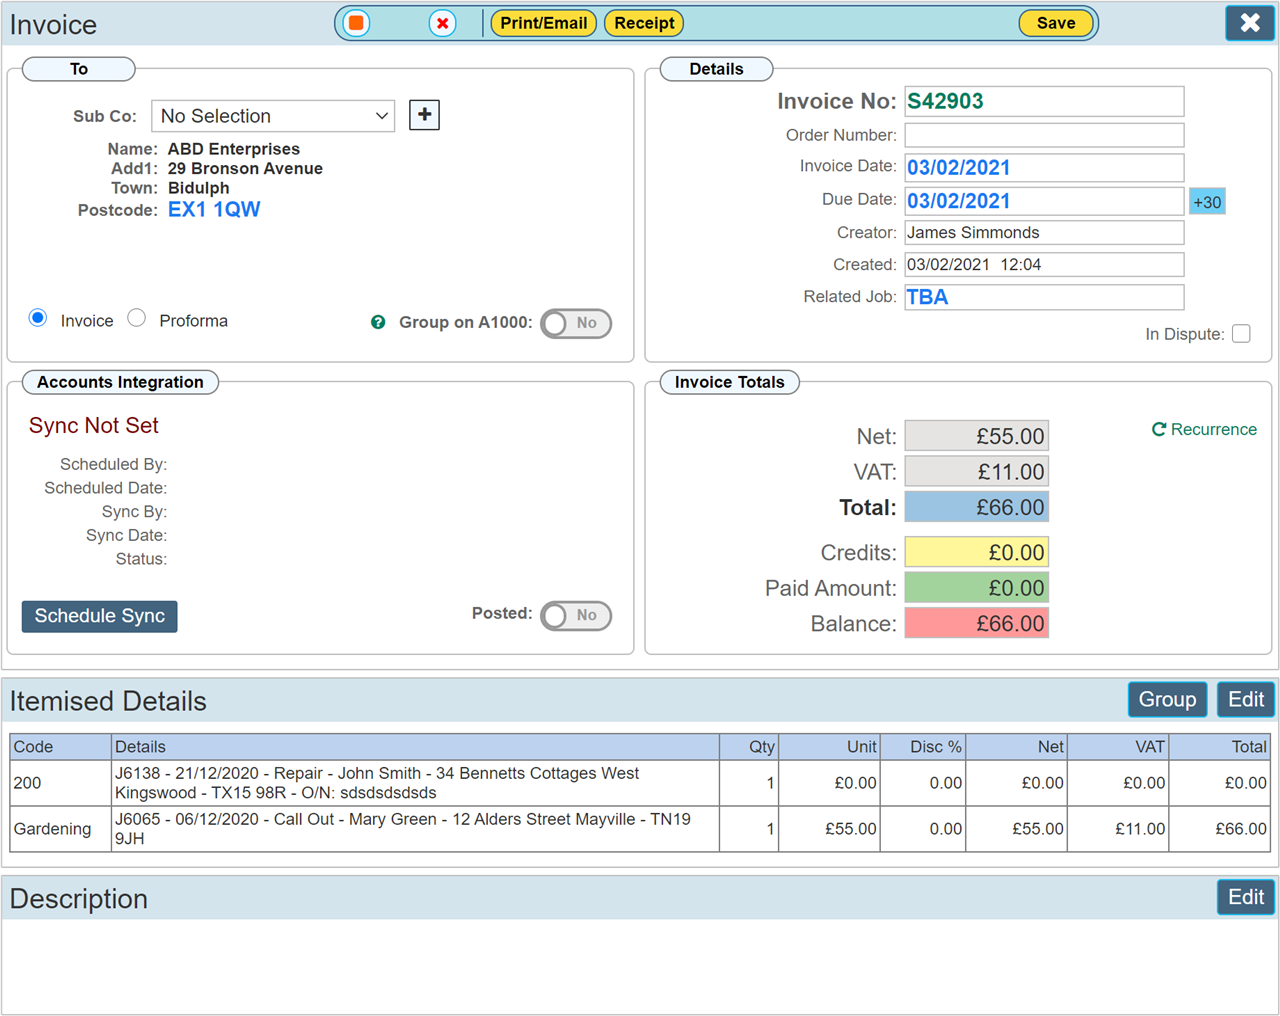
The below example is a new invoice created within the managing agent account 'ABD Enterprises'
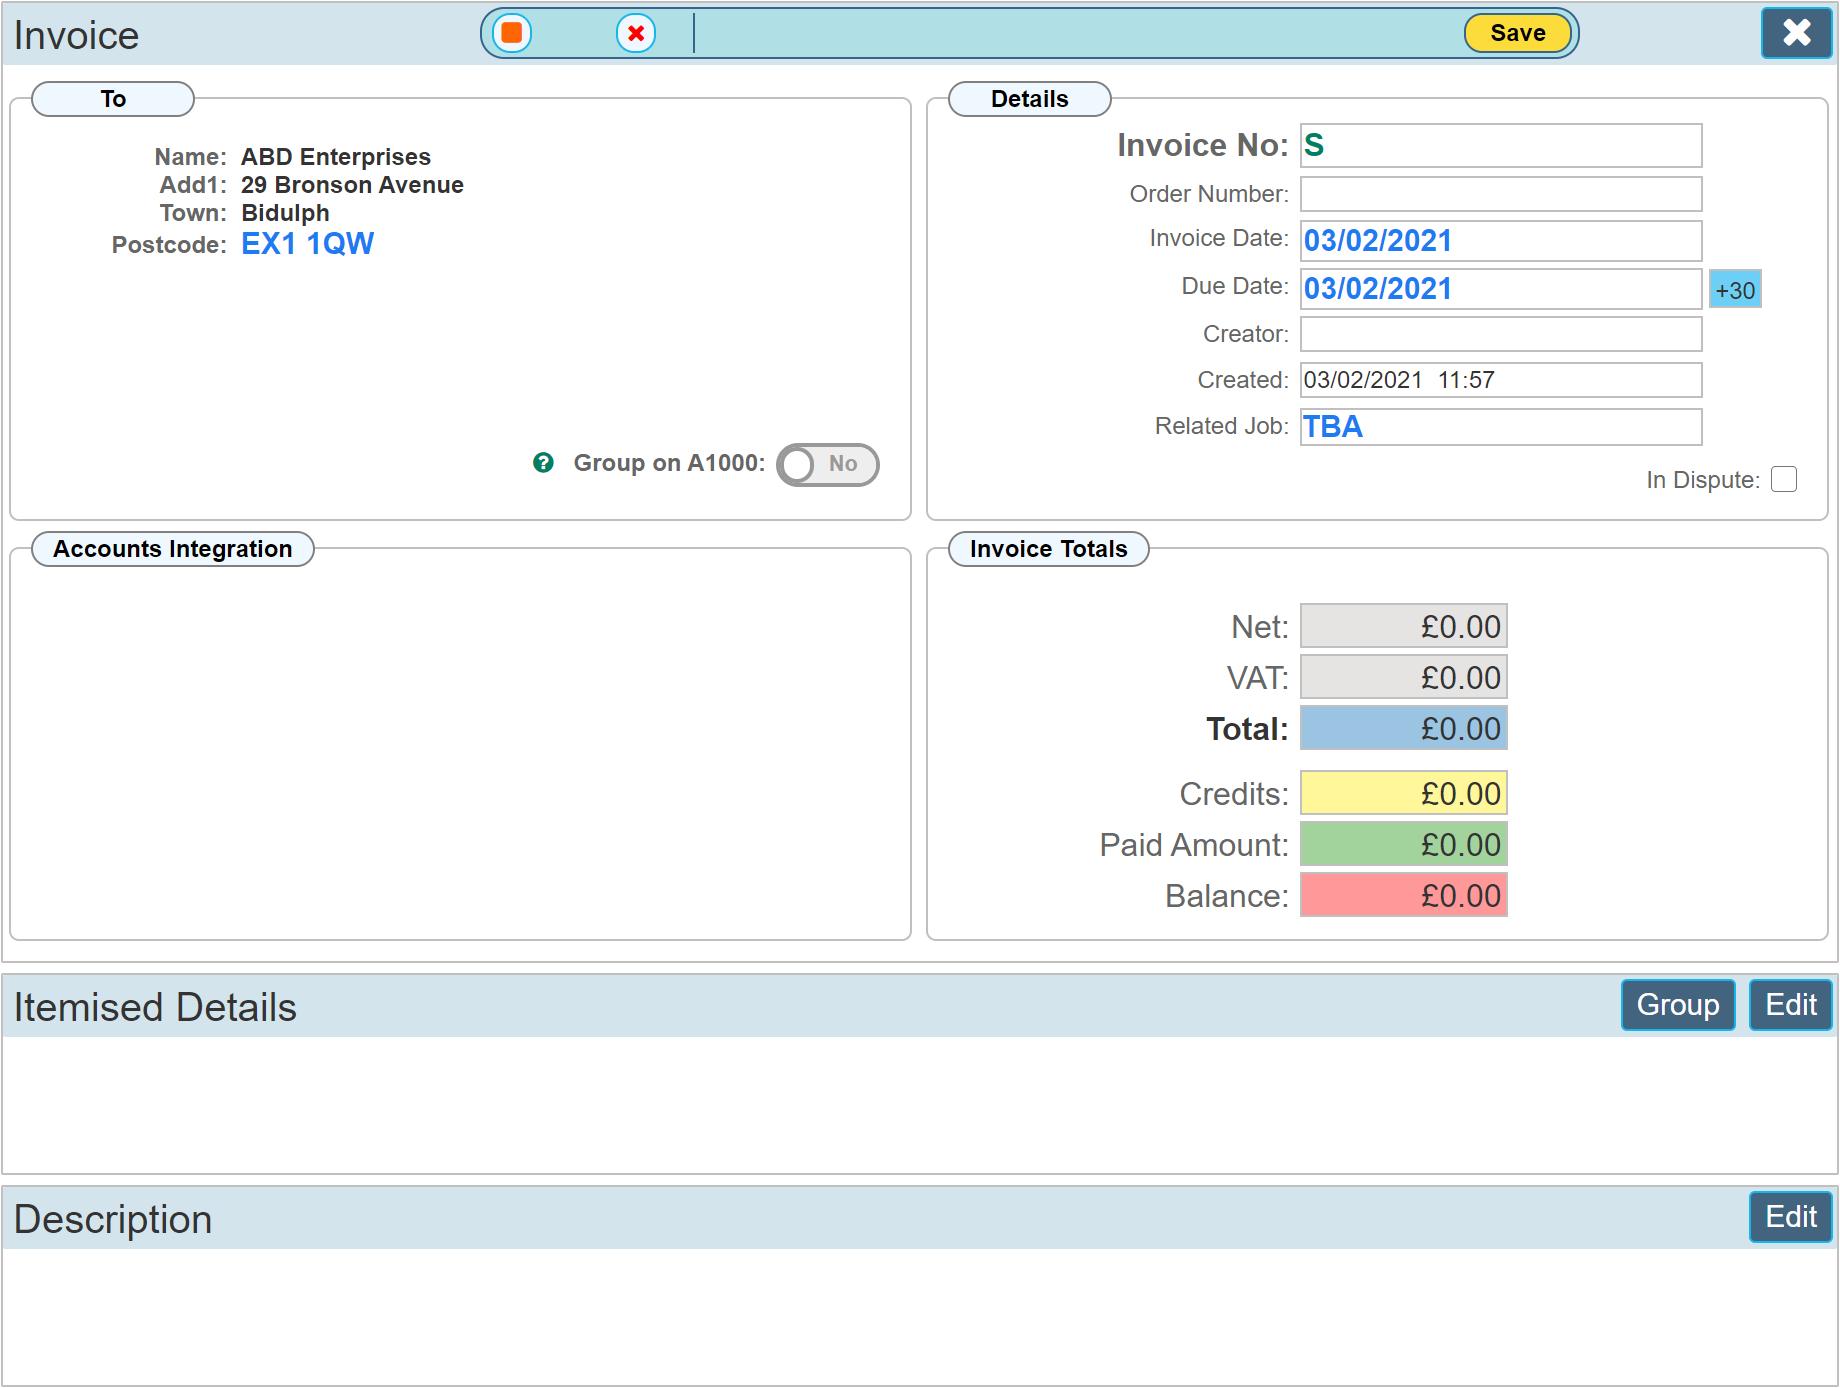
To allocate a job ticket to this invoice, click the 'Group' button to open the group invoice selection dialogue.
Selecting a Job
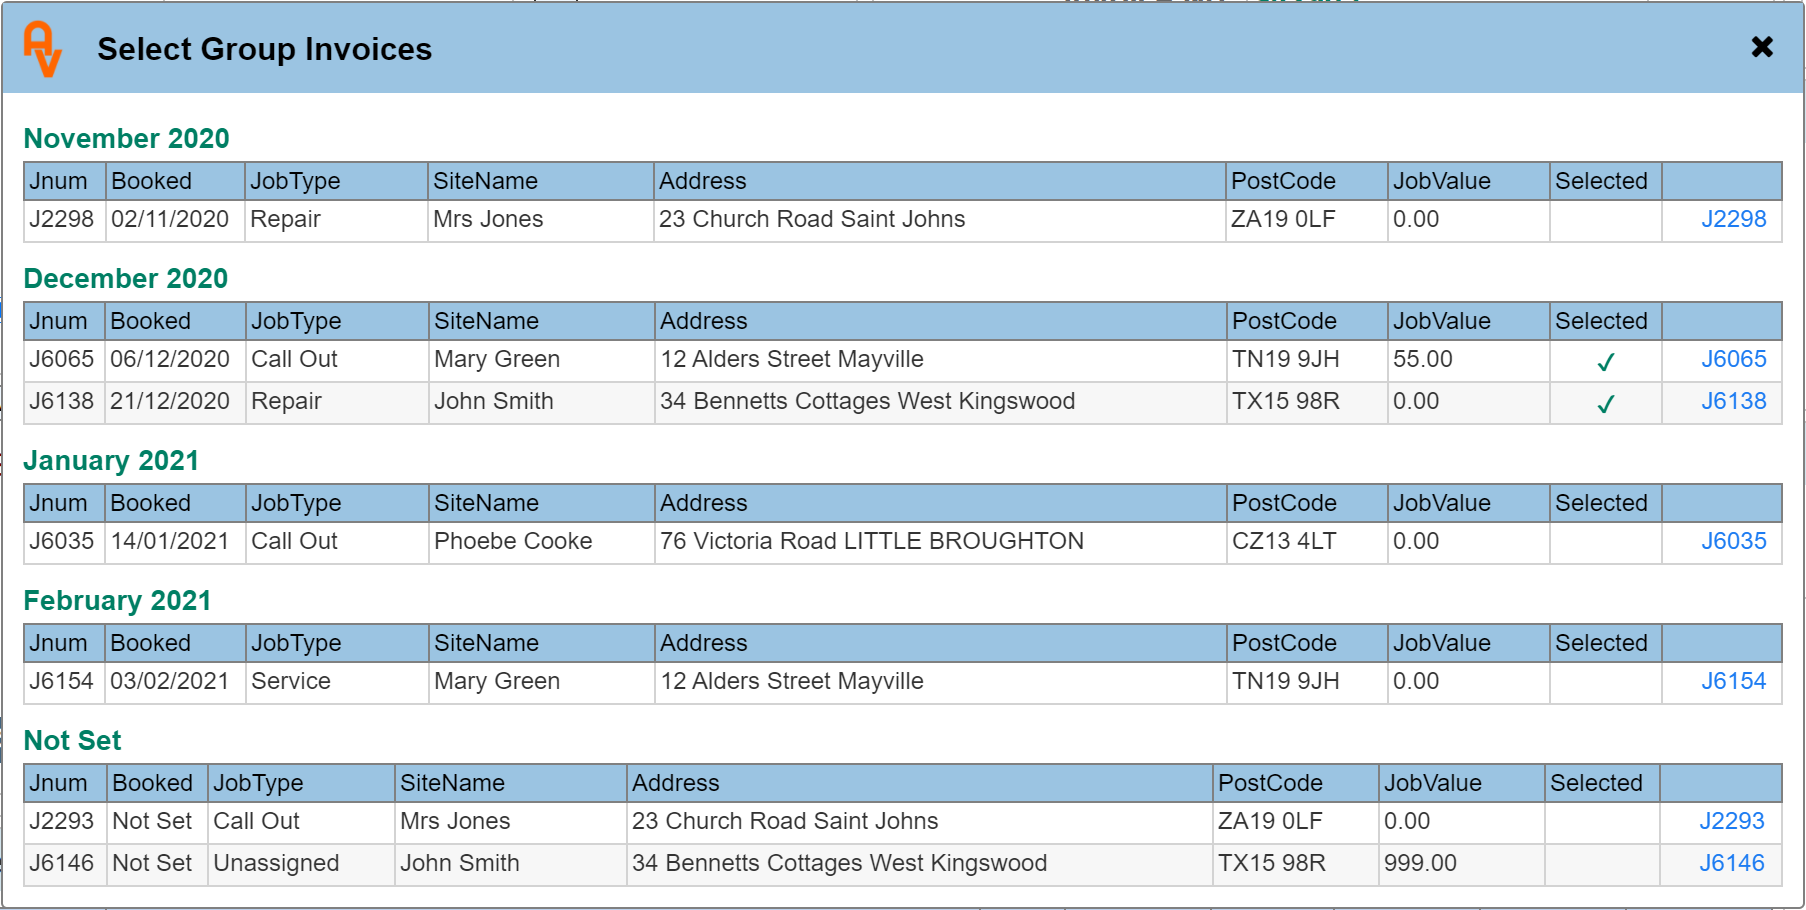
To select jobs to allocate to this group invoice, click anywhere within the row to select. Once selected, a green tick will appear within the column headed 'Selected'. The column on the far right hand side shows links that will allow you to navigate directly to the job ticket in question should you notice something that may require an update.
The job tickets are grouped into month blocks and sorted into date order within each block. If a booking has not been allocated to the job ticket, these will be shown at the end of the list under the heading 'Not Set'
Once a job ticket has been allocated to the group invoice, the details recorded from the job ticket inserted into the invoice Itemised Details line will remain the same as they did at the time they were allocated. I.E. Editing the job ticket after the invoice detail line was created will not change the detail in the invoice. This is to prevent the details from being changed once the invoice has been created and sent to your customer. If you noticed an error and wish to edit the job ticket, simply deselect then select the job ticket again to update the values.
|
Editing Job Ticket details after the Group Invoice has been created will not update the group invoice details.
|
Job Value Column
The Job Value column will show the total sale price of the job that was allocated to it within the job ticket page. Group invoices often form 2 types of scenario, they are either priced as individual items where the allocated price will show in this column, or they may be listed as zero, with an additional line within the invoice set up to allocate an overall price. The choice it there whichever type of invoice you are creating.
Closing the selector dialogue will update the invoice to show the jobs we have just allocated.
We may further edit this invoice to include additional details by opening the Itemised Details dialogue. Click 'Edit' next to the group invoice button to open the Itemised Details dialogue. You may edit any part of the details automatically inserted, including the values. If you de-select then re-select an item from the group selector panel, when re-opening the Itemised Details, the line will be re-set to the job ticket detail, again editing after this stage is possible.
To delete a job ticket from the Itemised Details panel, re-open the group selector and de-select it from there.
The below example shows our 2 selected jobs, we have also added in an additional line.

Code
You may notice that the 'Code' column (Nominal Code) selector is already pre set for the allocated jobs.
The code, which is the nominal code that will be allocated within your financials package can be pre-assigned to a given Job Ticket type within the Job Ticket setup page. Once these values are set, the corresponding code will automatically apply when adding a job ticket to a Group Invoice.
If you have not pre allocated a code, the code will not be set.
Pricing
If you allocated a value to the job, this will be shown in the total net column. Tax (VAT) will be applied to this automatically. If you have marked this site (product user) as a VAT exempt client, the Tax column will remain zero. This is a level of automation that will apply correctly for 99% of your jobs (when set). You may of course wish to edit the tax allocation at this stage. Click the relevant tax value to edit.
Receipted Invoices or Invoices marked as Sent
Once allocation of the required job tickets has been made to this particular invoice, it is preferable to make sure further jobs are not accidentally added (or removed), especially since the invoice may have been sent to the customer.
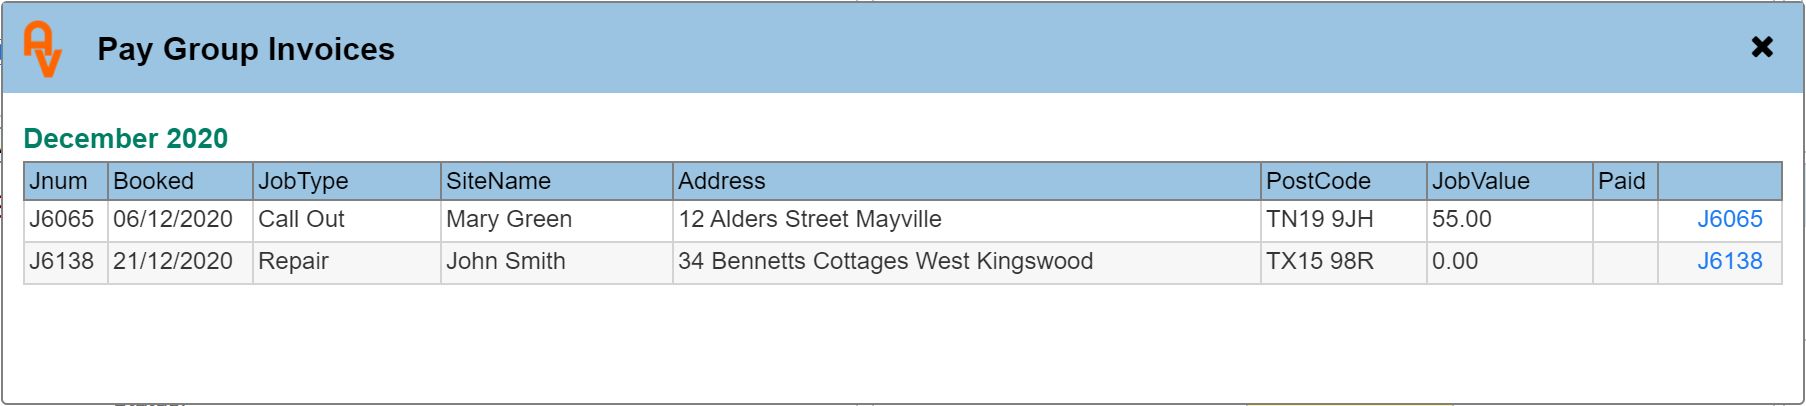
We block this scenario using either the 'Sent' toggle within the Print/Email dialogue or that the invoice has been receipted. If either of these situations is true, the Job Ticket selector dialogue will no longer show all available invoices. Instead, the dialogue will show the actually selected invoices with the ability to mark each one as 'Paid'
Please Note: Receipting the invoice for the full amount will automatically mark each job ticket as 'Paid', part payments will not mark any job ticket paid until the full amount has been allocated.
To manually mark a job ticket as paid, select each from the dialogue. The below example shows the payment allocating dialogue. You may also mark a job ticket paid directly from the Job Ticket page.