The Chart of accounts allows you to define the correct accounting nominal (often called 'Products & Services code' in your accounting software) for each detail line of your invoices. These become particularly important if you utilise the accounts 'Sync' function of Workforce Manager to synchronise invoices created within Workforce Manager to your financials software.
To open the Chart of Accounts, navigate to Settings > Custom Values > Chart of Accounts
On first opening the chart of accounts, we have automatically included 2 codes, primarily to give you an example of what each line may look like. Feel free to either delete these or edit accordingly.
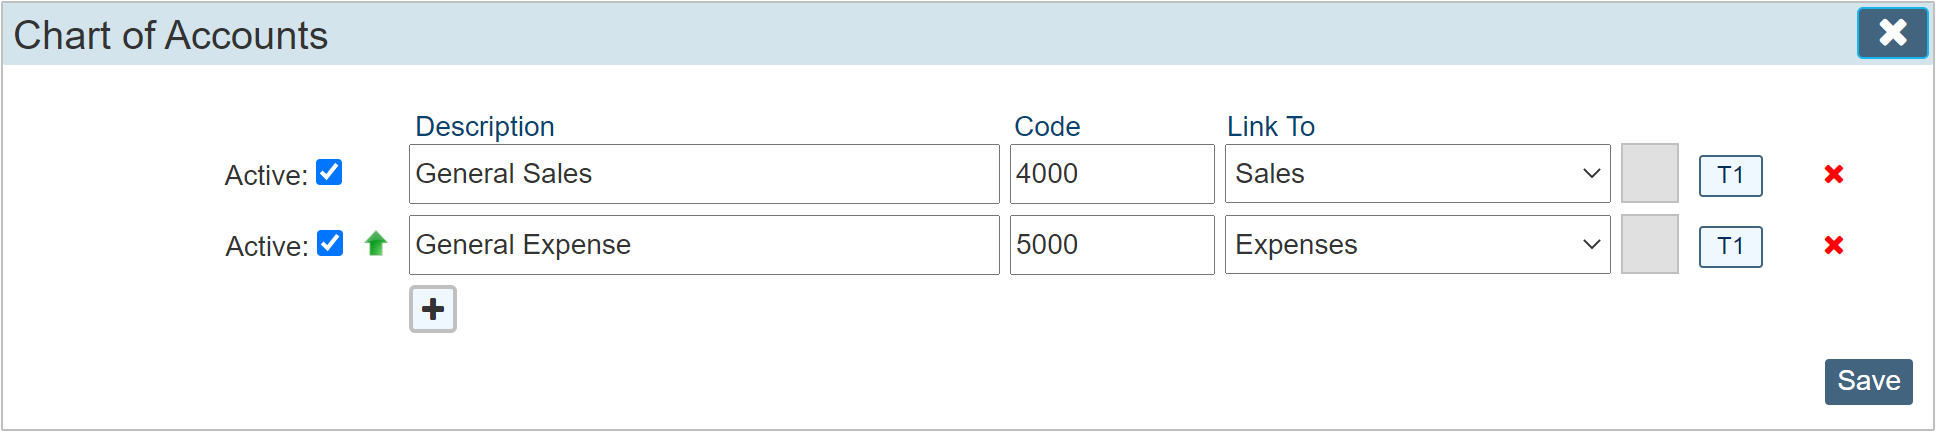
Description
The description field allows you to elaborate on what the code is used for. It is often the case that in some financial software, that actual code is a number, the description field allows you to summarise what the code is for.
Code
The code field must show Unique values, the system will not save the page unless each value in this column is unique. The Code represents the same unique field within your financials software that would be allocated to that detail line.
Link To
The link to drop down box contains two values. 'Sales' or 'Expenses' The point of this is to make sure that the nominal you are creating is either allocates to sales invoices or to purchase orders. I.E. only sales invoices will show nominals allocated to 'Sales'
Tax Selector
The item in our example at the RH of the line currently labelled 'T1' allows you to allocate a tax code to the nominal code. This, along with the actual 'Code' column must reflect the values you have set within your financials software.
Its role is to automate the tax code selection within the invoice detail lines editor.
Clicking the 'T1' button will allow you to change the selected tax code.
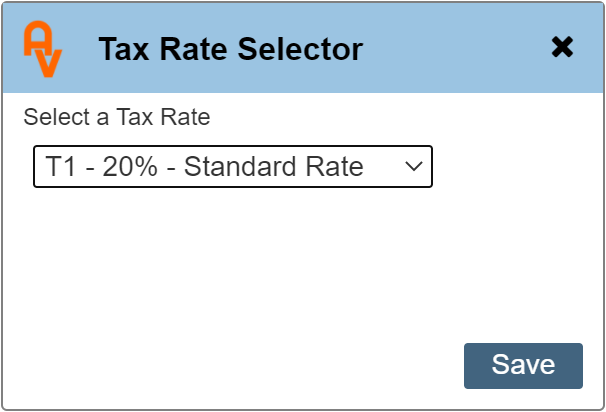
Click the Drop down list to view the available rates.
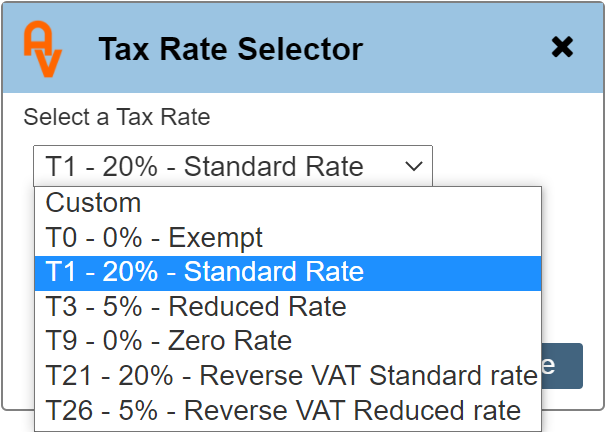
The 'T' number is a system we utilise within Workforce Manager, similar to those used within 'Sage' accounting software.
Once the tax 'T' code is selected, each time a detail line is created within an invoice, once that code is selected, the correct tax code will also be selected.
Below is an example of an additional 2 lines within the chart of accounts, we also selected a colour as detailed above.
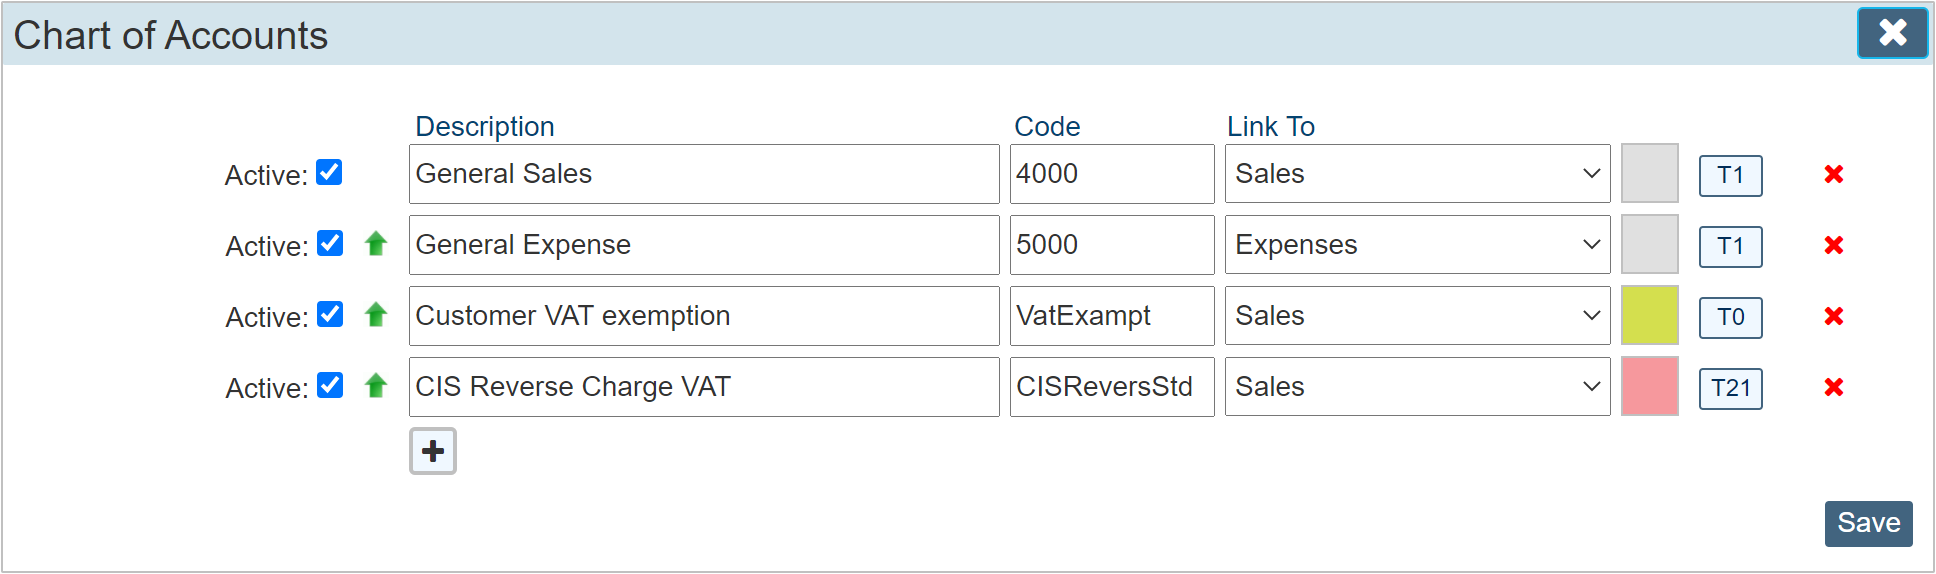
We can now see that the button to the right that we have just added shows 'T0' and 'T26'. These codes represent the codes within the tax code picker.
The code column is not limited to numerical codes. Your financials package may use either. So long as they are unique and reflect the codes used in your financials, workforce Manager will accept them.
Red Delete X
The cross at the end allows you to delete a code completely. Unless you are just setting this up and have entered a few codes in experimentation, we would advise not deleting the codes once in use. Should a code have been used within an invoice then subsequently deleted, the invoice would no longer show the code. Instead a zero will be displayed. Instead of deleting a code you may no longer use, consider just making it 'Inactive' by clearing the corresponding checkbox in the 'Active' column.
Add a New Line + Button
The plus symbol underneath the last detail line column simply adds a new line.