Method 1 - Booking directly from the diary page
The site can be searched using the search bar. Below we can see the search results for several records within our demo system. We will use the first result to create a new booking.

By clicking anywhere within the line, I.E. click on the yellow highlighted area to open up the address dialogue;
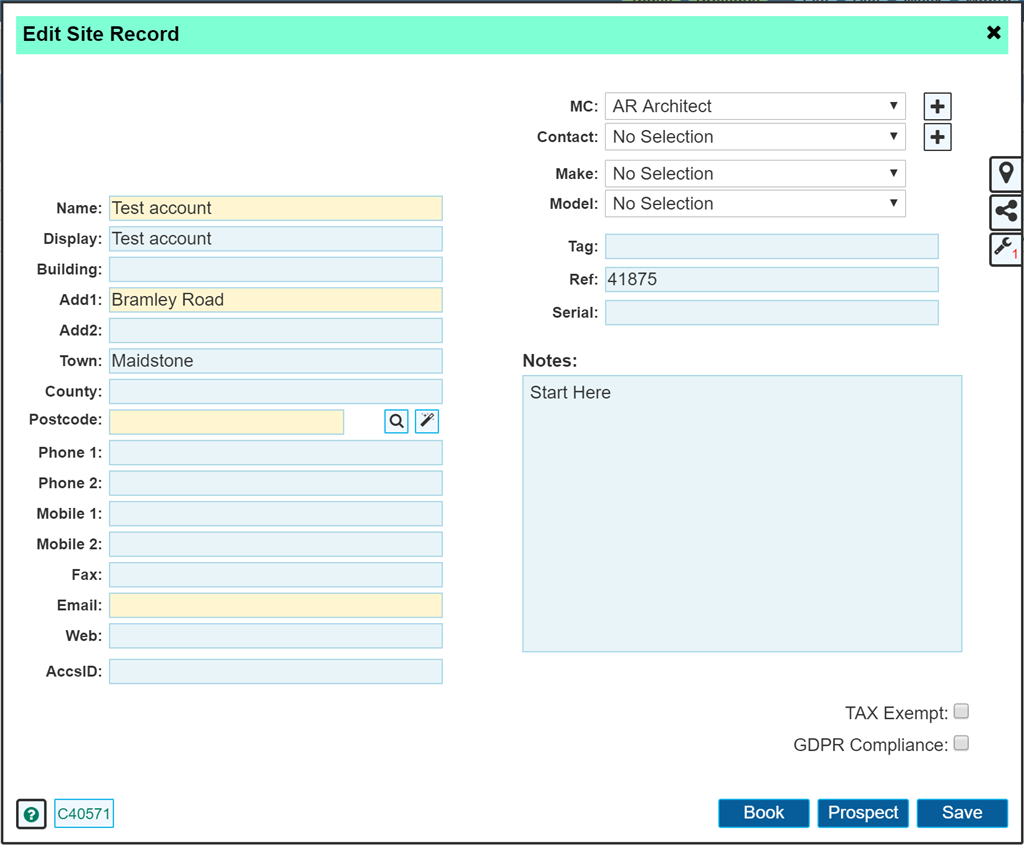
The above dialogue shows you the full address details for this particular site. To quickly book a job from here, simply click the button at the bottom of the dialogue labelled 'Book'. This will open up a new booking dialogue if there are no pending jobs already within the system. Shown below is a blank booking dialogue (which is more often the case), followed by the potential choice of opening up an existing job if any exist.
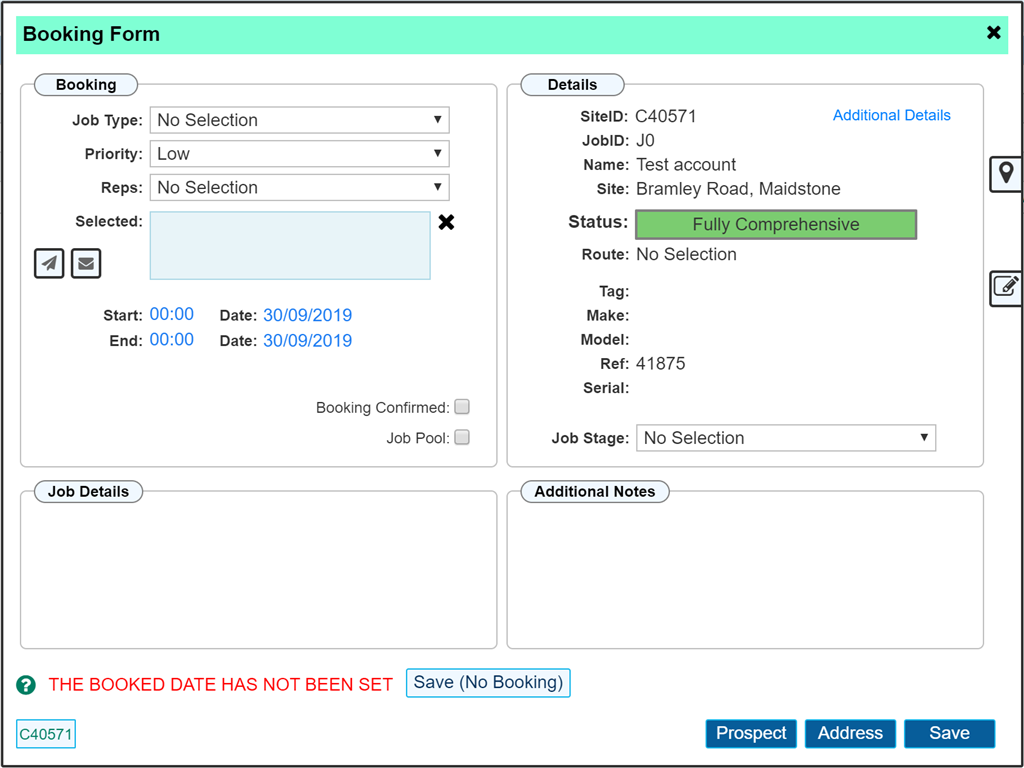
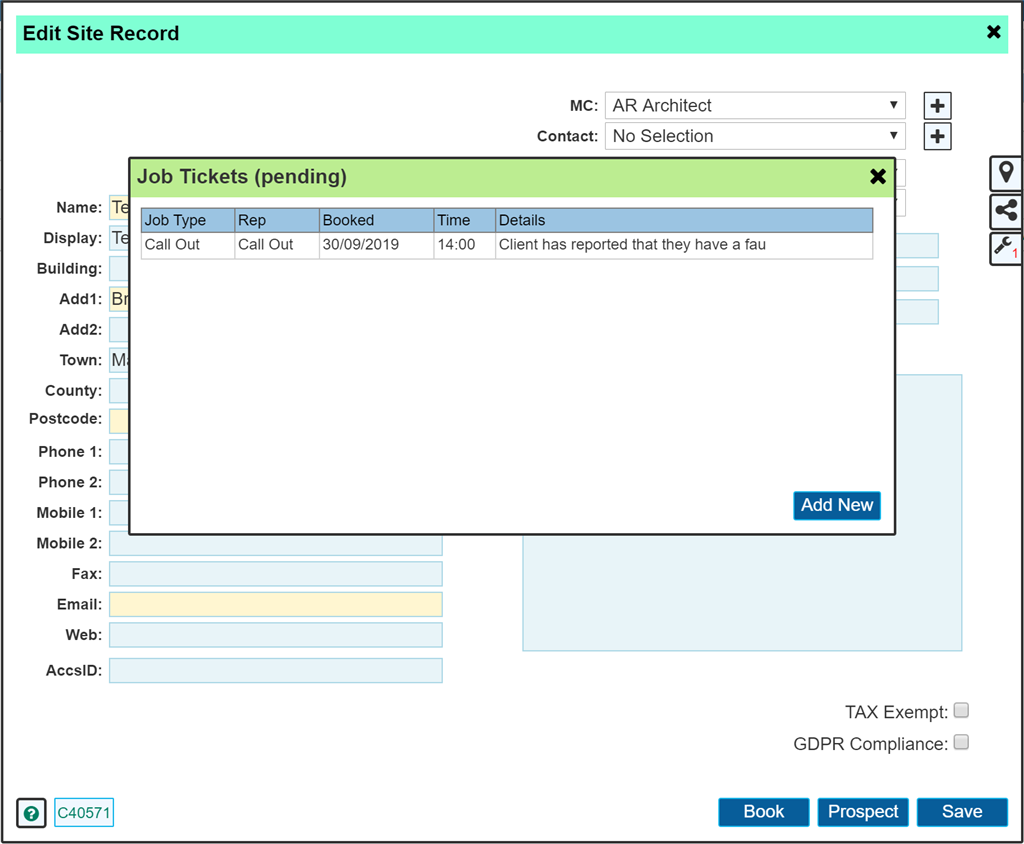
The below dialogue will appear if there is an existing job that you may wish to continue working with, otherwise simply click 'New' to obtain the same dialogue as above.
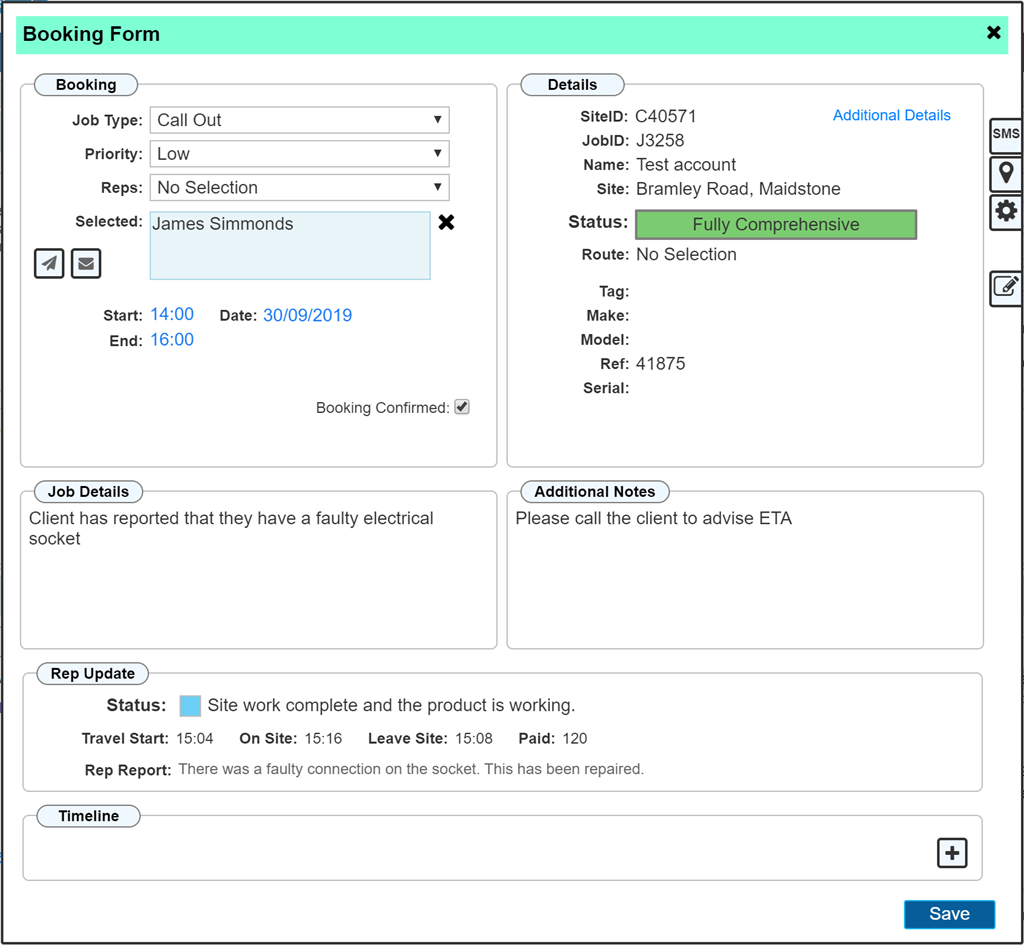
Once you have the Booking Form open, Complete the details on the form with information and click save. ('Save no booking' will be covered in another tutorial)
The minimum information required is;
- Job Type
- Rep
- The Date
- Job Details
An example below;
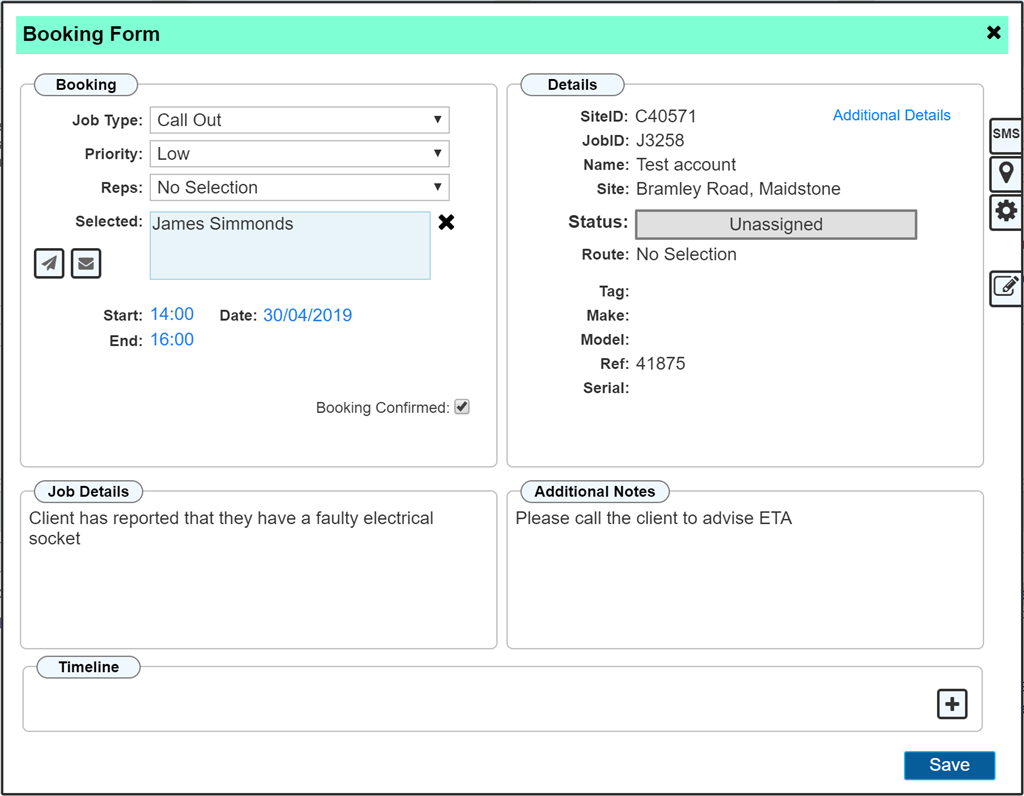
Once the above details have been saved, the job is added to the calendar, and has also automatically been sent to the rep's app. No additional requirements are required to send the job to your site operative other than simply booking the job and selecting which rep the job applies to.
See the section detailing the Mobile App to see what the site operative see's once the job has been booked.
Method 2 - Booking from the site record
Where 'Method 1' allows you to book directly from the search results, you may wish to first view the client's site record details, including any previous visits made. From the search results previously shown, instead of clicking anywhere within the result, click the button at the right hand side of the results, in this instance the button labelled 'C40571' in green. This will take you directly to the 'Site' record.
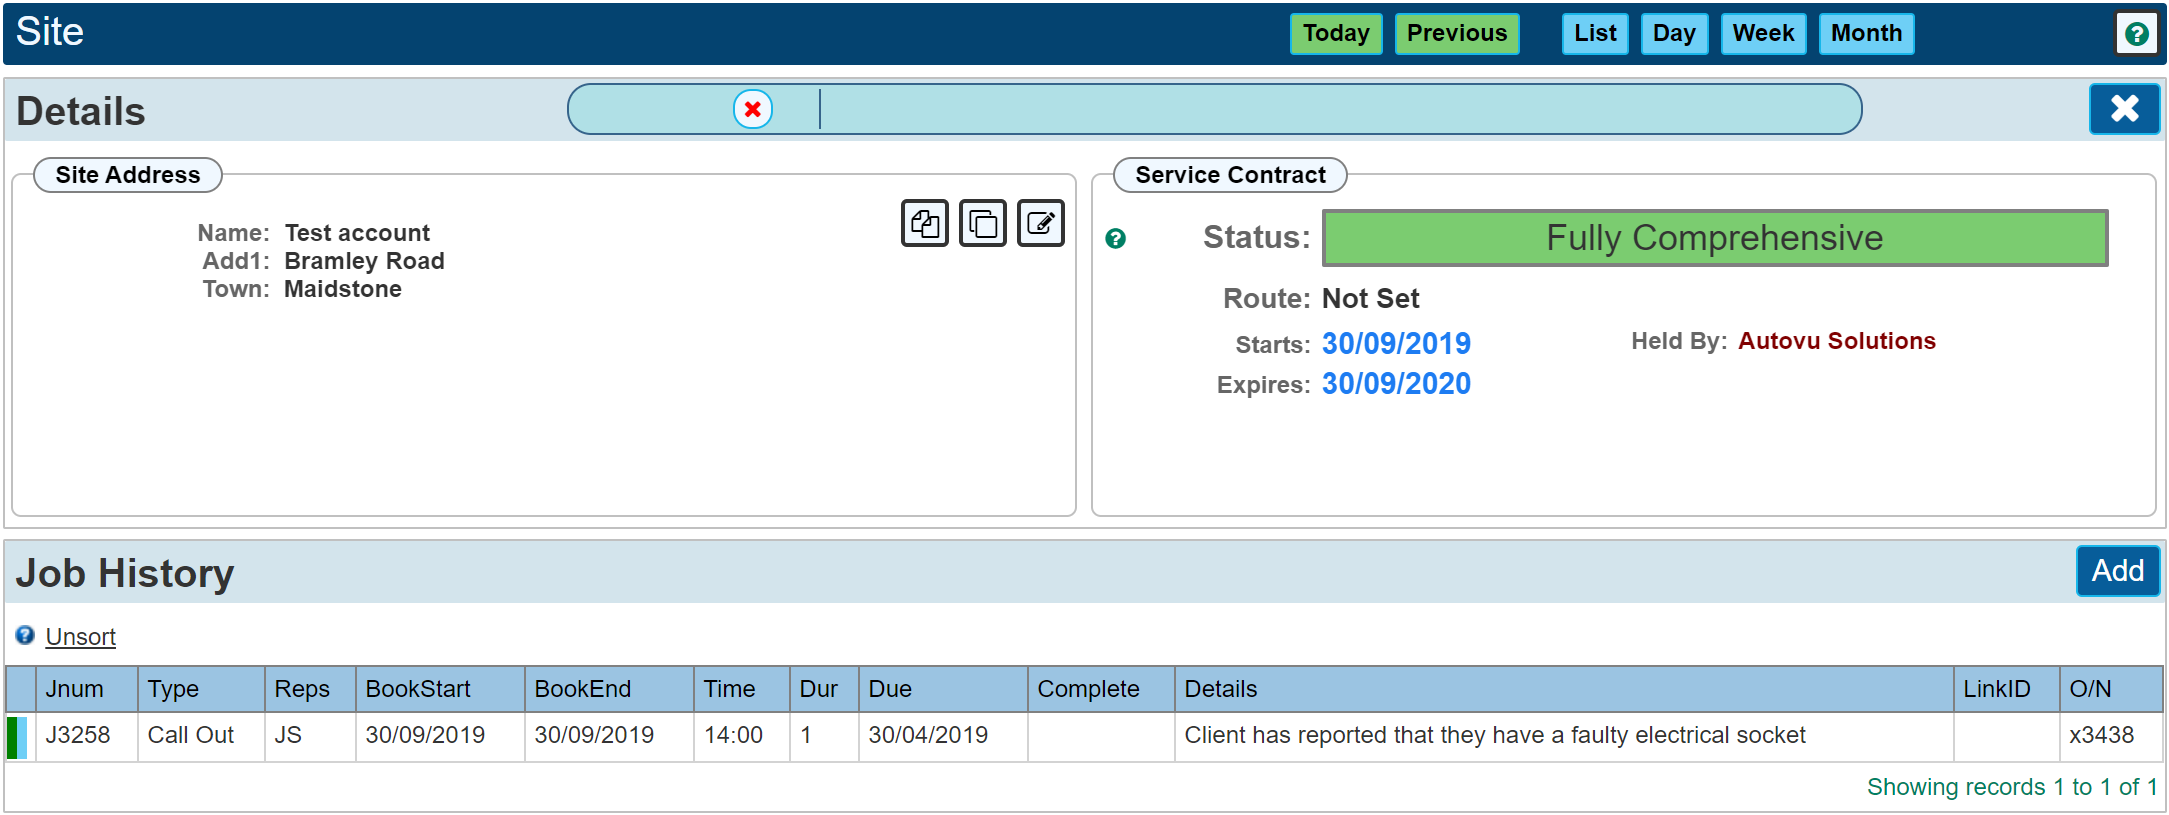
In this instance, we can see the job booking shown within the job history that was already made in the example above. To add a new job simply click the 'Add' button or to further edit an existing job, click the grid entry. For our example, we will click the existing job that we booked earlier.

Here you can see we have a job ticket overview (the upper section) and a single booked day (the lower section). When a job ticket is first created directly from the site record, it does not have any bookings, I.E. the section labelled 'Days Booked' above is empty. To add a booked day we would click the 'Add' button as shown above. Many days can be added to a single job ticket where required. E.G. if you had products that require an installation, it may take several days to complete the work. In this instance more than one booked day can be allocated.
Using our example above, we can see that the work has already been completed by our site operative using the mobile app, there is a job report and we can also see that the rep and the customer have signed on completion.
To open the booking, click 'EDIT' to show the same booking form we saw in 'Method 1'. Here it is again for reference except we can see additional information where the site operative has completed his work;