Your email address must be verified before email can be sent from your CRM.
Open the email settings page
To begin the process of setting up your email account on Workforce Manager, navigate to 'My Profile' by clicking the 'My Profile' button shown in the LH menu whilst on the main diary page. If you are a system administrator, you are able to perform this process on behalf of your users by clicking 'My Company', then selecting the appropriate user account. (You will need their email details)
Once your profile page is showing, click the LH menu button labelled 'Email Settings' to open the email settings page.
Server Type
Select a server type from the options Microsoft Office 365, Gmail or Other'
The server type determines the method of authentication used to verify your email address for use on Workforce Manager. Both Microsoft and Gmail use oAuth2. The process of verification will vary depending on the authentication method you selected when setting up your Microsoft or Gmail email account.
Microsoft Office 365
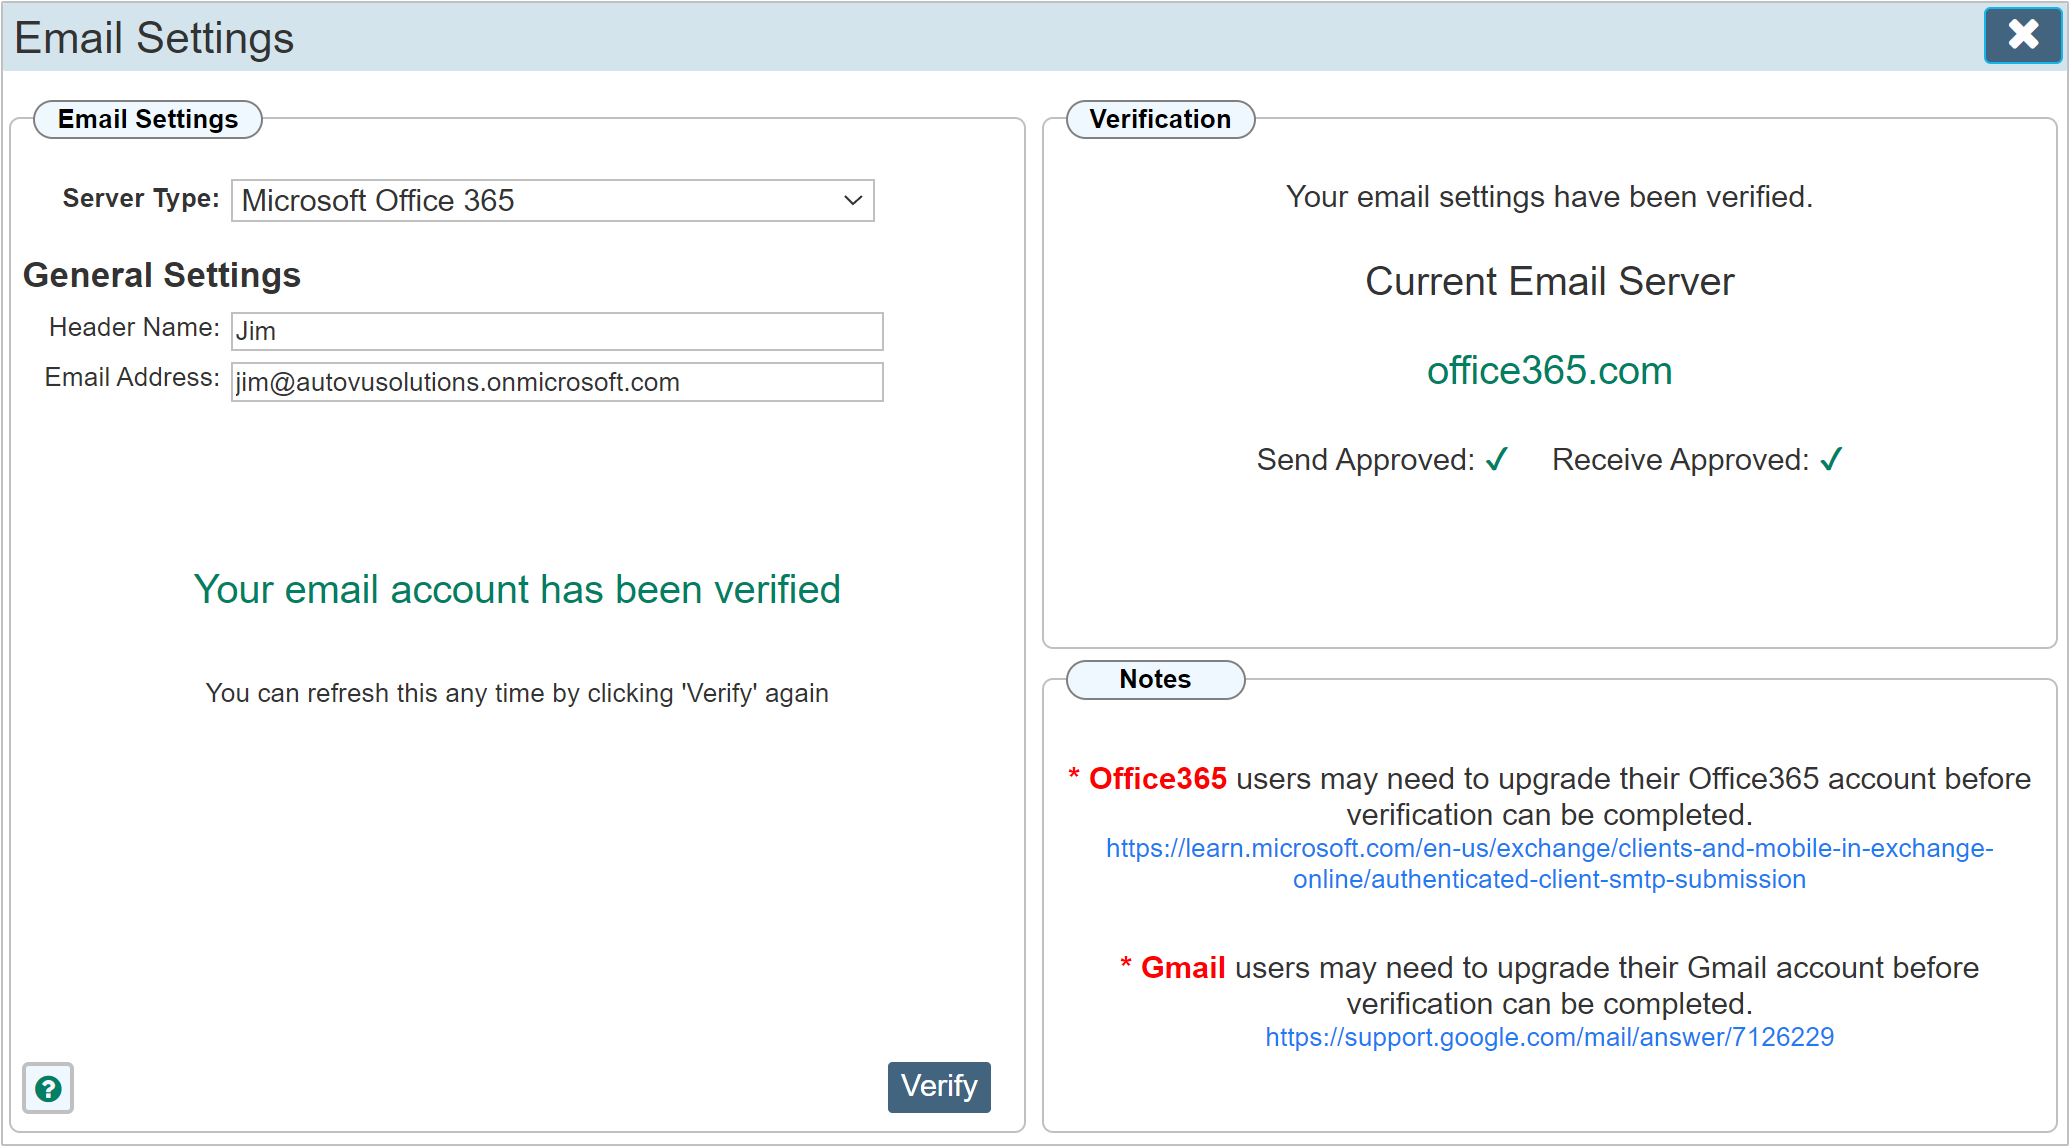
With Microsoft Office 365 selected as the server type. Click verify where you will be redirected to Sign in with Microsoft for verification.
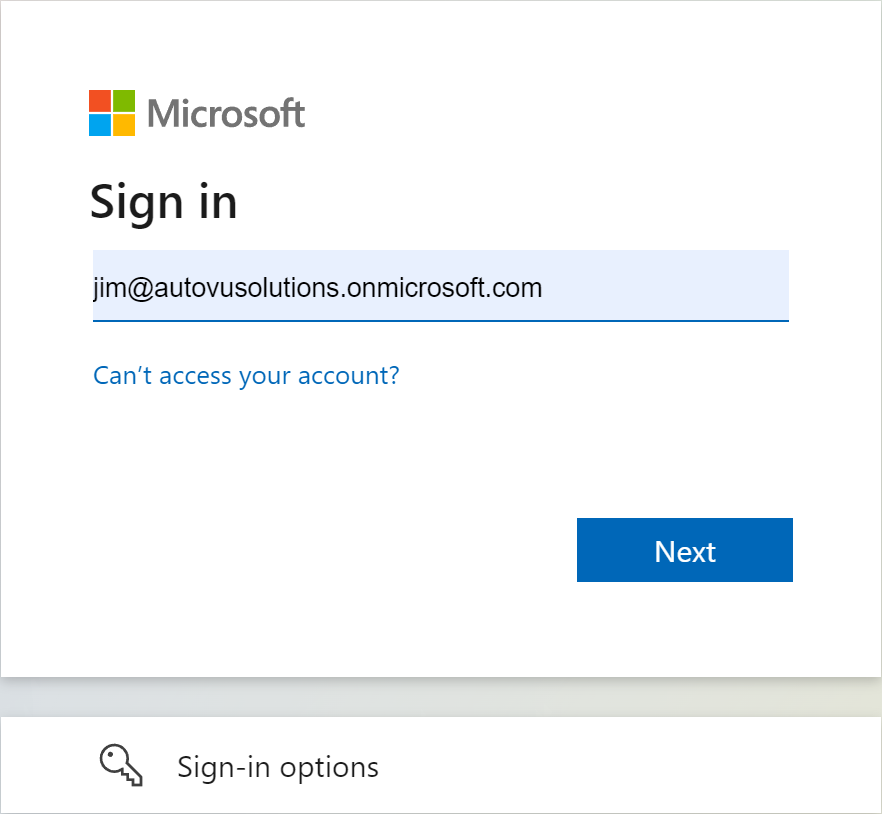
Click next having entered your email address if not already pre selected. N.B. this must match the email address on your Workforce Manager account.
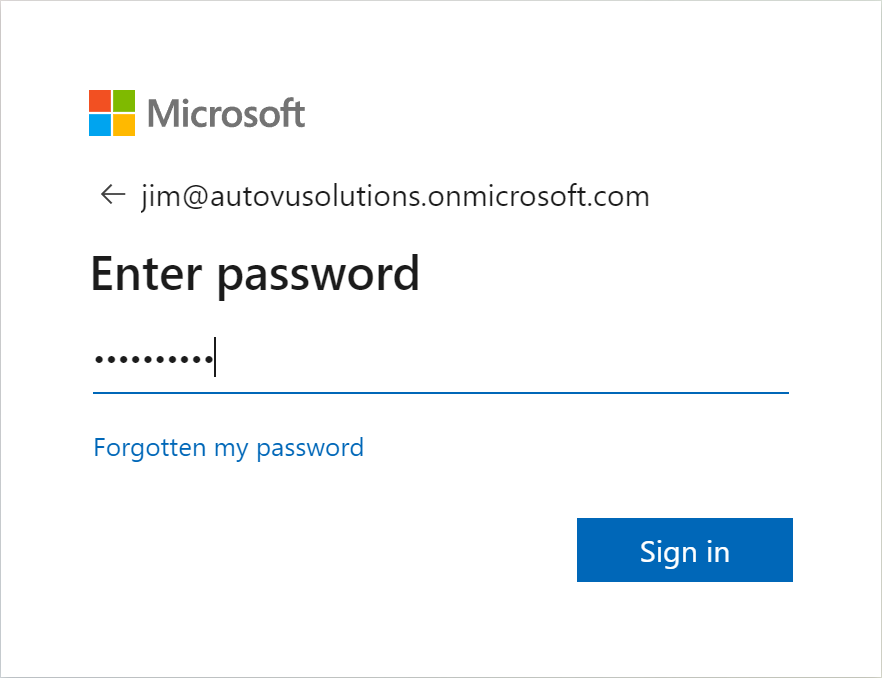
Click Sign in to open the verification code screen. In the below example, we have selected the authenticator app for providing the authentication code. You may have set your email account up to send the code via email. In this case, check your email inbox for the appropriate code.
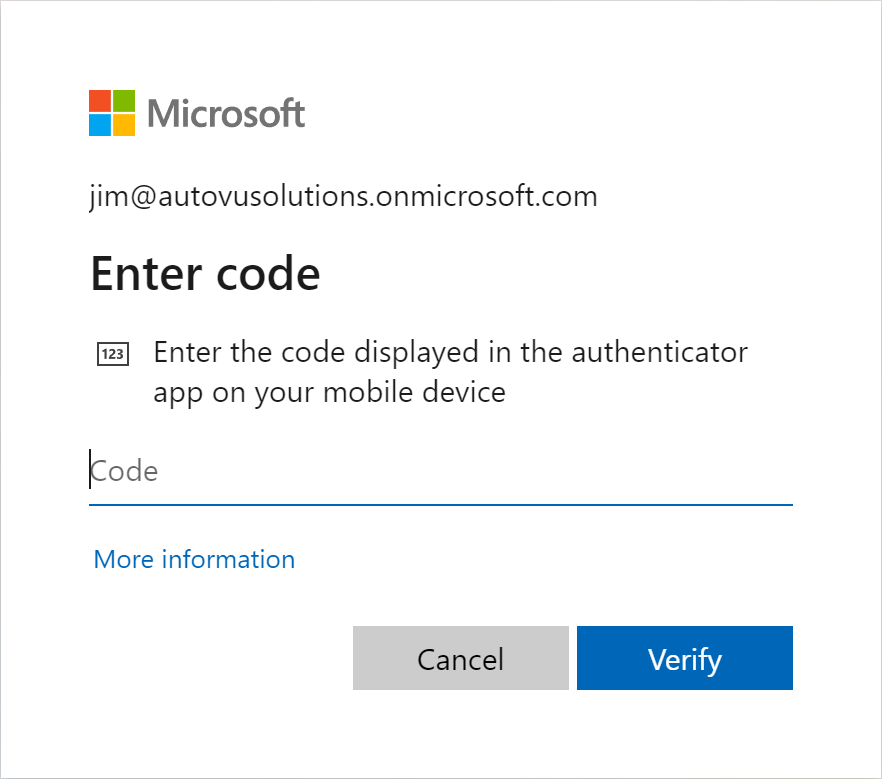
Having entered the code, click verify to continue.
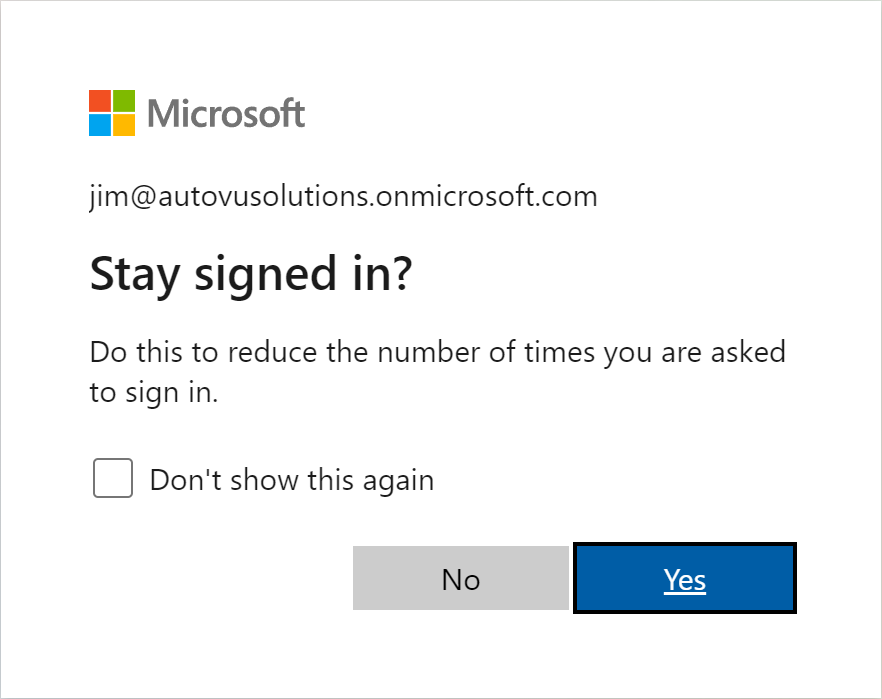
Please make sure to click 'Yes' as your email address will not stay authenticated for more than an hour.
After completing all the steps with Microsoft, you will be re-directed back to Workforce Manager where your email address will be marked as verified.
CRM Outlook Integration: "Need Admin Approval"
This section explains the steps required to resolve the "Need admin approval" message that may appear when linking your CRM system to your Microsoft Outlook/Microsoft 365 account.
This message is a normal security measure put in place by Microsoft and requires action from your IT administrator.
What the User Sees
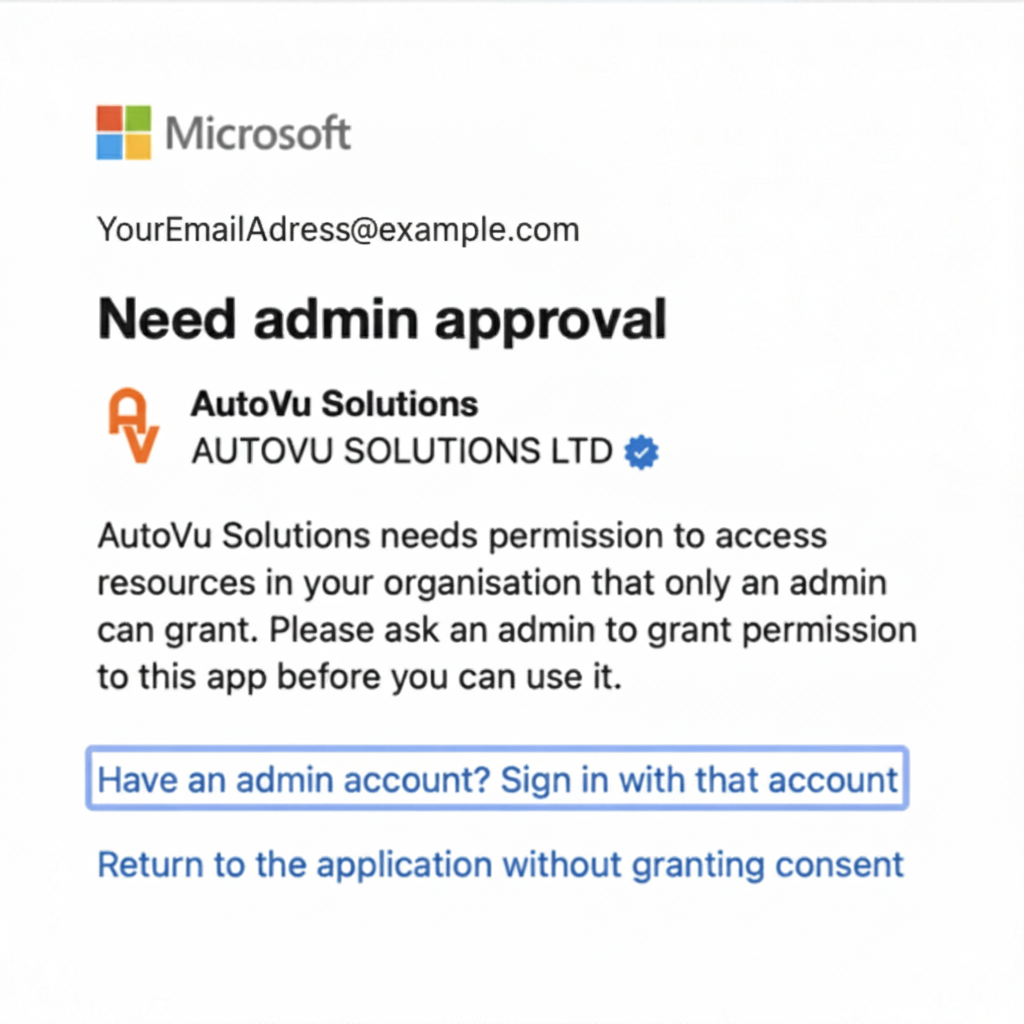
When attempting to connect the CRM to Outlook, you see a message similar to this:
Need admin approval, AutoVu Solutions LTD needs permission to access resources in your organisation that only an admin can grant. Please ask an admin to grant permission to this app before you can use it.
User Action: How to Fix This
You cannot fix this yourself; you need to trigger the process and contact your organisation's IT administrator.
Step 1: Generate the Request
-
Attempt to connect your CRM to Outlook/Microsoft 365 as you normally would.
-
When the "Need admin approval" screen appears, do not close the window.
-
On some versions of this screen, you may see an option to "Request approval." If this option is available, click it and follow the prompts to submit a justification (e.g., "Need CRM to log emails against customer records"). This formally submits the request to your IT team (if they have enabled the Admin Consent Workflow).
Step 2: Contact Your Administrator
You must contact your IT team (or Global Administrator) and clearly explain the issue. Provide them with the following key information:
-
The exact name of the CRM application you are trying to connect.
-
The exact permission error message (a screenshot is ideal).
-
Request that they perform Admin Consent for the application.
Administrator Action: Resolving the Error (For IT Team Only)
This issue arises because the CRM is requesting access permissions (e.g., access to read / write to mailboxes), which Microsoft's "Secure by Default" policy now blocks for standard users. The Global Administrator must grant tenant-wide consent.
The administrator has two main ways to resolve this in the Microsoft Entra admin centre (formerly Azure Active Directory).
Method 1: Granting Consent via Enterprise Applications (Recommended)
This is the most direct way to approve the app once a user has attempted to sign in.
-
Sign in to the Microsoft Entra admin centre with a Global Administrator or Cloud Application Administrator role.
-
Navigate to Identity > Applications > Enterprise applications.
-
Search for the name of the CRM application (it should be listed after the user attempted to connect).
-
Select the application, then go to Security > Permissions.
-
Carefully review the permissions the application is requesting.
-
Click the blue button: Grant admin consent for [Your Organisation Name].
-
A confirmation box will appear. Click Yes or Accept.
This one action will grant permission for all users in the organisation to use the CRM integration.
Method 2: Approving a Pending User Request (If Workflow is Enabled)
If the Admin Consent Workflow is configured, the administrator can follow this process:
-
Sign in to the Microsoft Entra admin centre.
-
Navigate to Identity > Applications > Enterprise applications > Consent and permissions > Admin consent requests.
-
Review the pending request submitted by the user.
-
Click Review permissions and consent and approve the request.
Further Reading (Microsoft Documentation)
For a detailed, step-by-step guide directly from Microsoft, your administrator can use these links:
Gmail
With Gmail selected as the server type. Click verify where you will be redirected to Sign in with Google for verification.
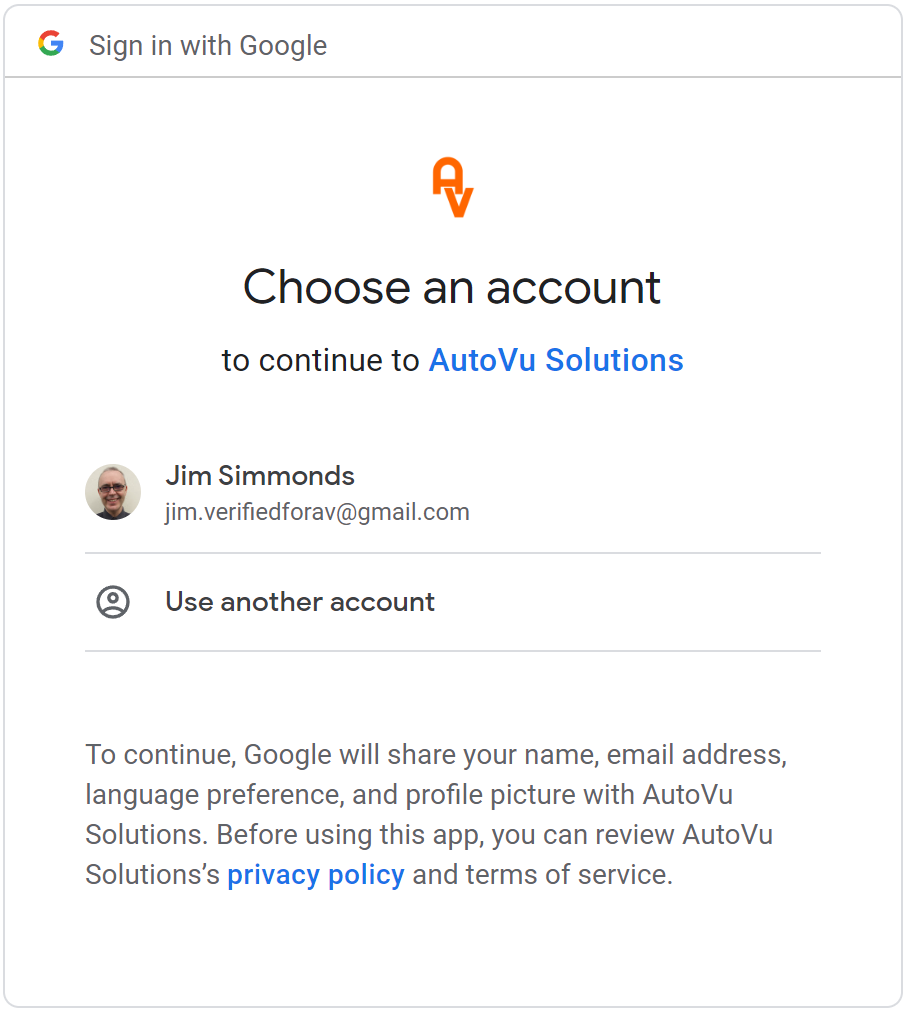
Choose the correct account that matches the email address you are attempting to verify.

Check all the boxes to allow Workforce Manager to send and receive emails from your Gmail account and click Continue.
The process of authentication will depend how you have set up your email account, you may have set your Gmail up to use the google authenticator. This will introduce an additional step where you will enter the authenticator code.
After completing all the steps with Google, you will be re-directed back to Workforce Manager where your email address will be marked as verified.

If you do not check all the boxes on the sign in pages, you may still have a page that shows as verified but when you try to send email, it may fail as permission was not granted. In this instance, go back to the email verification page and re verify your email address.
Depending on your settings, you may not be verified (as shown above) for receiving email but the ability to send email, e.g. job tickets, invoices etc will be enabled.
Set up your email account using basic Authentication
Using Server Type 'Other' allows you to set up basic authentication using traditional SMTP and IMAP protocols.
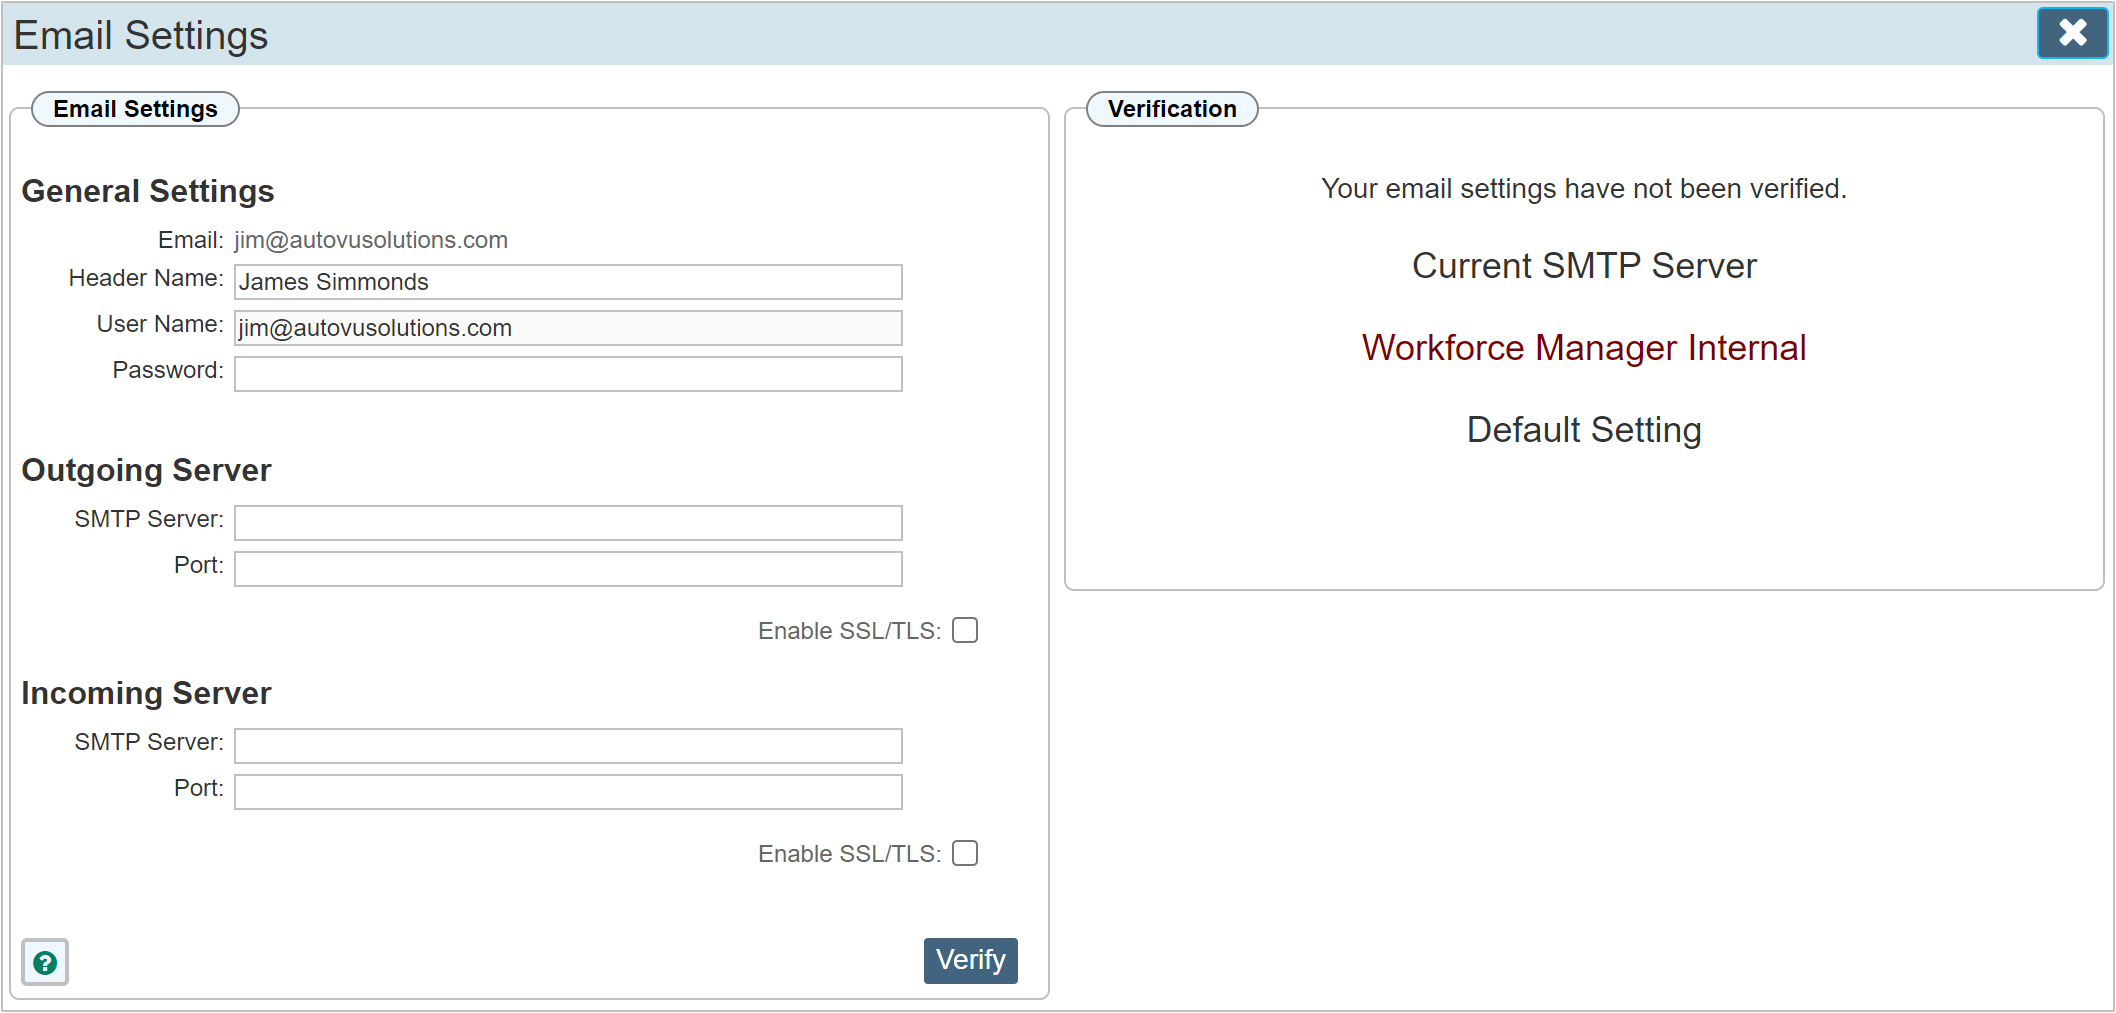
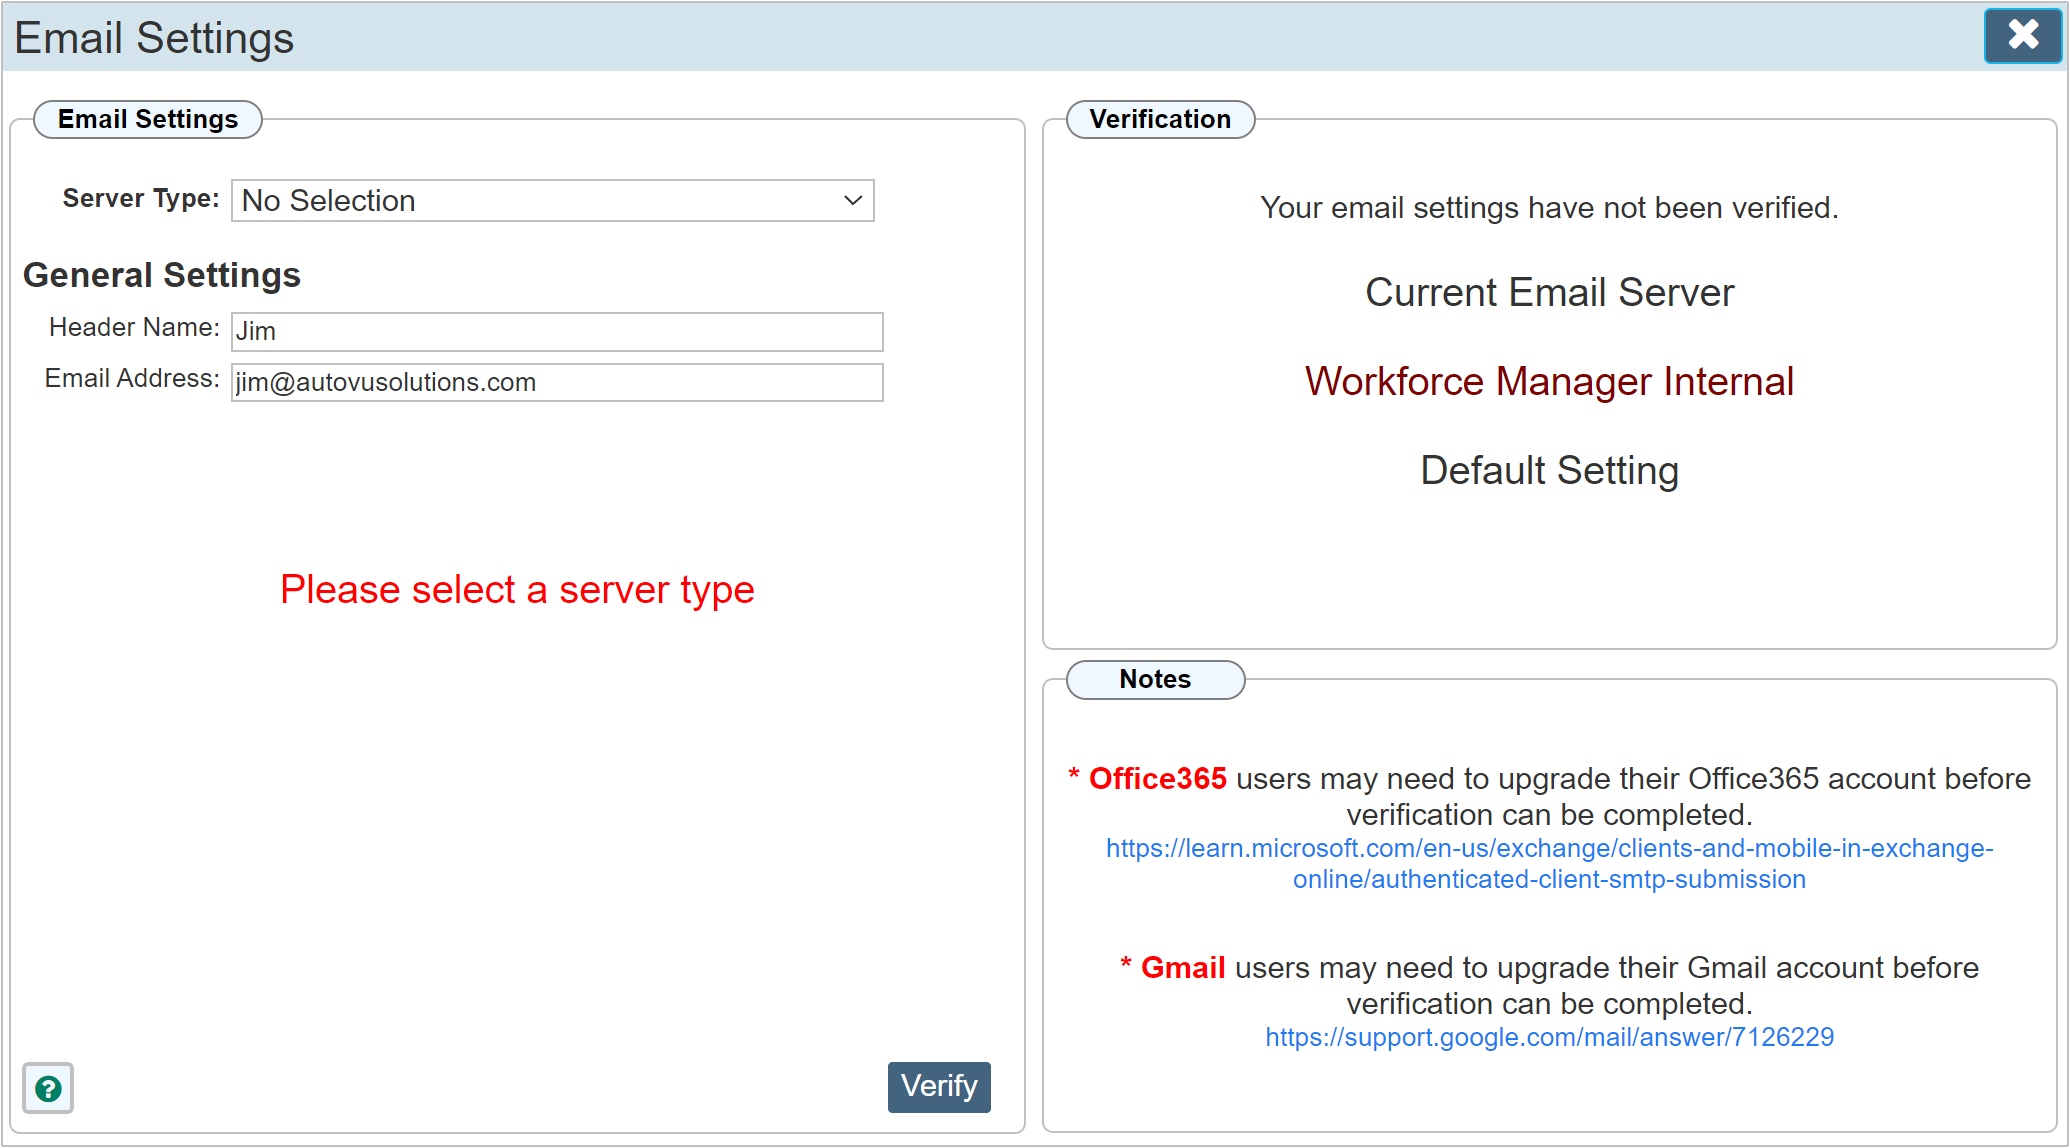
The above example shows the email settings dialogue when first opened. You will notice within the 'Verification' panel that the email address has not been verified at this stage. All emails sent through Workforce Manger while unverified will be sent using Workforce Managers own internal email server.
The settings
General Settings
| Header Name: |
When your email is sent, if you set a Header Name, this name will be shown to your recipient instead of your email address. This is often set the same as your email address. Care must be taken to ensure the header name has similarities to your email address name if using anything other than your actual email address. Particularly in outlook, it may be rejected by the recipient if an obscure header name is used. This situation has occurred in more recent times as the security of email accounts with regards to spam have been improved. We would recommend using your email address as the header name.
|
| User Name: |
This field contains your email address and is pre populated with your email address as shown on your 'My Profile' page. If you wish to change your email address, you can do this from here and it will also update the email address shown on your 'My Profile' page.
|
| Password: |
The email password associated with your email account.
|
Outgoing and incoming server details are provided by your email provider. If you do not know these, contact your email provider for the relevant information. A quick google search will often show you what these may be.
Outgoing Server
| SMTP Server: |
The outgoing SMPT server name
|
| Port: |
The port number that your outgoing email is sent via
|
| SSL / TSL: |
If your email account uses an encryption method, check this box
|
Incoming Server
| SMTP Server: |
The incoming SMPT server name
|
| Port: |
The port number that your incoming email is sent via
|
| SSL / TSL: |
If your email account uses an encryption method, check this box
|
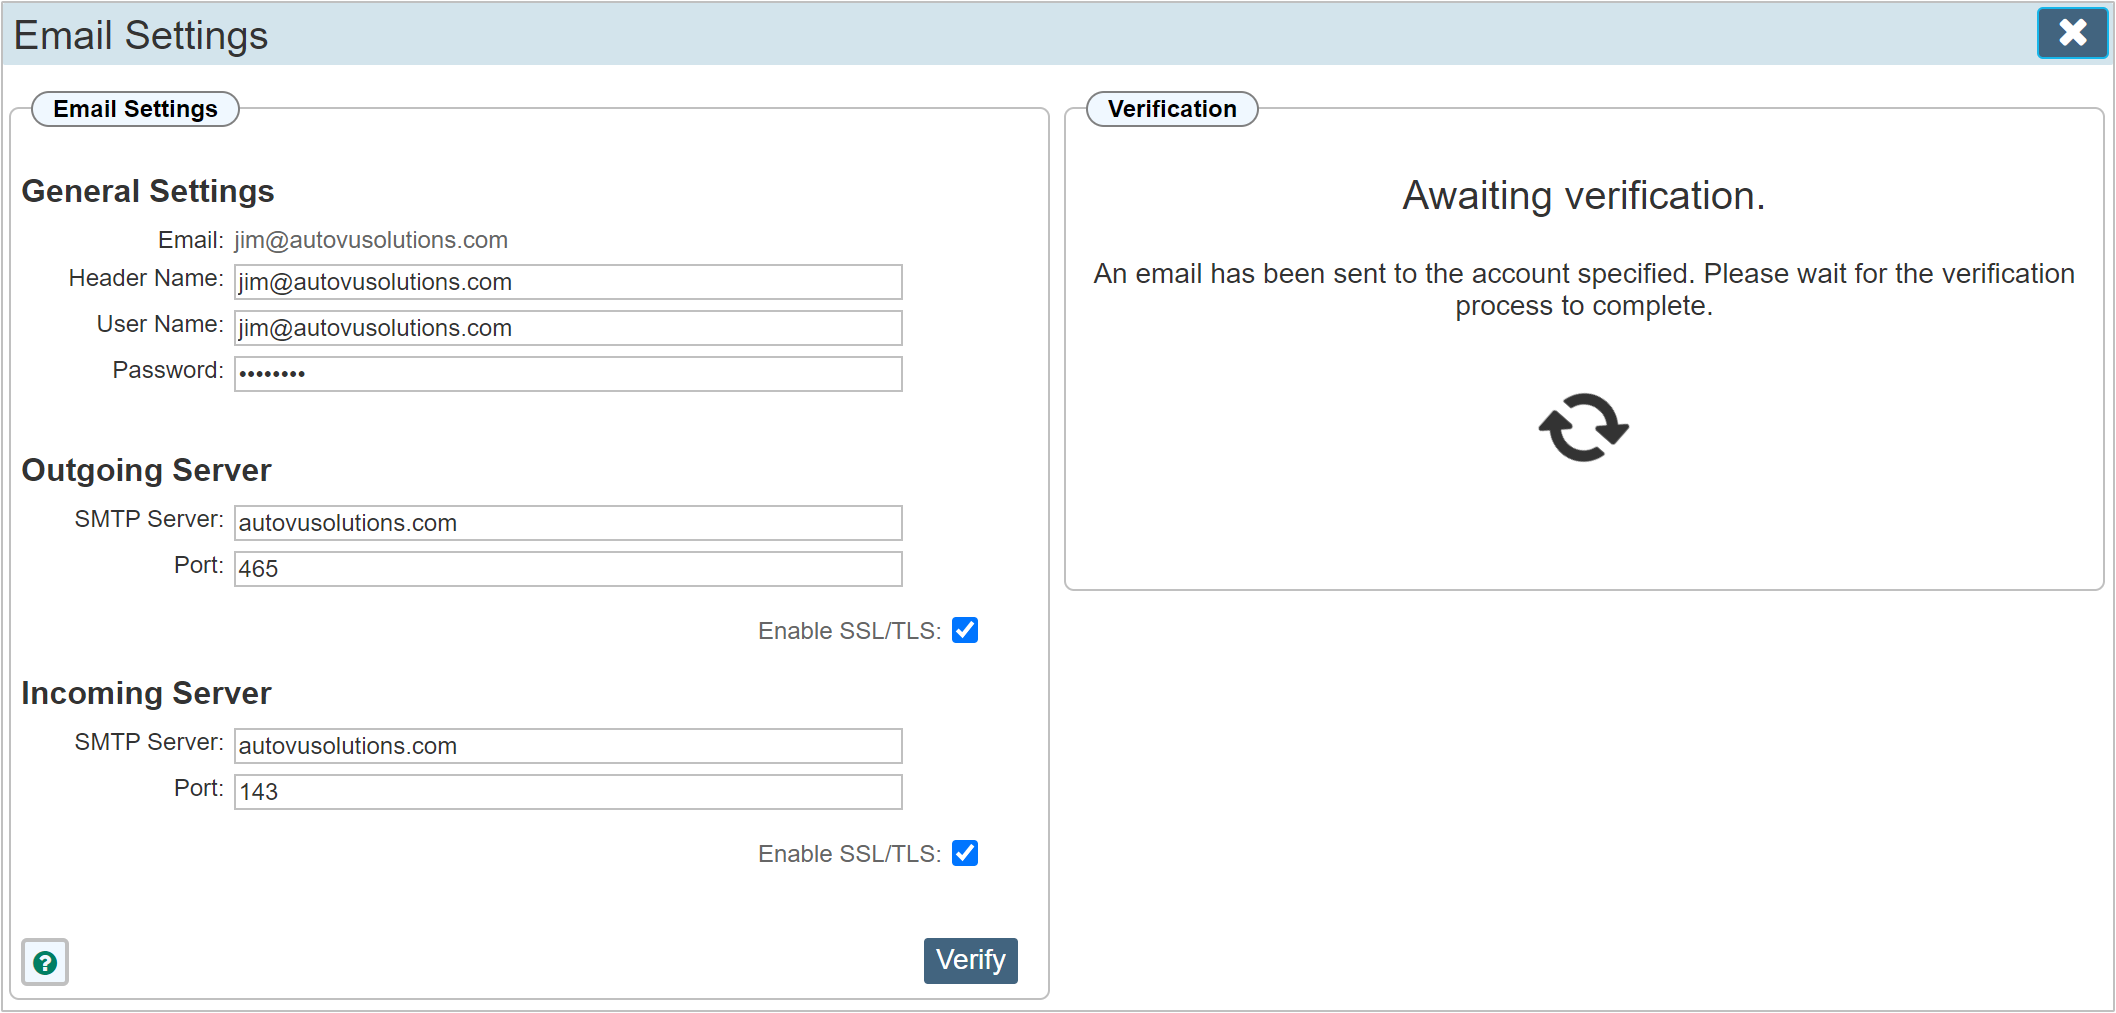
Once all the relevant details about your email account have been entered, click the 'Verify' button to enable verification. It will take a few moments to verify your account, please stay on the page until the verification process completes.
The below dialogue showing the 'Awaiting verification' notice. An email will be sent to your own email address to enable the verification process.
|
Do not delete the verification email during the verification process
|
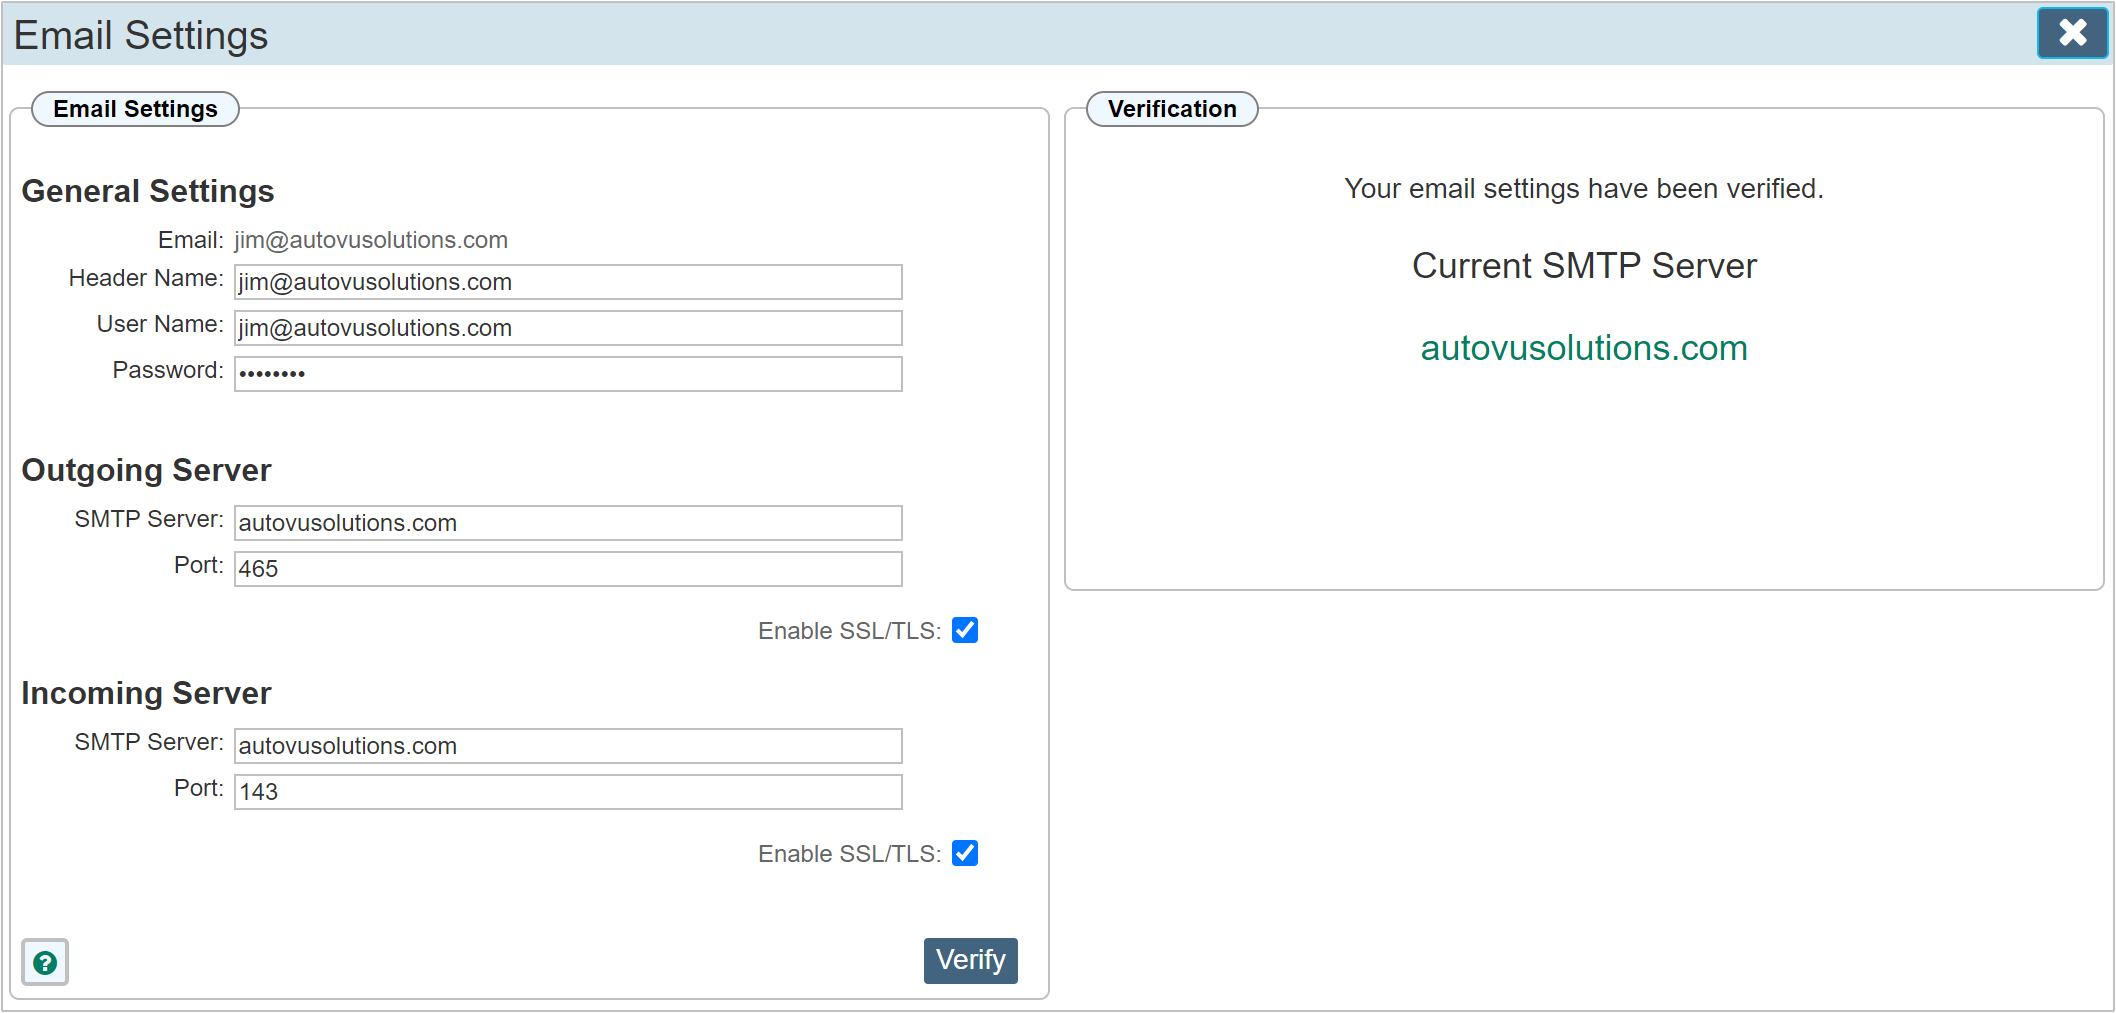
Once the verification process has completed, if the details you supplied were correct, the verification panel will update as shown in the below example to indicate Workforce Manager will now use the indicated email server when sending email for your account. You may delete the verification emails sent to your email address once the verification process is complete.
|
Depending on your browser, you may be asked if you wish to save the new password in your passwords list. This is an automated response prompted by your browser. PLEASE CANCEL THE REQUEST. If you save the email password in the browser password list, it will overwrite your Workforce Manager login password. I.E. it has nothing to do with your email password, its just the browser noticing that there is a password field on the current form. Your security is not compromised should you accidentally click yes to save the password, it just means next time you try to log into Workforce Manager, it will fail because it is trying to log in using the now incorrect password.
|
If your email settings could not be verified, you will be prompted with the verification notice as shown in the below example.
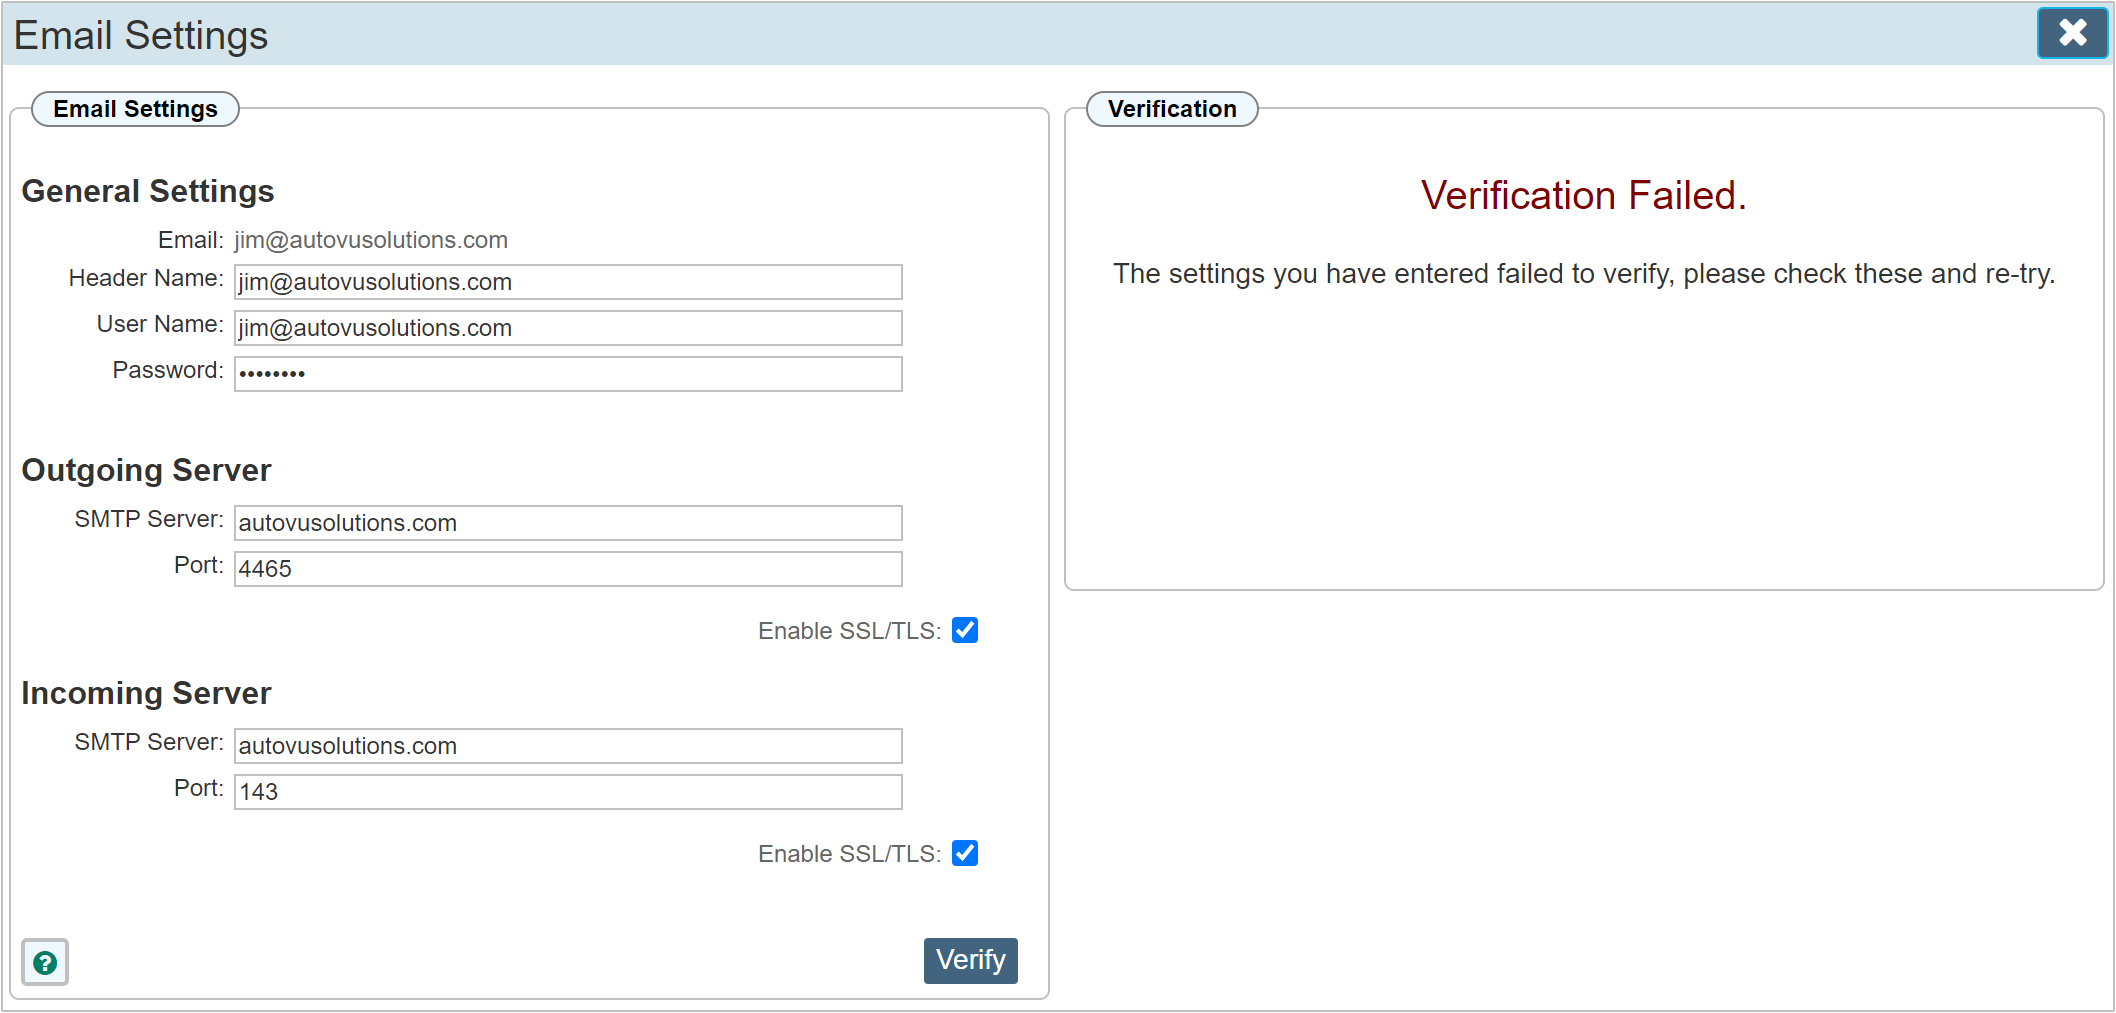
This situation will occur if any part of the detail supplied is incorrect. To force this situation for our example, we have changed the Outgoing Port number to an incorrect values. Where the verified account shows port number 465, the failed process shows 4465 which is incorrect.
Notes
* Not all email providers allow automated insertion of 'Sent Email' via third party providers. Office 365 / Outlook does support this, all sent email is shown in your Outlook sent box for all email sent through Workforce Manager, but some providers block this.