Once jobs have been allocated to a Service Route, all un-booked jobs where the Due Date is within the next 30 days or less, are sent directly to the Workforce Manager Mobile App allowing the Rep to view all Service Route Jobs on the system, including how far away it is from their current location and how long the job has been on the system along with a due date indicating when the work should be completed.
This process completely automates the allocation of work to site workers, particularly useful for servicing work.
There are two methods of allocating service jobs to a Service Route.
Method 1 (simple method)
This is the simplest method and requires very little setup. By toggling a few switches within the system allows you to immediately begin sending service jobs to each site rep and shown within the Service Route list within the App. This method sends ALL service route jobs to ALL reps.
To activate this method;
- First navigate to Settings > Company Settings > Mobile App scroll down the list and toggle the switch 'Include Non Assigned Routes' to 'Yes' and 'Save' the form.

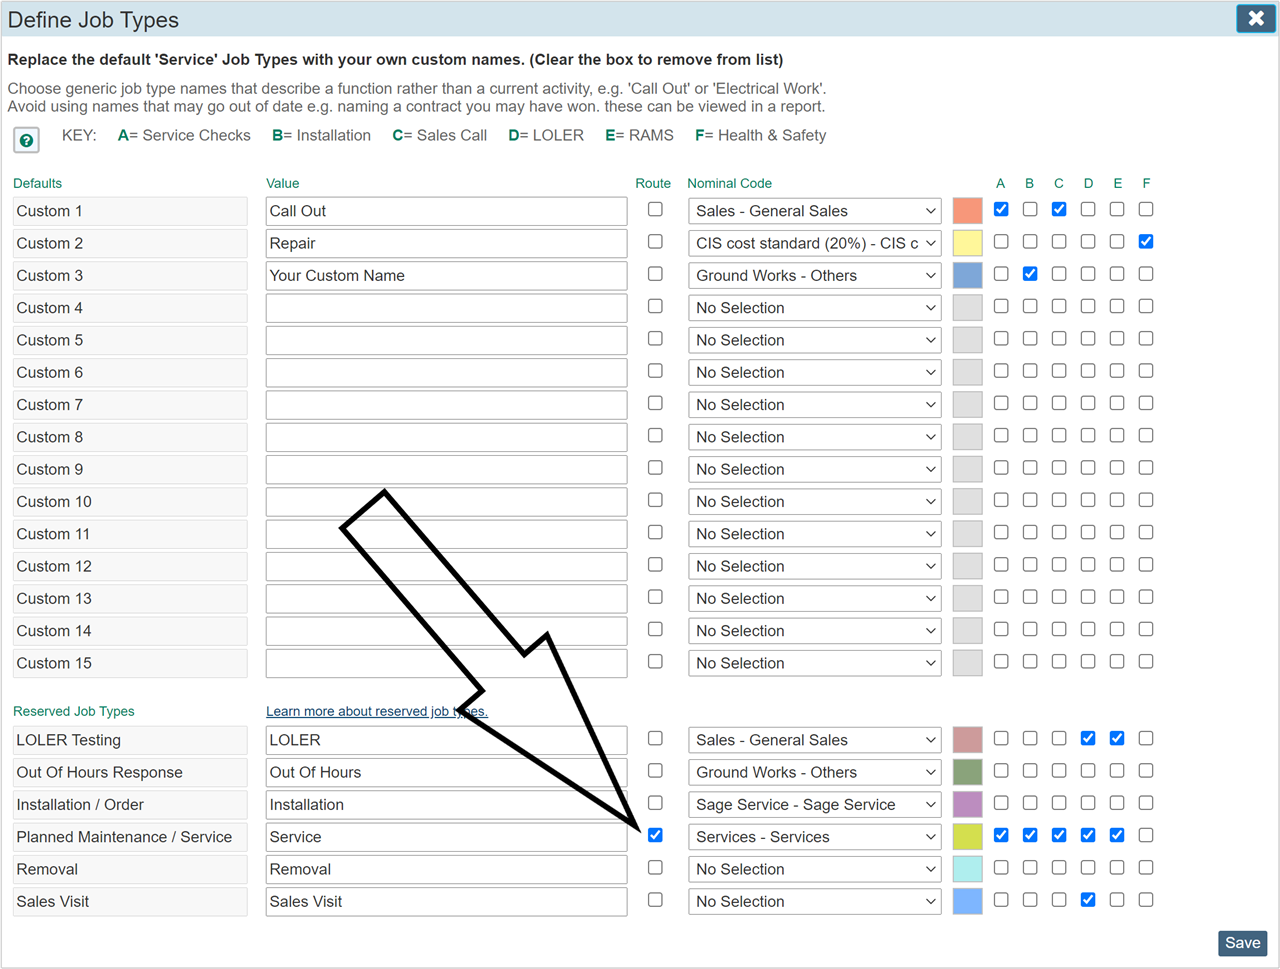
- Second, navigate to Settings > Company Settings > Job Ticket Types and toggle the Route switch for each of the service job types you want to automatically send to the Mobile App.
The image below shows the Job Ticket Types dialogue. Primarily, you would allocate the 'Service / Planned Maintenance' Job Type which would include all regular service work. You may include any or all of the job types where required. We can see the 'Service' job type has been selected for our example. (don't forget to save the form)
Once this simple setup procedure has been completed, all jobs created with the job type 'Service' (or any others job type you selected) will automatically be sent directly to each rep via the Mobile App.
|
Only Jobs where a booking has not yet been made will appear in the App Service Route List
|
From this point, each job ticket that you create on the system that does not have a current booked date / rep allocation will be sent to the Service Route on the Mobile App allowing any engineer to select, and accept the Job and book it on the current day diary. These bookings will automatically appear on your diary web UI as the reps accept the jobs.
Method 2 (advanced method)
This method requires a little more setup. We would use this method when we are required to target a particular route / rep combination, where each rep would typically work within a particular area (route). First we set up the route names / rep allocation, then we would allocate these routes to each site.
Once a Service Route has been created and site locations have been allocated to it, each new job that is added to the system is automatically sent to the site rep that has been assigned to that route.
This method targets an individual rep / route. I.E. only the rep allocated to that route will receive the jobs within their Service Route List.
How Does it Work
If a service contract spans multiple service visits all with individual due dates, the system will automatically send the service job to the assigned reps Mobile App. As soon as the rep accepts the job on the app, the job will automatically book itself onto todays diary showing that the rep as accepted the job booking.
These bookings will fill the day diary automatically as each rep works through the route. I.E. No one at the office has to book these type of jobs, they will automatically appear on the diary. Once the booking has been made, the job will no longer show in the App Service Route list but will then show within the App's main diary page exactly the same as bookings created for them by the office.
|
Only Jobs where a booking has not yet been made will appear in the App Service Route List
|
Setting up a Service Route
There are a number of steps required to set the system up for targeted service routes.
The first step involves setting up the actual routes. (the names that appear within the 'Contract Manager' route drop down list)
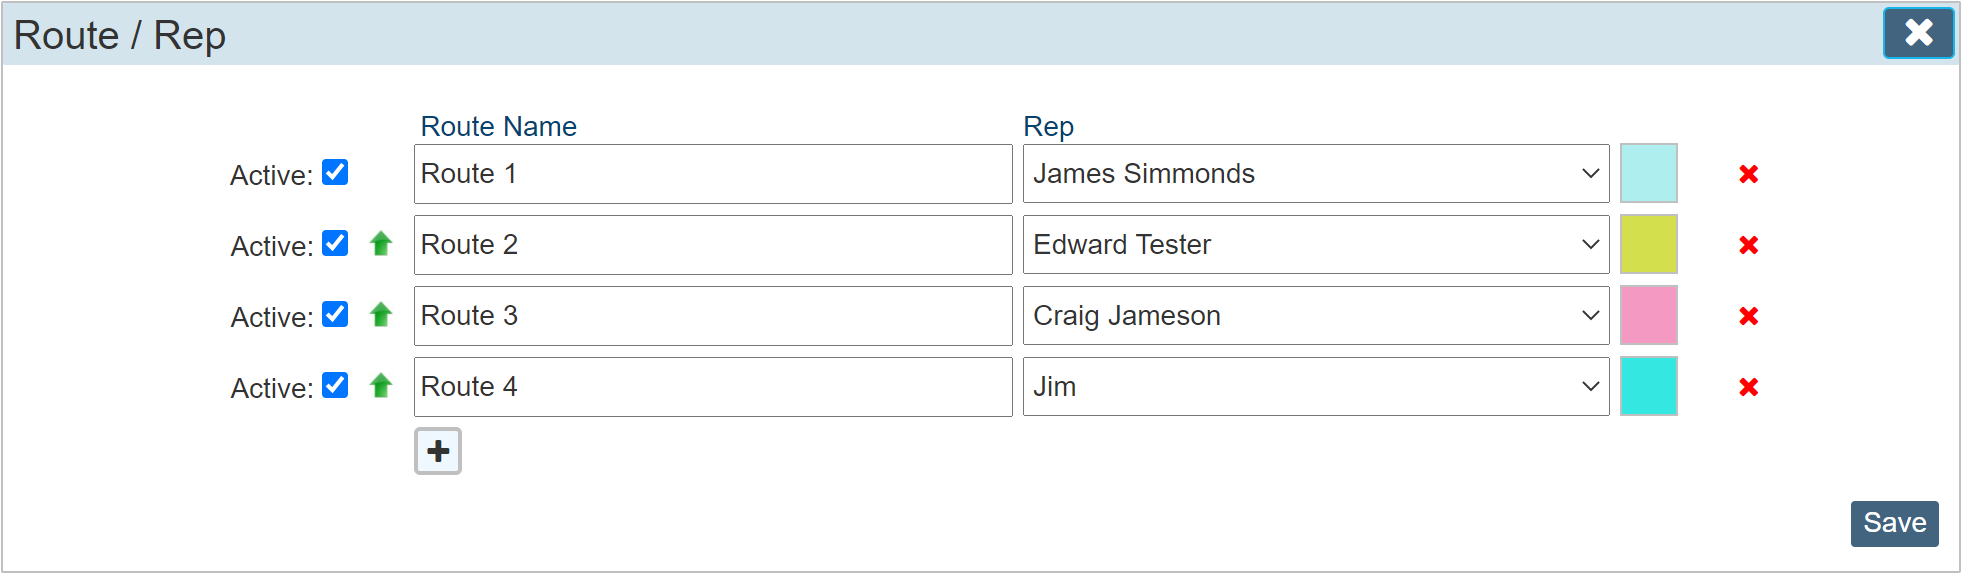
To set this up, navigate to Settings > Custom Values > Route / Rep
The below example shows our Demo 'Route / Rep' allocation. Click the 'Plus' button to add a new line, enter a name for your Route in the 'Route Name field then select which Rep from the Rep drop down list who works on this route.
Once the Routes / Rep allocations have been set, we can then select these routes within each site / Service Contract
Allocate a Route to a Job Type
Primarily, you would allocate the 'Service / Planned Maintenance' job type which would include all regular service work. You may include any or all of the job types where required.
Open the 'Job Ticket Types' setup dialogue by navigating to Settings > Company Settings > Job Ticket Types
The below example shows our demonstration Job Ticket Types panel, the details here will vary depending on how you have your own system set up but the main thing we are looking at is the column labelled 'Route'
Checking the 'Route' check box for any service job type will allow that particular job type to be sent through to the Mobile App. In our example we can see that the job type 'Planned Maintenance (Service)' has a check box ticked. Any other job ticket types can also be checked where required.
Once these settings have been made, it is then just a task of allocating each site service contract to the correct route. I.E. Within each Site, open the contract manager and use the 'Route' drop down list to allocate the Route / Rep selection to that site.
Setting other Job Types
The above process shows us how to set up the system to automatically add service job types that are automatically created by the Contract Manager.
It is equally possible to add any other job type to the Service Route by checking the 'Route' checkbox within the Job Ticket Types panel as discussed earlier.
Creating a Service Contract
Navigate to a Site Record.
We will set up a Service Contract to automatically create several service jobs.
Open the Contract Manager by clicking the status bar within the Service Contract panel.
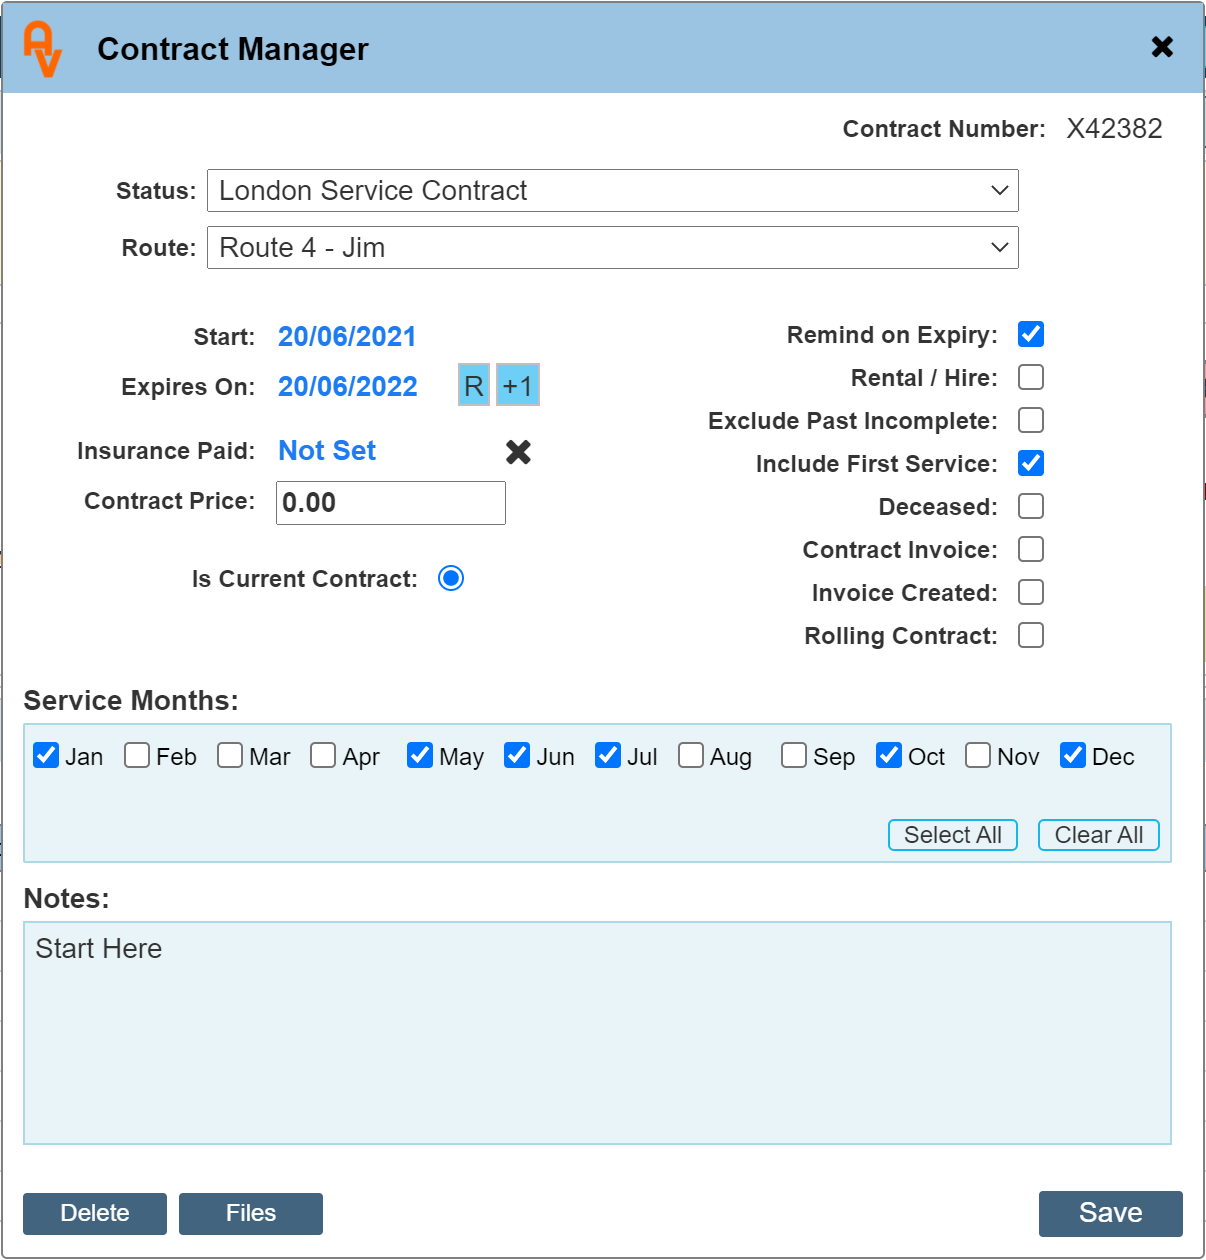
In this instance we will create a contract that spans 20/06/2020 to 20/06/2022 with service visits for several months within the year as indicated above. We will also select a route using the 'Route' drop down list. How to add Routes to this list will be covered further into the guide.
Once the 'Contract Manager 'Route' drop down list has a Route / Rep selection, any 'Un-booked' Job Type where the 'Route' checkbox was selected will automatically be sent the the Reps Mobile App and the process works the same.
|
It is not necessary to to set start and expiry dates in the Contract Manager if your site location does not have a service contract. To use the Service Route option only requires the 'Route' drop down to be set if you intend to use the Service Route option on any other job types.
|
The resulting visits once saving this dialogue will be shown within the Job History where each has a due date within the month where requested.
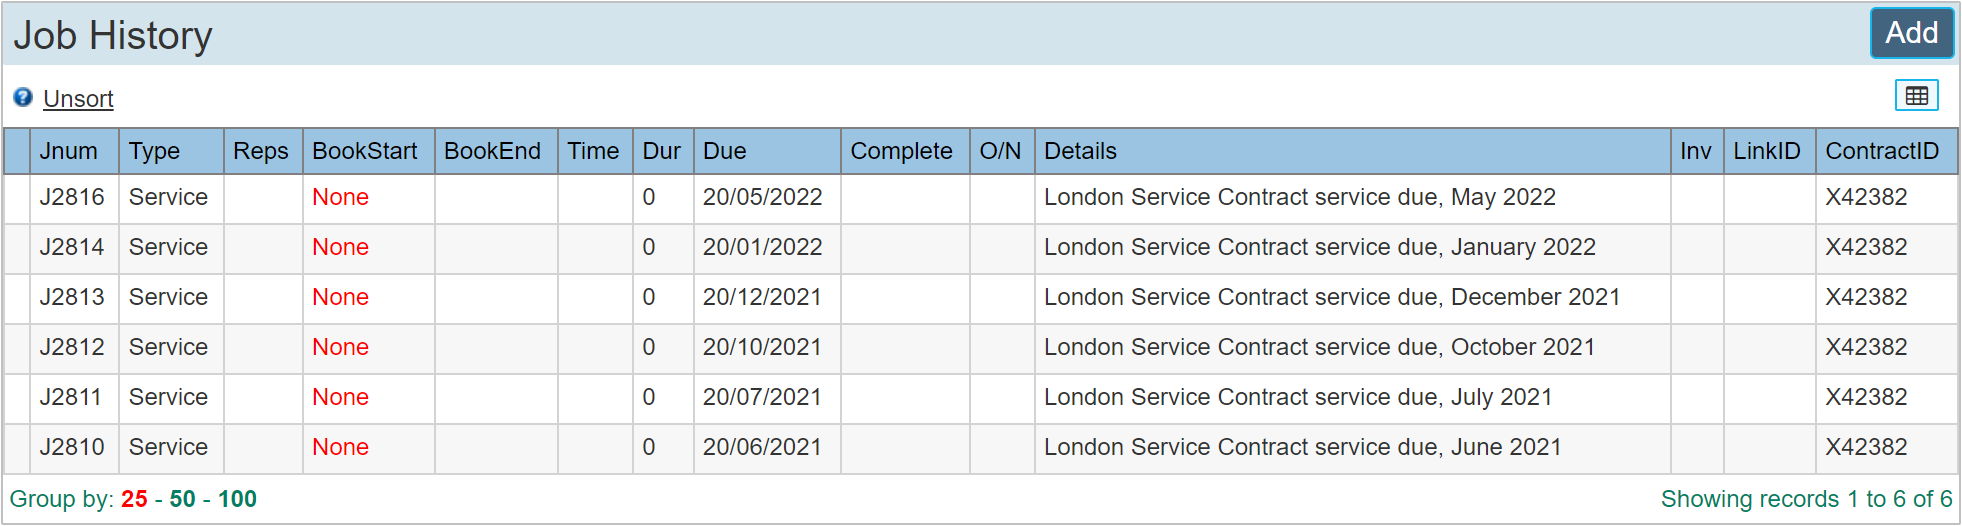
The 'Due' column shows the specific date that each service visit is due. Usually to be completed within that month.
As soon as these jobs have been created, they will be available on the site reps Mobile App. Only jobs that are due within 30 days (or overdue) will be shown.
|
You may manually create service route jobs in the same way you would add any regular job. As long as a booked date does not exist, the job will be sent to the App Service Route.
|
The Mobile App
Below we can see a screenshot of the Mobile App Service Route. Two jobs are showing, based on the due date (at the time of writing this guide) we can see one has gone past its due date by 10 days, whereas the other is not due for another 20 days. To the right of the Due date we can see the number indicating the number of days due or overdue. I.E. a positive number indicates that the service visit is 10 days past the due date whereas the one with a negative number is telling us that the service visit is not due until another 20 days.
We show visits where the due date is up to 30 days in the future so that jobs that are E.G. potentially 'a long way off in distance' may be done a few days early at the convenience of the site contact and visiting rep should the job tie in with another one that puts the rep within the location of the job.
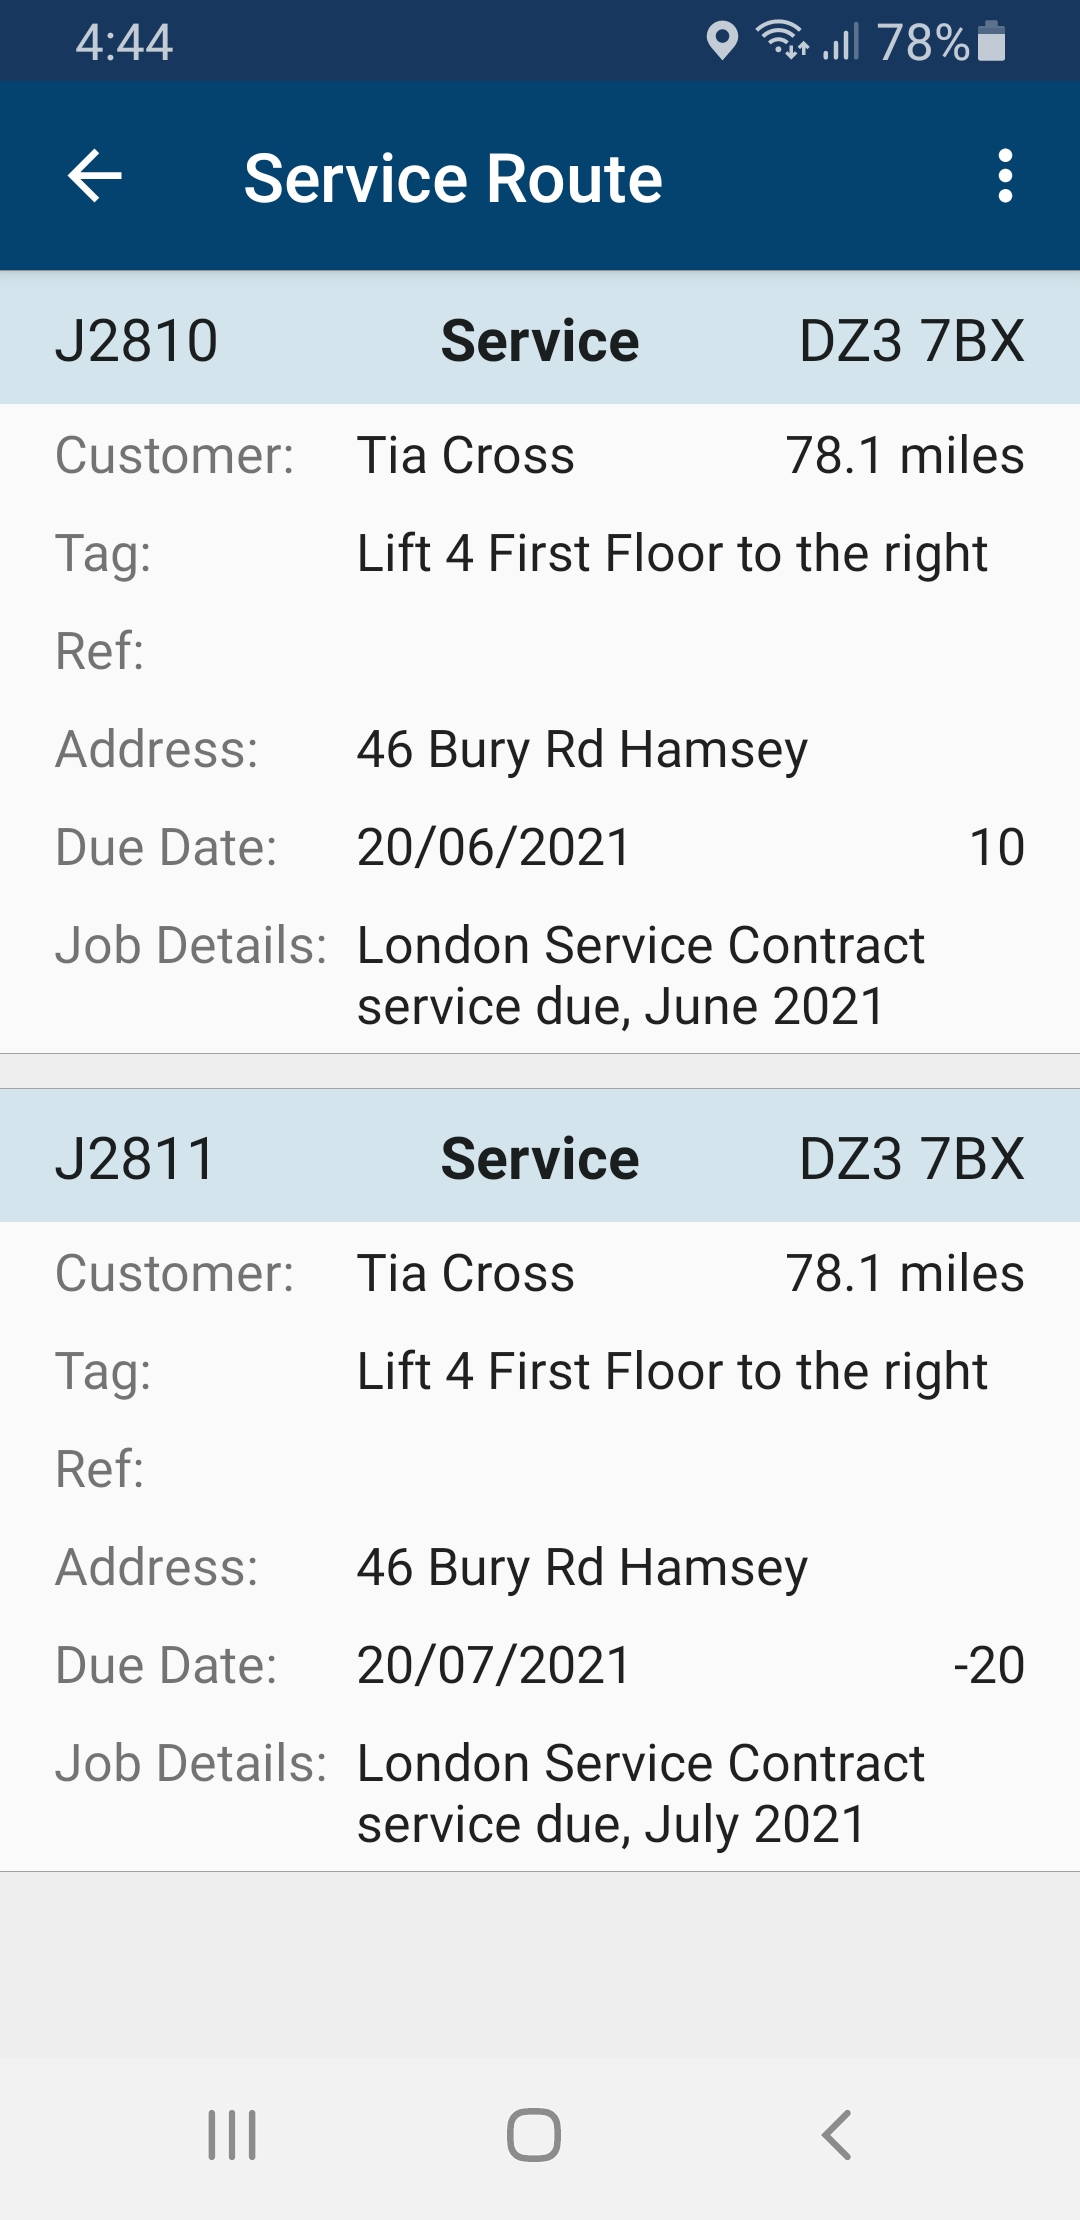
Clicking on either of these jobs within the App will open the record showing further details and the opportunity to 'Accept' the job. If the Rep 'Accepts' the job, the booking is automatically made on the web diary for office personnel to see.
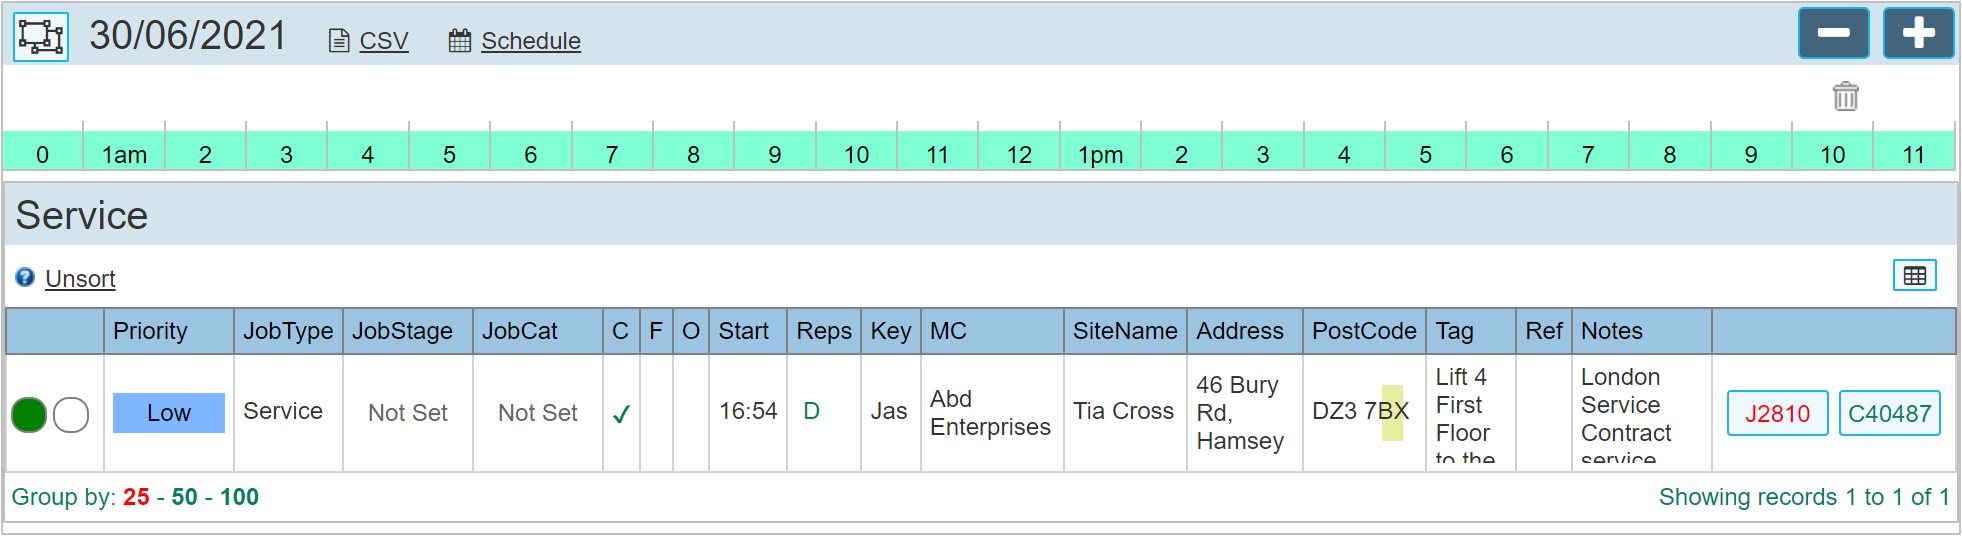
The Web UI view
The below web diary example shows one of these jobs automatically visible after clicking the 'Accept' button on the App.
Combining the Methods
It is possible to combine both of these methods allowing you to target some jobs to specific reps where other jobs are sent to all reps.
If a site service contract has a Route / Rep allocation, jobs for this site will always be targeted to the allocated rep. All other reps would not see jobs from this site within their Service Route List.