Managing Visits: Bookings
Each Job Ticket is linked to one or more Bookings. A Booking represents a specific visit to the site required to complete the work outlined on the Job Ticket. For simple tasks, a single Booking may be sufficient, but for multi-day jobs like a complex installation, multiple Bookings would be attached to the same Job Ticket, with each Booking corresponding to a day of work.
Initiating Work: Booking Site Visits
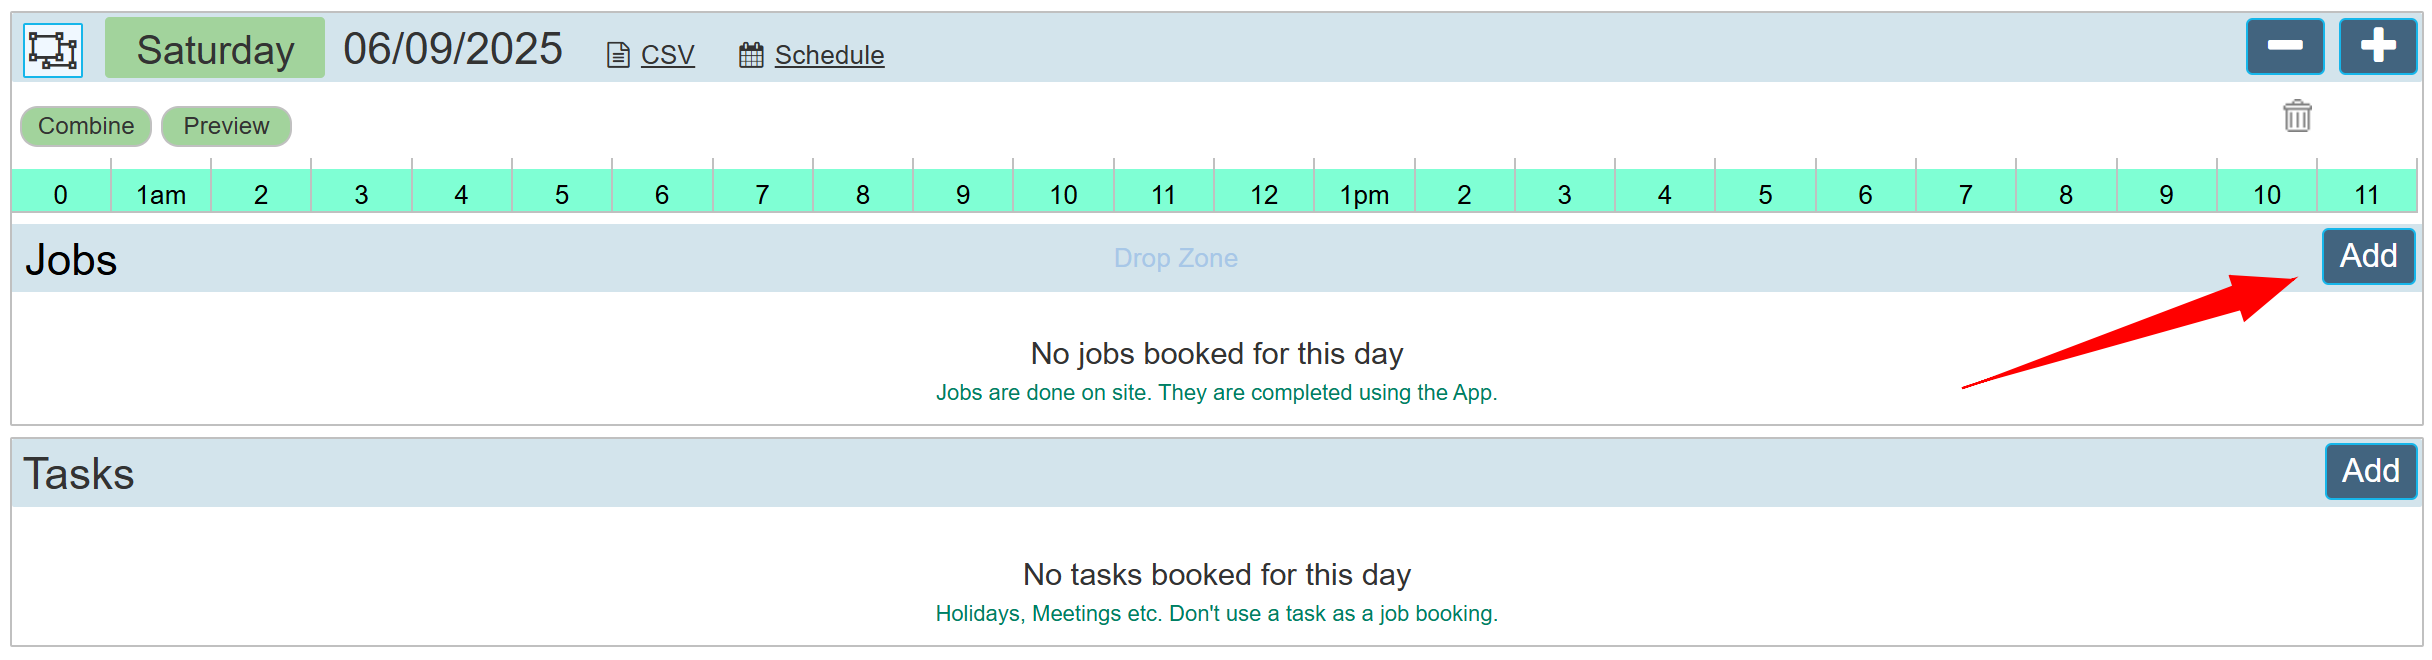
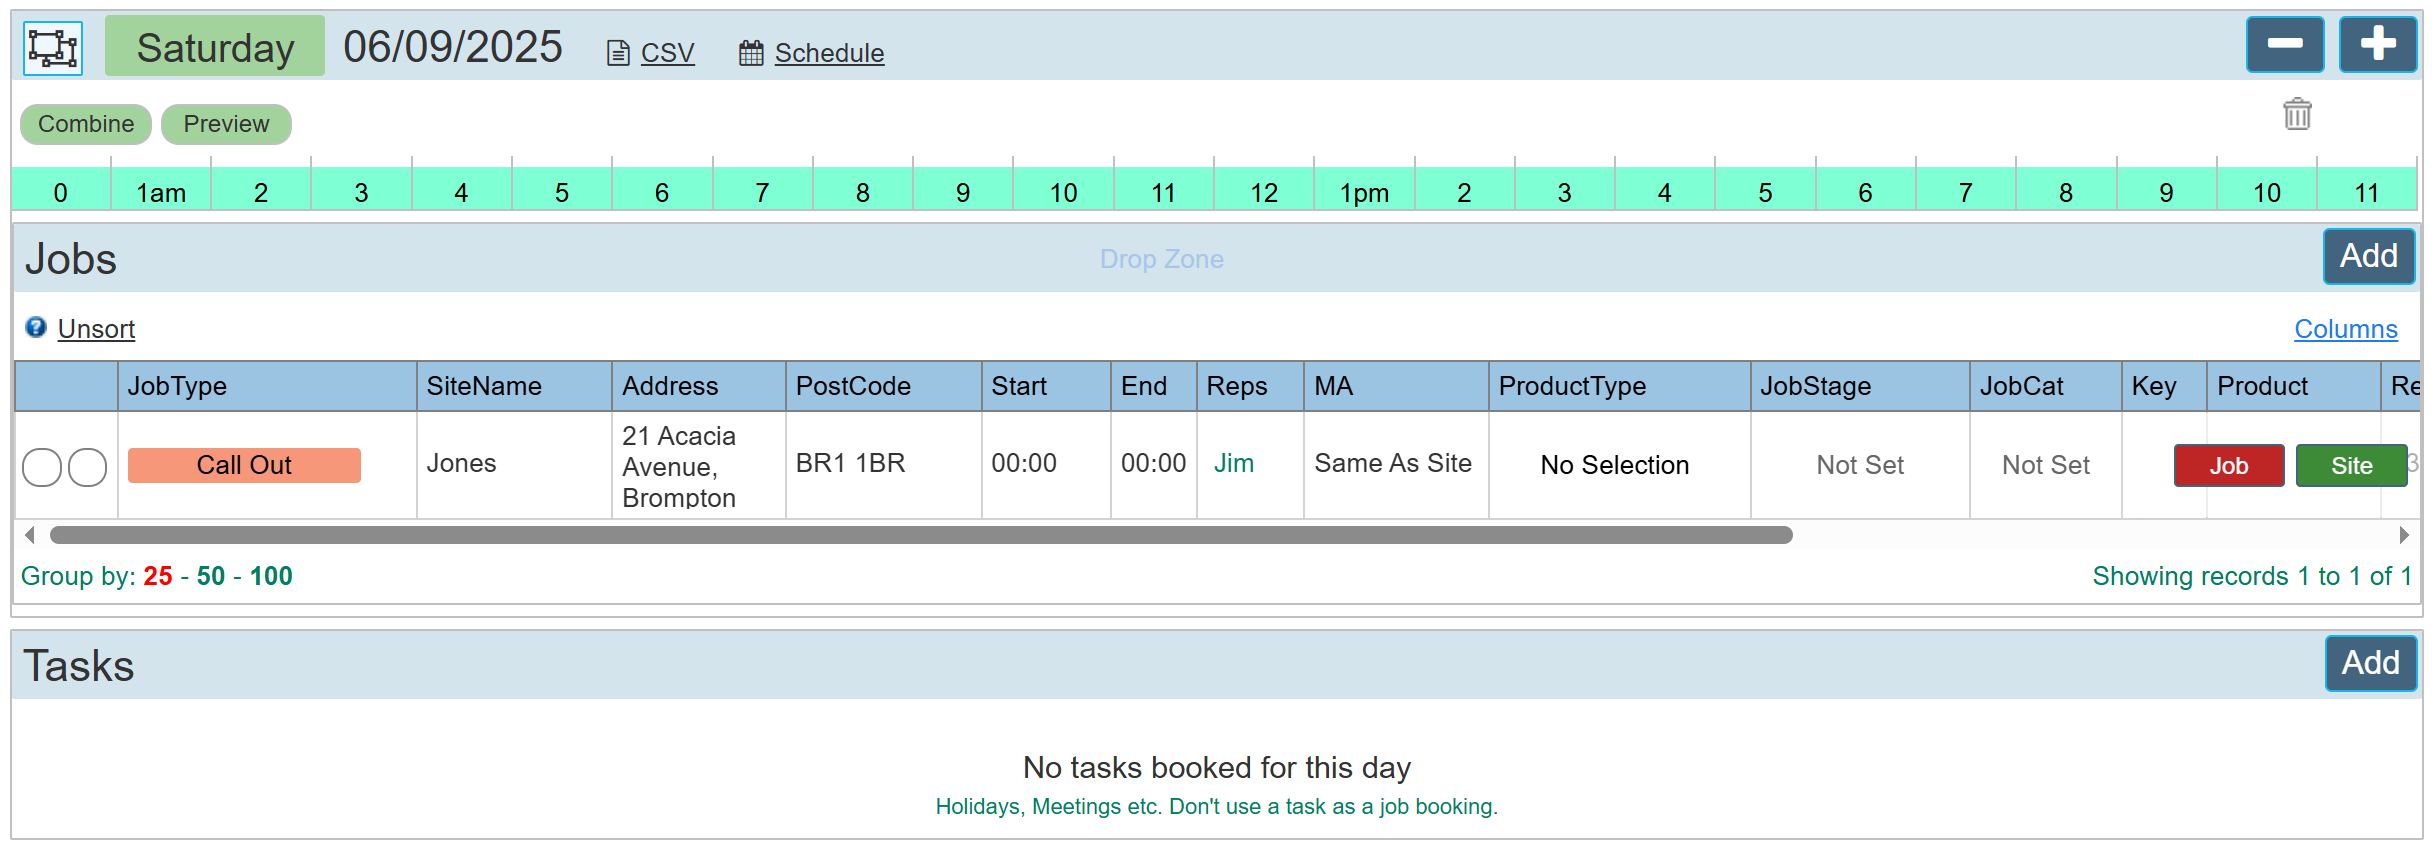
To begin scheduling, you will start with an empty diary, as shown in the interface below, ready for you to add your first bookings.
Getting Started: Booking a New Job
There are several methods for booking jobs within the system. For this 'Getting Started' guide, we will focus on the most efficient method to ensure a swift booking process.
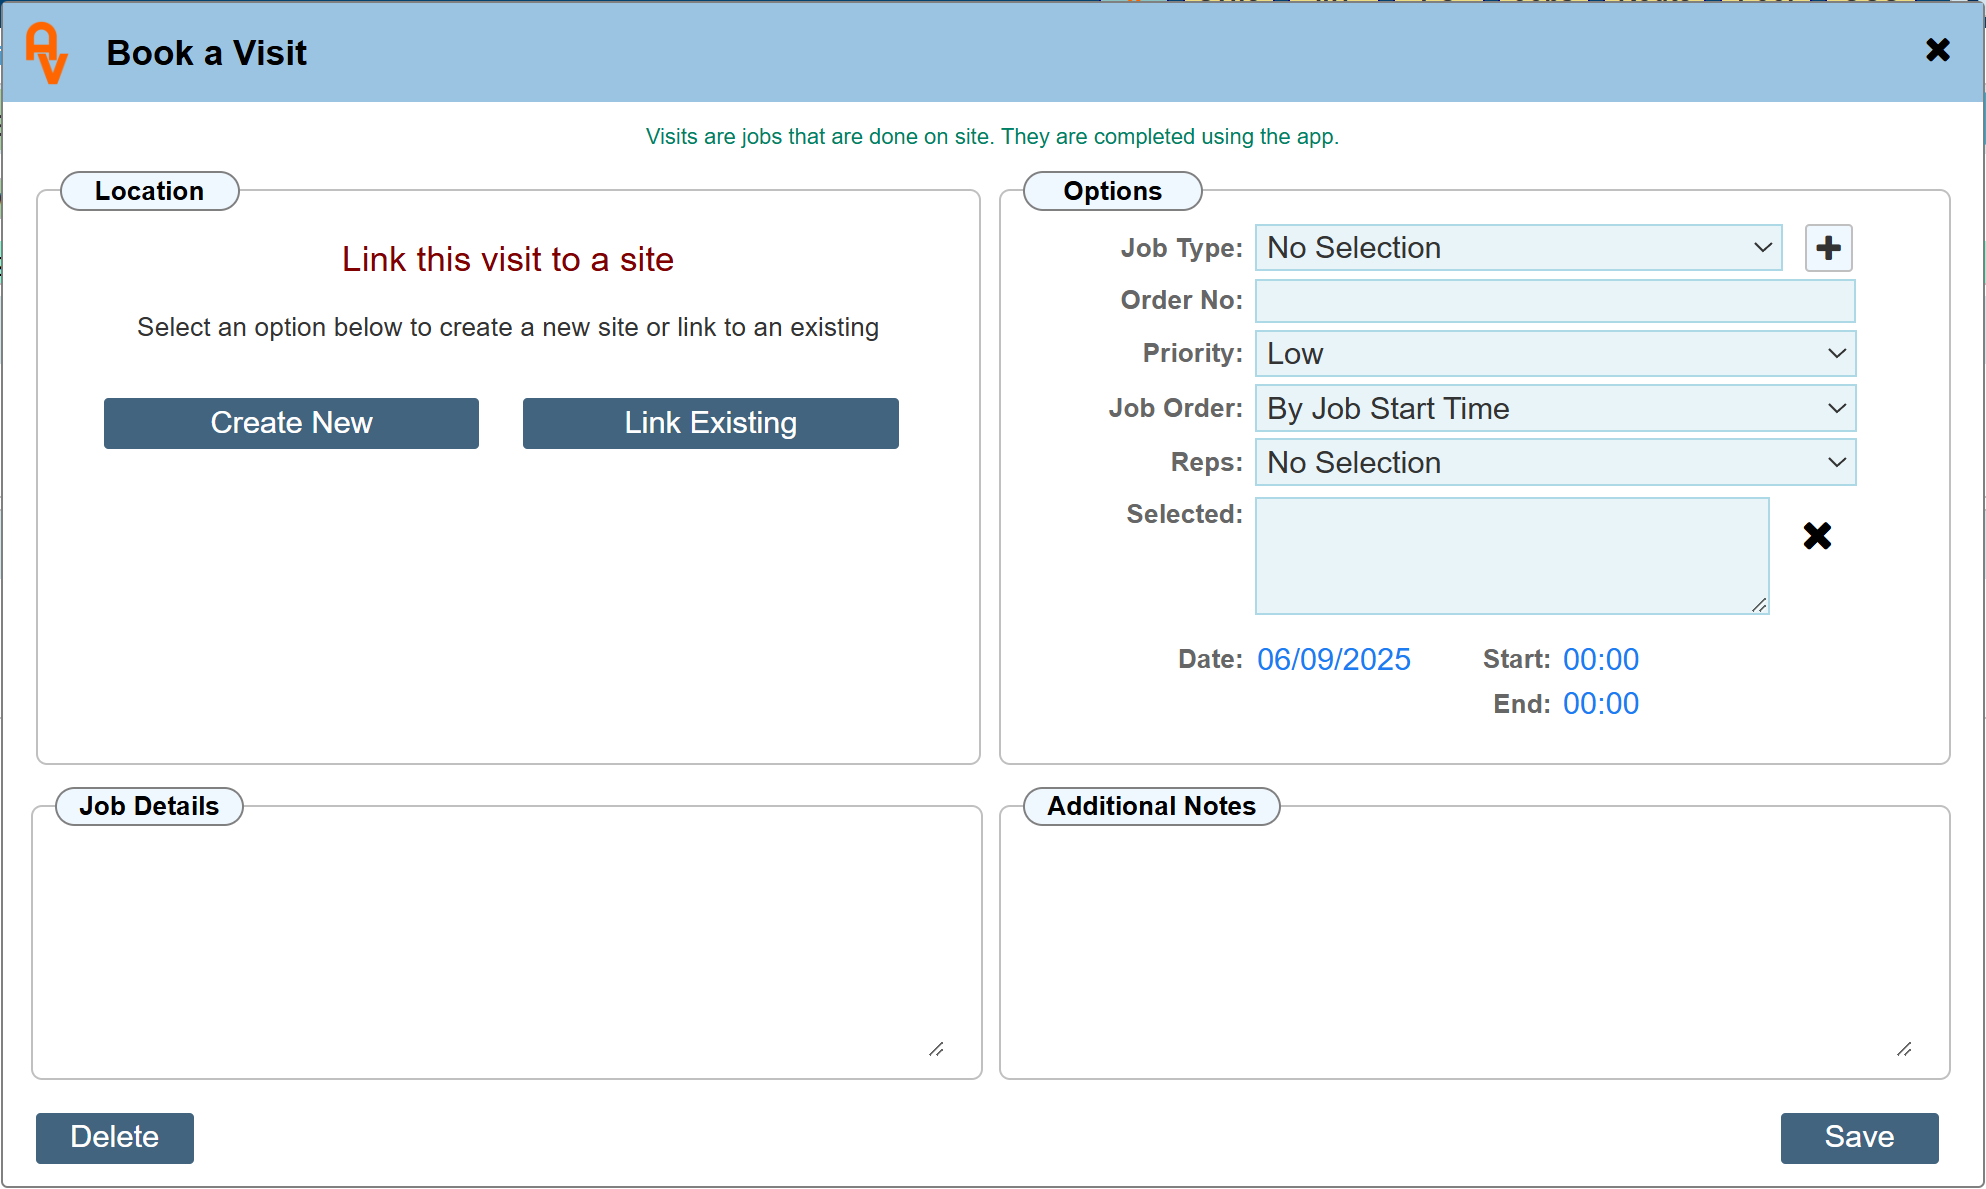
Click the 'Add' button to open the booking dialogue.
Set the Job Type
The Job Type drop-down menu is pre-populated with standard options. These can be customised or new ones added in the system settings. For this guide, please select 'Call Out'.
Allocate an Attending Representative
From the Rep drop-down list, select the individual who will be attending the visit. If you are currently testing the system, it is recommended that you select a different representative to prevent a potential log-out. The system prohibits using the same login credentials on two devices simultaneously.
Enter the Visit Date and Time
The booking dialogue will automatically default to the currently selected date. You can click on the date field to change it if needed. Similarly, click on the time field to edit the time of the visit.
Enter the Job Details
Use the Job Details section to provide a clear description of the work to be carried out by the engineer.
Saving the Booking
With the basic job details now entered, the booking can be saved. However, to ensure a representative can attend a customer's location, it is essential to include an address.
Create New
This option is used when the booking is for a completely new customer. Clicking 'Create New' opens the address dialogue for us to enter the name and address of the new location.
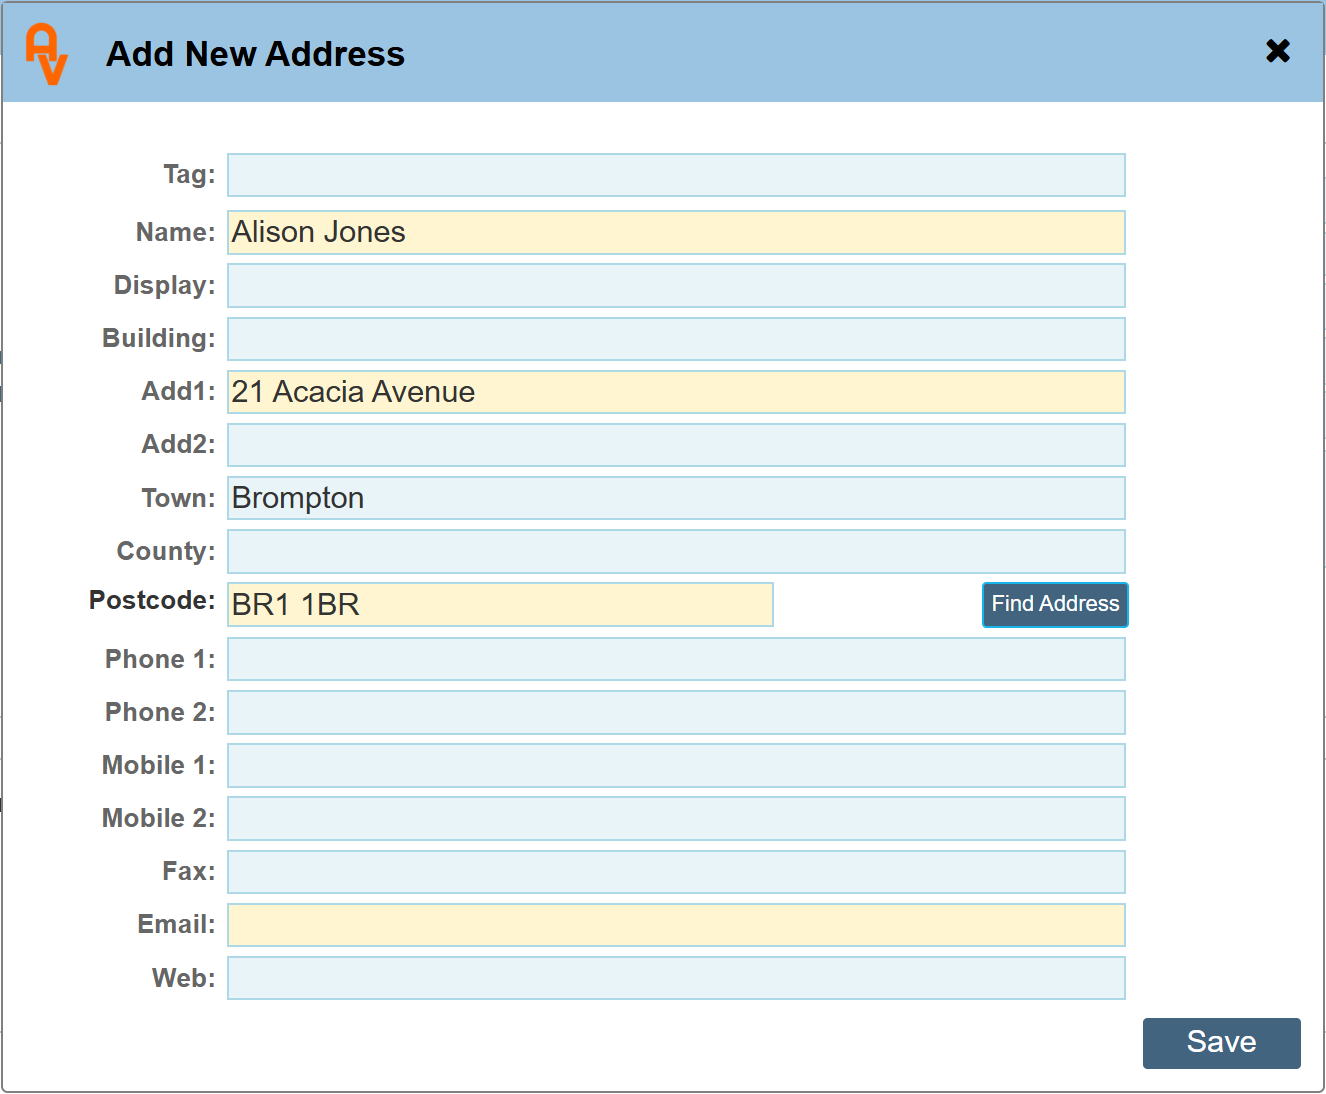
Finding a Site Address
To automatically populate the address details, simply enter the postcode and click 'Find Address'. A list of all corresponding addresses will then be displayed for you to select from.
Saving and Updating the Booking
Once the details are saved, the booking dialogue will refresh and reopen. The updated view will now be the full booking dialogue, displaying all available features. The Location panel will now reflect the site details you just entered.
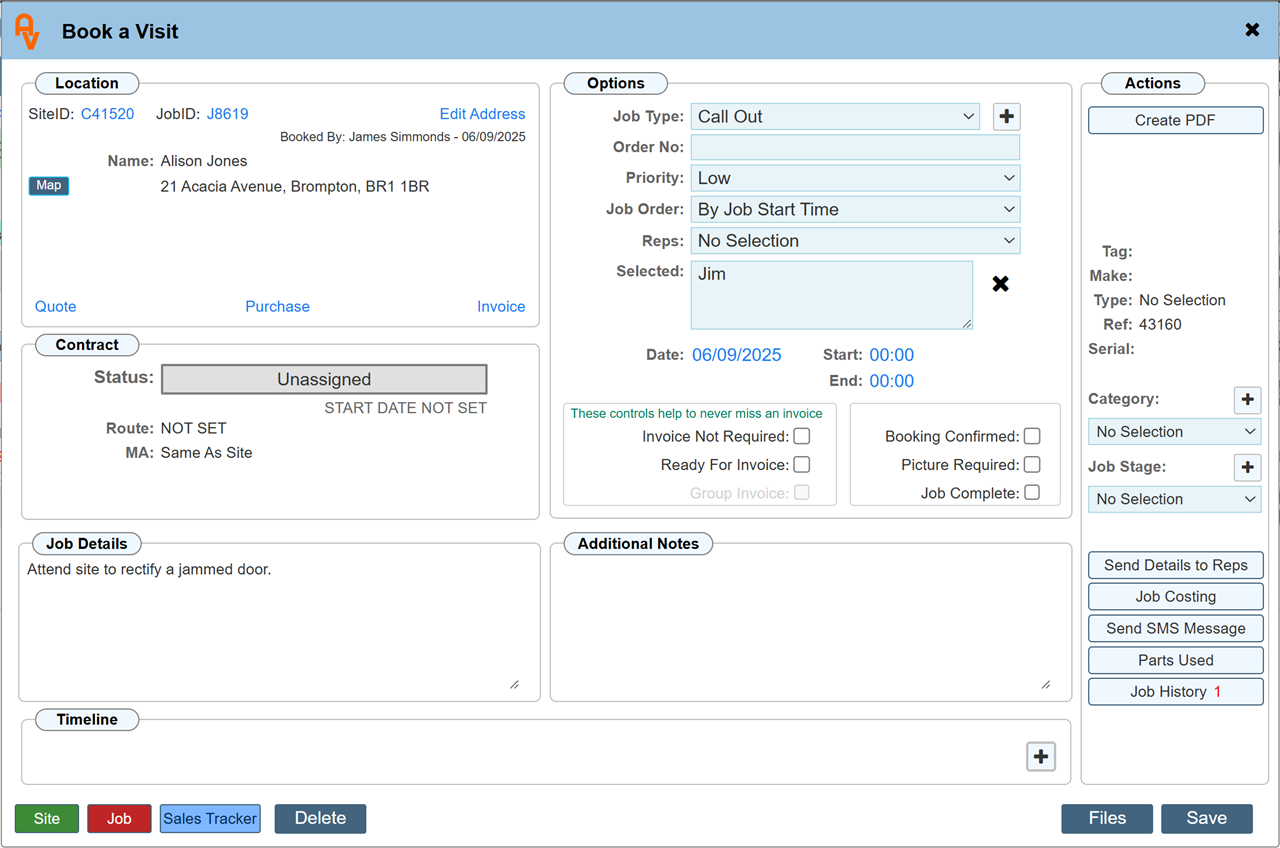
You may now close the booking dialogue to view the Diary. The booking we have just made will be shown.
Mobile App Integration
Once a representative is assigned to the booking, the job details are automatically sent to their Workforce Manager Mobile App. No further steps are needed to dispatch the job to the app. More information on mobile app functionality will be covered later in this guide.
Linking to an Existing Site
If you are creating a booking for a site you have previously created, you can link the new booking directly to the existing site rather than creating a new one.
It is crucial to link all subsequent visits to an existing site. This prevents the creation of duplicate records, as the site's details are permanently stored in the system for all future use.
On our original booking dialogue;
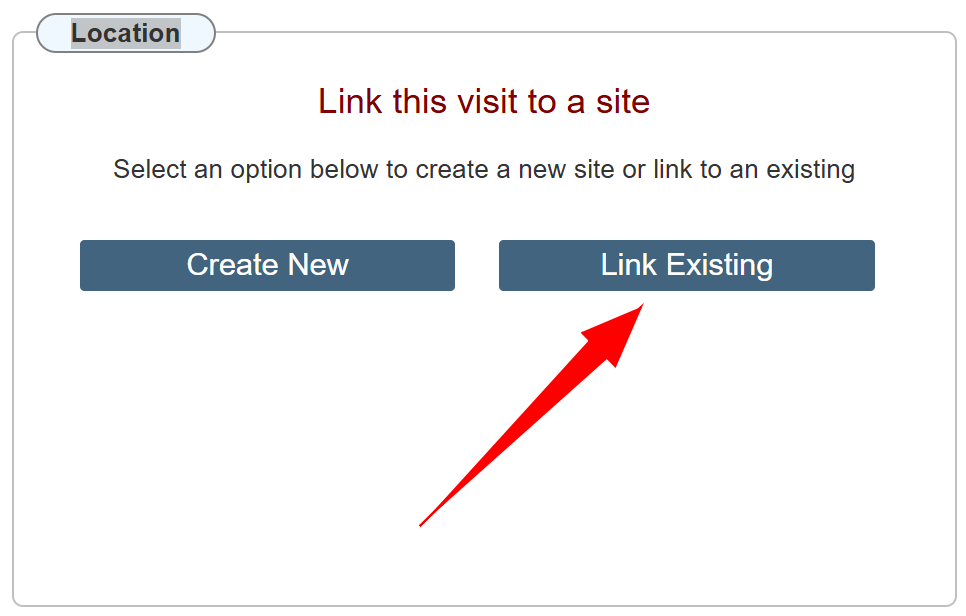
For this booking we are going to click 'Link Existing' where a new search dialogue will open.
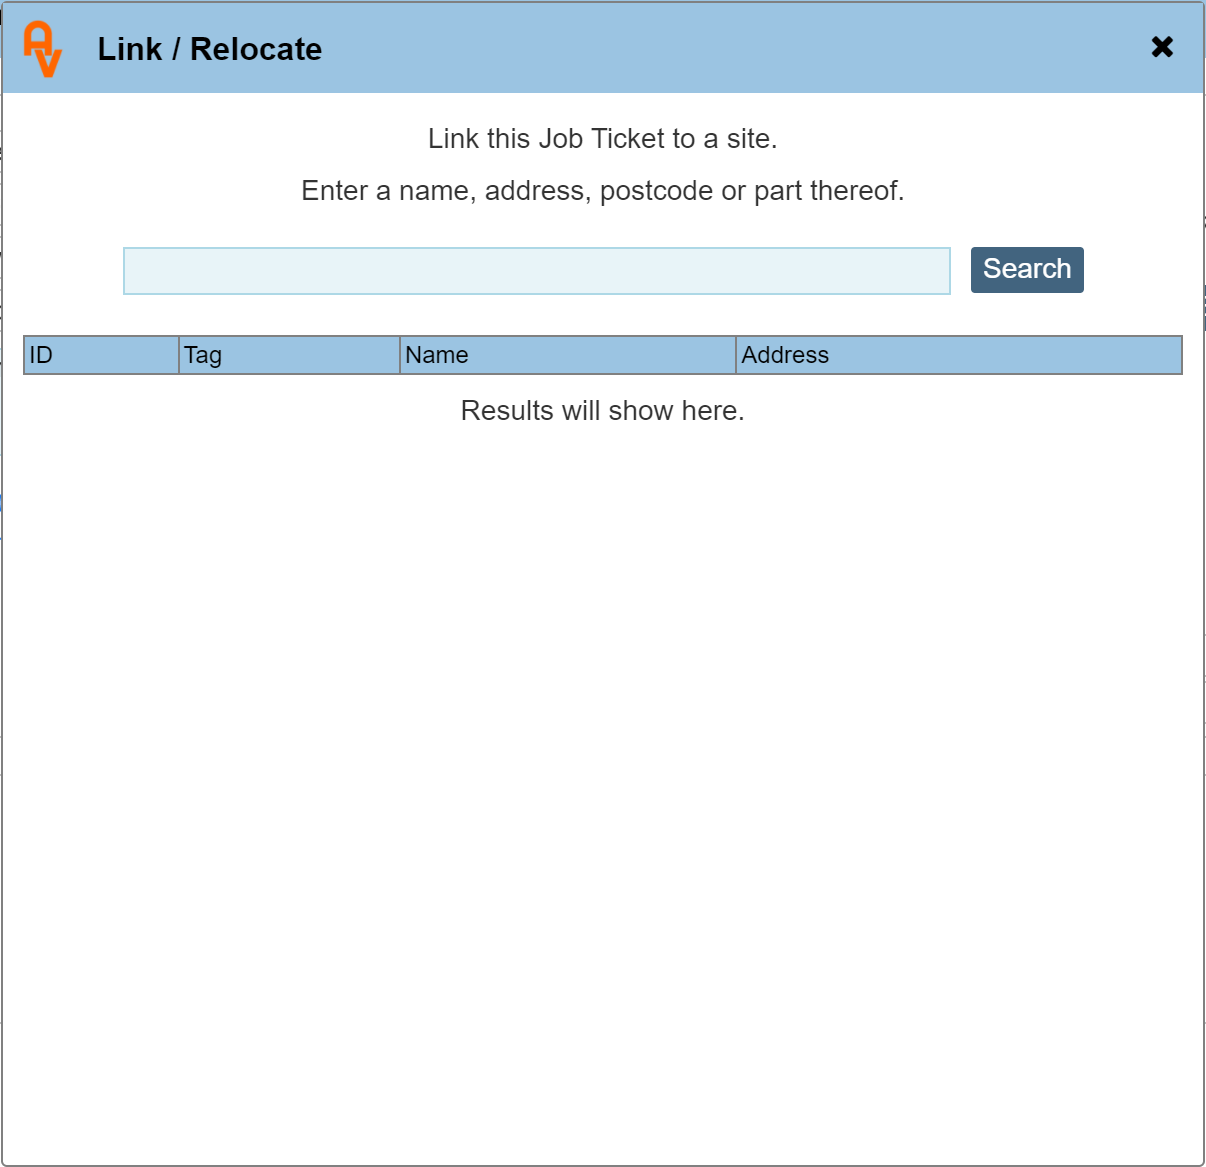
In the search dialogue we will enter 'Alison Jones' this is the name of the site we created earlier in the guide.
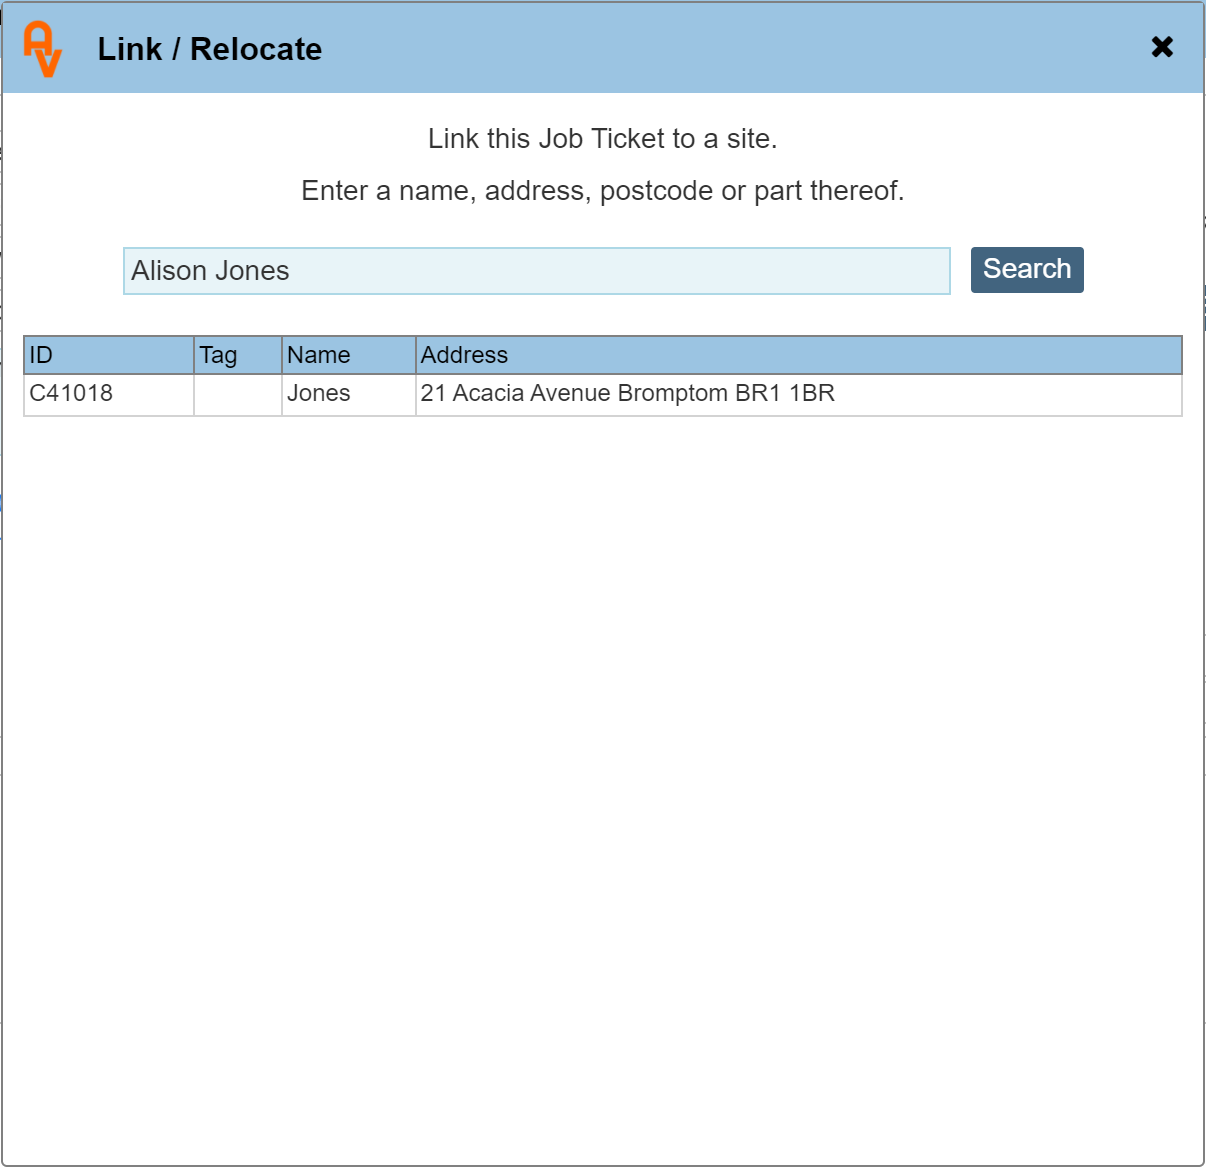
Search and Link a Site
After you click the 'Search' button, any matching sites in the system will appear. To link your booking, simply click on your site from the list. The booking dialogue will then reopen, displaying the newly linked site details.
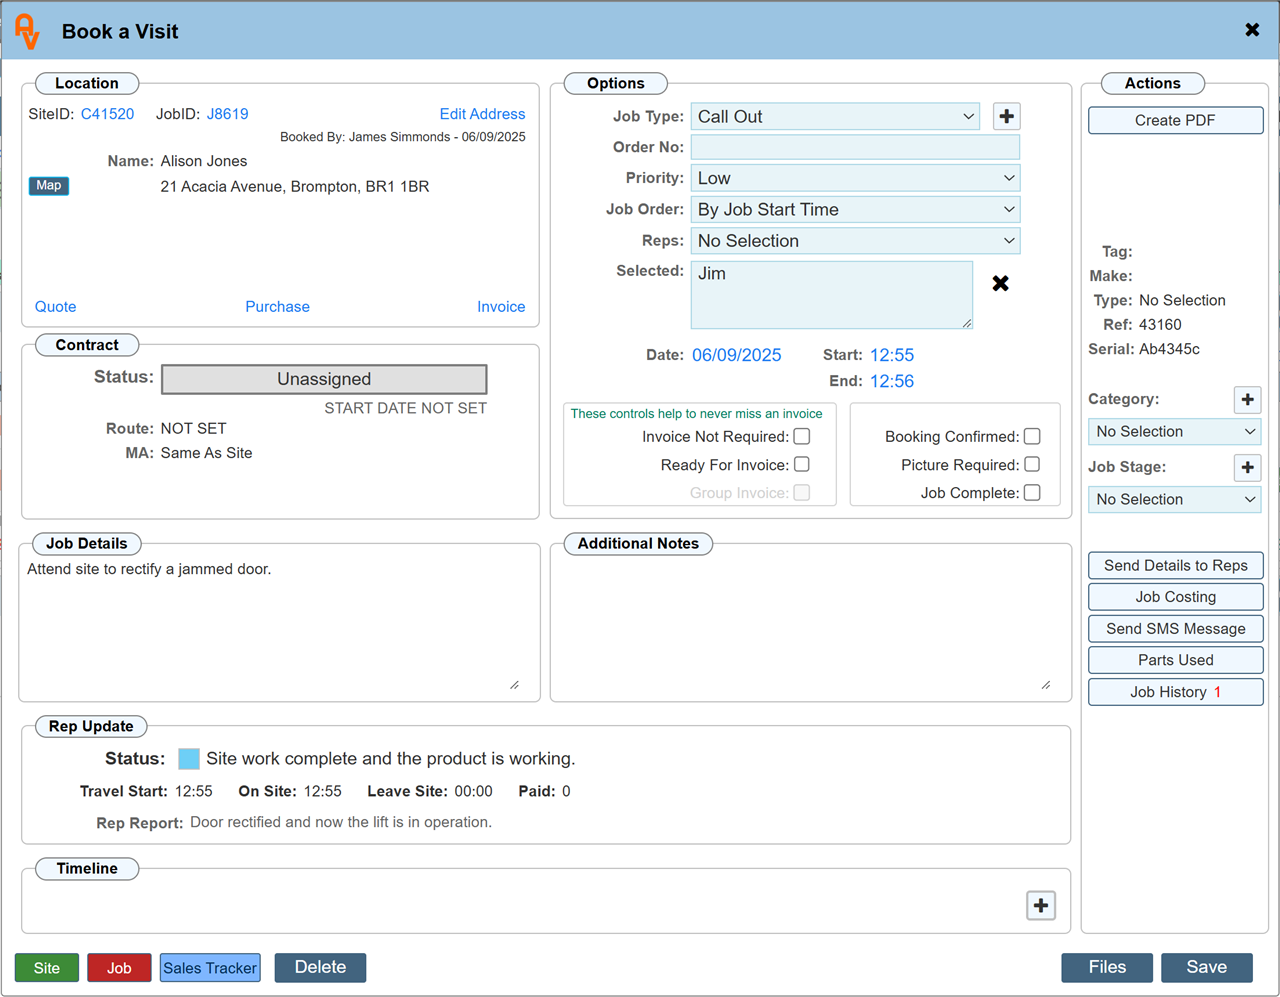
View the Booking
Clicking on the entry will open the full booking dialogue, where the completed booking will also be visible in the diary.
Responding to Bookings via the Mobile App
Next, we will explain how a representative can respond to the bookings you have created using the Workforce Manager Mobile App.
Viewing Jobs on the App
If you now open the Workforce Manager Mobile App and log in as the engineer you assigned to the jobs, you will see the two jobs that have been booked.
.jpg)
We will click on the first job to open the details
.jpg)
Accepting and Managing Jobs
A representative can choose to accept the job. If the 'Reject' button is selected instead, the representative will be prompted to provide a reason for the rejection.
At any point, clicking the 'Map' button will provide directions from the user's current location to the site. This feature uses Google Maps on Android devices and the Maps app on iOS devices.
.jpg)
Job Status Updates
Once a job is accepted, the first step is to indicate that you are on your way and have subsequently arrived at the site. These stages must be confirmed before any job details can be entered into the app.
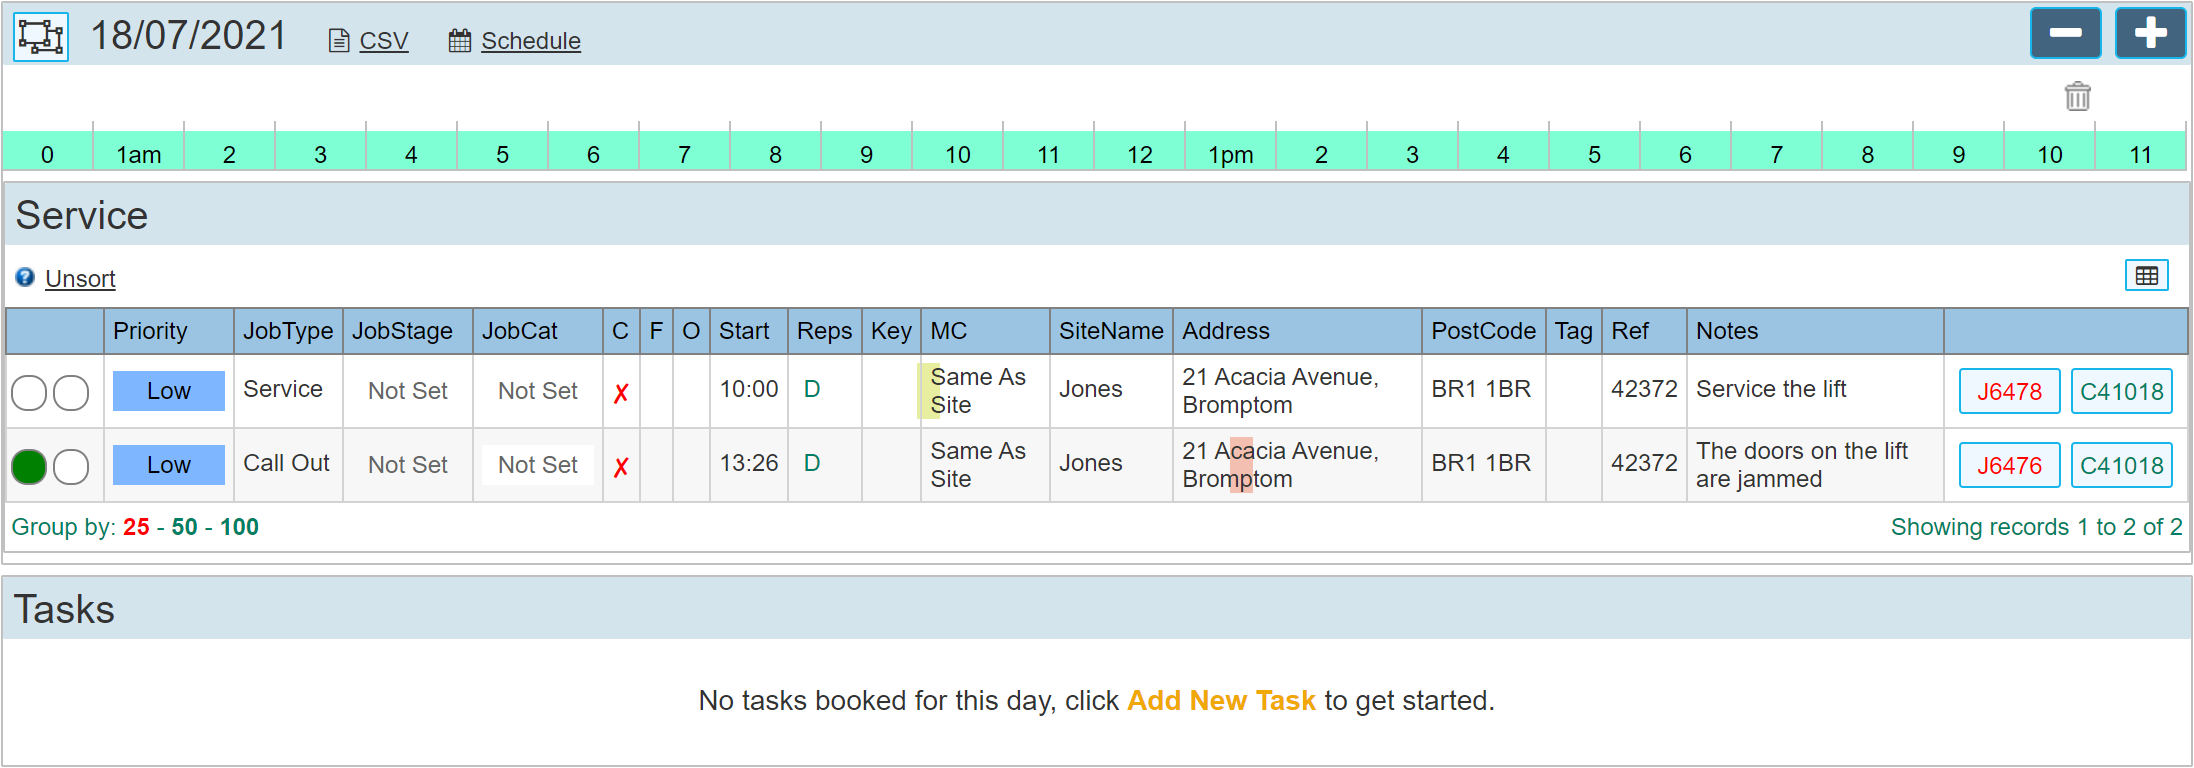
On the web diary, each of these stages is represented by two small circles on the left-hand side of the grid. After you refresh the screen, you will notice their colours have changed. When a job is accepted, the left-hand circle will turn green (it would turn red if the job was rejected).
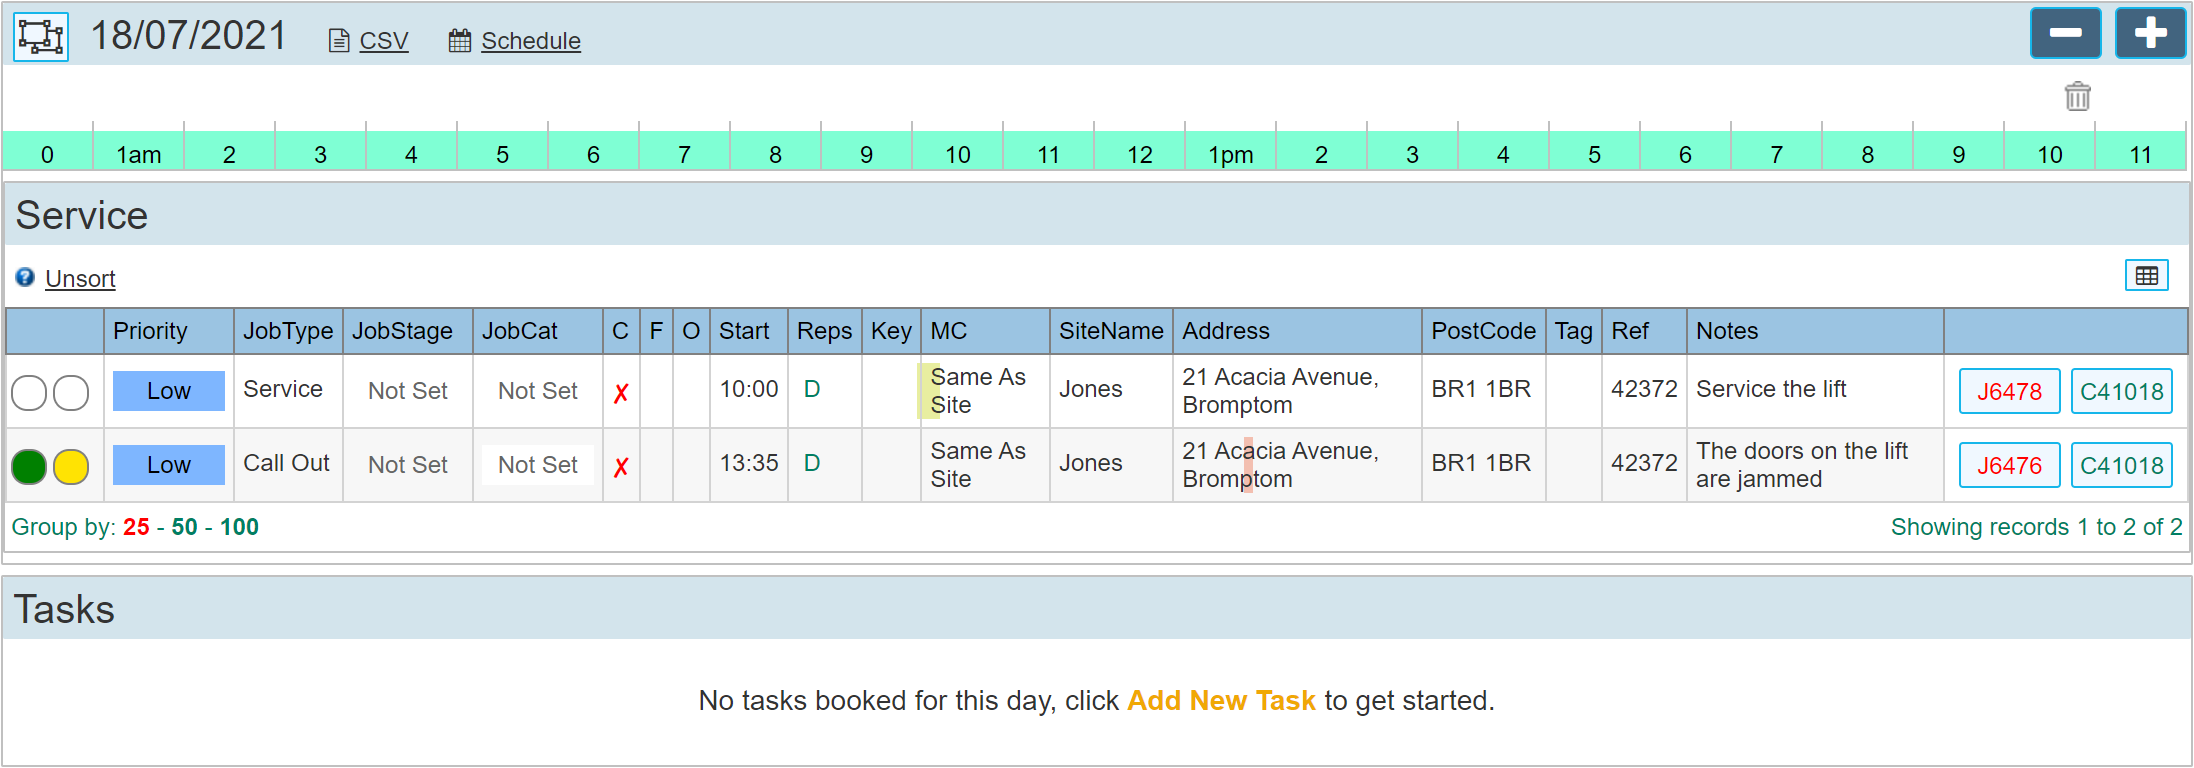
Once the rep using the app indicates that they have arrived On-Site the RH circle changes to 'Yellow'
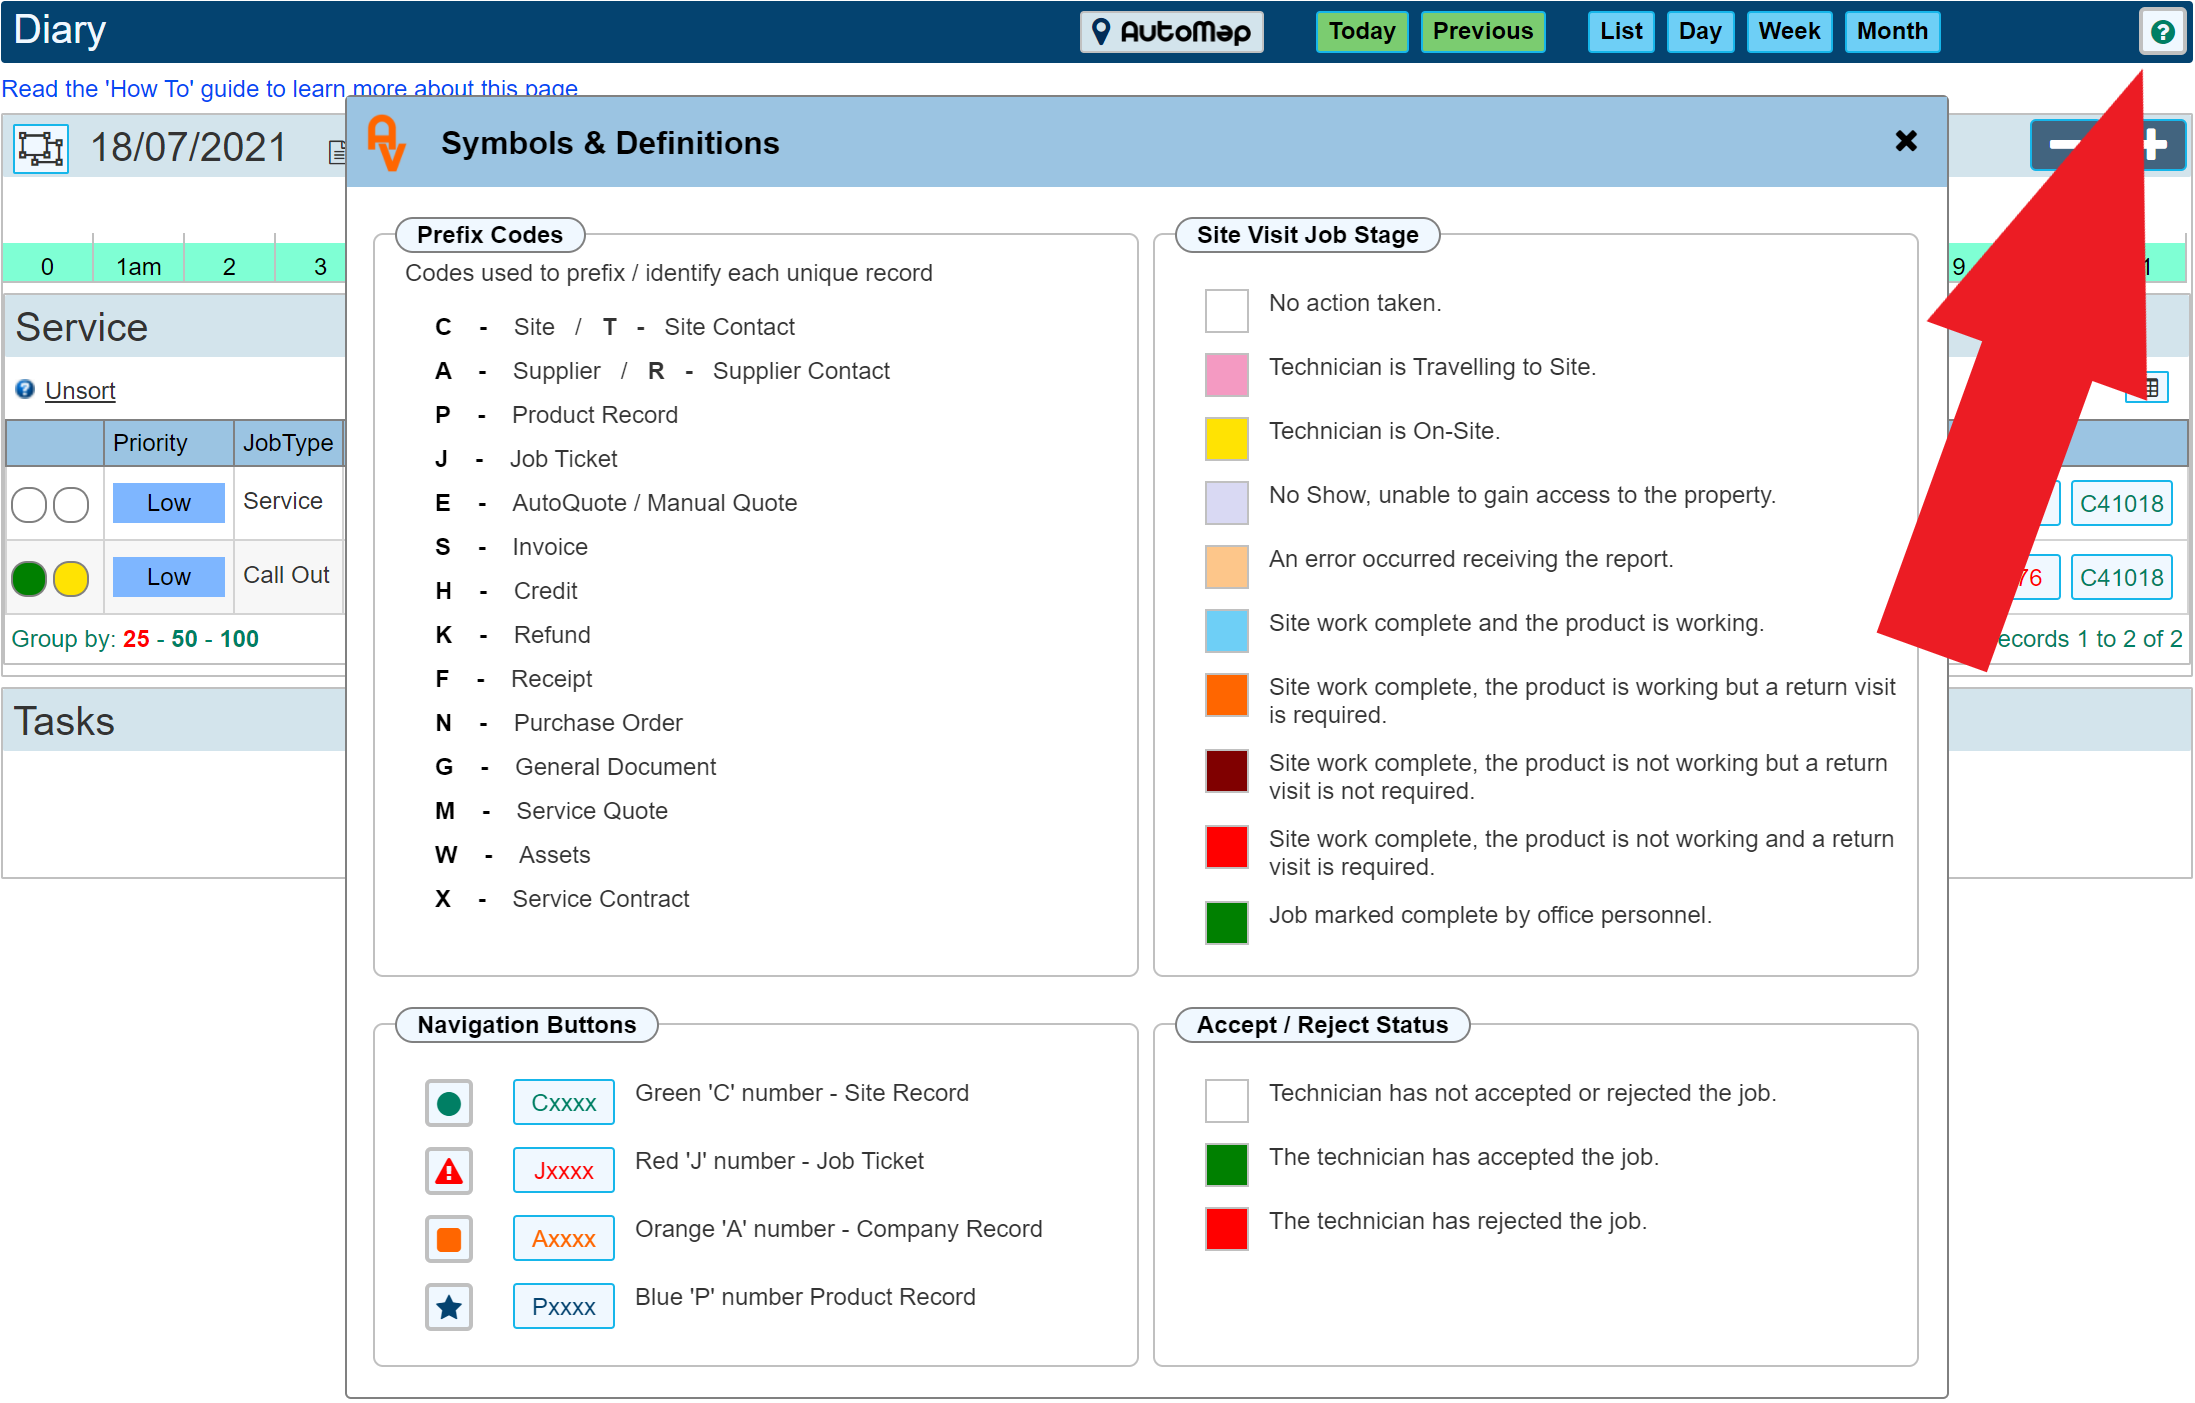
These indicators are very useful in allowing us to know at what stage the engineer has reached. There is a Symbols & Definitions KEY showing what all of these symbols mean.
Finishing the Job On Site
Once the Rep has completed the work On-Site, pictures can be taken and a rep report completed.
1.jpg)
Save the report by clicking the 'Disk' icon at the top right of the screen. This will invoke a series of questions about the job.
- Is the product serviceable. I.E. is it still working.
- Will a return visit be required.
- Was the job done Outside of normal working hours.
Once these questions have been answered, the details are then automatically sent back to the server for viewing on your diary.
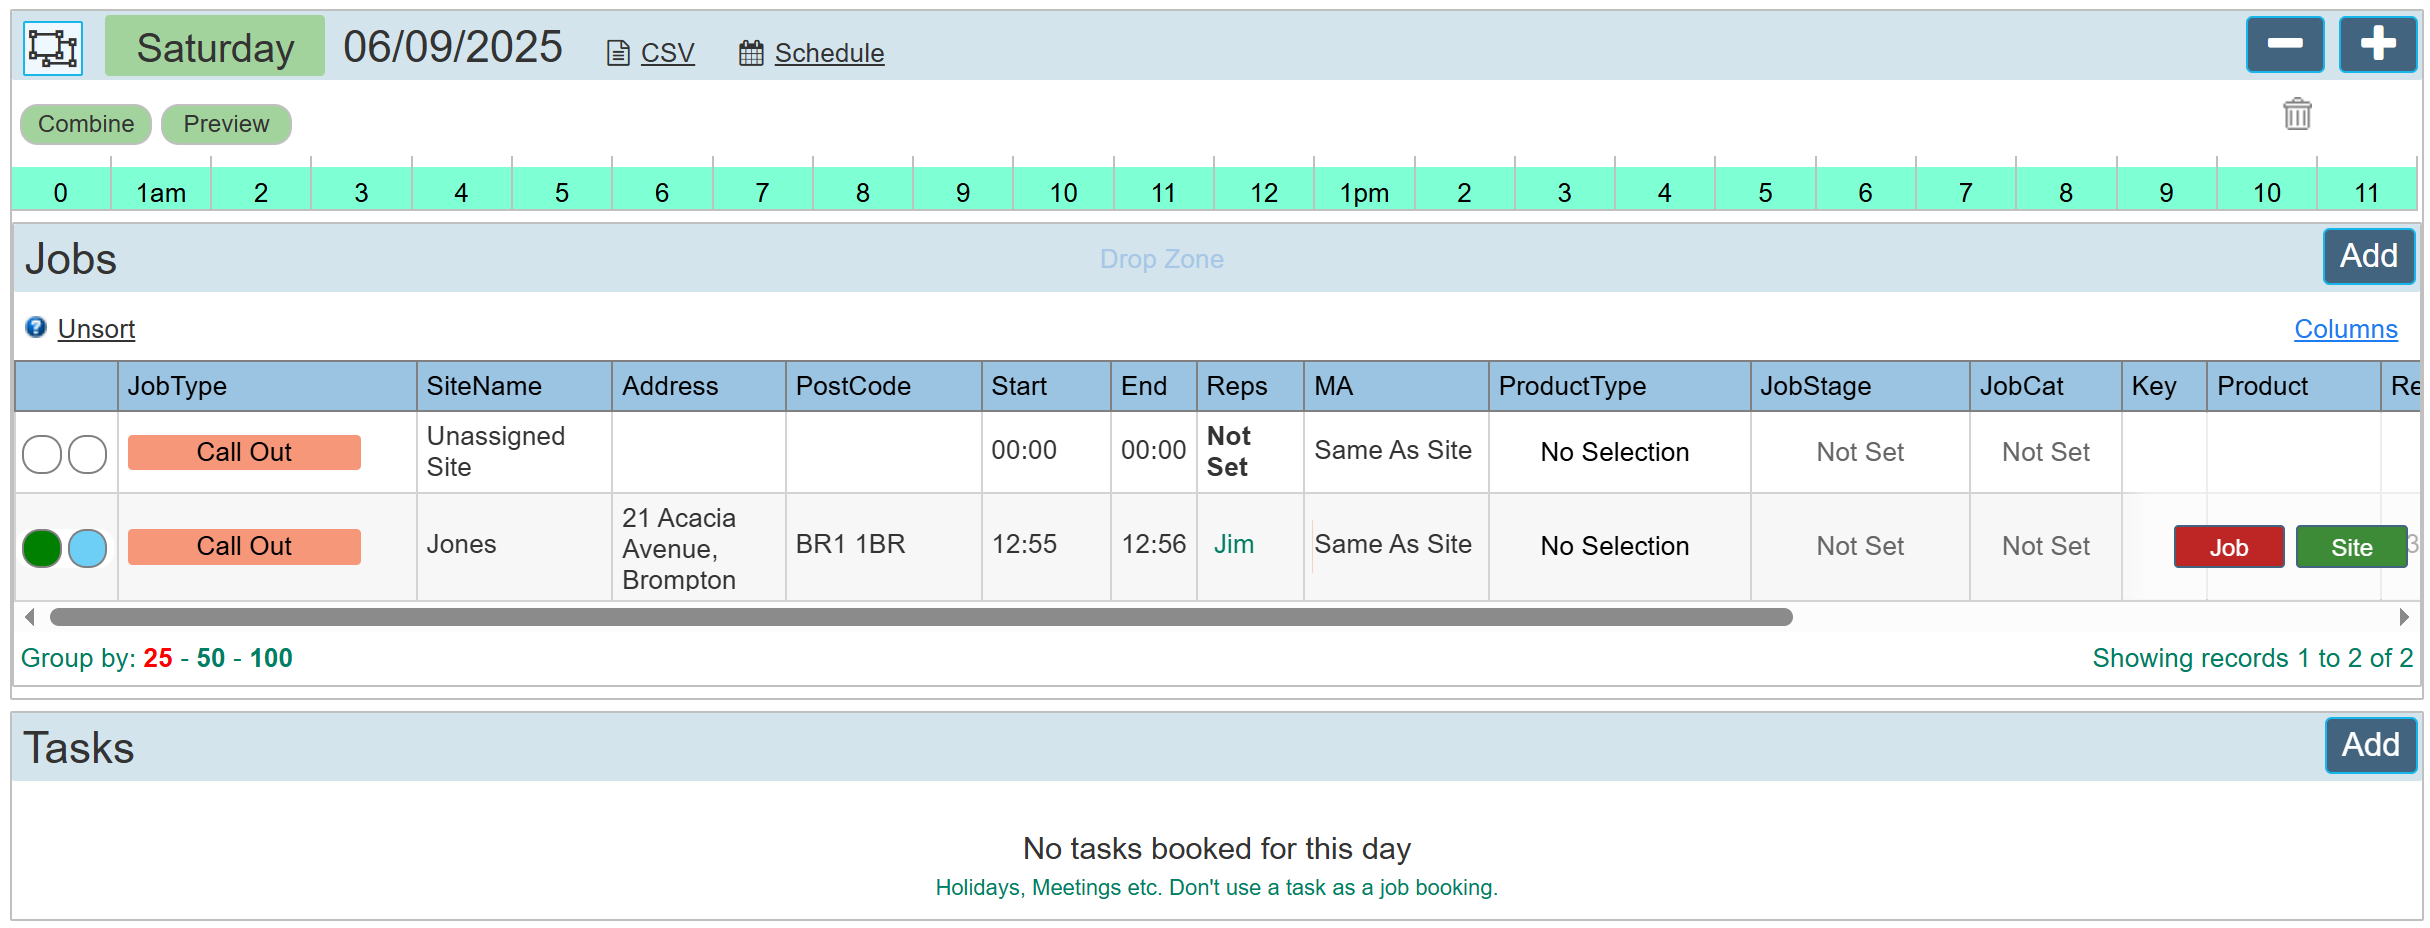
If we click within the grid for our completed job to open the booking dialogue we will see the details of the completed job.
Additional Features and Questions
The steps outlined above demonstrate the simplest method for booking jobs and dispatching them to the mobile app. While there are many more features and customisation options, this guide focuses on the most straightforward approach to get you started.
Common Questions
Managing Agents
If your business works on behalf of other companies, you can link them to each site as 'Managing Agents'. For example, a local authority responsible for numerous tenants can be set as the Managing Agent for all related sites, allowing you to group them together for easy management.
Service Checklists
For jobs that involve equipment installation or servicing, you can set up a series of questions or checks. These custom Service Checklists can be created for each product type and sent directly to the app, ensuring all necessary steps are completed before the job is signed off.
PDF Job Tickets
Once a job is finished, all collected details can be automatically formatted into a professional PDF Job Ticket. You can design these tickets to include your company's logo and address. Additionally, you can create unique ticket designs for the companies you work for, featuring their specific branding and details.
Viewing Site and Job Records
While this guide focuses on creating records directly from the diary page, you can also view the full Site record or Job Ticket page at any time. In the diary, you will find two buttons to the right of each booking. Clicking the red button will take you to the Job Ticket page, while the green button will open the Site Record page, which contains all job tickets created for that specific location.
For more information, please consult the various 'How To' guides. If you need further assistance or clarification on any of our guides, please contact us through the Support panel.