The aim of Job Categories is to allow a specific Job Type to be sub divided into a number of similar types. E.G. The Job Type for 'Service' (or Planned Maintenance) would include all jobs where a service visit has to be attended.
Although they are all Service Visits, there may be instances where you would be required to identify some of these visits as one type or another, including slightly different layouts for the Job Ticket design. This can be achieved through 'Job Categories'
A perfect example of this would be when your company does servicing work on behalf of another company. You may have a 'Service' Job Ticket design already in place, but the company you are doing work on behalf of requires you to use a Job Ticket design that includes their name, address and logo instead of yours. In this instance, the job is still a service job, but the design of the PDF Job Ticket is required to be different. Creating a 'Job Category' in the name of this company allows you to maintain all the Job Tickets within the Service tab, but allows you to create a unique Job Ticket design for this particular company.
To create Job Categories, navigate to; Settings > Custom Values > Job Category
The below image shows the Job Category section where we have already entered several Categories.
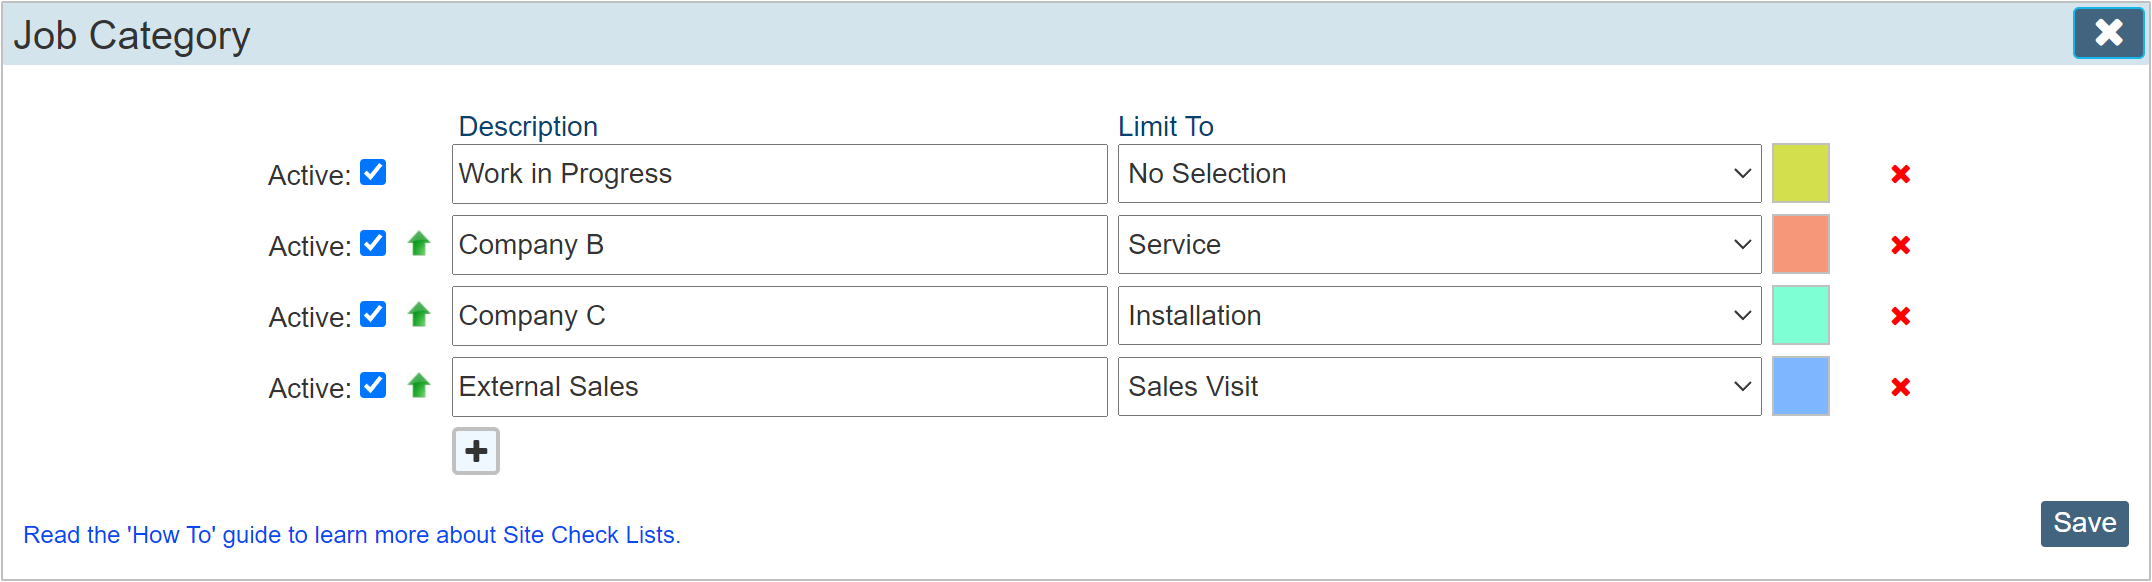
Description
A title for your Job Category
Limit To
This allows you to limit the Category to a specific Job Ticket name. E.G. if you have a number of Job Categories that are designed around the Service Job Type, then you may select the 'Service' (or Planned Maintenance) Job Ticket name in the Limit To drop down box. This will make sure that the option is only available when in that specific Job Ticket type.
If 'No Selection' is selected, then the Category will be available for all Job Ticket Types.
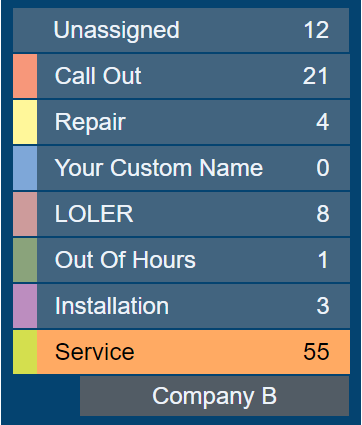
While a 'Limit To' selection has been made, the Category will be available for instant viewing on the Main Diary page LH menu when clicking on the Job Ticket type it is limited to. The image below shows the 'Service' tab having been clicked then the 'Company B' tab below is then visible allowing you to view all the Job Tickets specifically linked to that Category.
The Colour Option
Clicking the colour square towards the RH side of each category line allows you to colour code the Category so that when viewing on the diary, they are easily identified.
Printing / Email
The print dialogue and email module will automatically pick up the selected Job Category PDF design. If a design has not been created, then the main Job Ticket design will be used. This may be something that is required if all you want to do is categorise the Job Tickets into separate titles but they all actually use the same PDF design.
|
If an Active Job Ticket design does not exist, then the main Job Ticket design will be used.
|