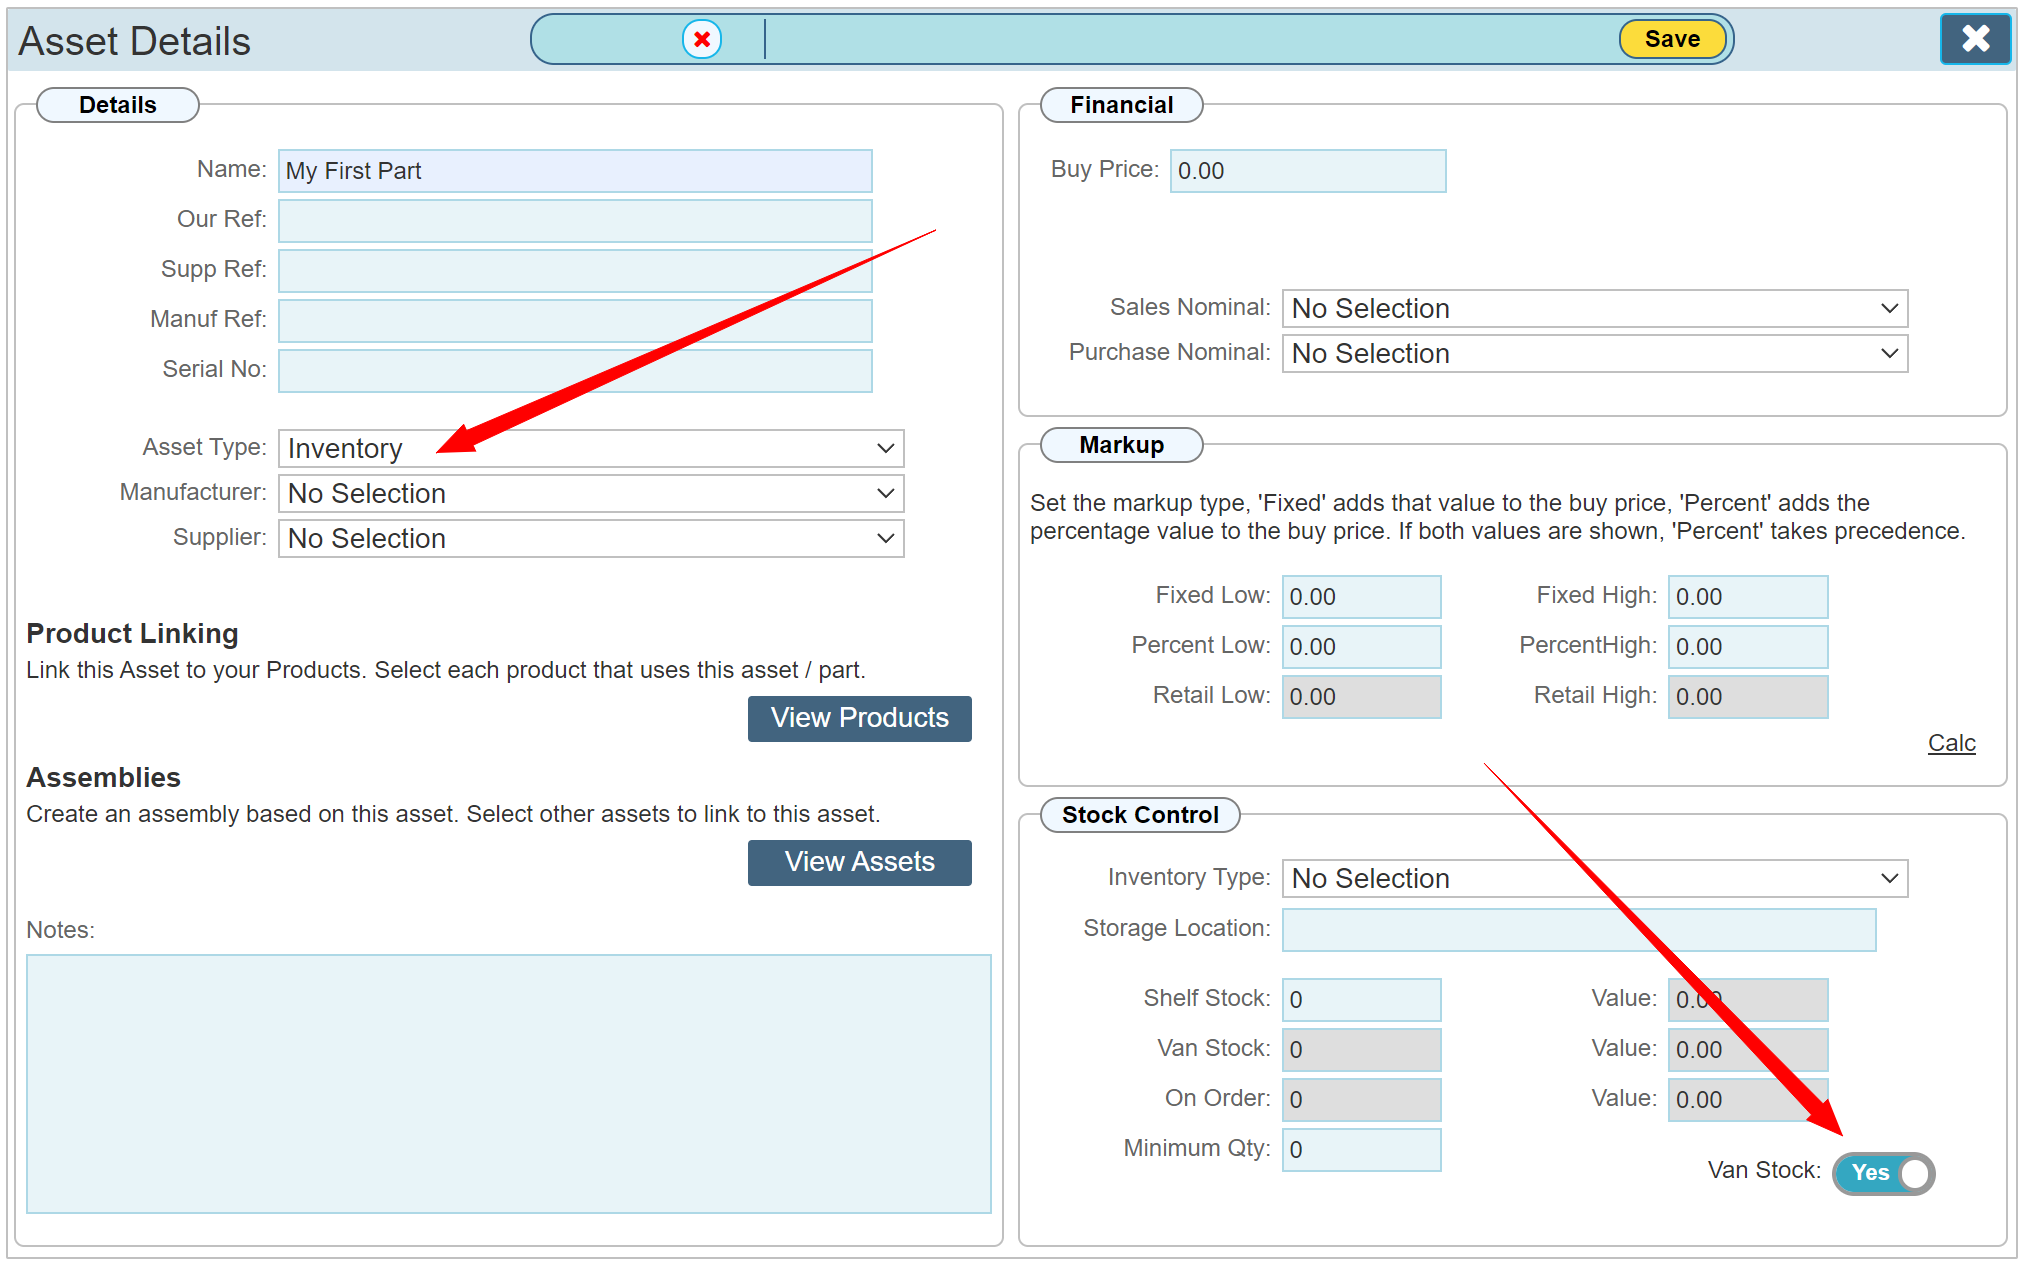
Each Asset that is assigned as 'Inventory' created within the asset list can be designated 'Van Stock'.
Create the asset
Below is a new asset created by clicking the 'Assets' top menu button then clicking 'Add' to create a new Asset. It must be Asset Type 'Inventory' (or a descriptive name associated with Inventory within the custom values section)
To allocate this as 'Van Stock' check the Van Stock toggle. Once the record is complete, Click Save.
Once an asset is recorded as 'Van Stock', it is then available to add globally across all vans when completing the engineer report and clicking the 'Pick' button to pick the parts and quantities used.
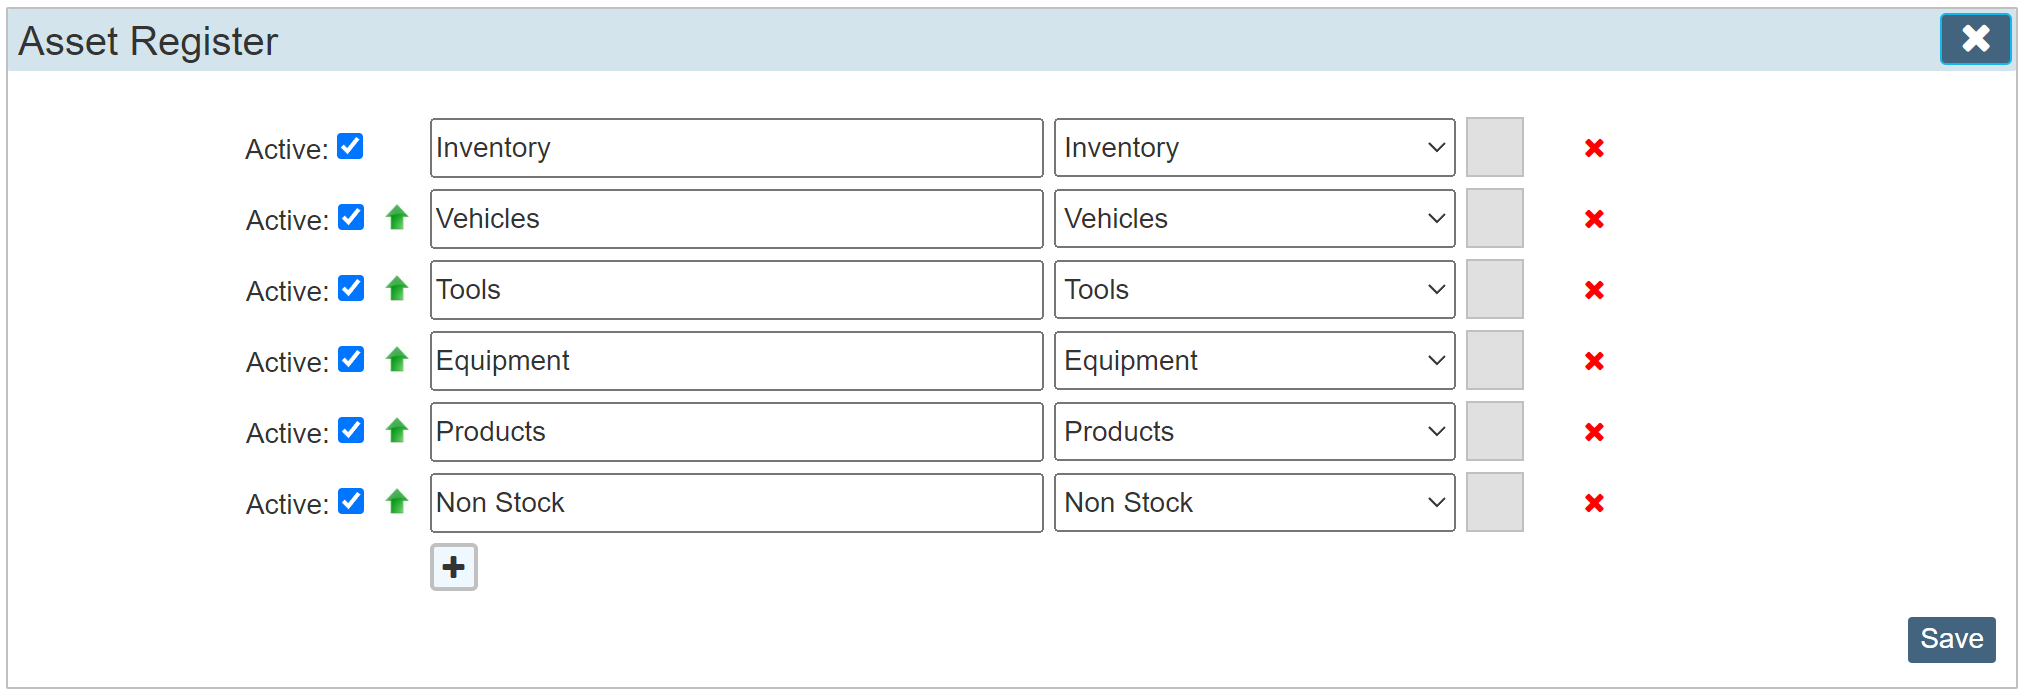
Edit the Asset Type List
There will be a number of pre defined asset types that fit most situations. You may edit or add to these as required.
To edit the asset type list, navigate to Settings > Custom Values > Asset Register to make changes.
Below is a typical list of Asset Types as listed in Custom Values.
For every Asset you have created, those listed as 'Inventory' type will show the 'Van Stock' toggle.
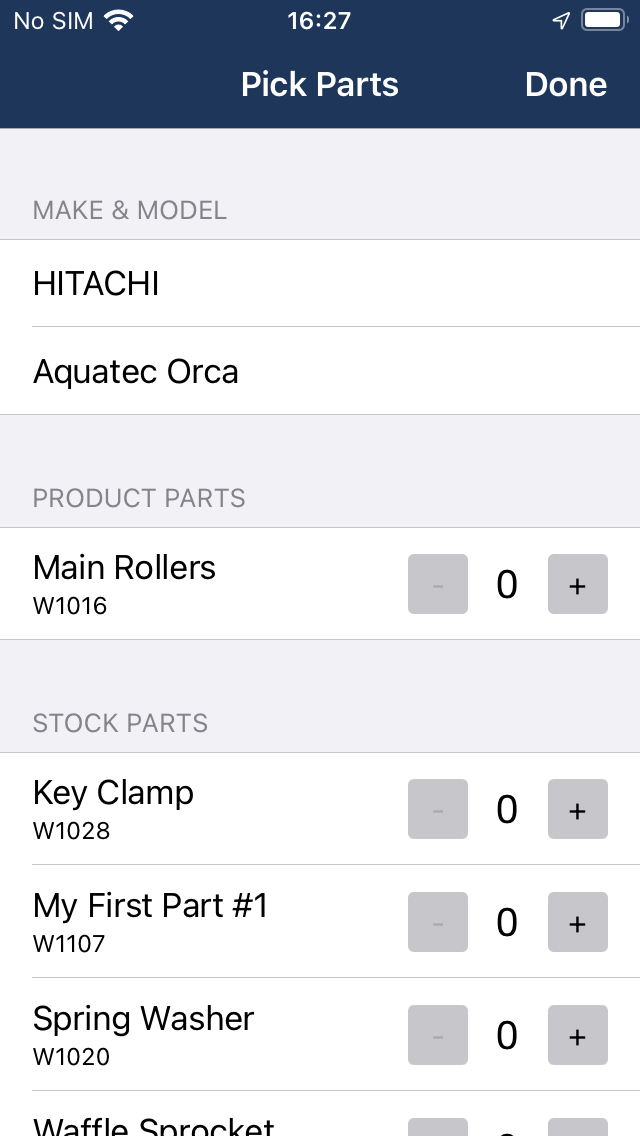
See the part on the App
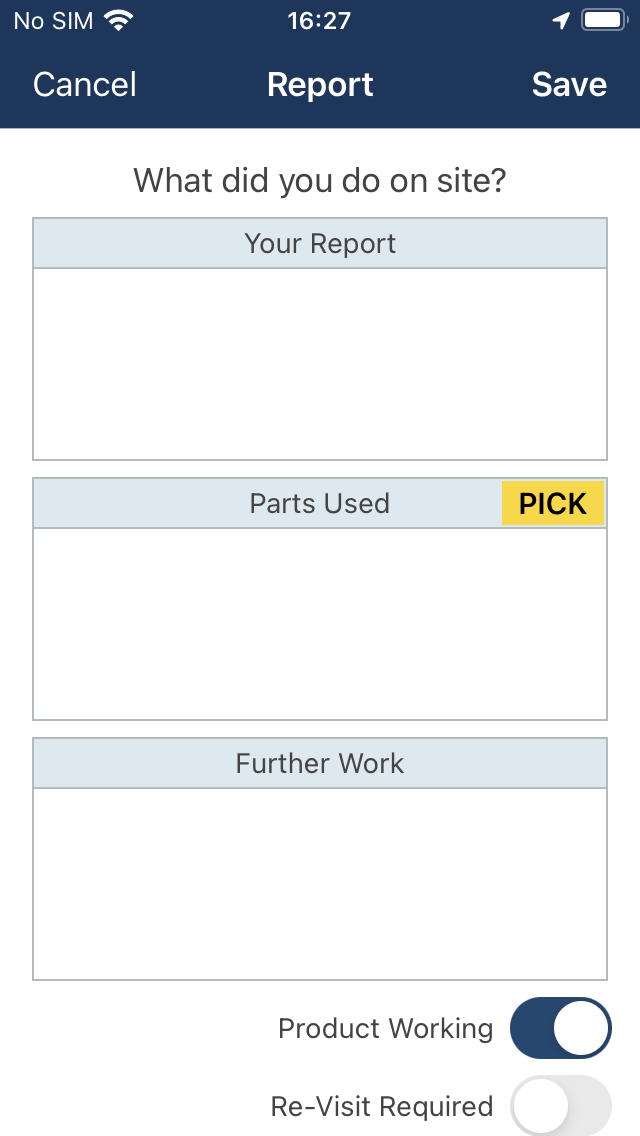
Open the app rep report and click the yellow button 'Pick'
Our new part (labelled #1 for clarity in our demo) can be seen in the grid.
Show Asset van allocations
Within the Assets section, click the 'Vehicle Stock' button. This will show a list of all assets allocated to vehicles. The first view as indicated for vehicle 'No Selection' shows us the quantities allocated to vans where the Driver has not been allocated. It is advisable when creating a vehicle Asset Type to always allocate a driver. If not then all vehicles without a driver allocated will draw from the same stock quantity allocation as shown in this view.
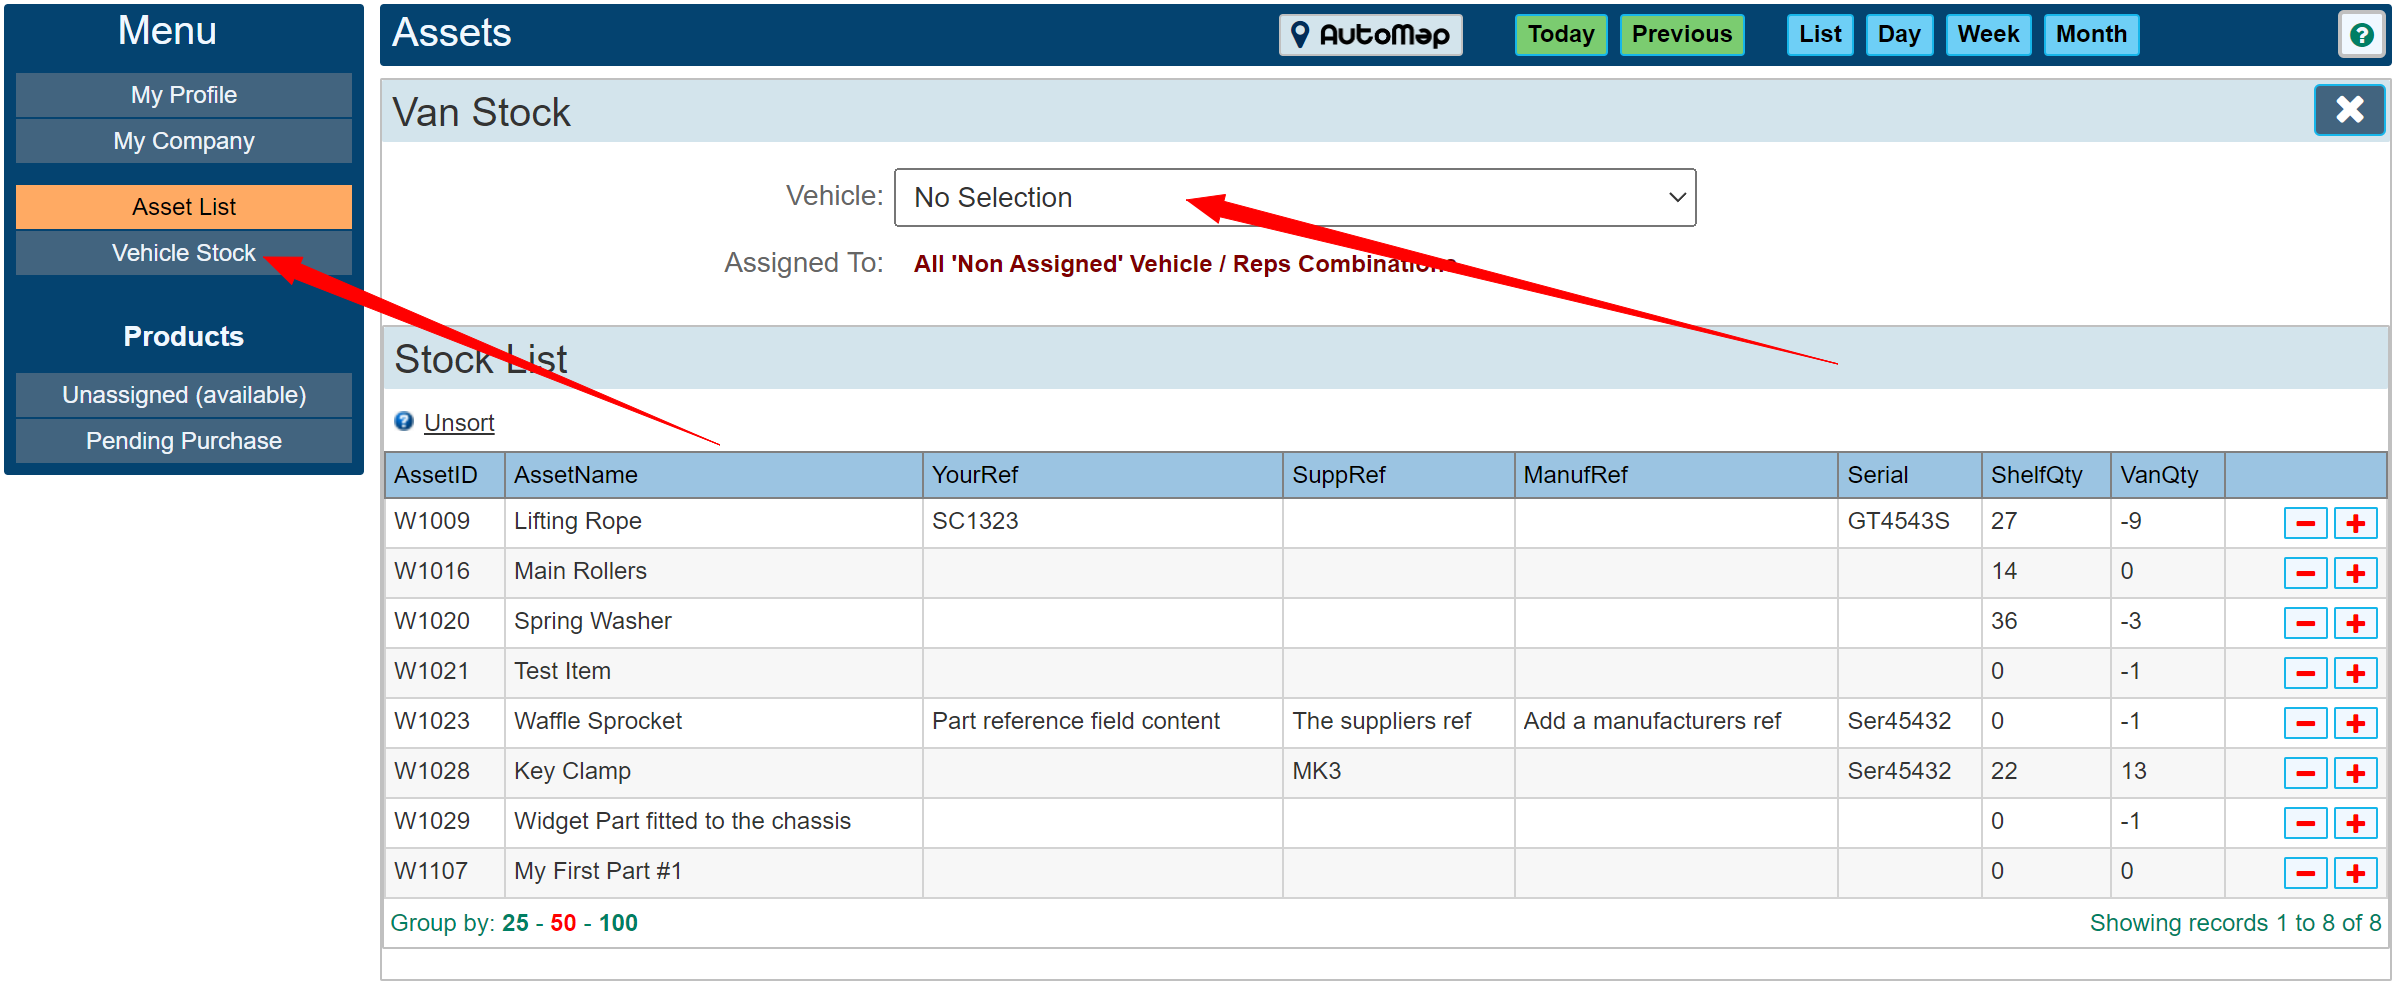
Particular notice must be made of the 'VanQty' column. This shows how many parts are available (or not) across all the vehicles not allocated to a driver. On changing the drop down list, this is the column that changes to show stock levels on each van.
It can be noted that the 'VanQty' is currently zero. This does not mean the rep cannot select the part on the app, but without setting stock levels, what will happen when used on the app is that the 'VanQty' value will begin to go negative as the reps use the part.
Specify the use of an asset on the app.
Using the app, we are going to click the plus button to use 3 of our new parts.
.png)
Once we save this on the app, the parts used will show both on the app and also on the Job Ticket.
If we go back to our Vehicle Stock list, we will see that in this instance, the 'VanQty' column still says zero. This is because the rep completing the allocation of the part is assigned to a particular vehicle.
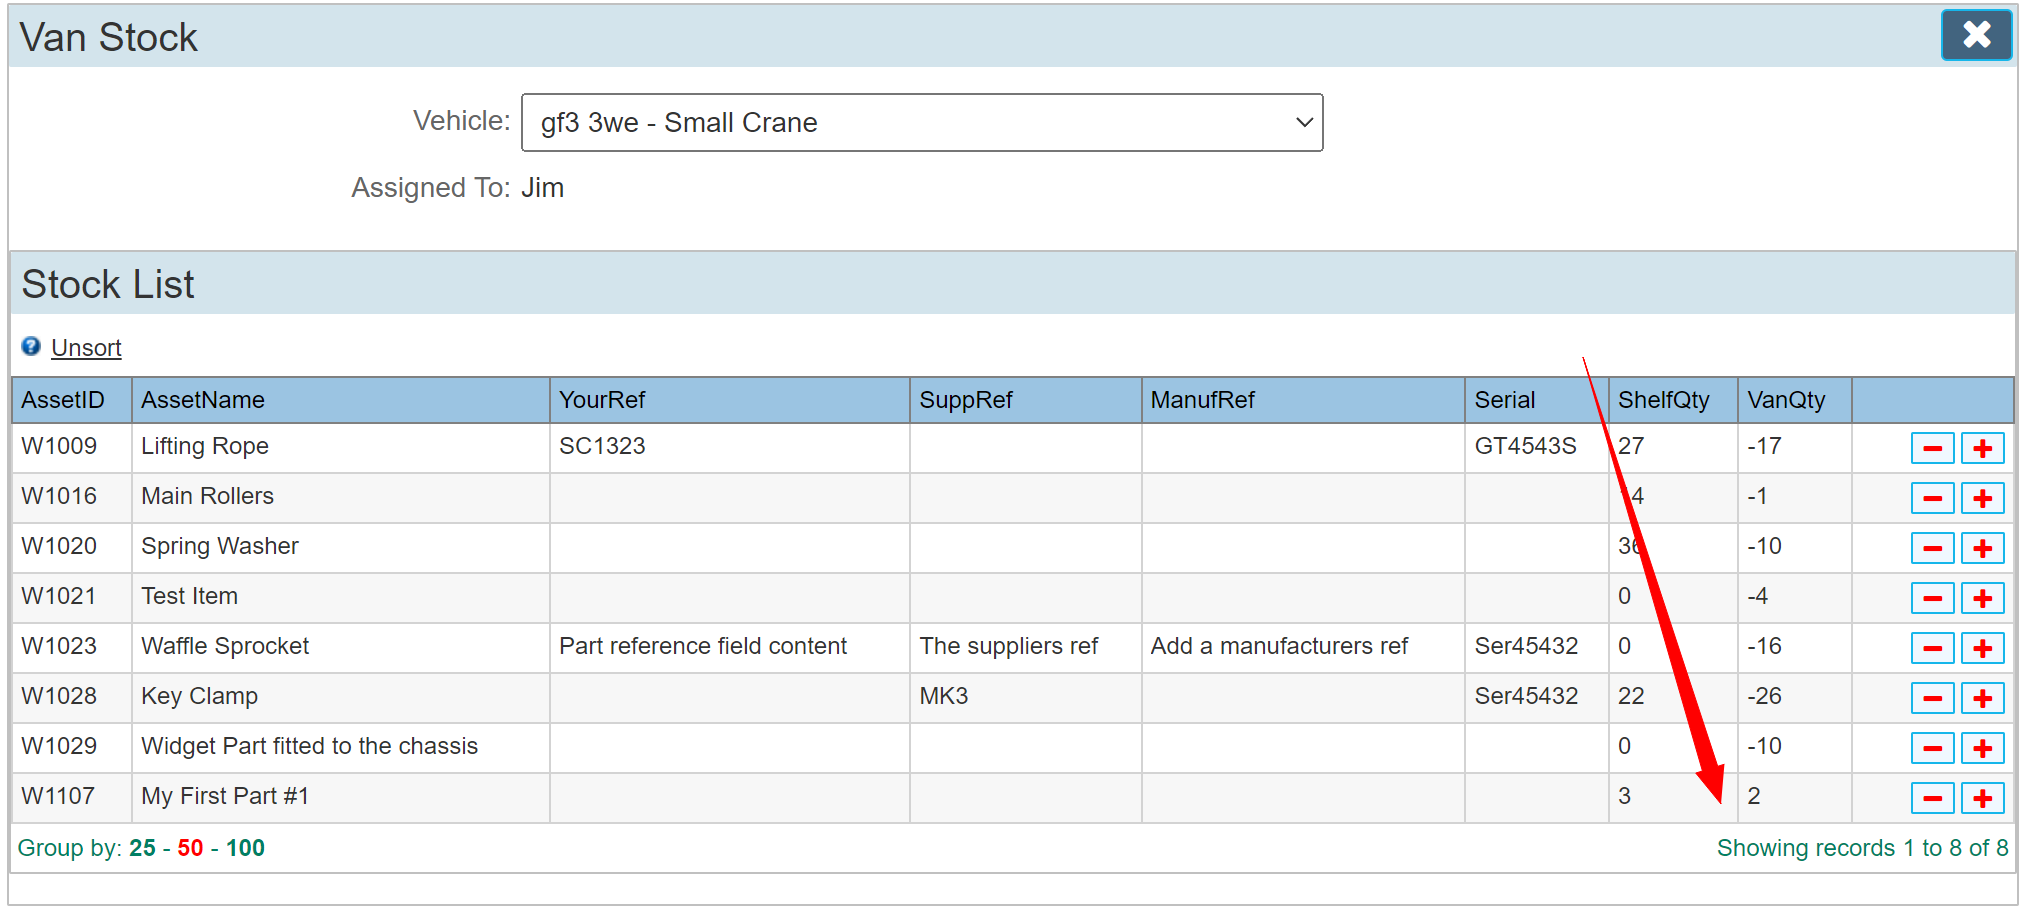
If we now select that vehicle in the Drop down list, it shows that it is assigned to 'Jim' we will see the part being used. In this demo, 'Jim' did the job on the app and he is assigned to vehicle gf3 3we.
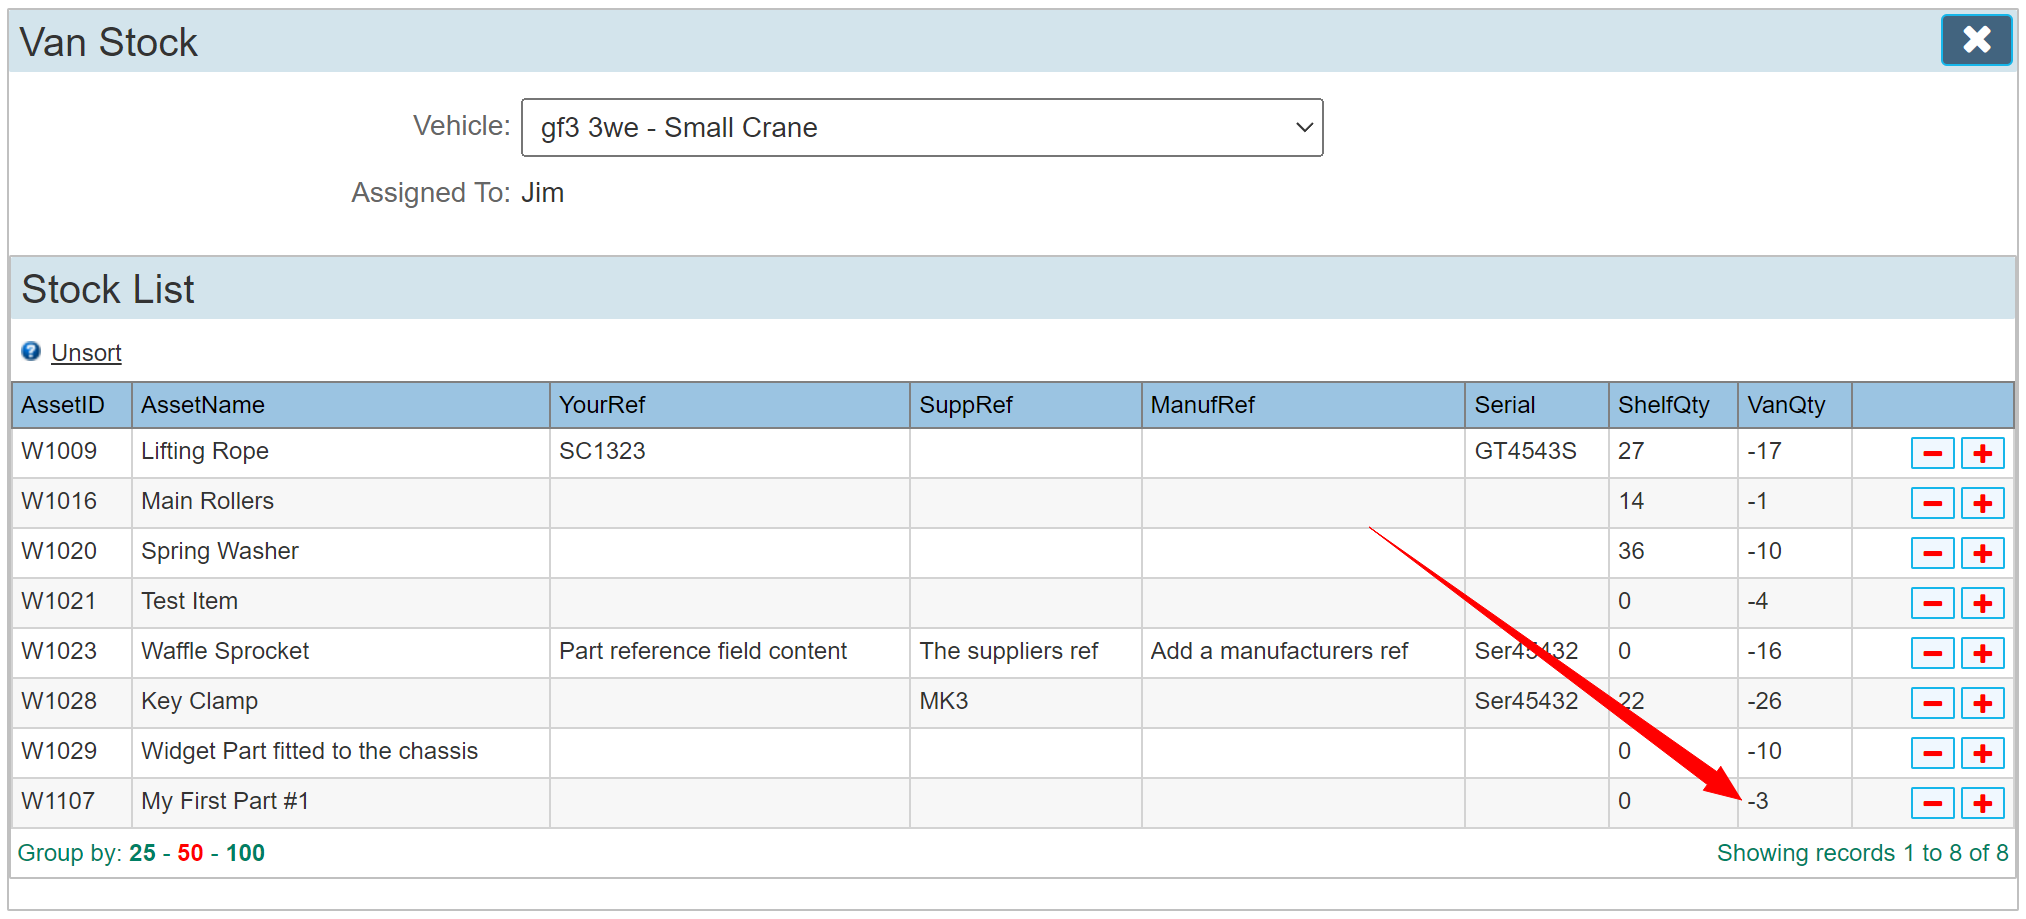
Because we never allocated any stock, the value will be negative. At first your thoughts may be that this should not be allowed, but we allow it, rather than the rep not allocating or stating any part was used because the app wouldn't let him despite there being one on the van.
The problem is not that the rep made a mistake, its that no one in the office allocated stock. This way we can still see the stock being used, but because its a negative number we know that the correct allocation of stock was never made.
Allocating Stock
We can see in the image above that our new part now has a -3 value. At first thought, you would click the plus or minus buttons to correct this. As the actual shelf stock is zero (that means how many items we have in our warehouse) is zero, we have non to allocate to a vehicle. Clicking the plus will alert that there is no stock to allocate.
To allocate stock that we have bought must first be allocated to the warehouse 'Shelf Stock'
Go back to the new asset we created as shown below.
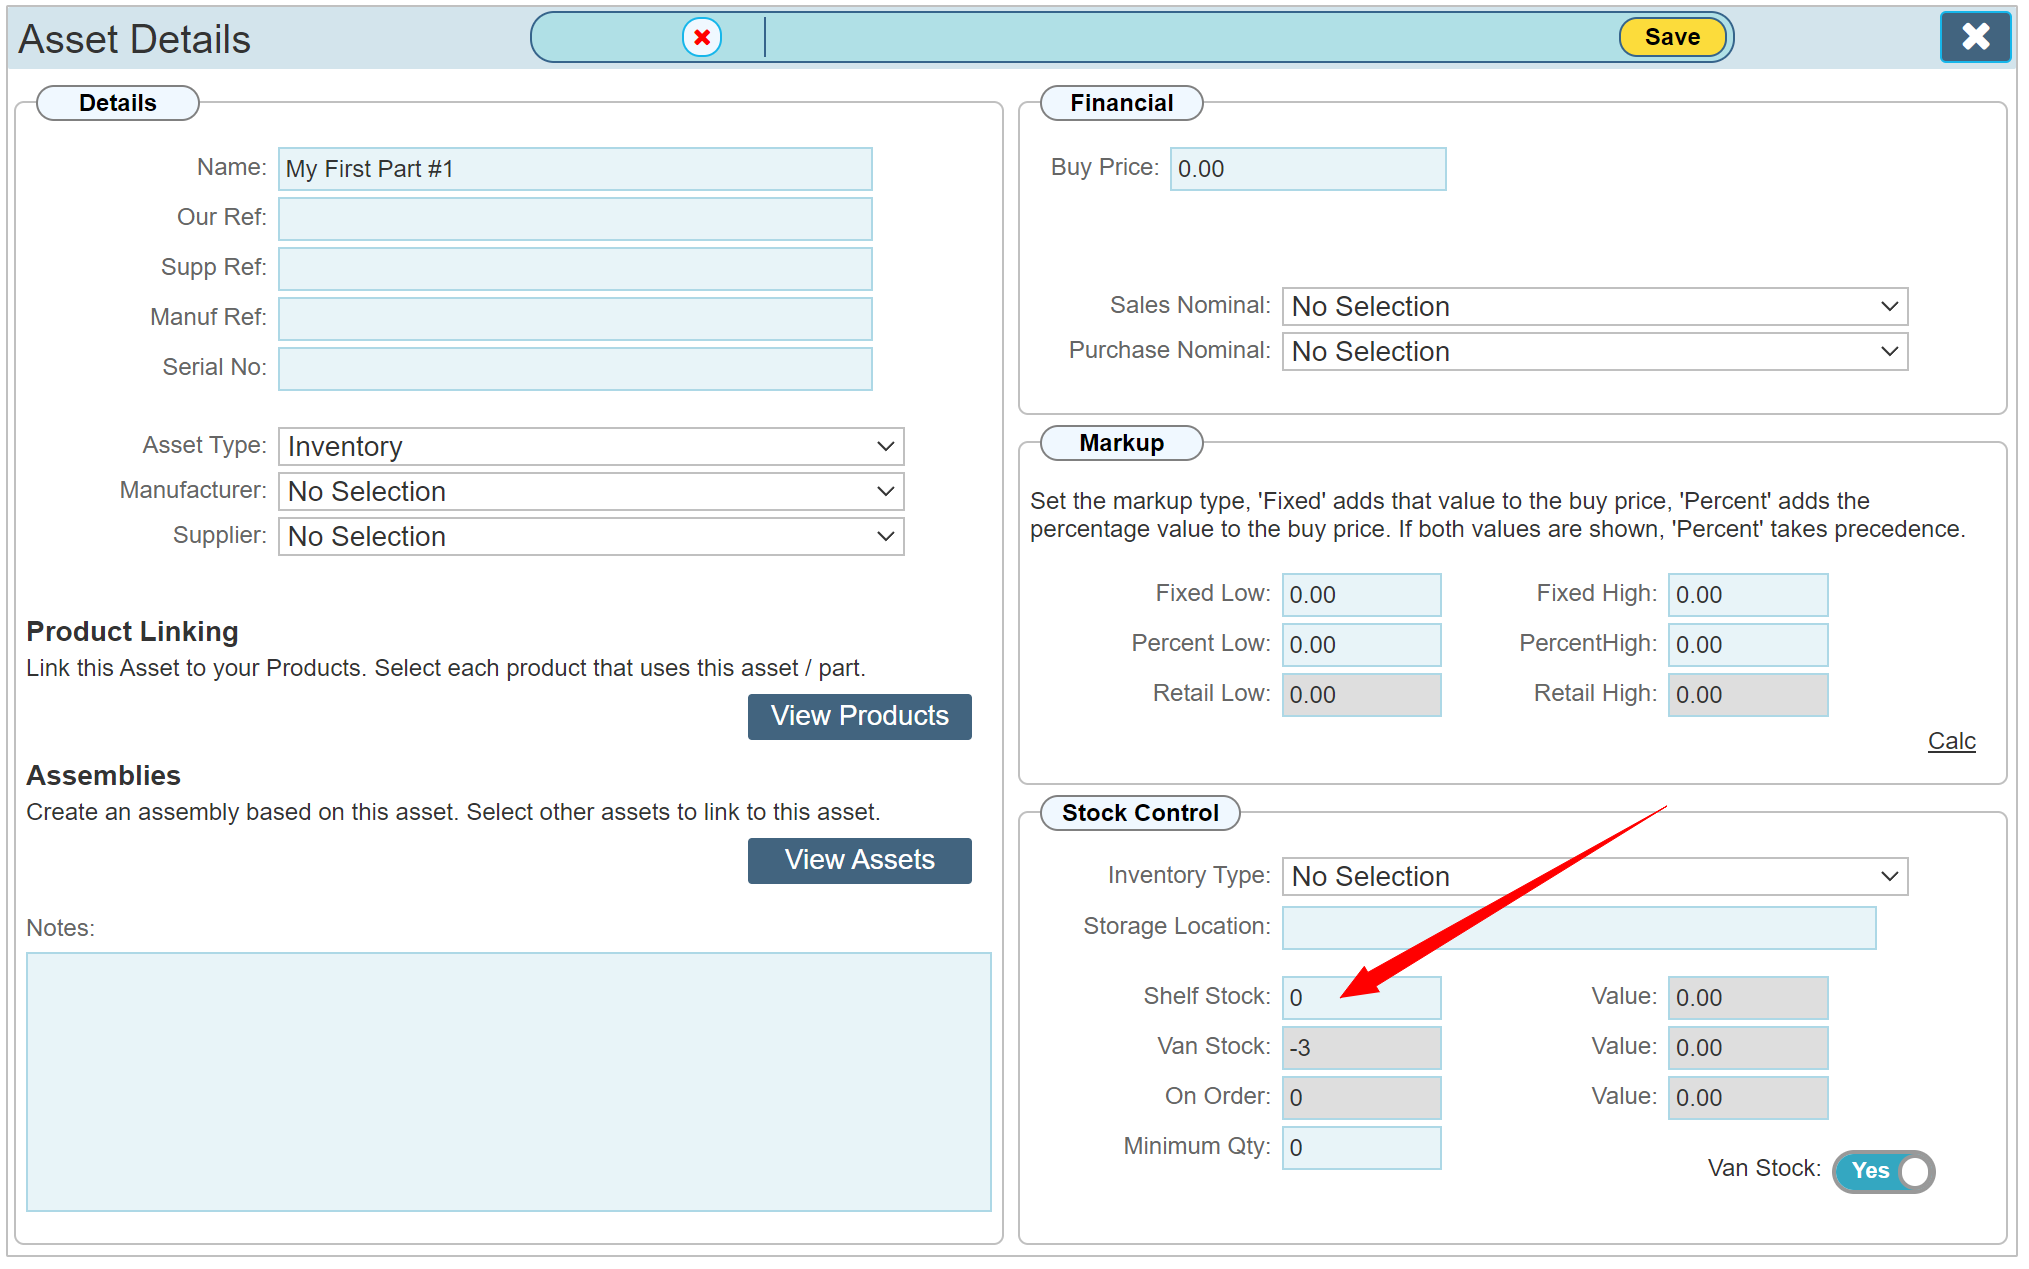
As indicated, the Shelf stock value is zero. We can also see that the 3 parts we allocated on the app are visible as a -3 value. To manually edit the shelf stock, click into the shelf stock box and change the number then Save. We will enter a number of 10
If we now click the 'Vehicle Stock' button in the LH menu again, we can now see that the level of shelf stock is 10.
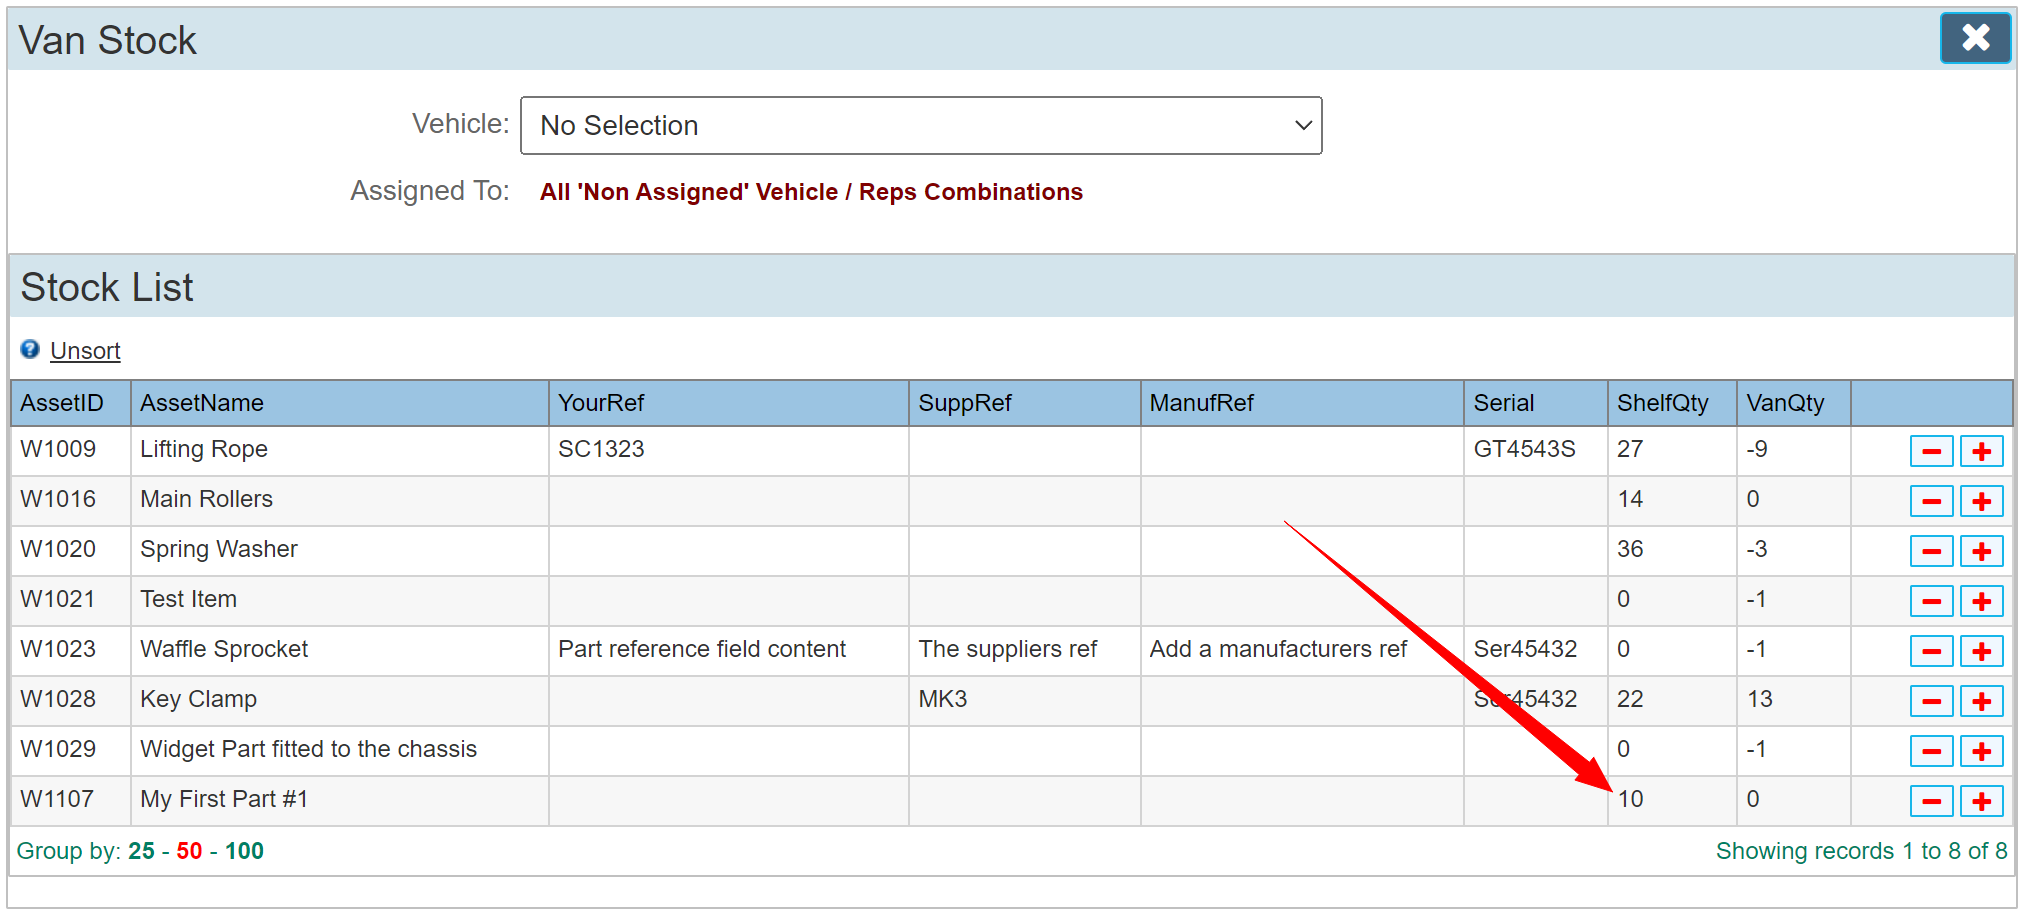
First, we will allocate 2 items to the non assigned vehicles. This now leaves a balance of 8 left on the shelf.
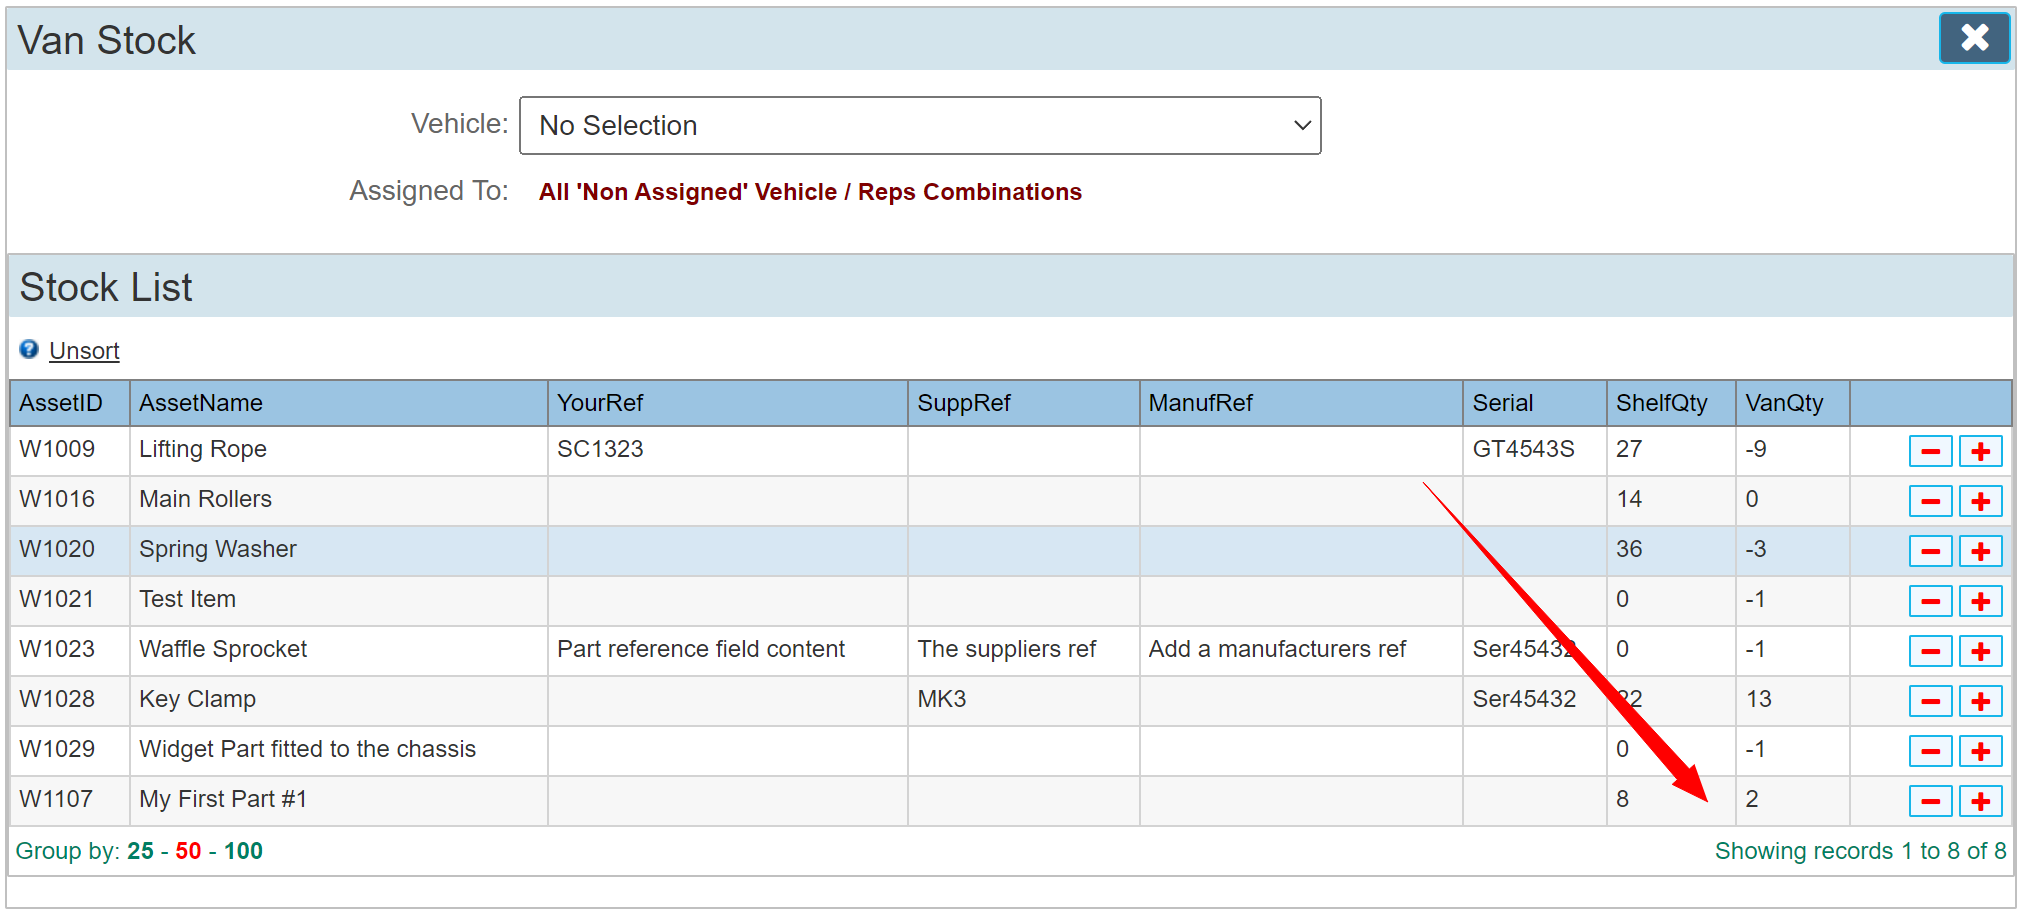
Next, we will change the drop down list to our reps van that used that parts earlier and allocate 5 shelf items. Because our van stock was originally -3 for this van, clicking the Plus button to add 5 items leaves a van stock of 2 and a total shelf stock of 3.
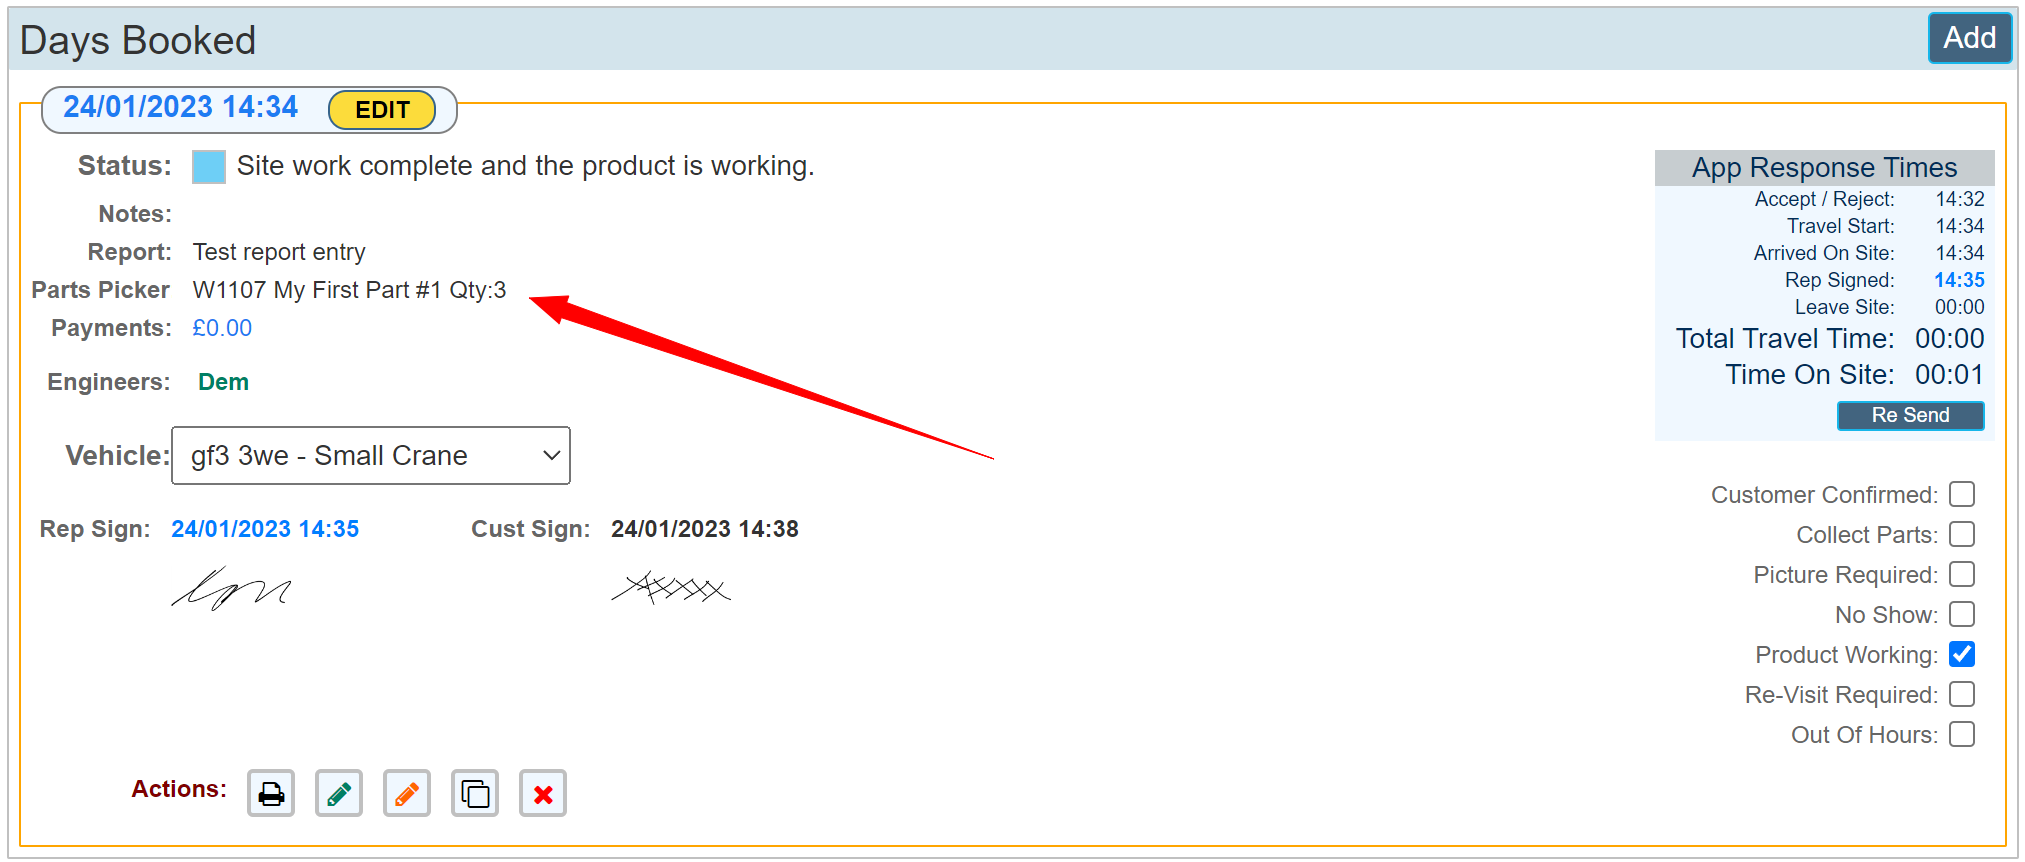
See the part used on the Job Ticket page
Below is the 'Days Booked' panel of the job ticket where our rep allocated the new part.