When a job first arrives on the app, it will be viewed as shown in the screenshot below, multiple jobs can be sent to the app, these will be grouped by date.

Selecting a job booking will open the record details as shown below;
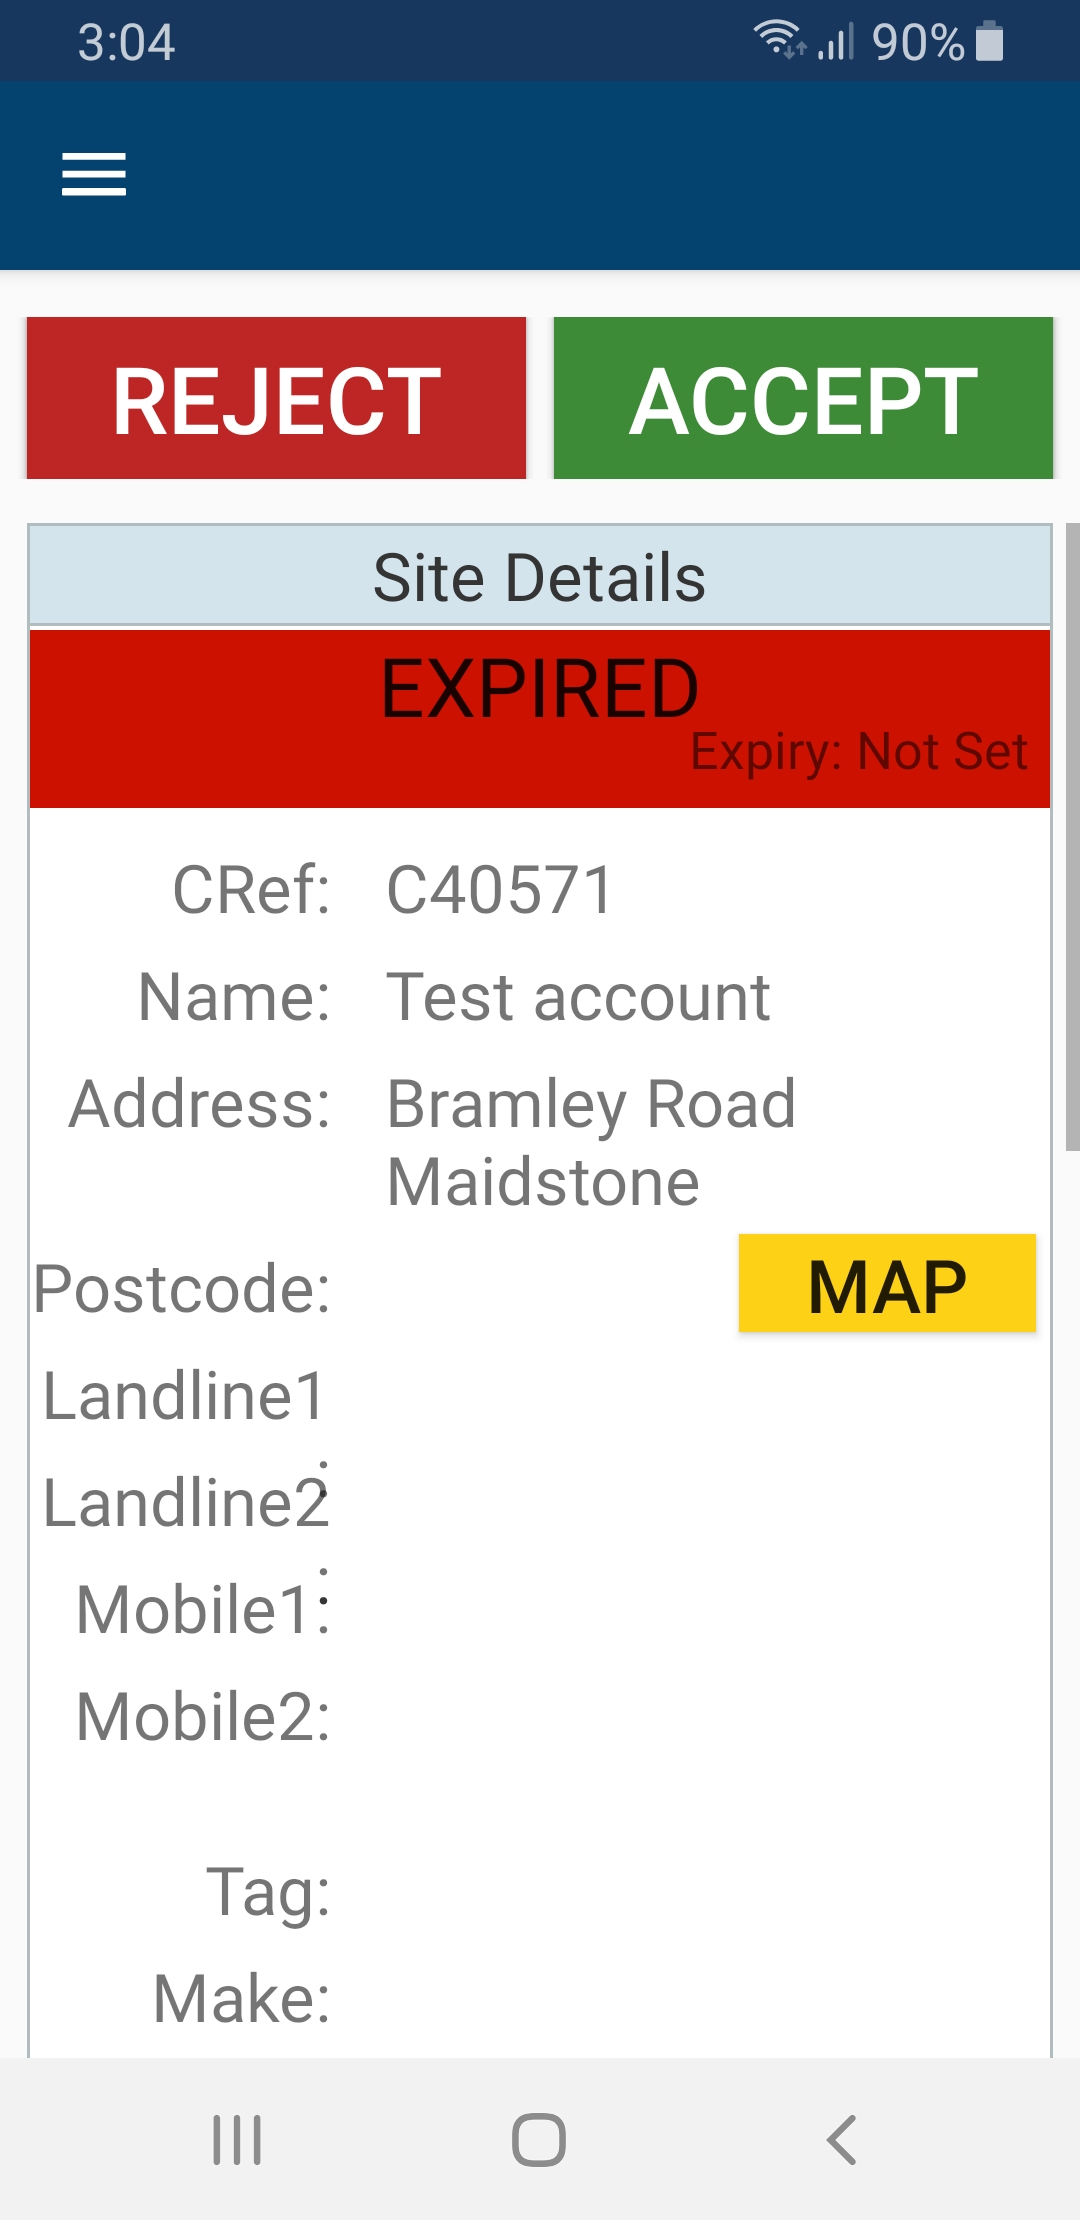
REJECT
Allows the app user to reject the job. When the rep rejects, the accept/reject marker on the web UI will be red. The user must enter a reason why the job has been rejected, a message will then be sent back to head office in the form of a timeline entry logging the rep name and their reason for rejecting the job.
ACCEPT
Allows the app user to accept the job, When the rep accepts, the accept/reject marker on the web UI will be green.
EXPIRED
In the example screen shot shown above, The red bar that shows 'EXPIRED' tells the app user that the current service contract for this product has expired. This may be used to indicate to the rep that the job is chargeable. The details for this are the same as those shown within the web UI site record 'Service Contract' panel. The colour and contract name on the app will match the ones on the web UI.
MAP
Clicking the yellow map button will open up Google Maps using the device location (providing permission has been accepted for the app to see the device location) and the location of the job to automatically route the user to the destination without having to type in an address. I.E. the app uses the location details sent to the app to create the route. On Apple devices, the default map will be the devices own maps program. Installing Google Maps on the apple device will make Workforce Manager use google maps instead.
Other Details
The rest of the information shown depends on what was entered back at head office about the site, I.E. the address information and details about the product.
Scrolling down the page will show further information, including the job details and any other information that the app user may require to complete the job.
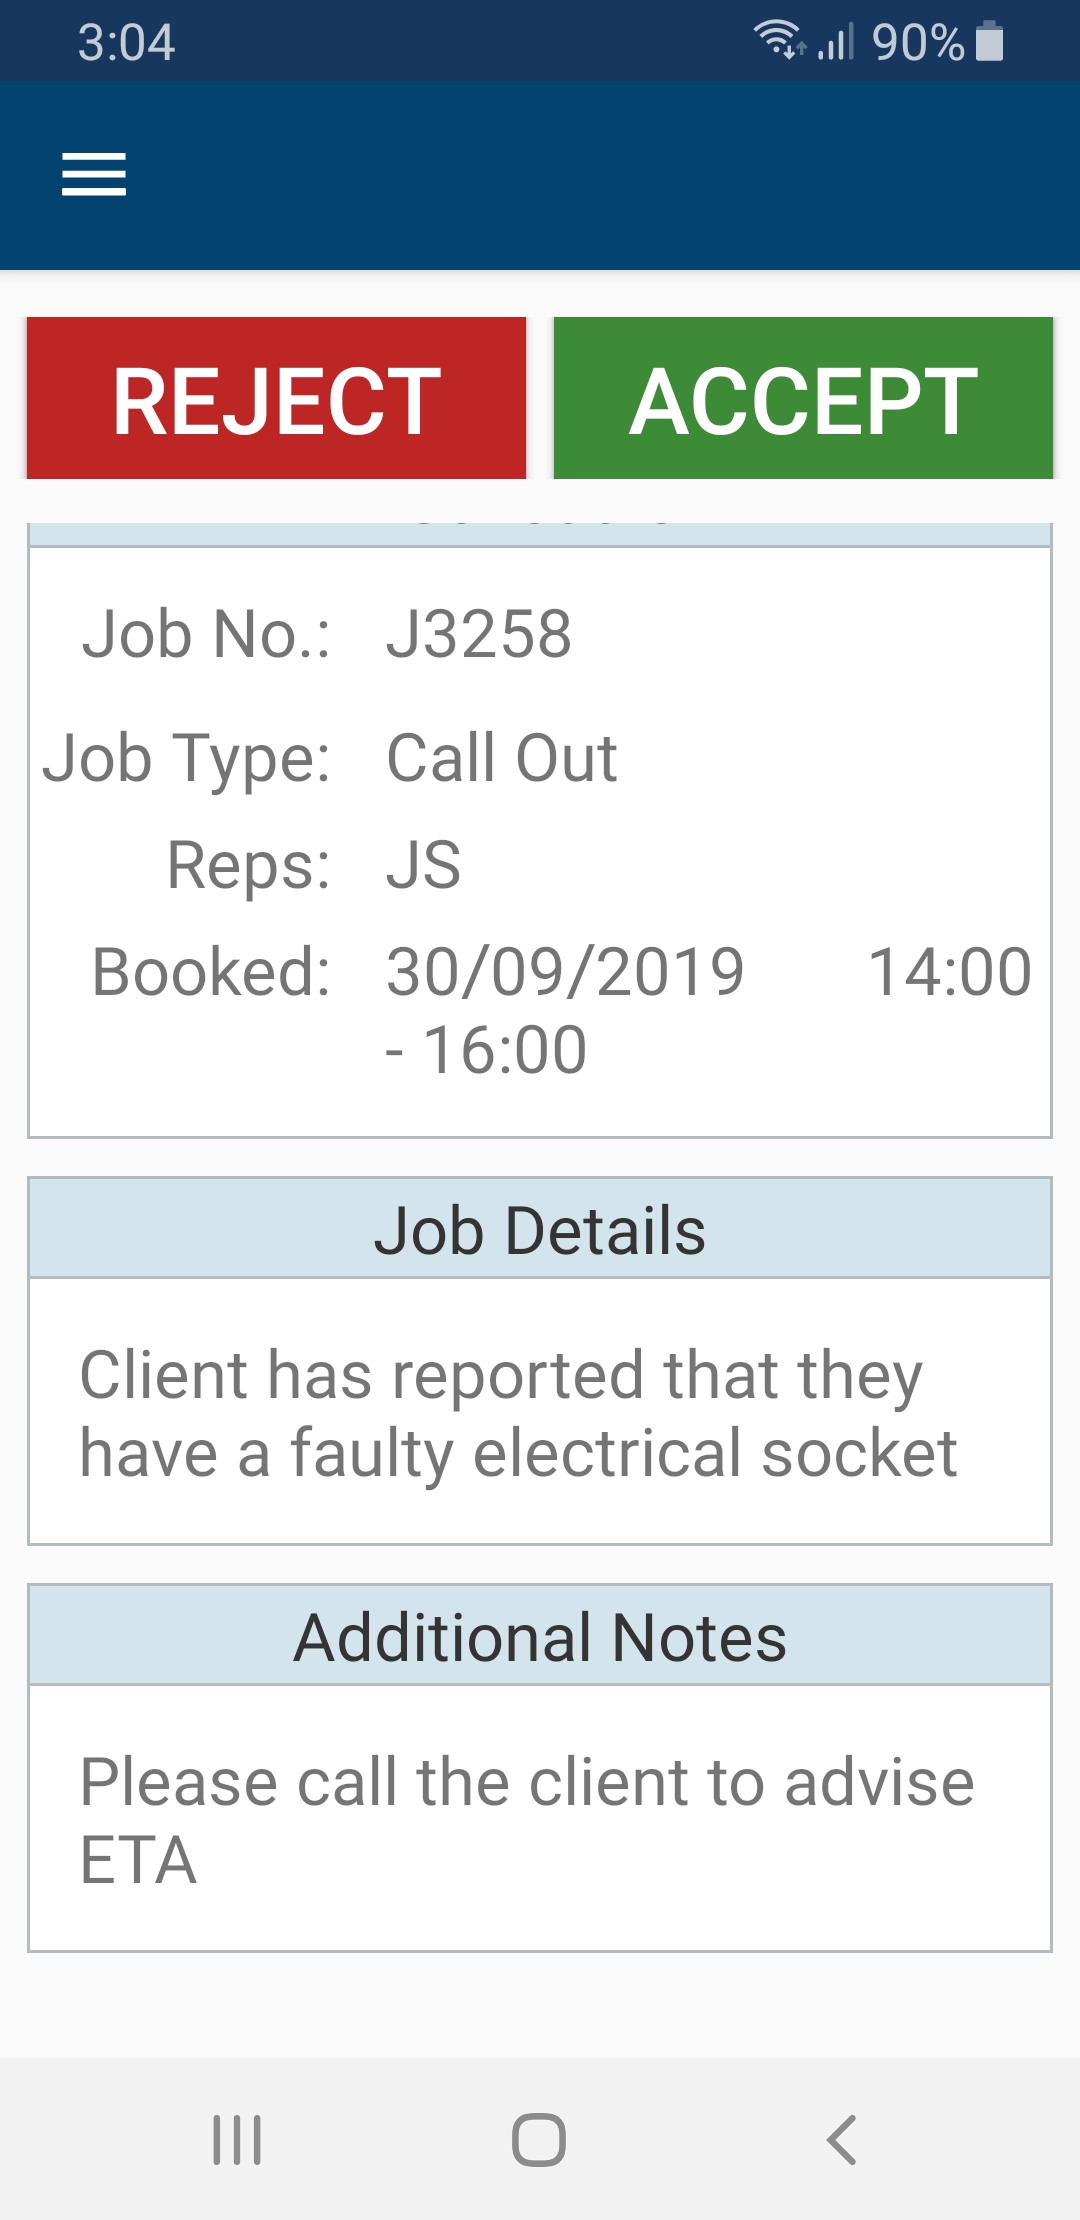
Before any interaction can be made on the job, it must first be accepted by clicking the ACCEPT button, This is usually clicked as soon as the app user see's the job on the app to alert the office that he has received the job and will be completing it that day.
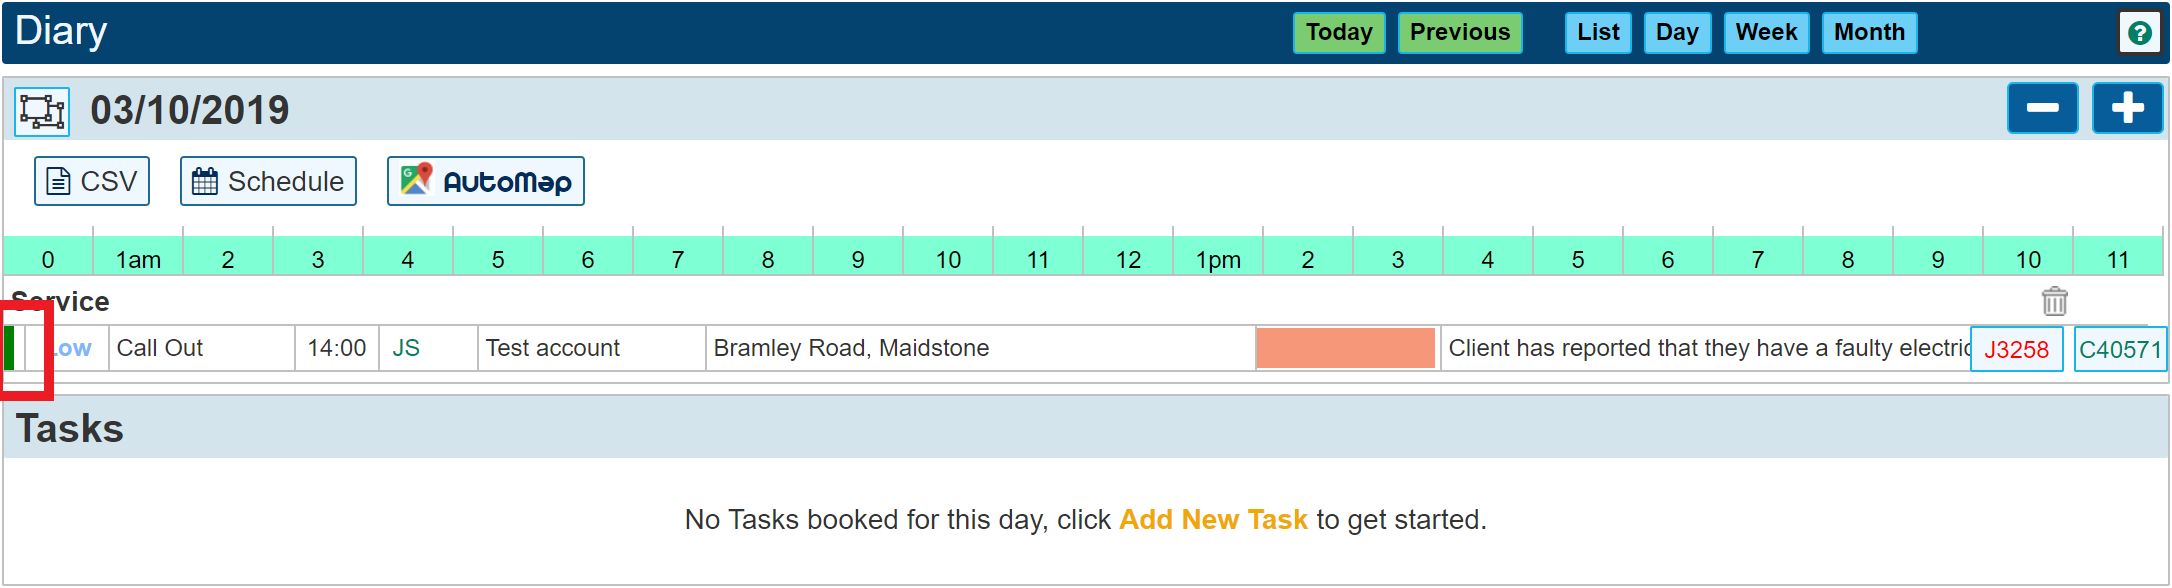
The screenshot below shows how this will be seen at the office once the job is accepted. See where we have highlighted in red to the left of the image. There is a green marker that tells us this job has been 'ACCEPTED'. If the job had been 'REJECTED' then this marker would be red.
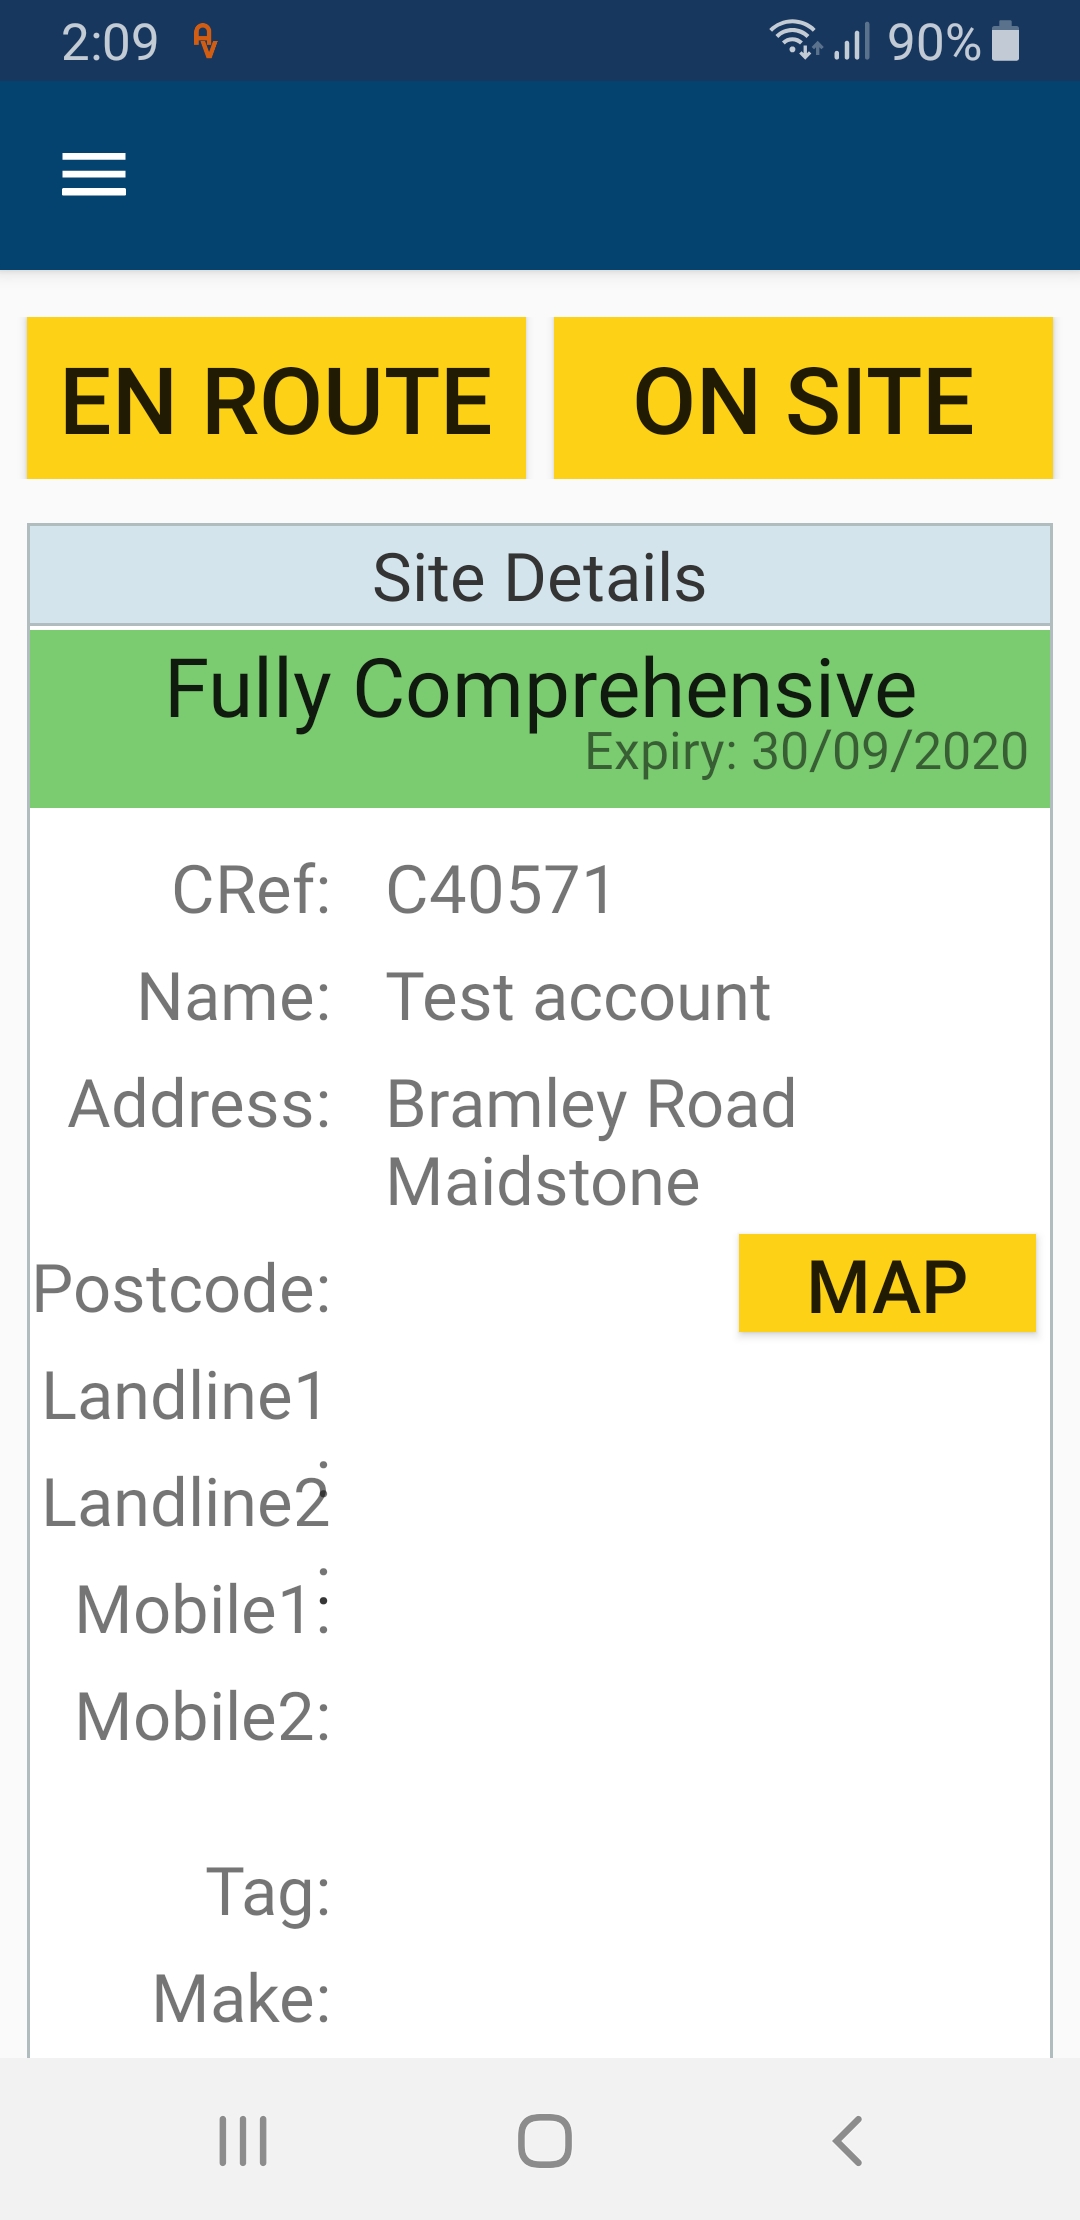
The App user now has a further 2 options available before anything else can be done. Once the app user is ready to travel to this particular job, 'EN ROUTE' will be clicked before setting off and then 'ON SITE' as soon as they have arrived. These two states will be alerted back at the office by highlighting a colour next to the accept flag as shown above. Each stage has its own colour.
You may note that we have added some 'Service Contract' information to the view below to highlight how this may be seen if the option is used.
Once the 'EN ROUTE' and ''ON SITE' buttons have both been pressed, the app user can then complete the work.
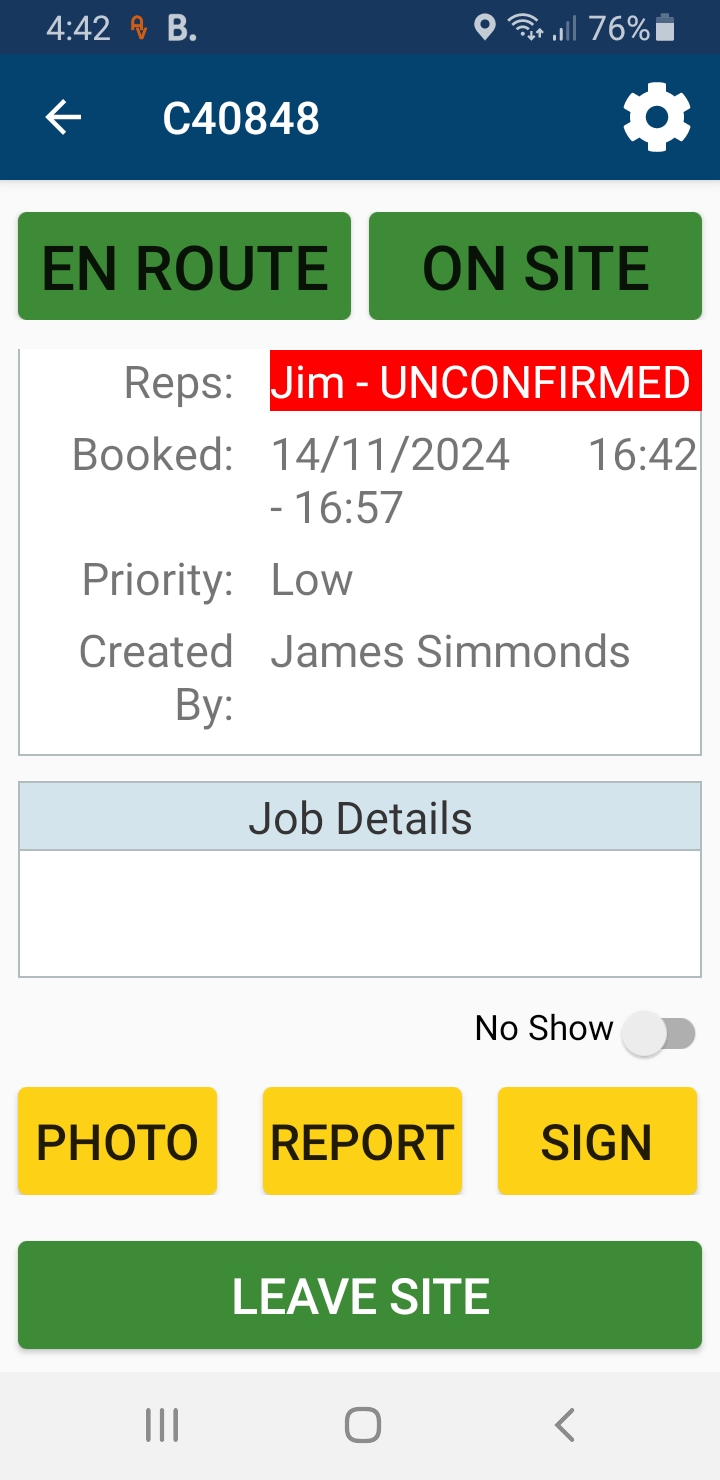
No Show
No Show is used to indicate that when the rep arrived at the site, there was no one available and that the job could not be completed as a result.
PHOTO
This allows the app user to take site pictures either directly on the app or by selecting images from the phone's image gallery. There are no limits to the number of site pictures that can be included. The site pictures are automatically uploaded to the job ticket on the web UI for viewing. (video can be uploaded providing it is included in the company subscription)
REPORT
This button opens a new dialogue where the app user will complete a report about the job.
SIGN
The app user and the customer on site can both sign the device on completion of the work.
LEAVE SITE
Once all work has been completed and the app user has signed the app, the job can be finished by clicking LEAVE SITE.
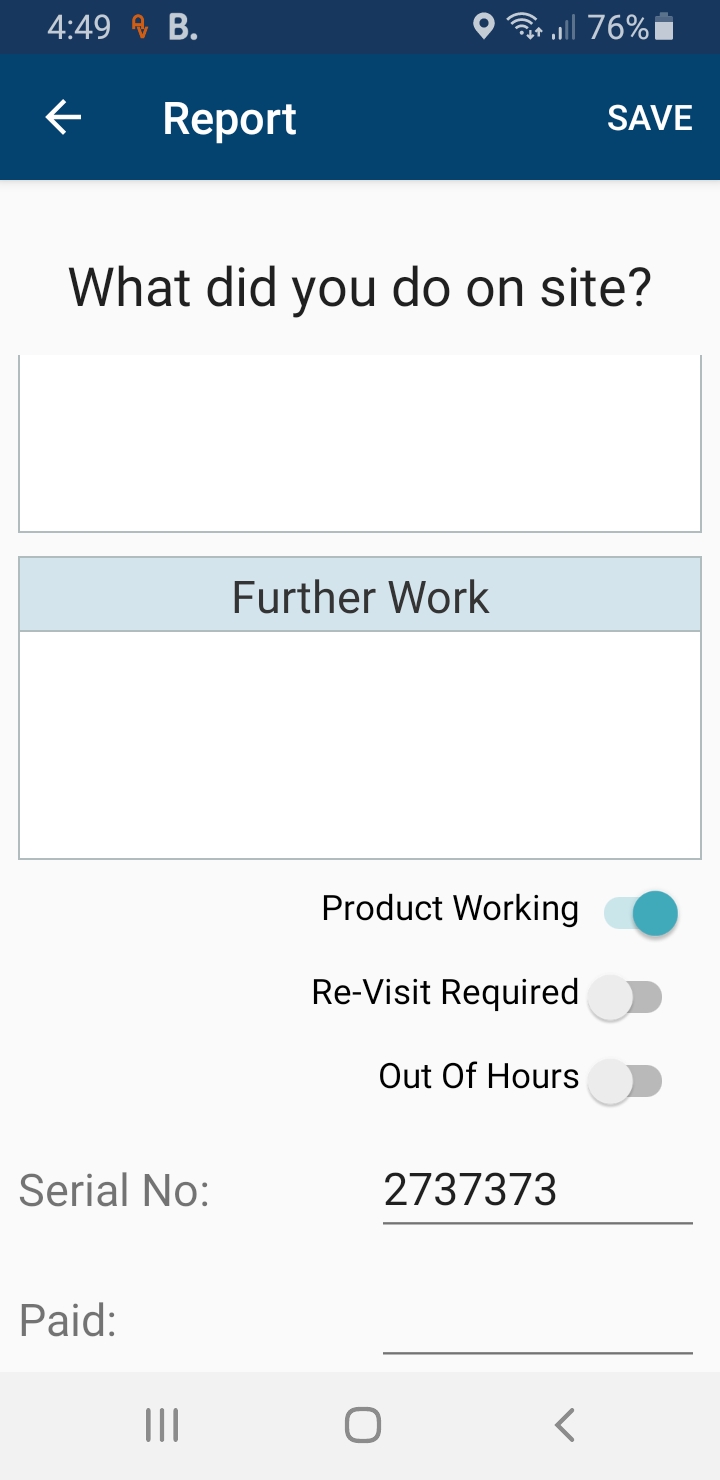
Below is a view of the rep report screen;

Scrolling down
Your Report
The rep will be prompted to enter a report that is not a single word or two but at least a short sentence.
Parts Used
Enter any parts used on site, this can either be typed in, or use the 'Parts Picker' section to allow selecting from a list of parts that the office personnel have previously added to the web UI 'Assets' section and marked them 'Van Stock'
Further Work
Use this area to indicate where additional work is required on site so that the office personnel can raise additional job tickets where required.
Once the report has been completed, the save button can be pressed. The app will prompt the user to confirm the settings for 'Product Working', 'Re-Visit Required', 'Out Of Hours' and 'Serial Number'. These are compulsory questions. If they are skipped and the user goes back to the site details view, any partial updates will be ignored. It is important to complete all steps when saving the report details.
Below is a view of the signatures screen;

The technicians signature is mandatory before the job can be completed. The Customer signature is not mandatory as on occasion there may not be a requirement or the Customer may not be on site at that time although depending on the system settings, the customer signature can be made mandatory.
COMPLETION
Having completed all stages of the job, the diary entry will removed from the main diary page once the LEAVE SITE button has been pressed. If the job needs to be re-sent to the device for additional information, this can be done from head office on the web UI by visiting the job ticket page and clicking 'Re-Send' within the App Response panel.