Once an invoice has been created, this can be made to recur each week, month or year depending on the pattern you set in the recurring pattern dialogue. A recurring invoice is based on an existing invoice except the invoice date and due dates will increment accordingly for each new invoice created. Hashtags can be used within the detail lines of the invoice to indicate the period which each new invoice is for.
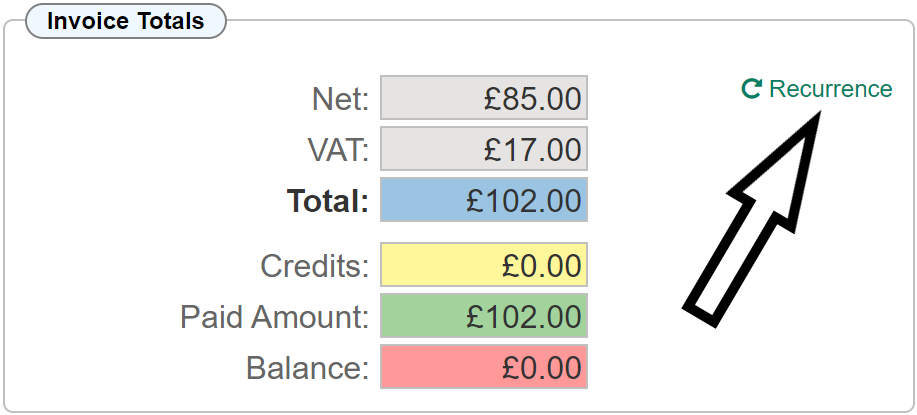
In the 'Invoice Totals' panel shown on your invoice, click the 'Recurrence' button as shown on the screenshot below to open up the recurring pattern dialogue. Please Note: The recurring pattern dialogue is not available until an invoice has first been created.
The recurring pattern dialogue opens as shown below;
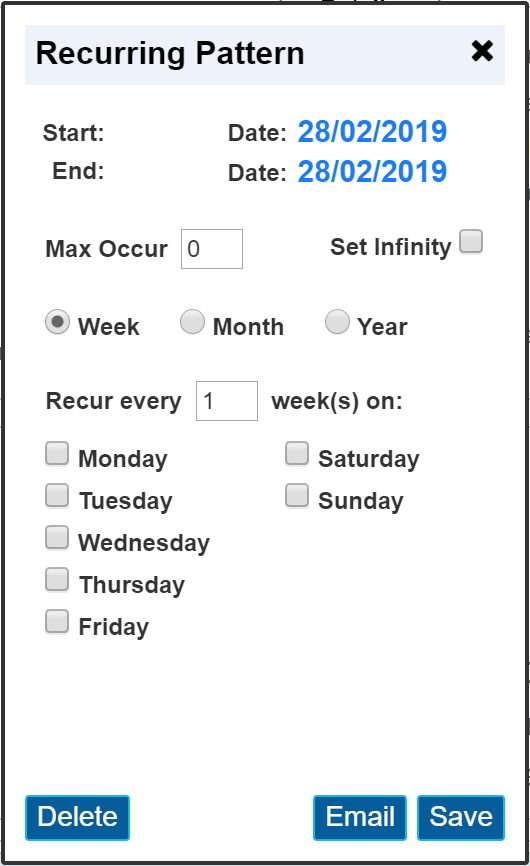
Initially, the start and end dates will have the same date as the invoice date. It is important to note; 'Invoices will not recur, be emailed or be added to the system for dates in the past'.
Put simply, this means that when you are setting up an invoice that will recur, make sure the recurring pattern for new invoices are at set for dates in the future. So, if the invoice that has just been set up is dated for any date in the past or present day, this should be sent to your client in the usual way. I.E. create the PDF and send the invoice to your customer via email manually.
Start / End Dates
The start and end dates represent the period of time that a recurring invoice will repeat. The start date can usually remain the same as the invoice date. If the start date is in the past, recurring invoices between that date and the current date WILL NOT BE CREATED. The end date is the last date a recurring invoice will be created.
Max Occur
If you were to put a start date of 1st January and an end date of 31st December but set the Max Occur to 6, only the first 6 invoices would be created. An important point to consider: If on the day you were creating the recurring pattern, you set a start date in the past, this will be taken into account when calculating the Max Occur. To clarify this, if your start date was set 2 months earlier than the current date, only 4 invoices would be generate because the start date includes 2 non generated invoices but the Max Occur takes this into account.
Set Infinity
Setting this flag allows the invoice to recur continuously. The Max Occur option is no longer active when the 'Set Infinity' flag is set. Also, the End date will be greyed out and inactive.
Week / Month / Year
Selecting one of these radio buttons allows various patterns based on that particular period. Using the above example set to 'Week' we have options to say every 'x' weeks and on which day(s)
E.G. setting 'Recur every' to the value 2 and setting the Monday and Wednesday flags will create a new invoice every 2 weeks on Mondays and Wednesdays.
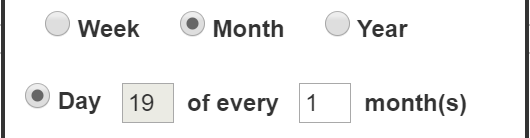
The month option allows a similar function. The invoice can be made to recur on the same date each month or by setting the 'of every' value to 3, then a new invoice would be created on the same date every 3 months.
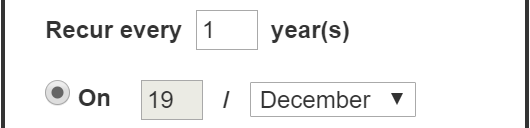
The year option allows a recur each 'x' years on a given month.
Once the pattern has been set to reflect the period you require, clicking save will set up the recurring invoice function to create the invoices according to the pattern you have set. Ideally these would also be sent out via email at the same time they are created. Clicking the 'Email' button allows you to set up who the invoice is from and who to send to. The dialogue shown below allows you to set this up.
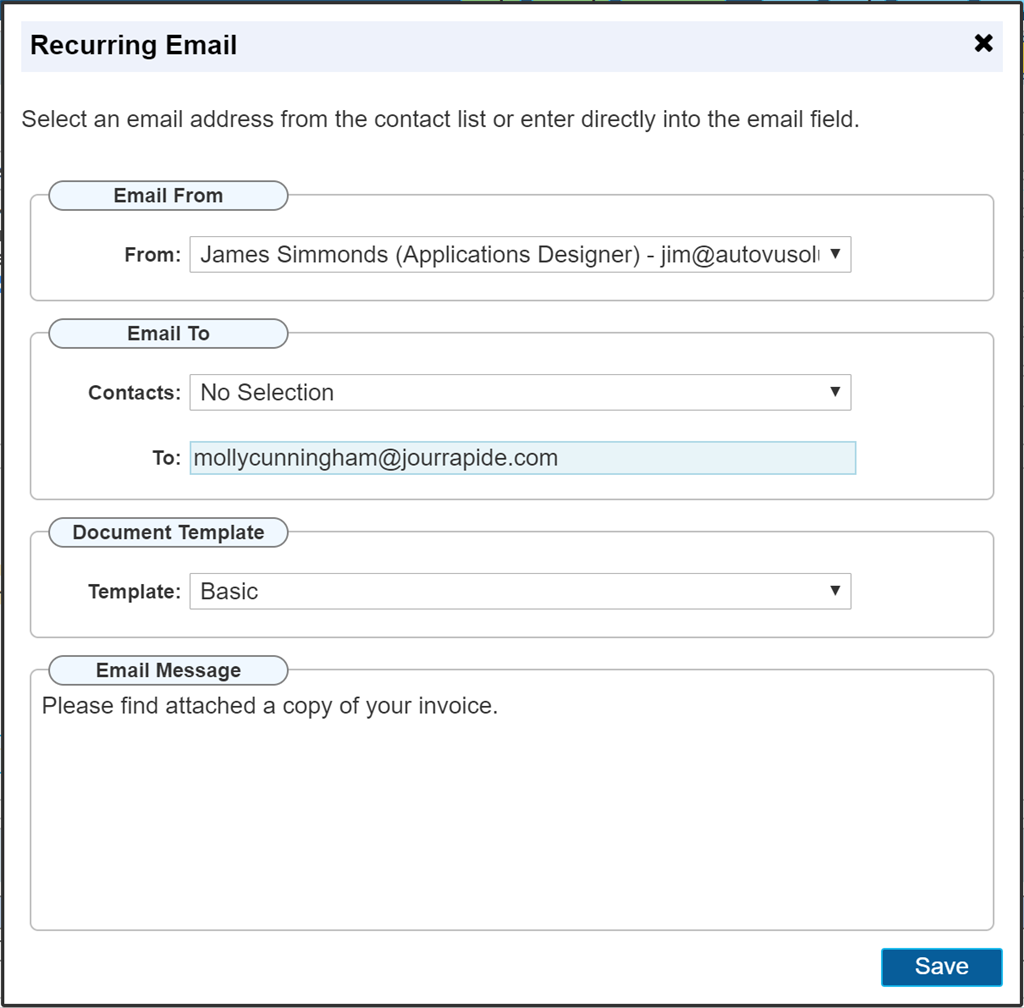
Email From
This drop down lists all of the accounts within AutoVu that have a current log in.
It is important to note that in order to send an email, AutoVu will need the email account details of the user selected. It must also be an active account. For this reason, it may be worth considering a dedicated account primarily used for this function. This could then be set up with a general email address such as 'accounts@autovu.co.uk' rather than an individual email address of a user. This of course depends on your business type and your own preference on how this should be done. The main point to consider is if you select an actual user account and then at some point in the future they leave the company and you make their account inactive, none of the recurring emails that used that account will be sent anymore. I.E. from the moment you deactivate the users account, future recurring emails will no longer be sent.
Email To
This drop down list automatically includes the 'Site' email address (if one was provided) and the main contractor email address and any contacts that have been set up on that site. This is purely for convenience, the text box below will be populated with your choice from the drop down list, OR you may simply type in an email address for the person you wish to email.
Document Template
This will list all the templates within the invoicing section that you have created via 'Document Designer'. Pre selected will be the 'Basic' standard template. This may be the only option within the list if you have not created any additional 'Custom' invoice templates. The standard template is of your own design, we call it the standard template simply to differentiate between additional custom templates you may create.
Email Message
Any additional text you wish to include within the body of the email can be included here. below is an example of how this will be received by the recipient.
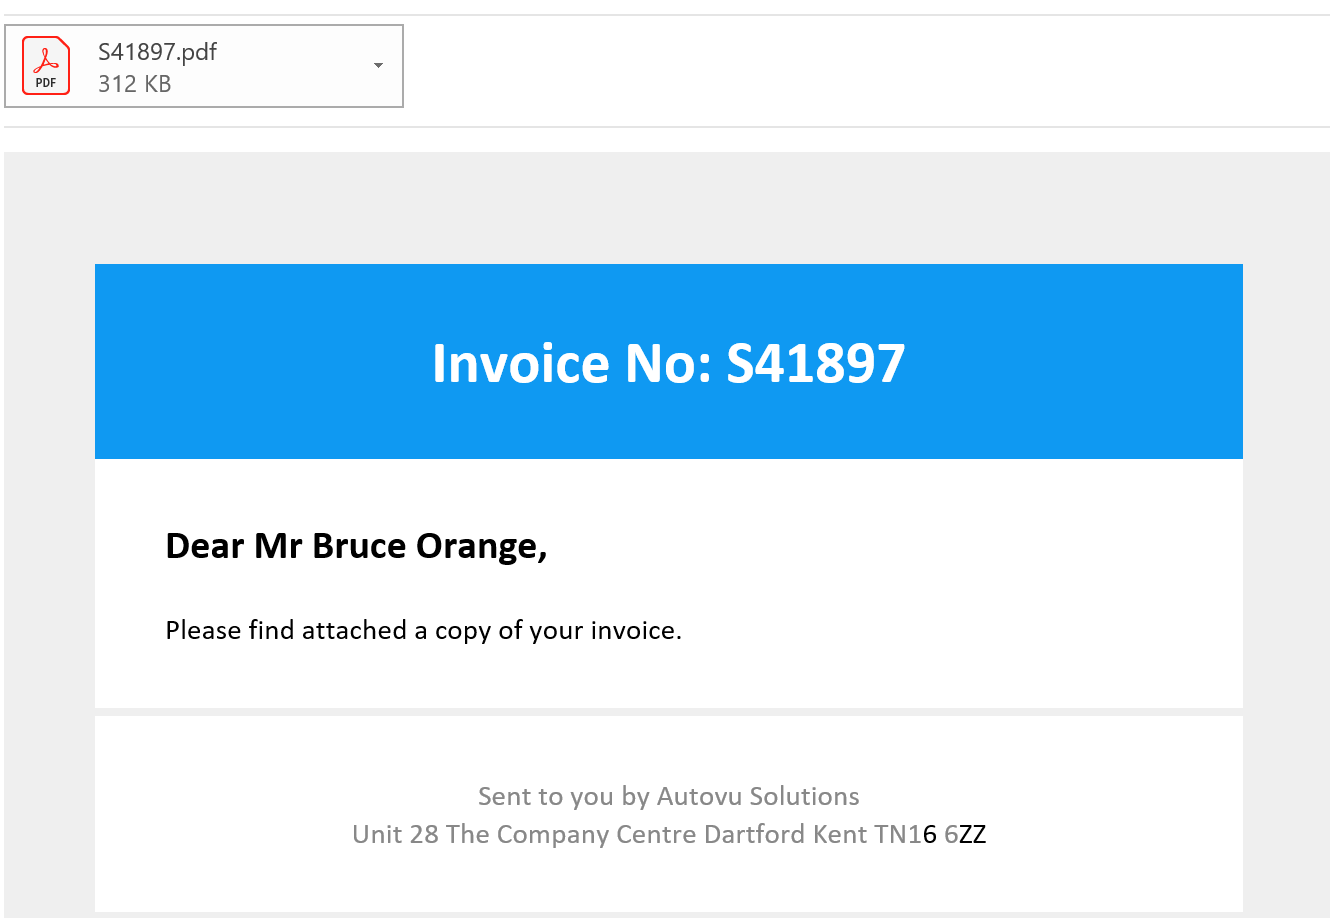
The details in the footer will correspond to your own company address.
Please Note:
Automatically sent emails will be received by the recipient in the early hours of the morning. This is the period where all recurring invoices are processed. This time period cannot be changed.
The design and layout of the received email is fixed. The things that change are the actual details I.E. who it is to, the invoice number, body text and your address.
HashTags
It may be necessary to include within the details of your invoice, the period for which the invoice relates. There are a number of HashTags that can be used that will automatically insert the correct dates determined by your recurring pattern.
Below are the available hashtags for use within the itemised details section of your invoice. The dates used here are an example for a recurring pattern of one month.
| HashTag |
Replaced By |
| #RecurMonthYear# |
February 2019 |
| #RecurDateStart# |
19/02/2019 |
| #RecurDateEnd# |
18/03/2019 |
| #RecurDateEnd2# |
19/03/2019 |
| #RecurDates# |
19/02/2019 to 18/03/2019 |
| #RecurDates2# |
19/02/2019 to 19/03/2019 |
You will notice the addition of hashtags with '2' at the end. The difference is in the end date, depending on your company preferences, you may be required to show the dates as whole months (using the '2' indicator)
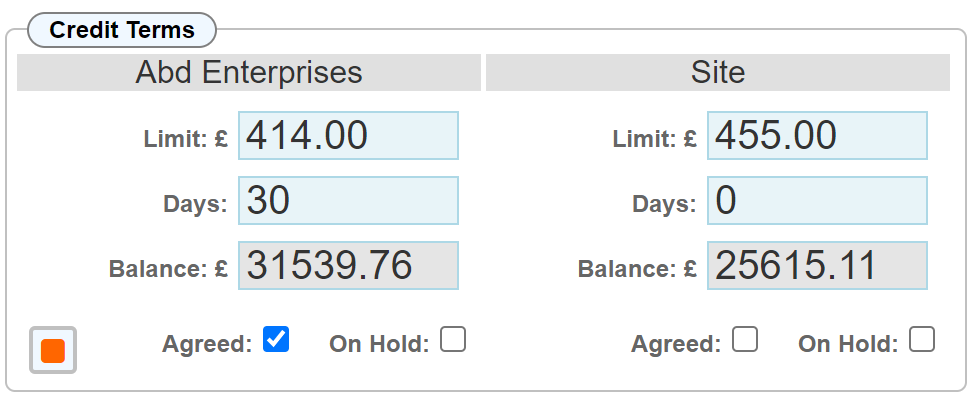
Credit Terms
In order to set the due date within each recurring invoice, you will be required to set the credit terms in the credit terms dialogue shown when you click the 'Financials' button on either the Site or Company record.
|
Setting the Due Date on your first recurring invoice will not be copied to recurring invoice. Set the 'Credit Terms' to indicate how many days credit you have given this account to allow the due date to apply the correct terms.
|
The box labelled 'Days' determines how many days from the invoice date that the due date will be set.
For more information about the 'Credit Terms' dialogue, see the how To guide for Financials.