Once a user account has been limited to a single Managing Agent, no other jobs are visible on the system other than those where the Managing Agent has been set to the 'Limit To' option in the login user profile.
Set a user profile to a single 'Managing Agent'
Go to 'My Company' and create a new user (or use an existing)
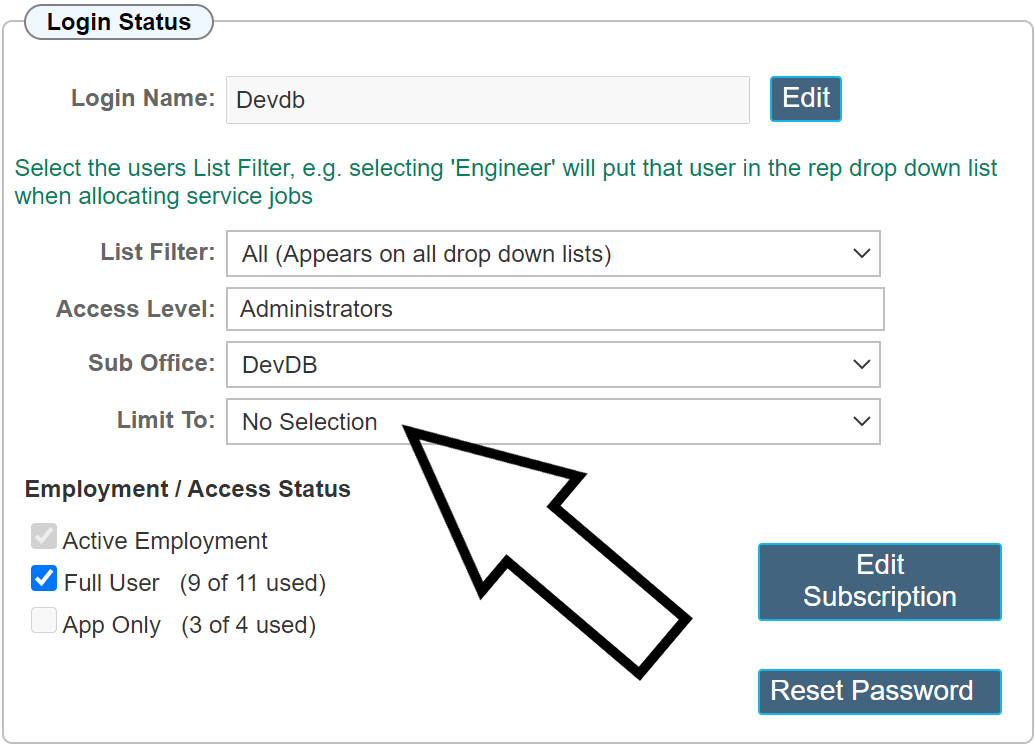
In the login status panel as shown below, select a 'Managing Agent' from the 'Limit To' drop down list.

Once the 'Limit To' option has been set, many of the functions within Workforce Manager are disabled. I.E. Anything that is not related to that Managing Agent is no longer visible. This includes the search feature. this will be limited to searching for sites that are assigned to that Managing Agent.
A user limited to a Managing Agent is still a 'Full User' in terms of pricing. I.E. they can log on using a browser, search for sites etc. however, users limited to a Managing Agent cannot use the Mobile App. I.E. Job Bookings, Job Pool and Service Route are not accessible / sent to the App when the 'Limit To' option has been set.
|
The Drop Down Lists; List Filter and Access Level, are no longer active once the Limit To is set.
I.E. Altering them makes no difference to the user experience.
|
What can the Managing Agent See ?
Other than the log in page, your managing agent once logged in is restricted to viewing 3 pages. The Dairy, Site Record and Job Ticket. Each of these is further restricted to show only the relevant information.
Diary

The diary is limited to viewing only the jobs booked for that Managing Agent. None of the Menu functions are shown.
The search feature is still available, but will only show sites that have been set for that Managing Agent.
Navigating through the calendar will show any jobs that have been booked in the past, present and future.
The diary can be viewed in day, week or month format.
When clicking the job entry, the user will always be navigated to the actual record, either the site or the job ticket depending on where they click.
|
THE BOOKING FORM (POPUP) IS NOT AVAILABLE TO THIS USER ACCOUNT TYPE
|
Site Record

When viewing the Site Record, none of the menu features are available. The user has the ability to navigate between each site product, but will not be able to view the product if the managing agent is not set accordingly.
The service contract information panel is visible but cannot be edited.
Clicking within the 'Job History' grid entry will open the Job Ticket.
Job Ticket

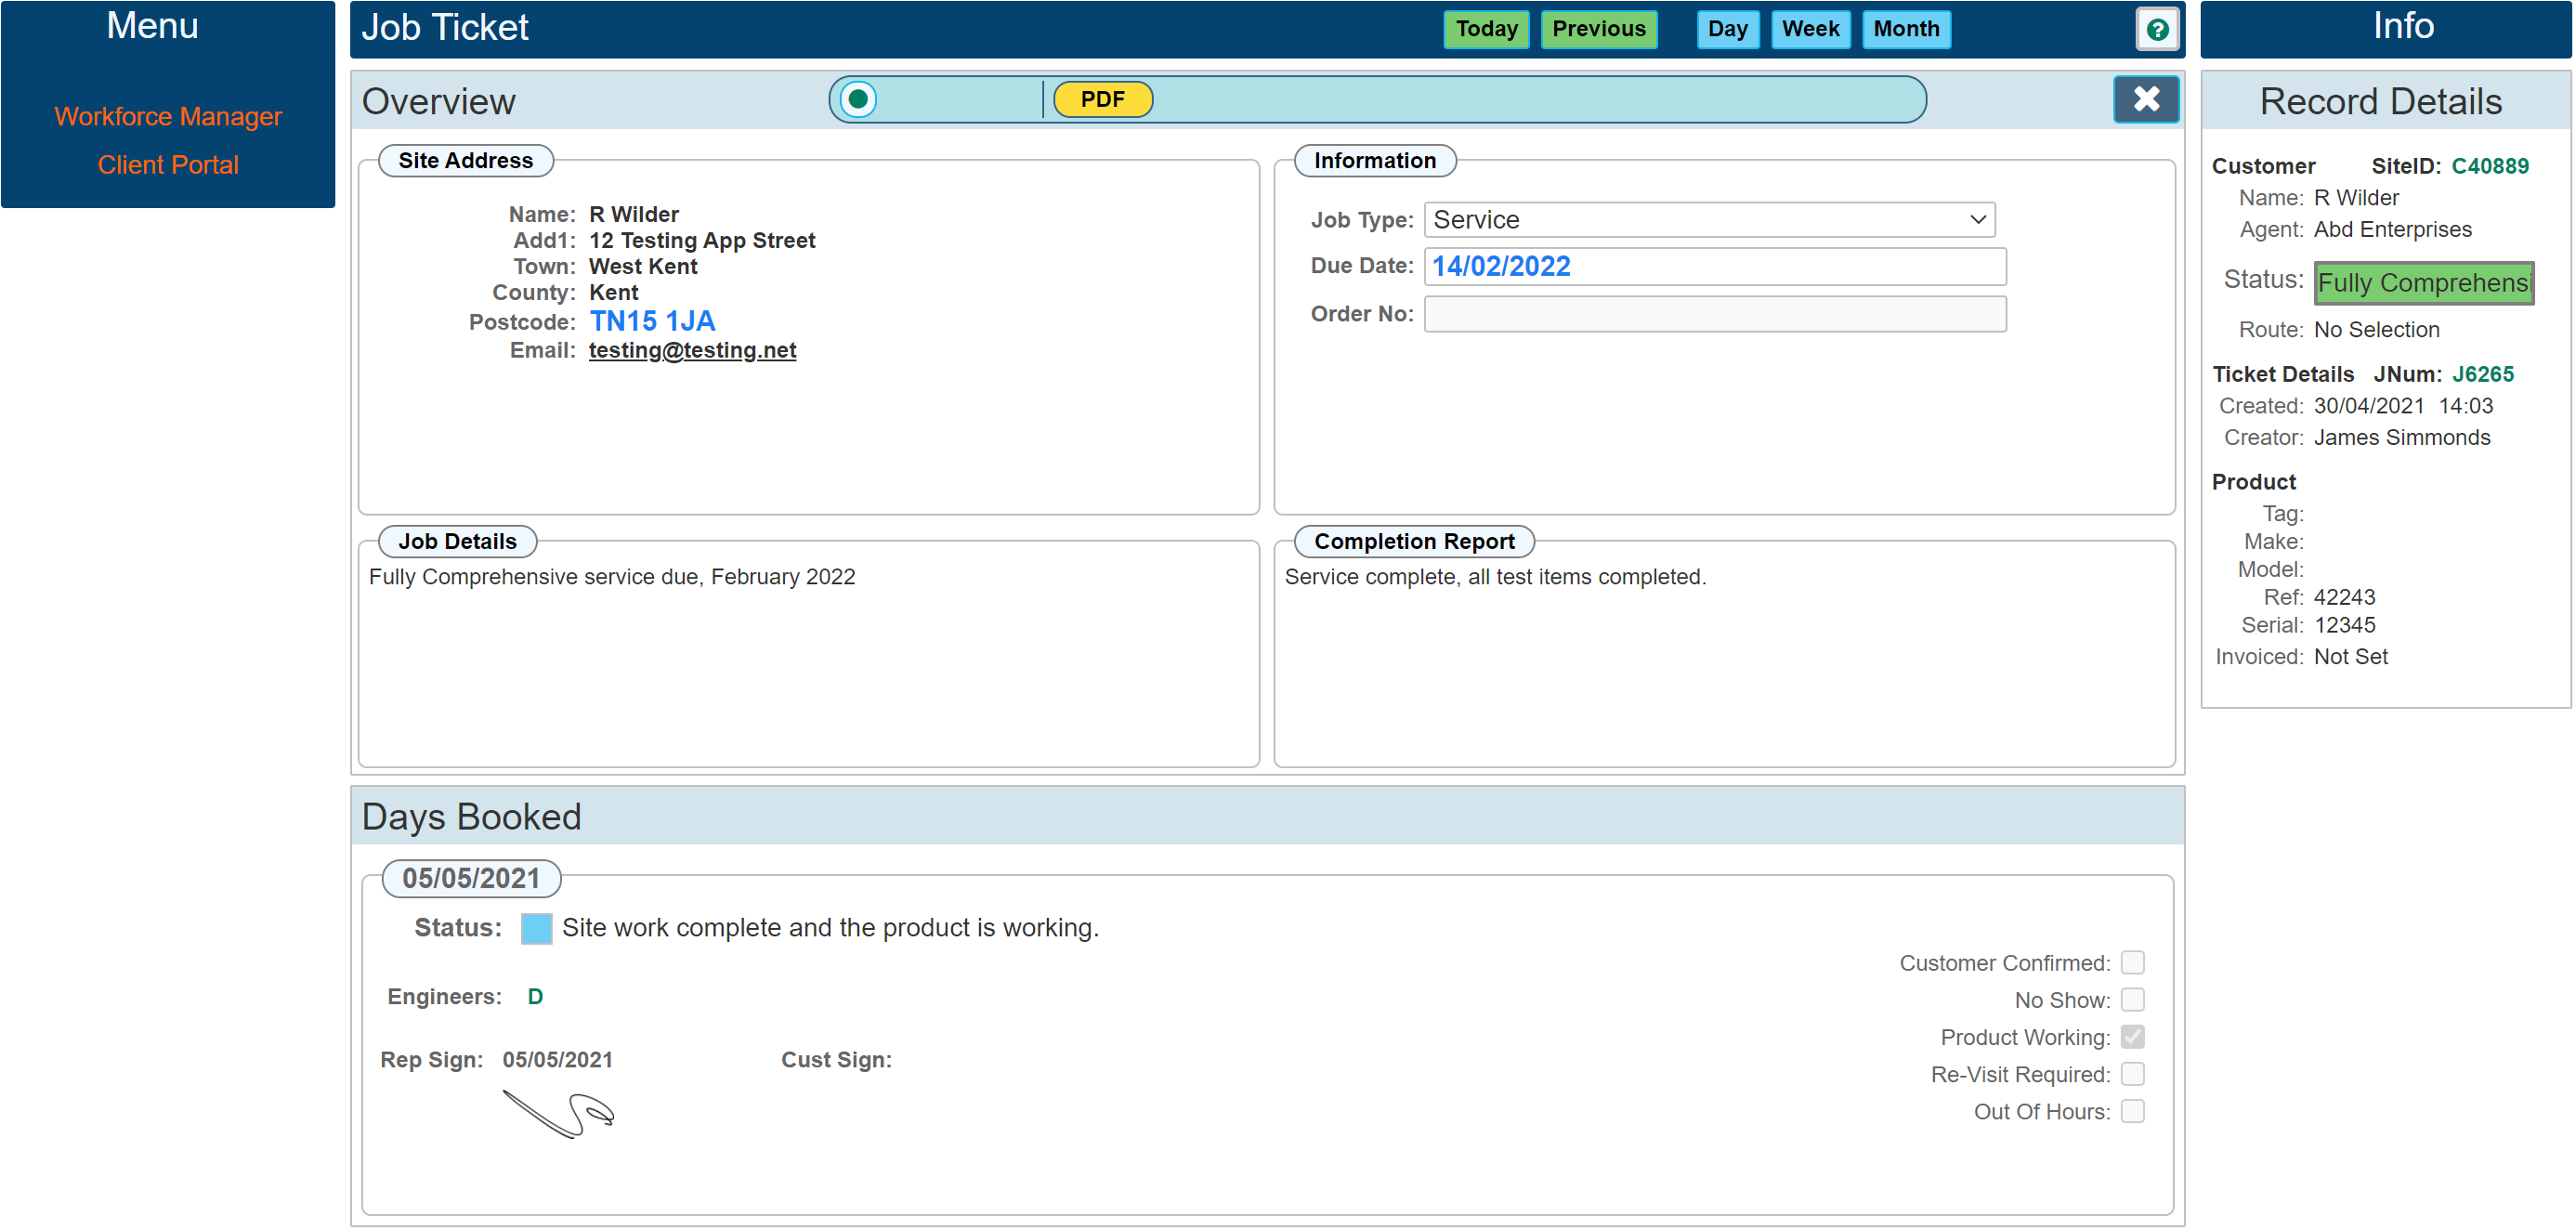
Job Ticket functions are limited to 'Read Only' of basic information. Nothing can be changed or edited.
All of the menu functions have been hidden.
Only the job details and Completion report are shown. I.E. the engineer report created on the app is not shown. The App response times are also not shown.
It is possible to view a PDF Job Ticket from this page by clicking the PDF button within the ribbon bar. PDF Job Tickets are only available to the end user once you have created them. I.E. Your users cannot view or create the PDF's. This will ensure the PDF can only be viewed once all the relevant details are available and you are ready to create the PDF.
|
The Job Ticket PDF is only available to your users once you have created it.
|
Create the PDF
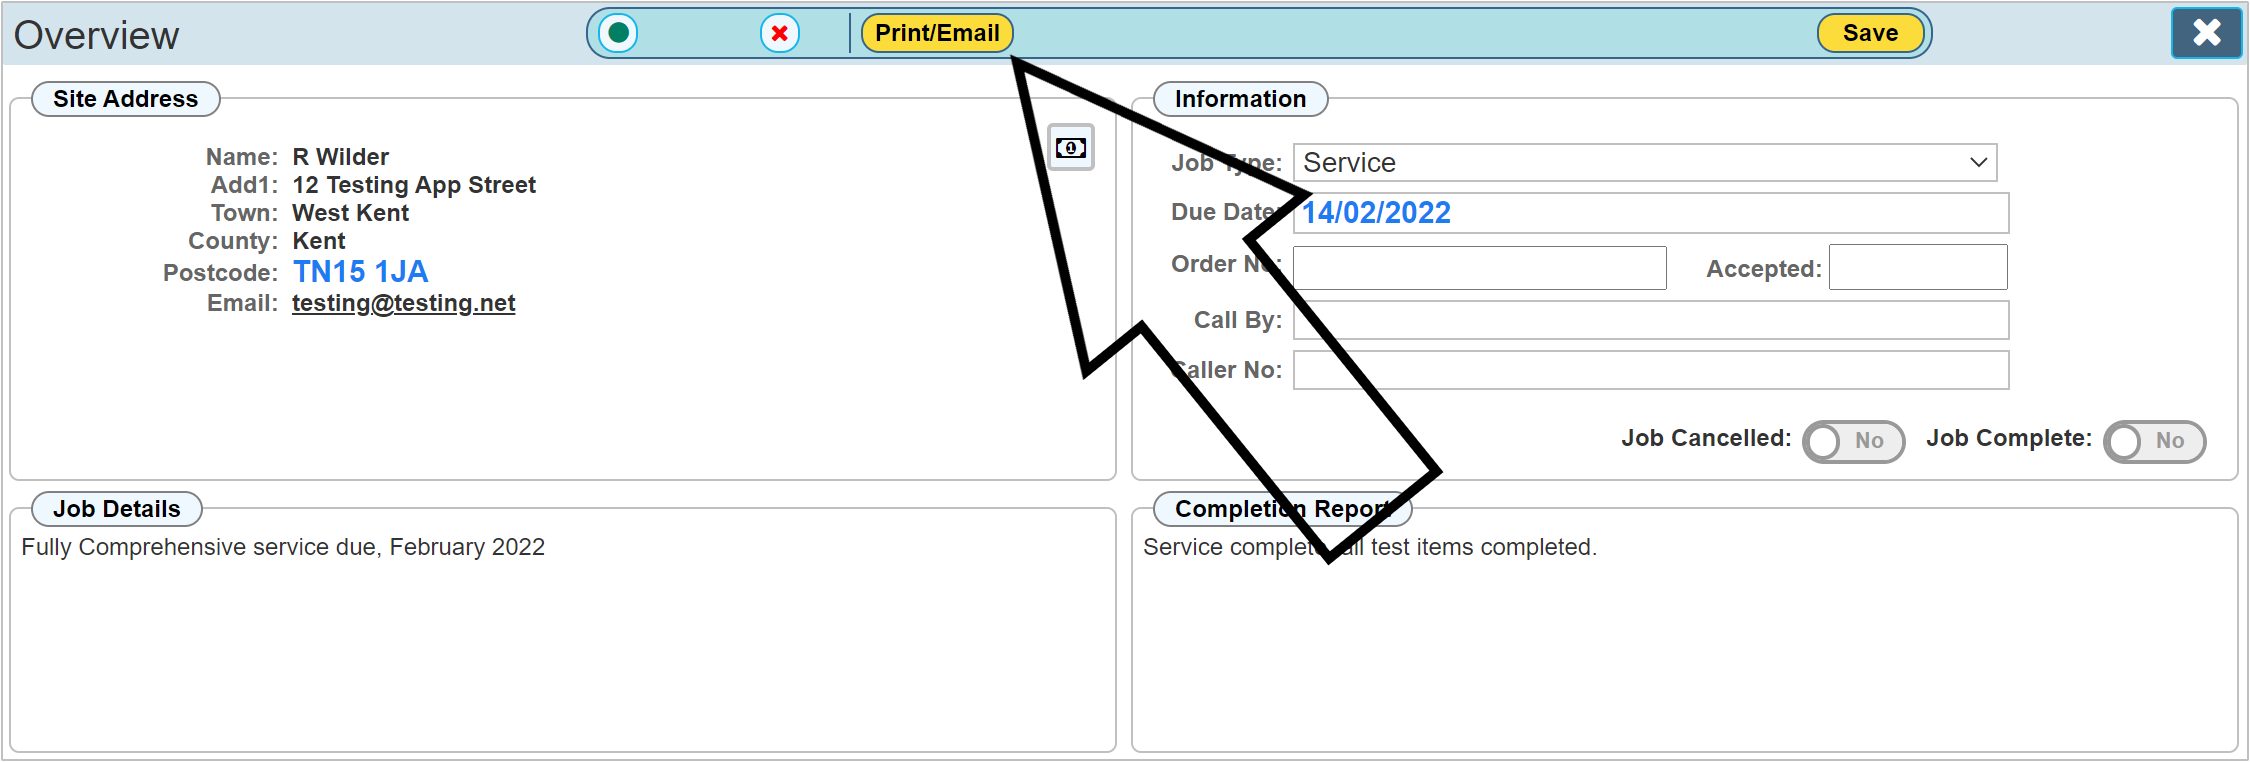
To create a PDF that is visible to your client (user). This must be created using the 'Print/Email' button shown at the top of the Job Ticket page. Once created, your client will be able to view the PDF. Using the PDF creating icon within the individual day bookings will not produce a PDF. Only the 'Print/Email' button will produce the client PDF.

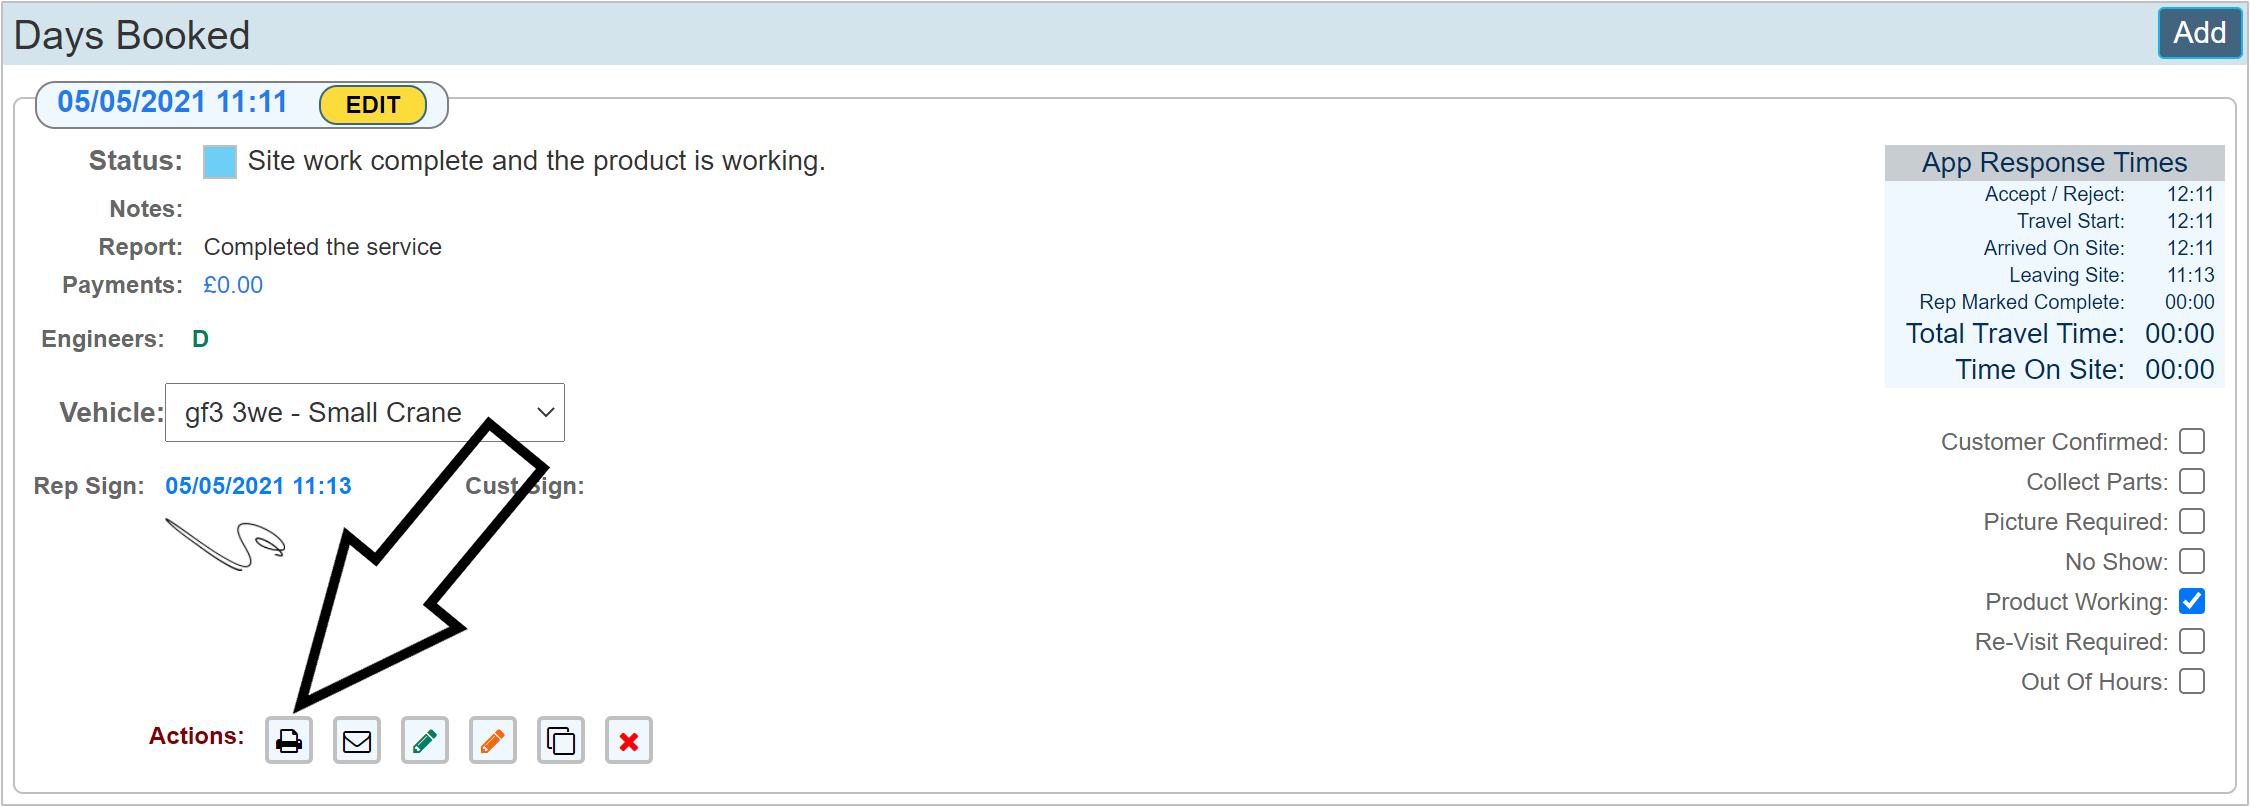
If you were to use the Days Booked PDF preview icon, this would not produce a PDF for your client. This is by design to allow you the flexibility of being able to produce your PDF during a 'Work in Progress' phase without the final PDF being shown to your client.

|
Creating a PDF from the Actions panel is not visible to your Client.
|
Please also read the Client Portal Guide designated to your Managing Agent. User Accounts - Client Portal (user)
How to instruct your Managing Agent to 'Log In'
You will have to give your Managing Agent instructions on how to log in. Copy and paste the below short guide into an email to help them get started. Enter their username and password in the sections shown in green.
- Go to: https://autovusolutions.com
- In the top Right Hand corner, click 'Log In'
- Enter your User Name: { insert the user name you created here }
- Enter your Password: { insert the password you created for this account here }
- Please note: passwords are 'Case Sensitive'
- Full user instructions are available in the How To guide 'User Accounts - Client Portal (user)