All forms of Debt Chasing E.g. by phone, email etc can be recorded within the timeline. The financials section timeline lists only financial timeline entries.
Open the Financials section of a site record by clicking the LH menu button titled 'Financial'
Within the Financials section clicking the Timeline menu button shown within the LH menu column will open the Financials Timeline dialogue.
|
Financial Timeline entries are only visible from within the Financials section.
|
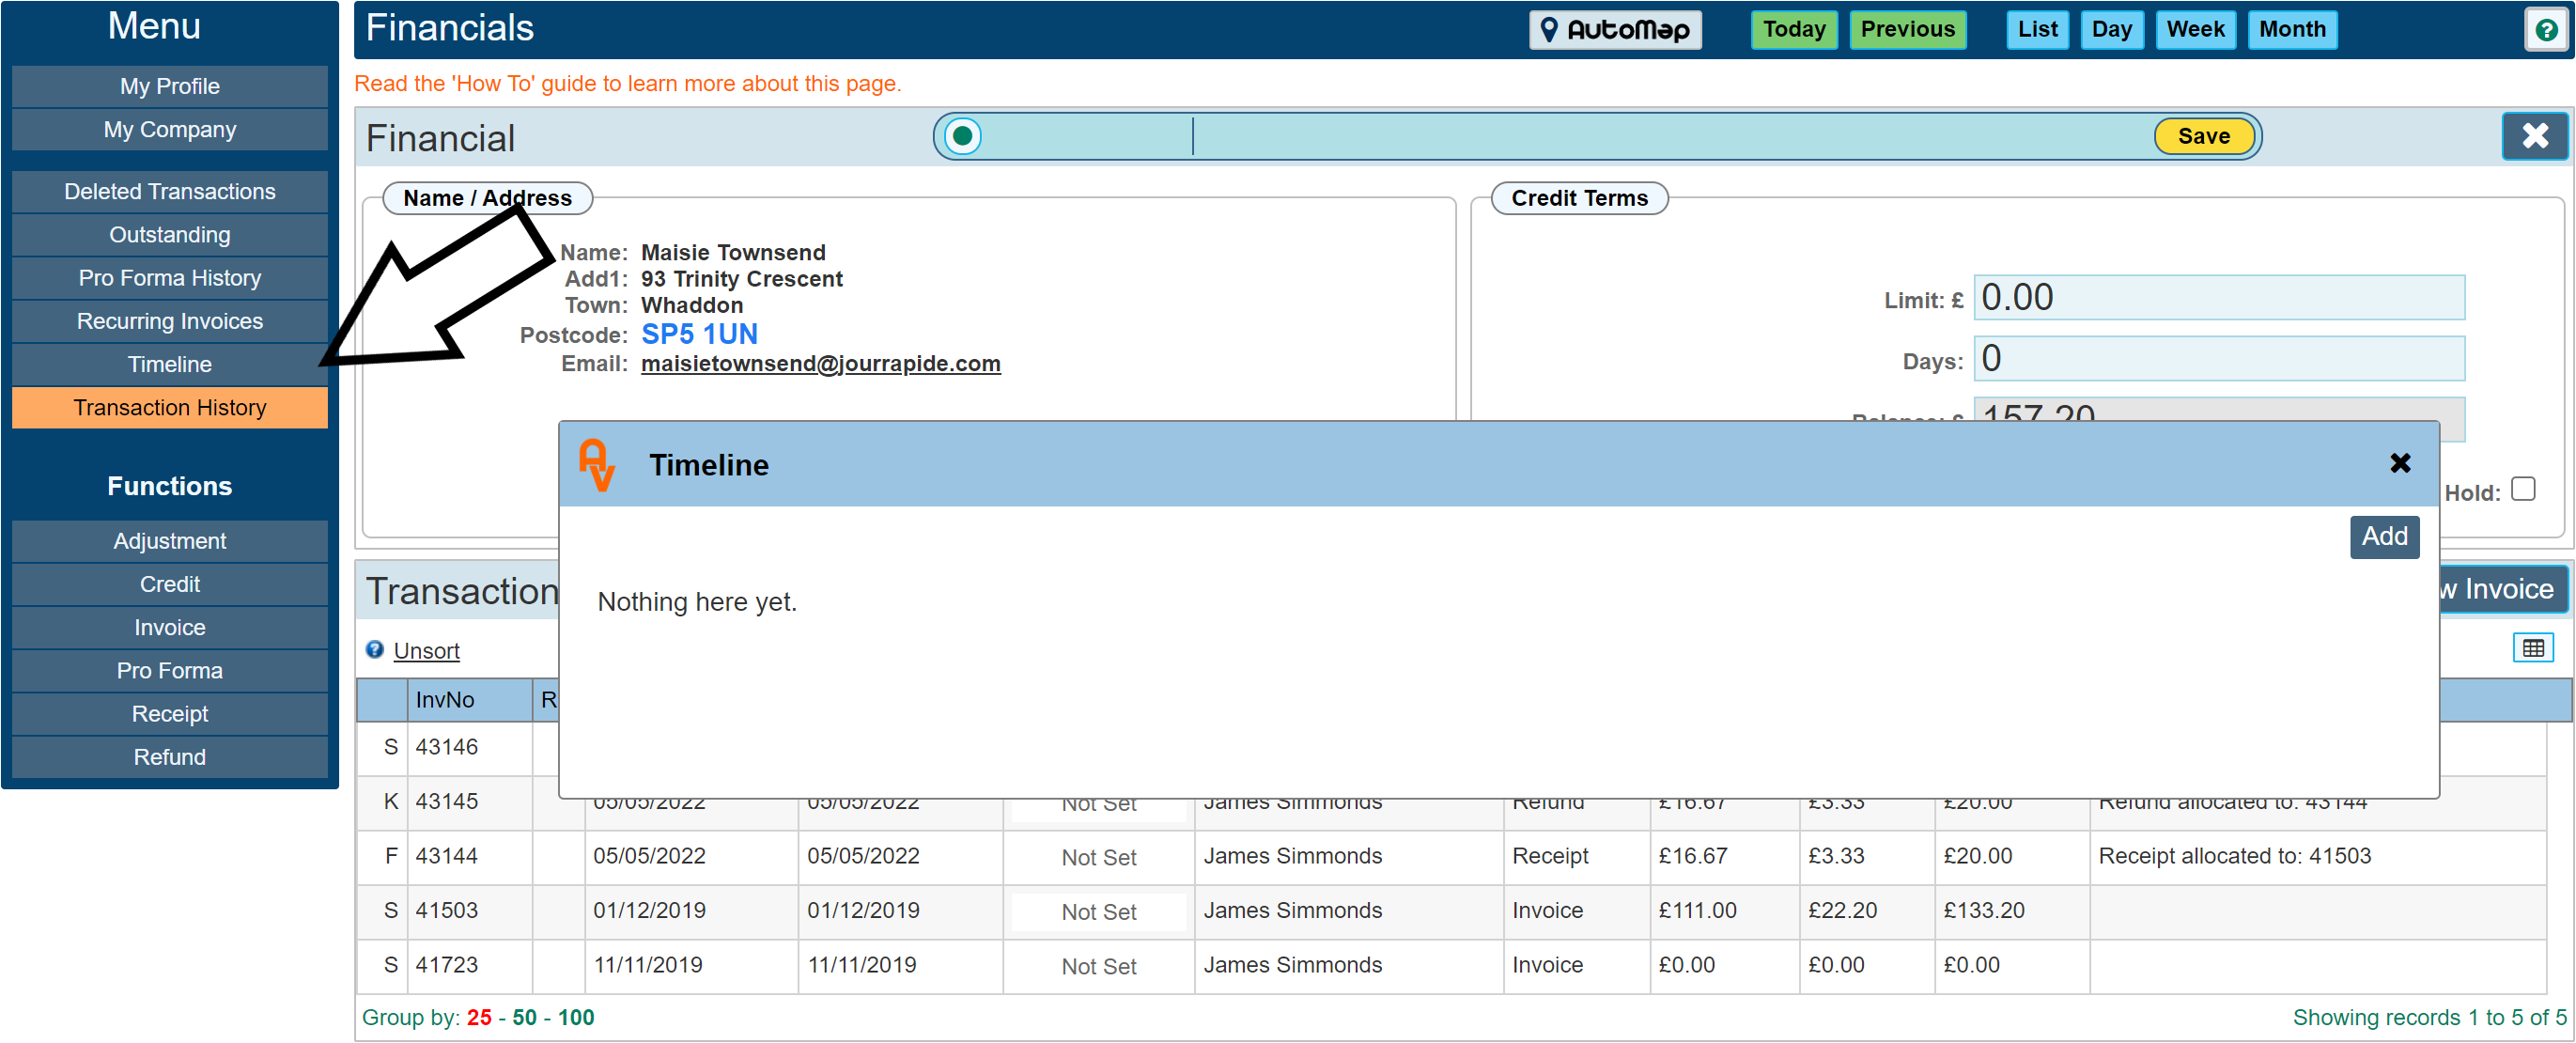
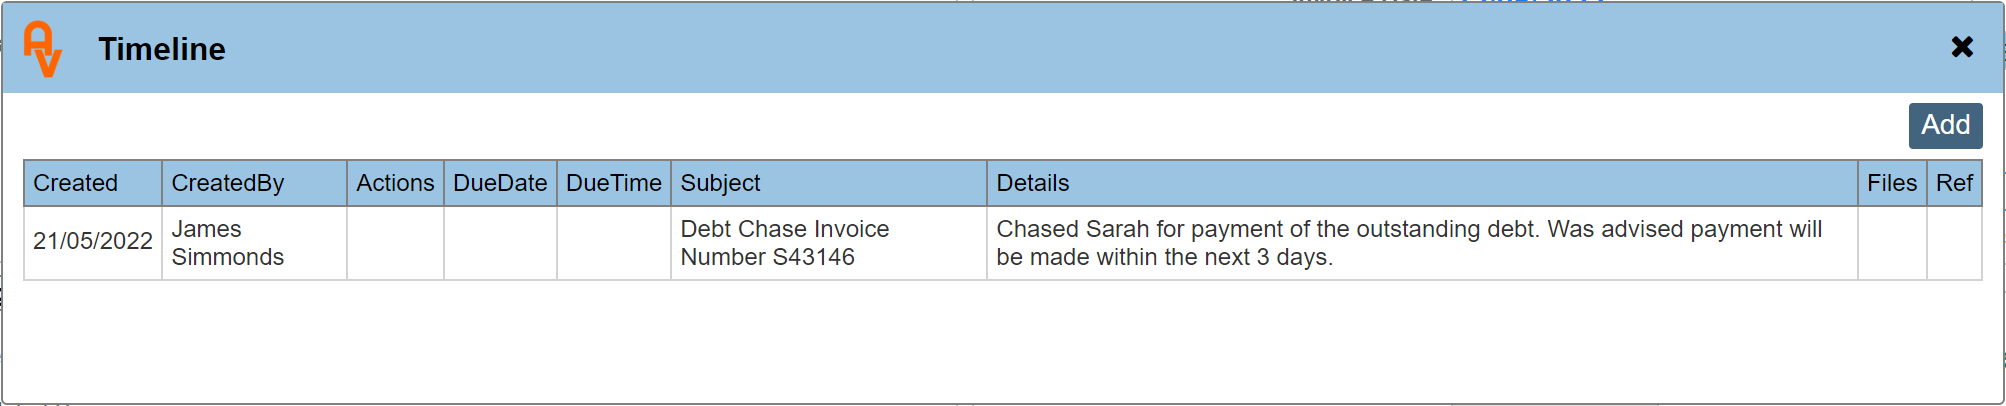
When the dialogue is first opened, there will be no entries as shown above.
When opening the Timeline dialogue from within the Financials 'Transaction History' section, it will show all financial timeline entries created either directly from an invoice or from the transaction history overview. I.E. it will show you all financial timeline entries for that product.
Opening the timeline dialogue from within a specific invoice however will limit the entries to those made directly within that invoice.
|
Timeline entries made within the Site or Job Ticket pages are not listed within the Financials Timeline.
|
To create a general timeline entry within the Financials section that is not specifically about a particular invoice, proceed as shown above and then click the 'Add' button shown on the dialogue to open up a Timeline entry dialogue.
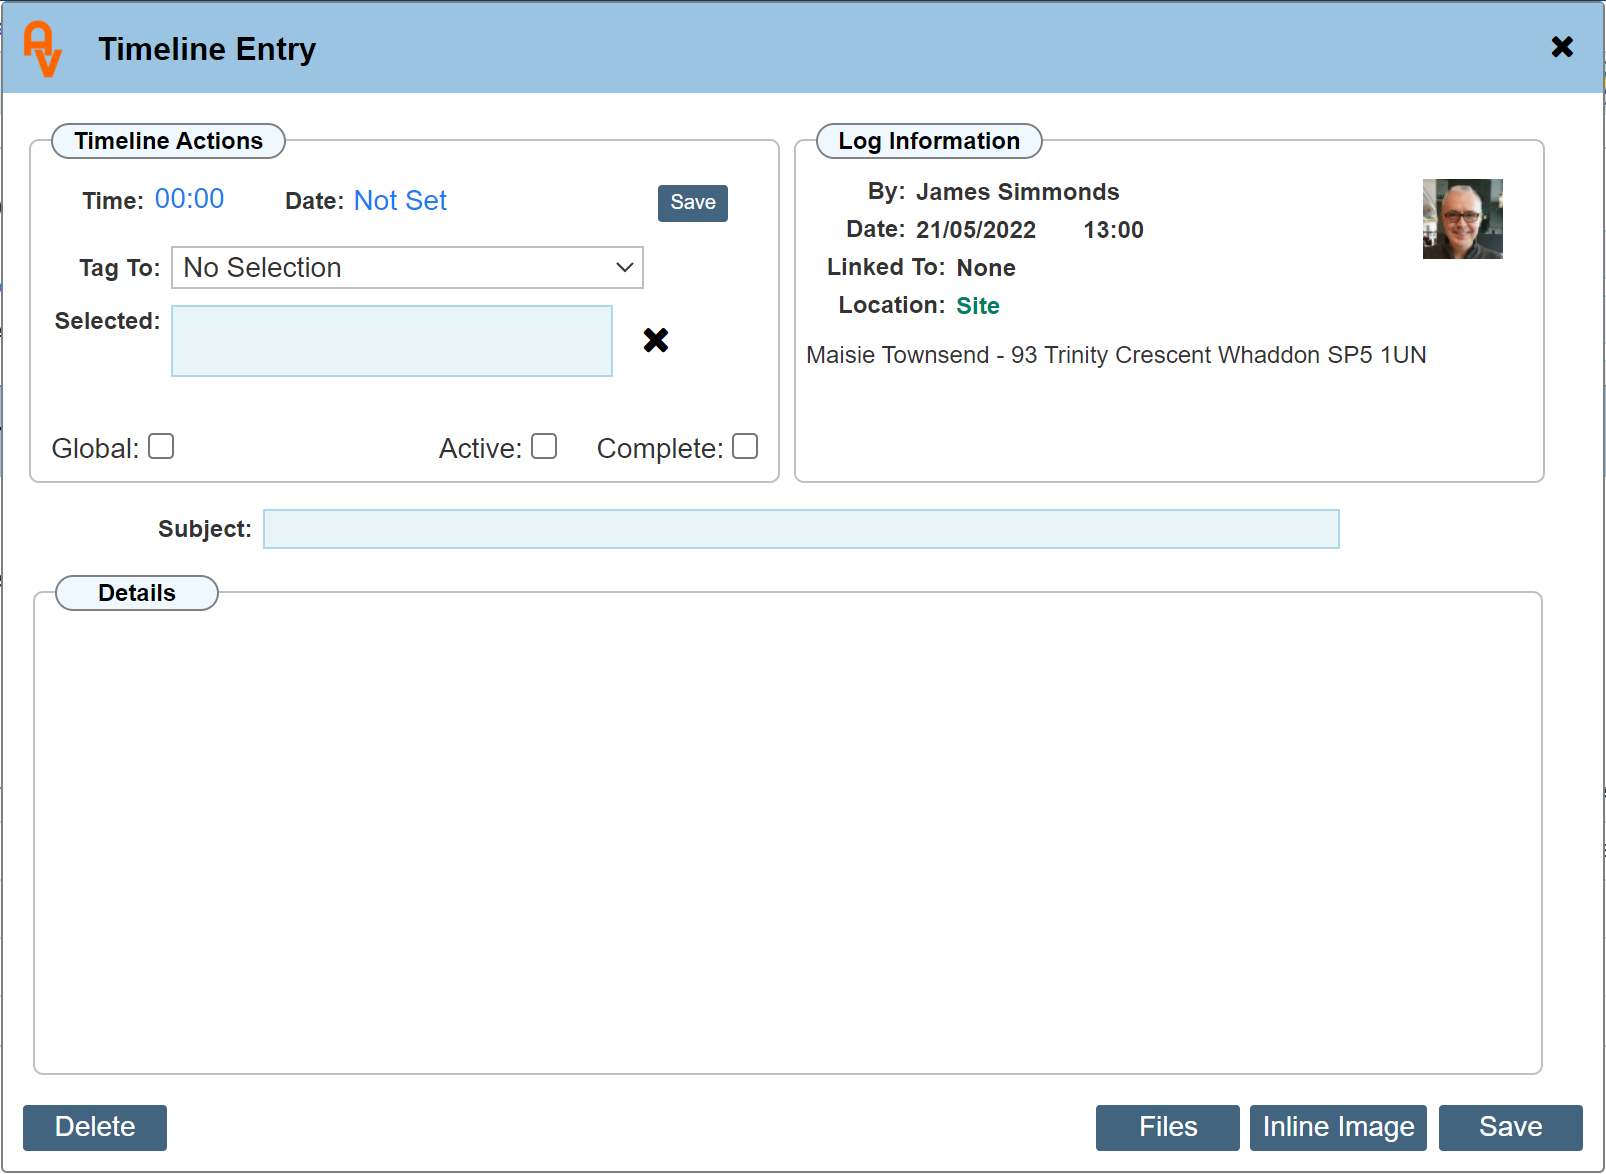
The timeline dialogue will automatically date / time the entry. Enter details about the chase up and add an optional 'Subject'
General timeline entries created while within the Transaction History are not considered Debt Chasing. To create a Debt Chasing timeline entry, open a specific invoice first.
Debt Chasing
Open a specific invoice that requires chasing.
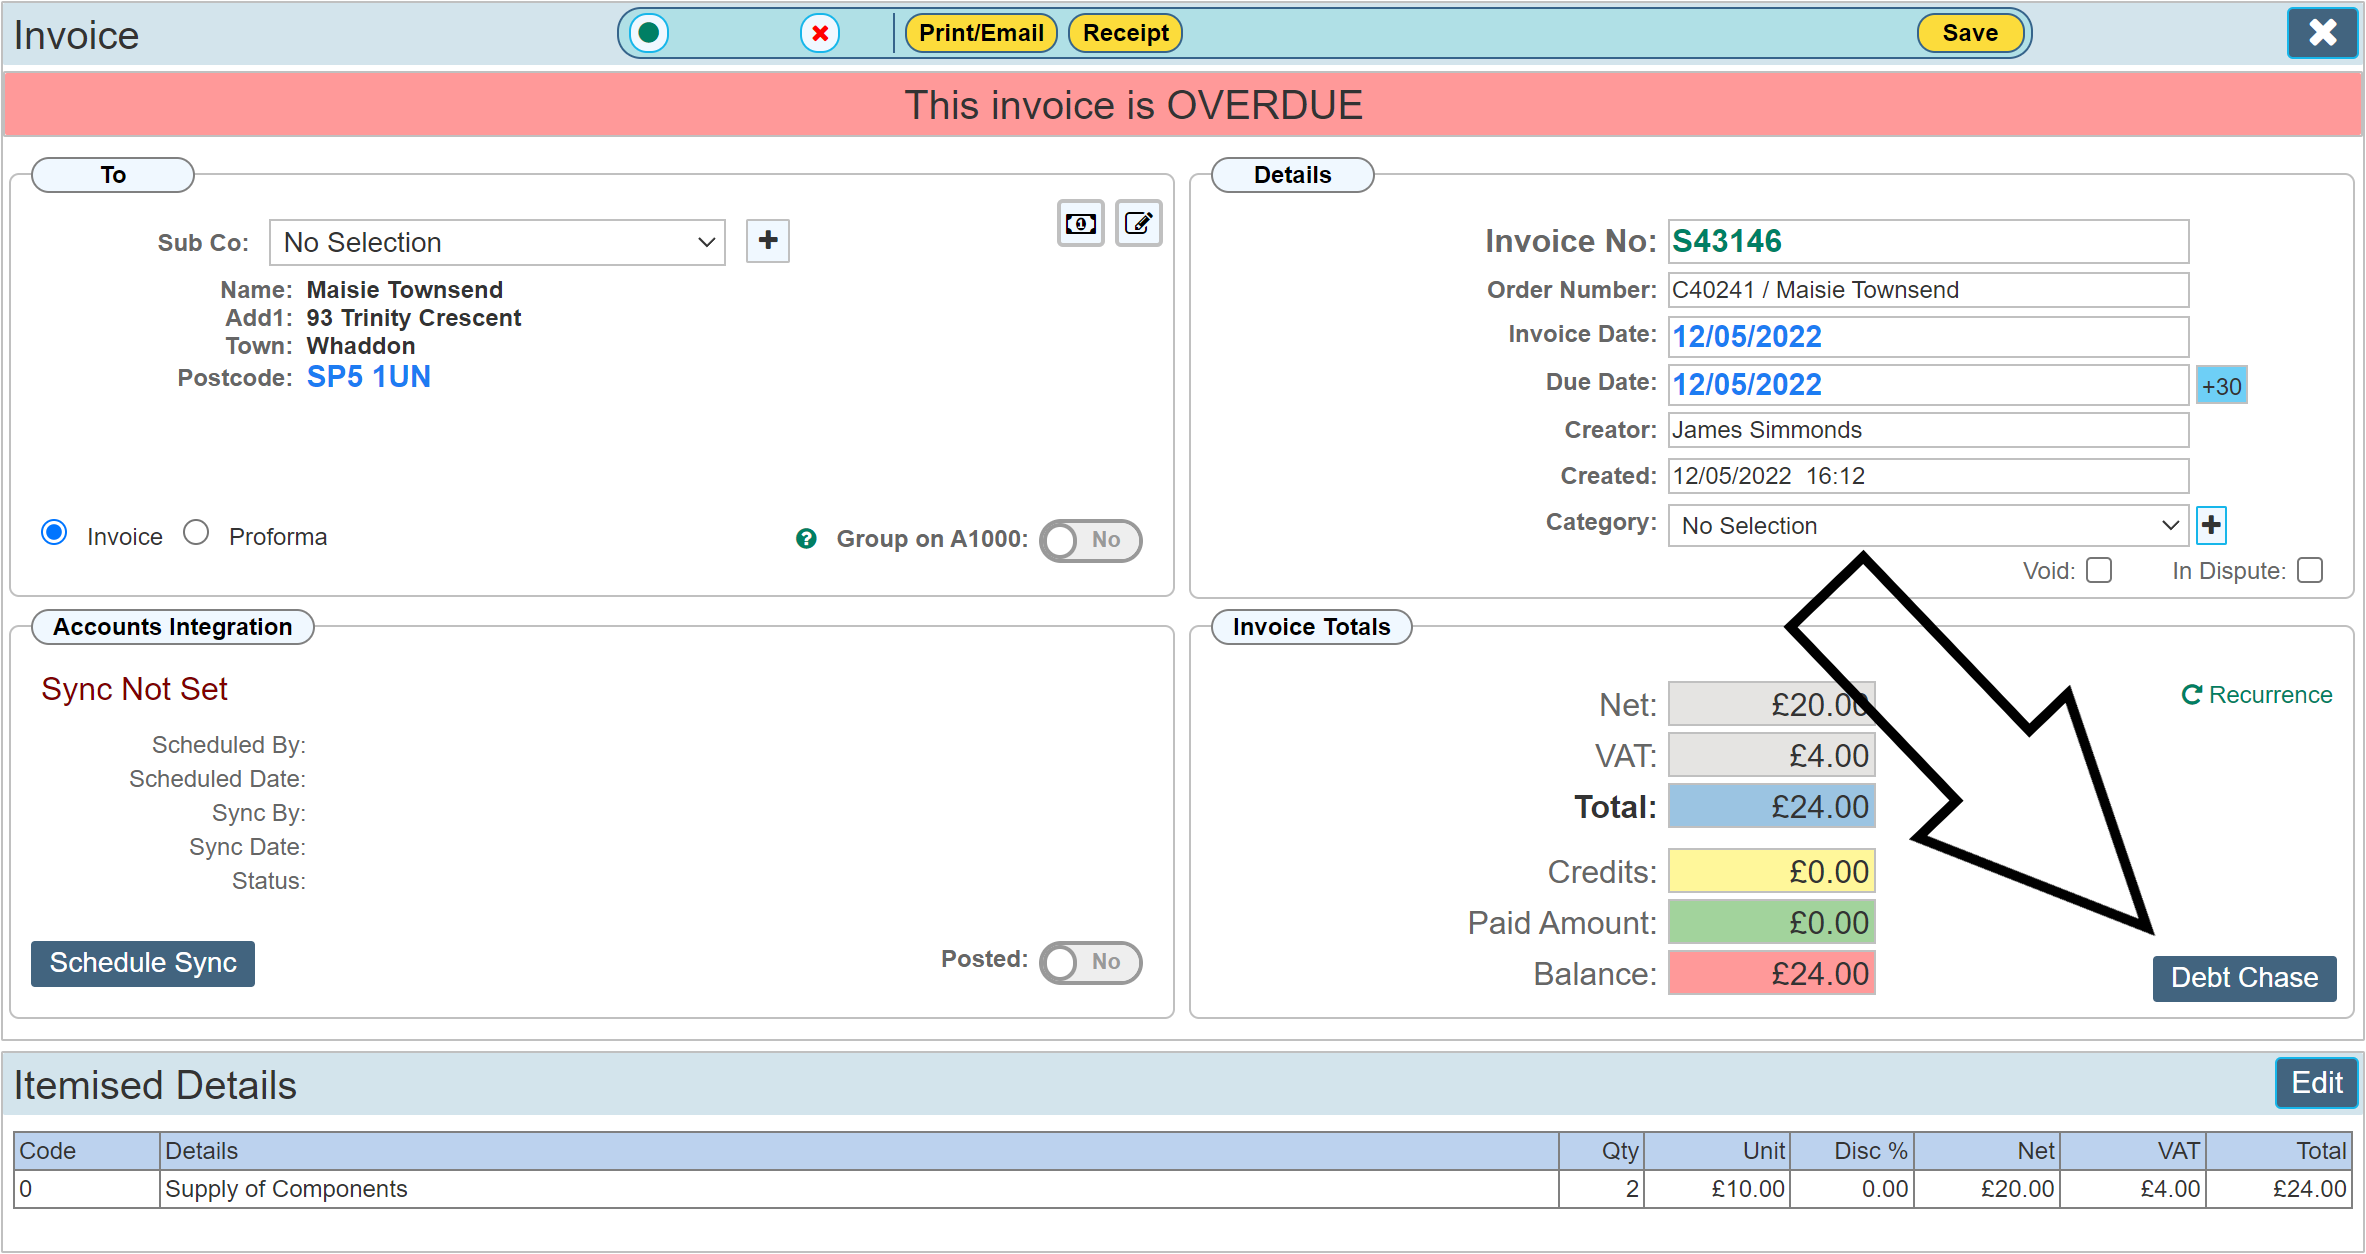
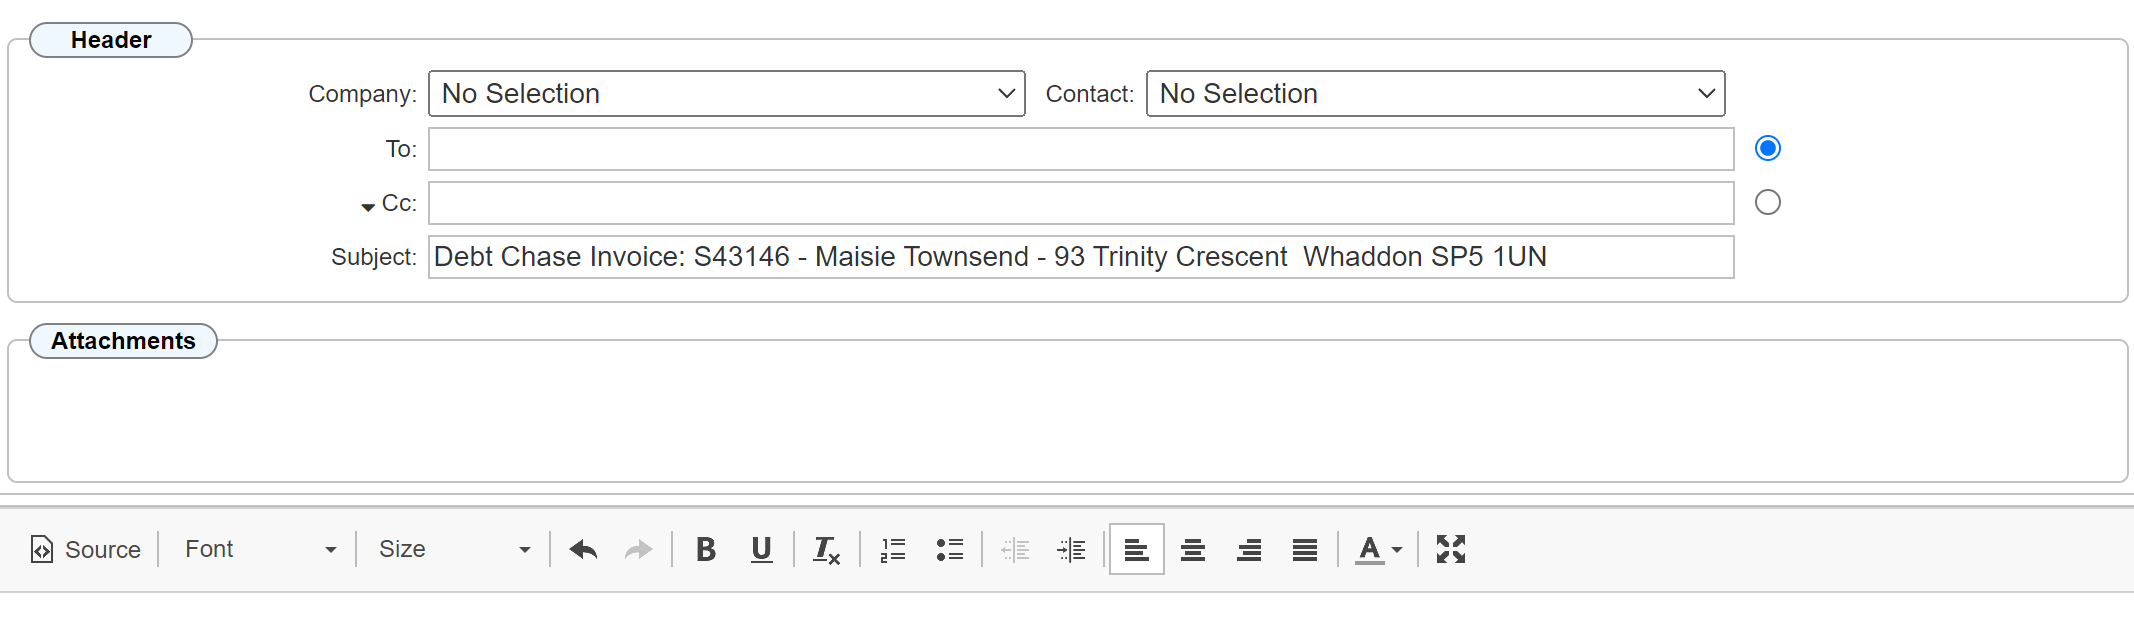
Within the invoice body, a quick link button labelled 'Debt Chase' is provided to open a new Debt Chasing Timeline entry. Clicking this will immediately open a timeline dialogue for entry. You may also click the 'Timeline' LH menu button to open the history and then click the 'Add' button.
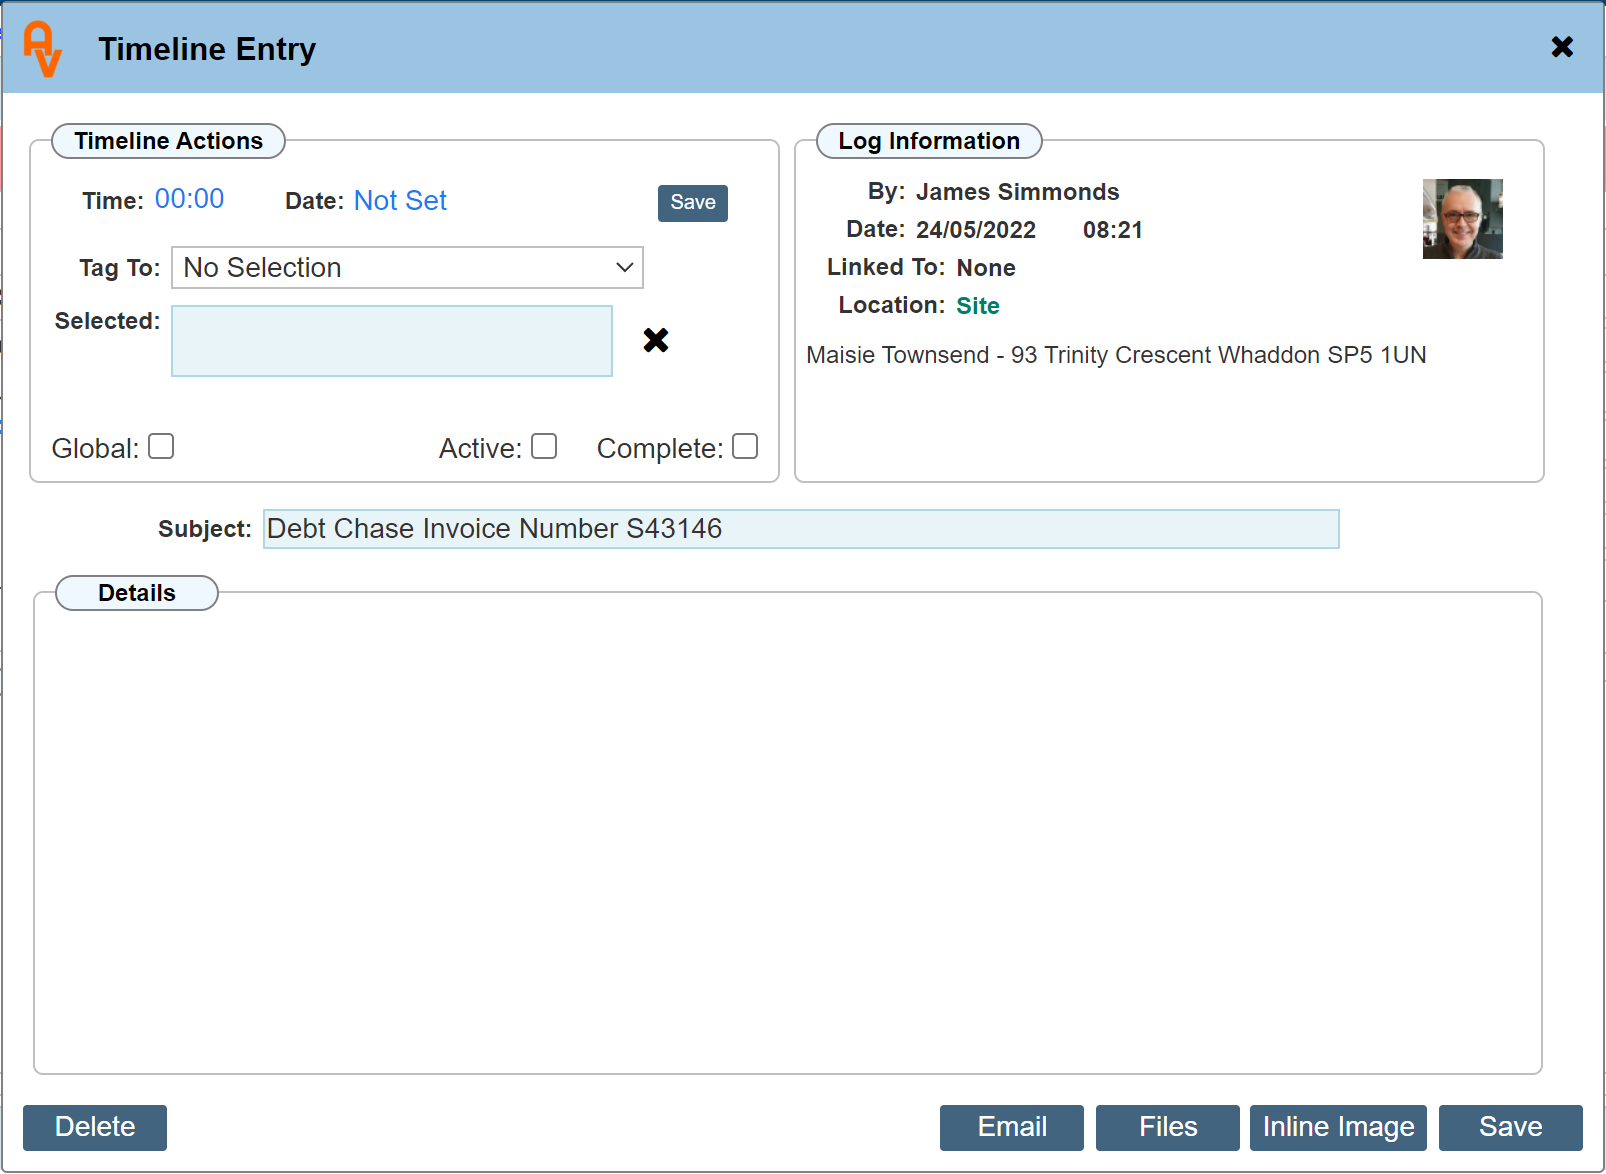
The Debt Chasing timeline entry will open but where the general timeline entry has no subject, this one will automatically insert a subject that includes the invoice number. This is so that when viewing all timeline entries on the transaction history, it is easily identifiable which timeline entry goes with a particular invoice. This form of timeline entry also includes a quick link to email.
In this instance, we created a timeline entry chasing the debt as shown below.

We can save this entry by clicking 'Save', alternatively we can create a debt chase email by clicking 'Email'. The below image shows the emailer dialogue open with the subject line including the debt chase title. You may edit this to suite.
Within the emailer dialogue, either type directly into the editor or select a pre defined-template. Send or close the email to return back to the invoice.
Timeline History
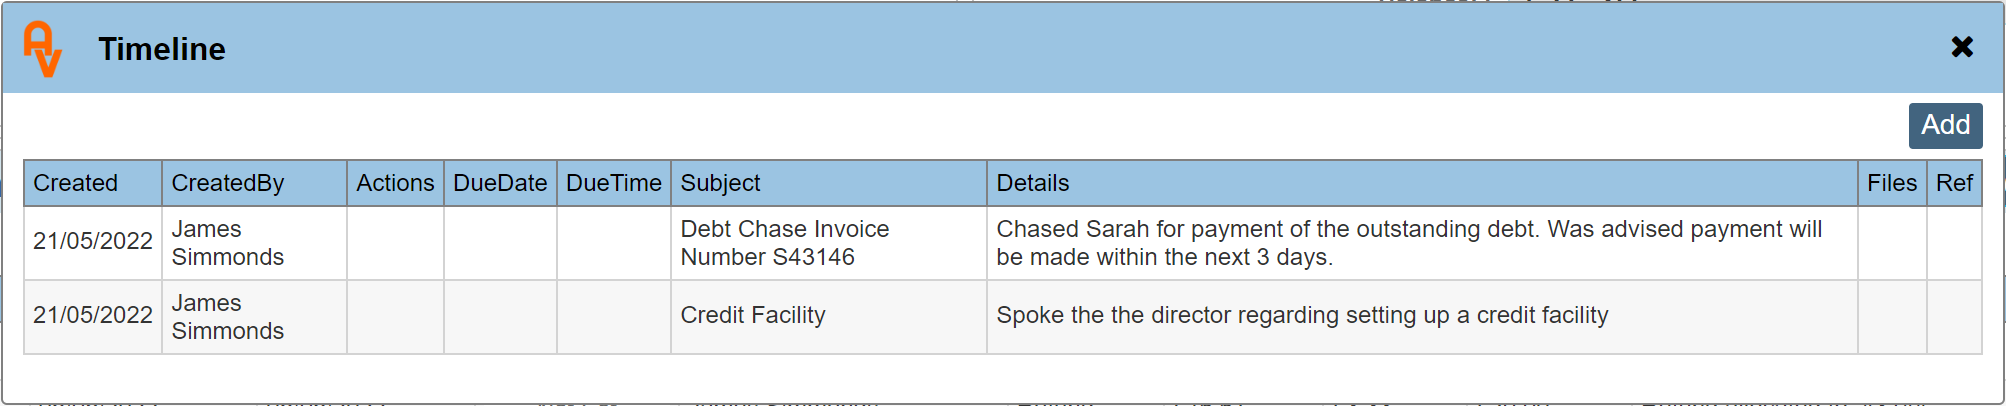
If we now open the Timeline History' dialogue while still within the invoice, we can see the debt chasing timeline entry.
|
While within the invoice, the timeline history will only show entries related to that particular invoice.
|
If we now go back to the transaction history by closing the invoice and then re open the 'Timeline History' we can then see all entries made for that account / product.
Debt Chase Follow Up
There are 2 methods of following up on outstanding debt.
The first method is available directly from the Diary Page and includes all outstanding debt that has gone past the Due Date.
From the main diary page, click the 'Invoicing' button from within the LH menu. Within the 'Filter 1' panel, select 'Overdue Invoices (Debt Chase)'
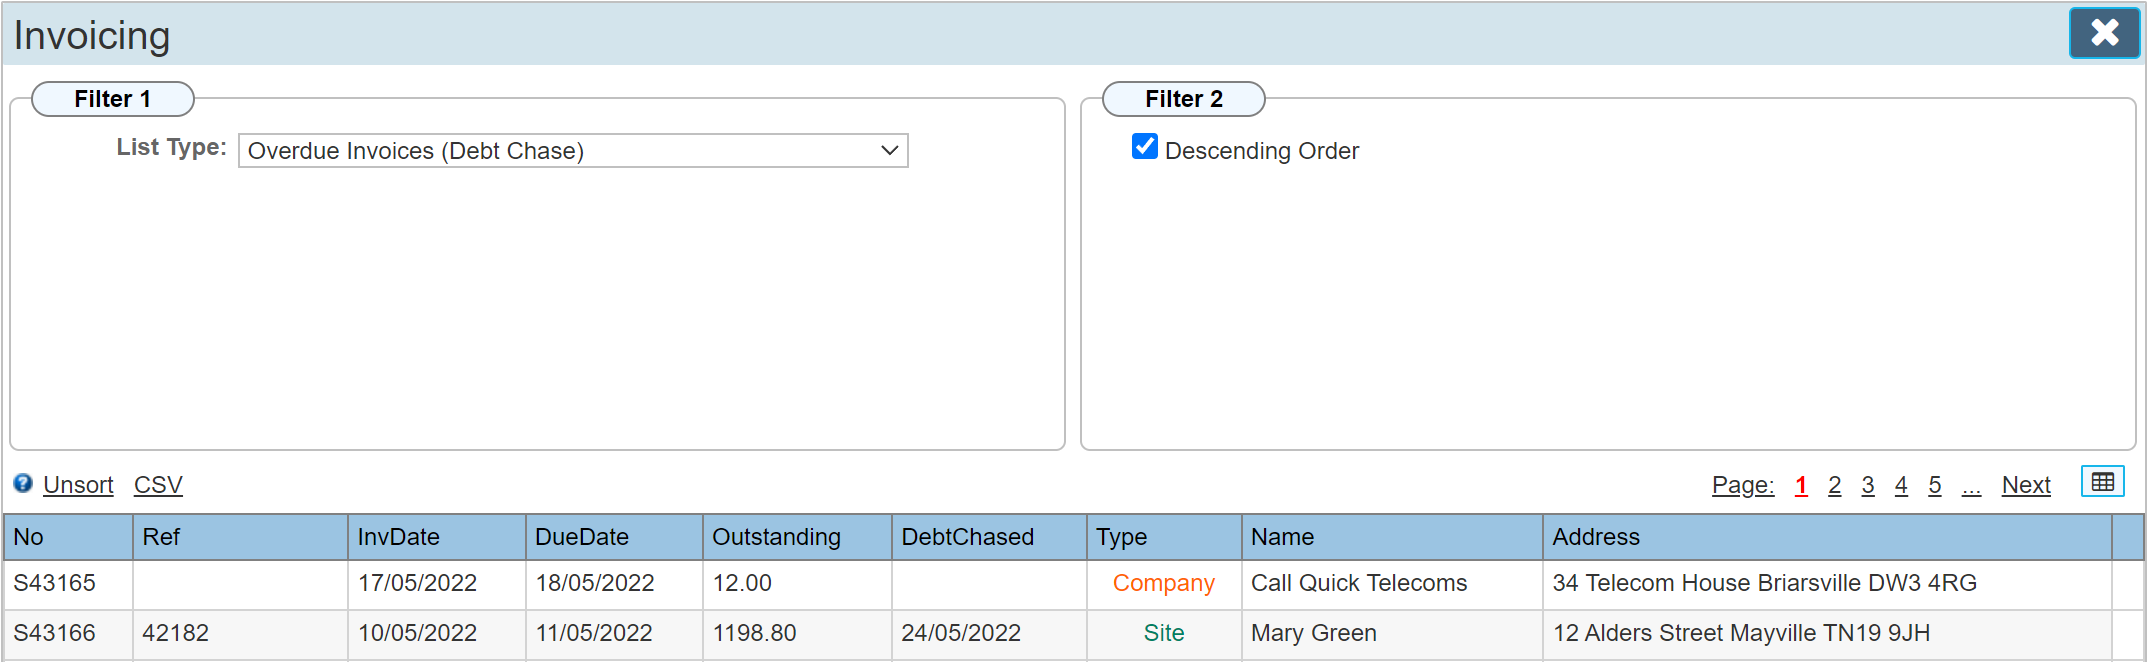
This will list all invoices that remain 'Unpaid' since the Due Date. You will see the column labelled 'DebtChased'. Clicking on the column heading will sort the dates into order either ascending or descending.
Clicking on an entry line will navigate to that particular invoice for either further viewing or to add an additional Debt Chase timeline entry. Closing the invoice will return to the debt chase screen.
|
The 'DebtChased' column shows the date of the last entry made where multiple dates occurred over a period.
|
An alternative, more detailed method would be to create a report on unpaid invoices. Reports allow you to be more specific about which invoices to show by using filters such as 'Date Range'.
Open reports by clicking the top menu button labelled 'Reports'
Within the LH menu of the reports section, click either Financial (Company) or Financial (Site) followed by selecting 'Unpaid' to open the Unpaid Invoices report.
Once this report is open, either set a date range to show unpaid invoices between the date range or toggle 'Show All Dates' to show all unpaid invoices ever created.
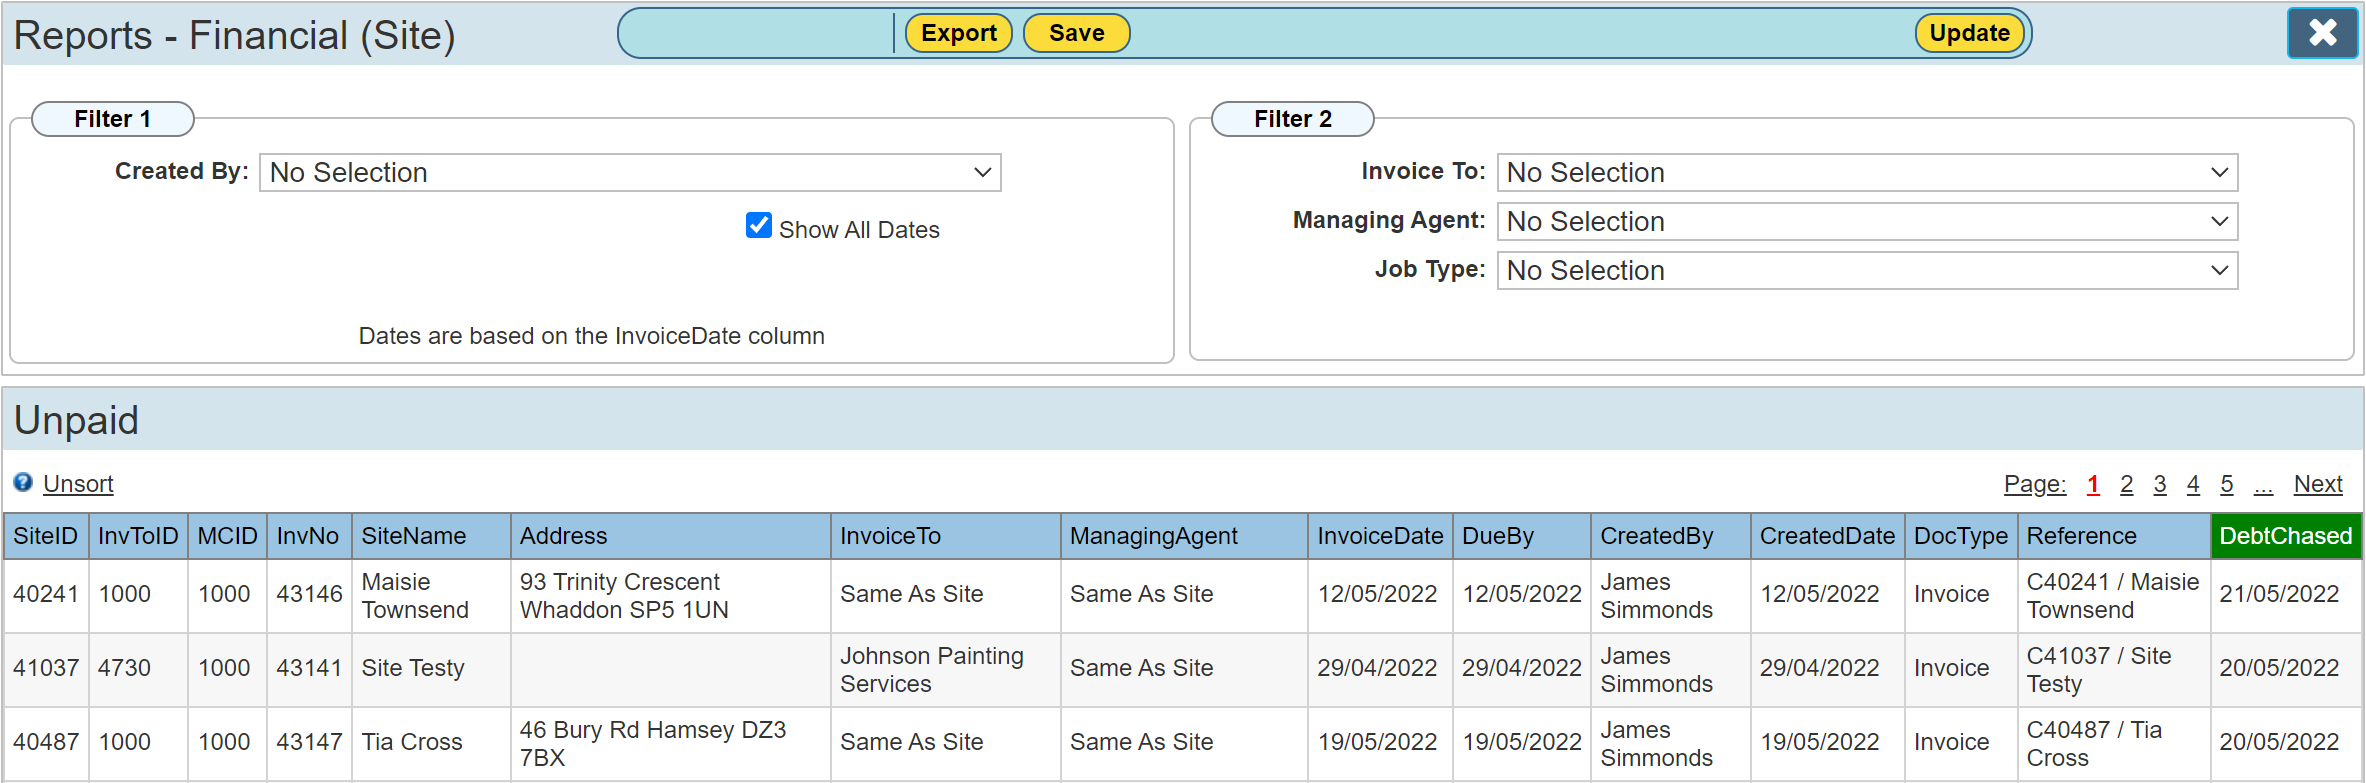
Specific columns can be viewed and other filters can be applied. Read the 'Reports - How it works' guide for further details on this.
Clicking on an entry line within the report will take you directly to the invoice to either further view or add an additional chase up timeline entry.
Using the methods shown above allows you to actively chase all outstanding debt with a clear indication of when each outstanding invoice was last chased.