These lists can be used for any purpose where a question must be answered while on site. E.G. Service Visits, LOLER, Health & Safety, RAMS. etc.
The names of these lists can be custom defined allowing your own names to be displayed on both the App and the Job Ticket page on the web UI allowing you to edit the default check list names where required.
The first 4 lists include 3 toggles allowing a one click solution to indicate the status of the question asked. E.G. ‘Good’, ‘Worn’, ‘Fail’ or ‘Yes’, ‘No’, ‘N/A’. An optional field for adding additional information is included with each question / set of toggles.
The button names can be custom defined allowing you to edit the default names to your own where required.
The last 2 lists, E and F are question and answers only.
When the lists are created, an option allows you to split a single list into several lists or ‘Sections’ when the data is displayed on the final PDF Job Ticket Report. Each of these ‘Sections’ can be colour coded within the table heading with its own custom table title.
|
To show the service check list questions and answers on the PDF Job Ticket, an appropriate #HashTag# must be shown on the relevant Job Ticket PDF design detailed in the Document Designer. There are several that can be used and detailed in the relevant How To guide, but to get started quickly, add the hash tag #AllCheckLists# to your Job Ticket PDF design.
|
Creating site check lists
Navigate to Settings > Custom Values > then select one of the 6 site check lists shown within the site check lists section. Initially these will be listed List A - D and Questions E - F. These names will update accordingly if you change the list name.
The drop down list allows you to determine which product the list relates to. If you have defined product types, the site check lists can be tailored to target each product type individually. This feature allows you to be very specific with the questions being asked for a given piece of equipment. For example, the check list questions being asked for a commercial passenger lift would be very different from the questions being asked for a fork lift truck.
Your business type may check / service more similar product types than the example made above, but the point being that the ability to group your products into ‘Product Types’ is possible and this then allows you to create targeted Site Check Lists.
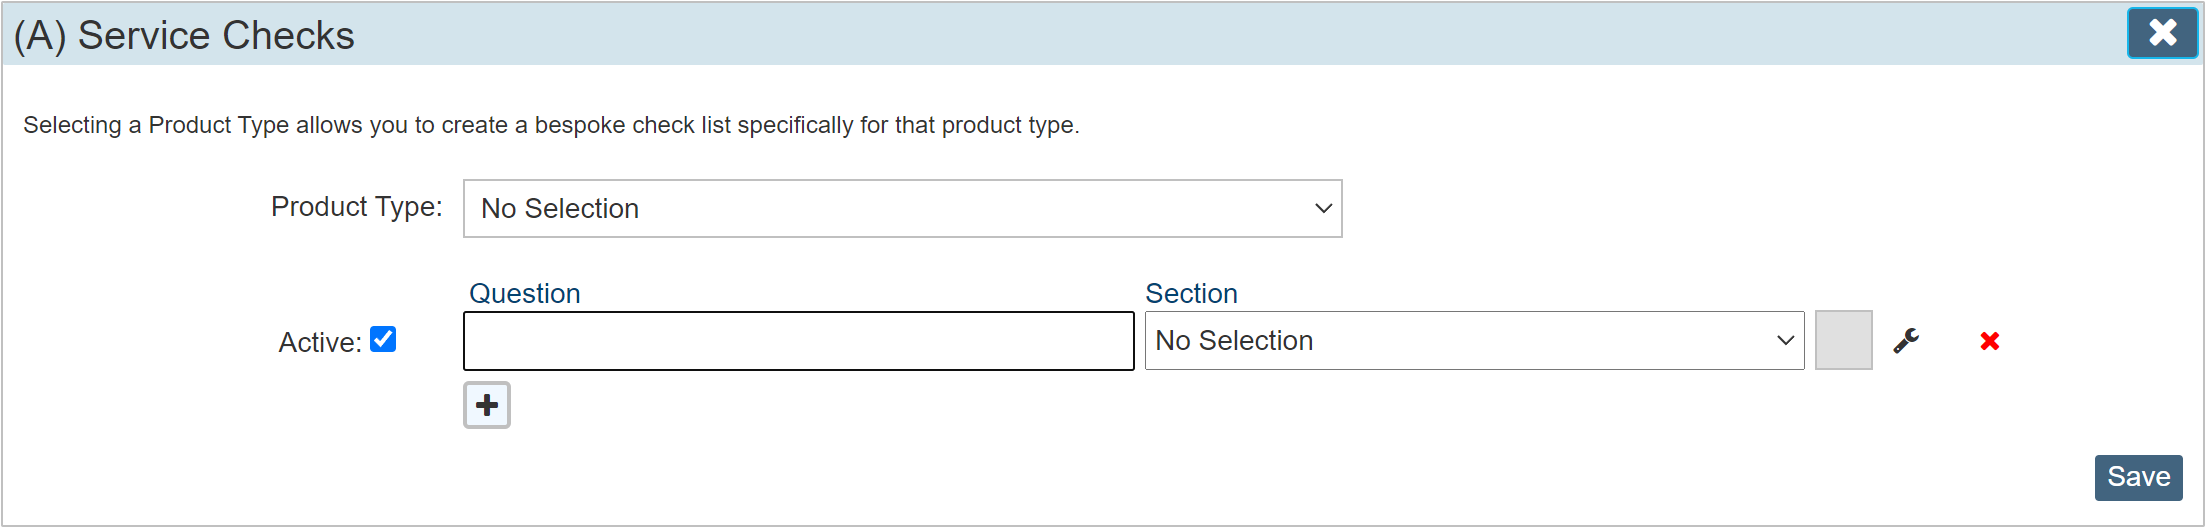
Where necessary, a global list can be created that captures all products that do not have a product selected in the Make / Model fields. Enter generic site check list questions by leaving the drop down list set to ‘No Selection’ Any site product that does not have a Make / Model selected in the Product Manager will use this list by default.
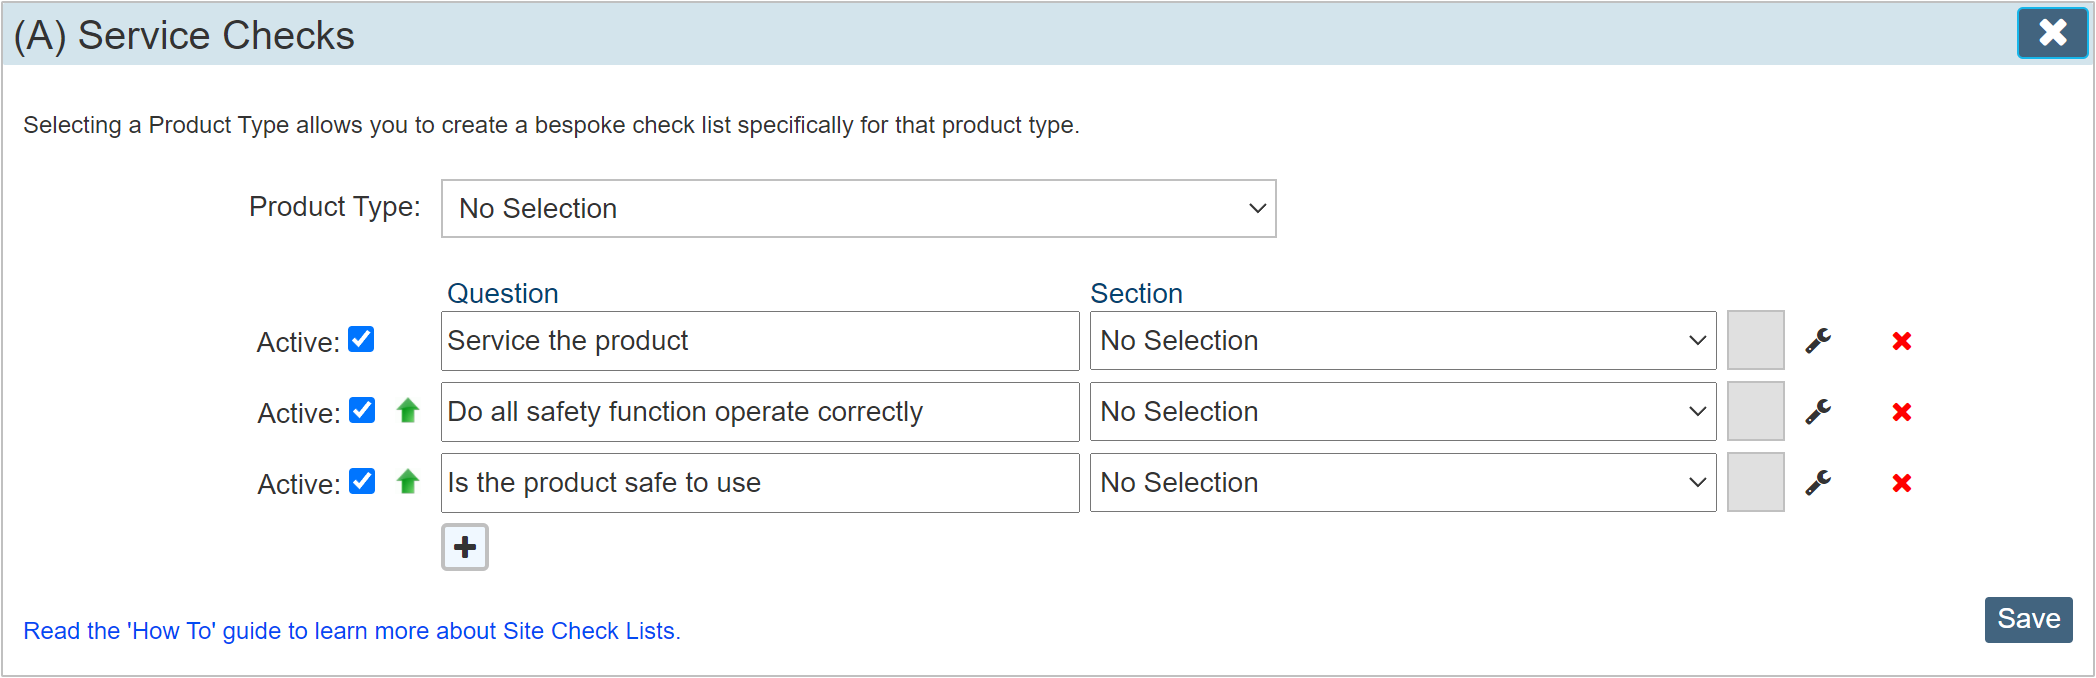
Generic Service Checks with no product type selected.
The same check list but with a product type selected.
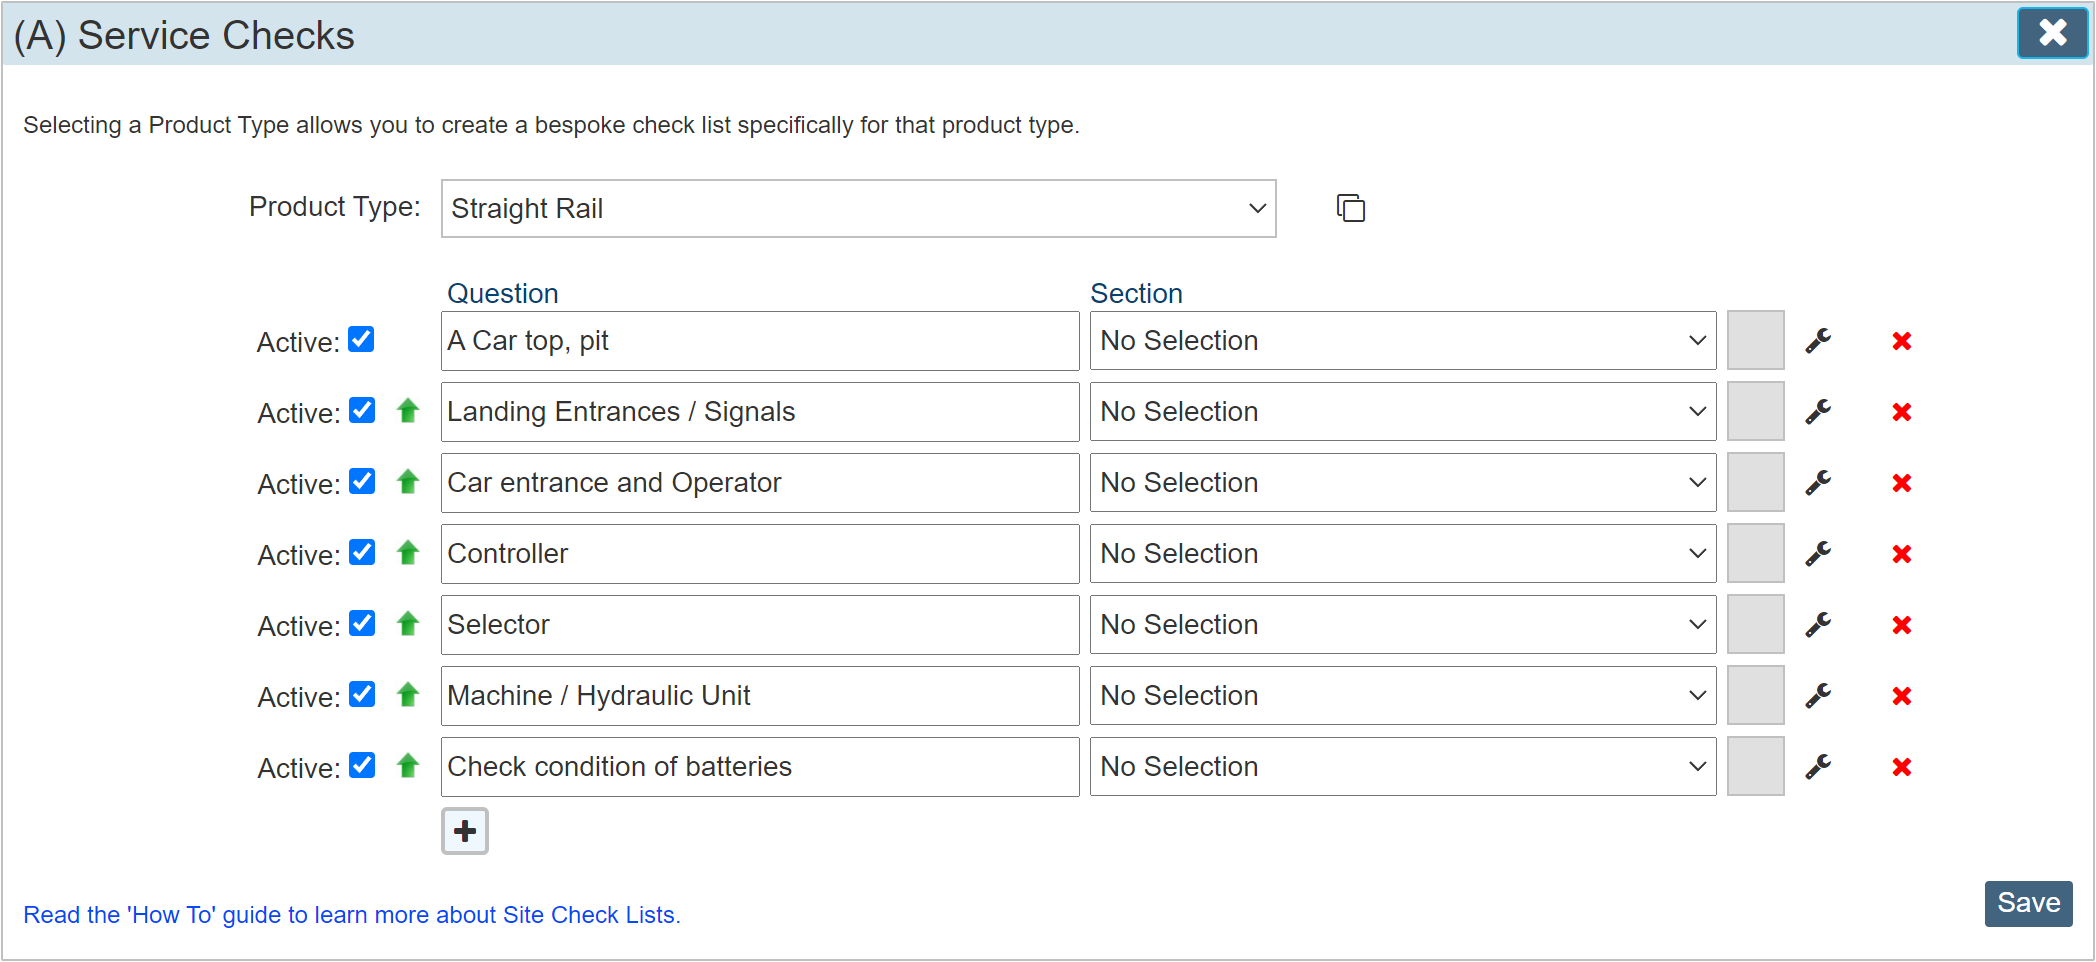
The questions can be completely different for each product type, on the App, the selection of the correct list is automatic based on the Make and Model assigned to the product. The site rep does not have to do anything to determine this, the correct questions are sent to the app based on the Make / Model / Product Type.
By utilising the Product Type selection, this effectively makes the number of available checks infinite rather than purely 6 basic lists.
Rename the Check Lists
Click the tab ‘Rename Check List’ tab shown in the LH menu to open the ‘Check List Name Editor’
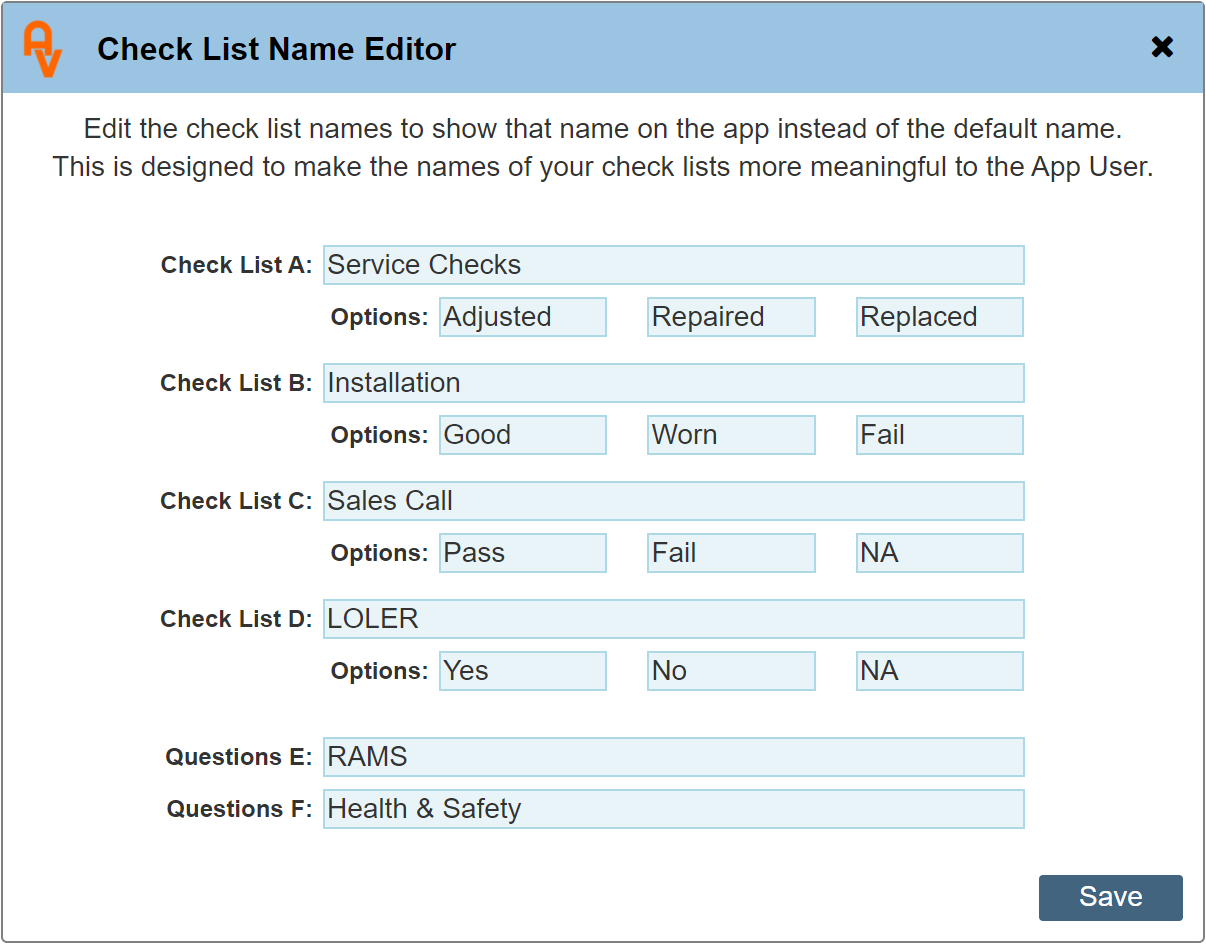
This dialogue allow you to rename the check list title and also the button labels when shown on the mobile app.
The default titles are show as Check List A – D and Questions E – F. Enter your custom name in the field provided and save.
The fields shown for ‘Options’ are provided for you to rename the button titles.
Please note that the buttons are fixed in width and space on the mobile app is tight. Use short single word titles such as ‘Yes’, ‘No’, ‘N/A’. If the titles are too long, the additional text will not be shown once the button width has been filled.
Section Headings
The use of Section Headings is optional. If you do not define section headings the final output on the PDF Job Ticket will be one single list.
A section heading allows you the split a single check list into several lists, each with its own heading and may also be colour coded. The sections are shown on the final Job Ticket PDF that you would send to your customer.
Once the ‘Section Headings’ have been defined, you may then select these in the drop-down list when entering the check list questions.
Consideration to the order of questions and the section heading selection is important. Although the sections will be accurately shown on the final PDF Job Ticket where each section will show only the questions designated for that section, to prevent confusion, it makes sense to group these accordingly when initially defining the questions and sections. I.E. keep all the questions for a given section together on your design.
Creating a Section Heading
Before a Section can be selected, these must first be defined.
Click on the Tab 'Section Headings' shown in the LH Menu to open the Section Heading Dialogue.
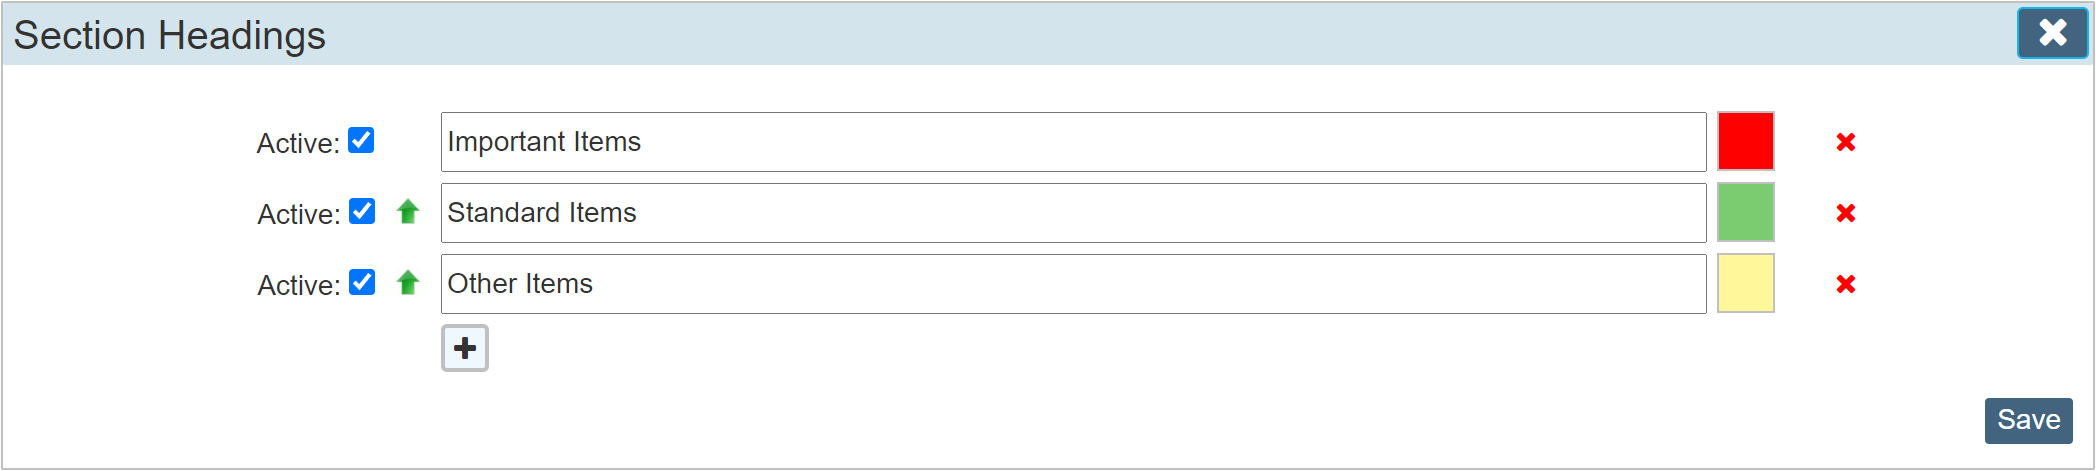
In this instance, we have already entered 3 section names, these can of course be names of your choice. Use the colour selector on the right by clicking the colour picker square box and select a colour of your choice.
Service Month Filter
This can be tricky to set up initially.
This is a bespoke feature that allows you to filter questions based on the current month and Job Ticket Due Date. It is primarily used with a service schedule where all service check questions can be defined in the site check list questions editor, but by selecting which month this question is allocated, the question will only show when the equipment is being serviced in that month or selection of months and the Job Ticket 'Due Date' matches that of the selected month. (Questions where no month has been defined will also show)
|
There is a secondary activation toggle for this feature to prevent accidental selection of service months which also allows you to globally de-activate the feature if it is no longer required.
Navigate to Settings > Company Settings > Mobile App and toggle 'Limit Service Months' on or off.
Proceed with Caution.
|
For most equipment, this option is not required but for products that are serviced monthly, it may be the case that certain service check items are serviced on a given month rather than every month.
If no selection of month is made, the question will always be sent to the app, if a month selection toggle is set then the filter is active and the check list item will only be sent on that month or selection of months.
Allowing questions to show where no month has been defined makes sure all other lists that do not utilise the 'Service Months' selector are still shown on the App.
|
It is important to make sure a Month is selected for every question that you intend to be targeted to a specific month otherwise the question will always be shown.
|
To open the Service Months selector click the 'Spanner' icon towards the right of each question.
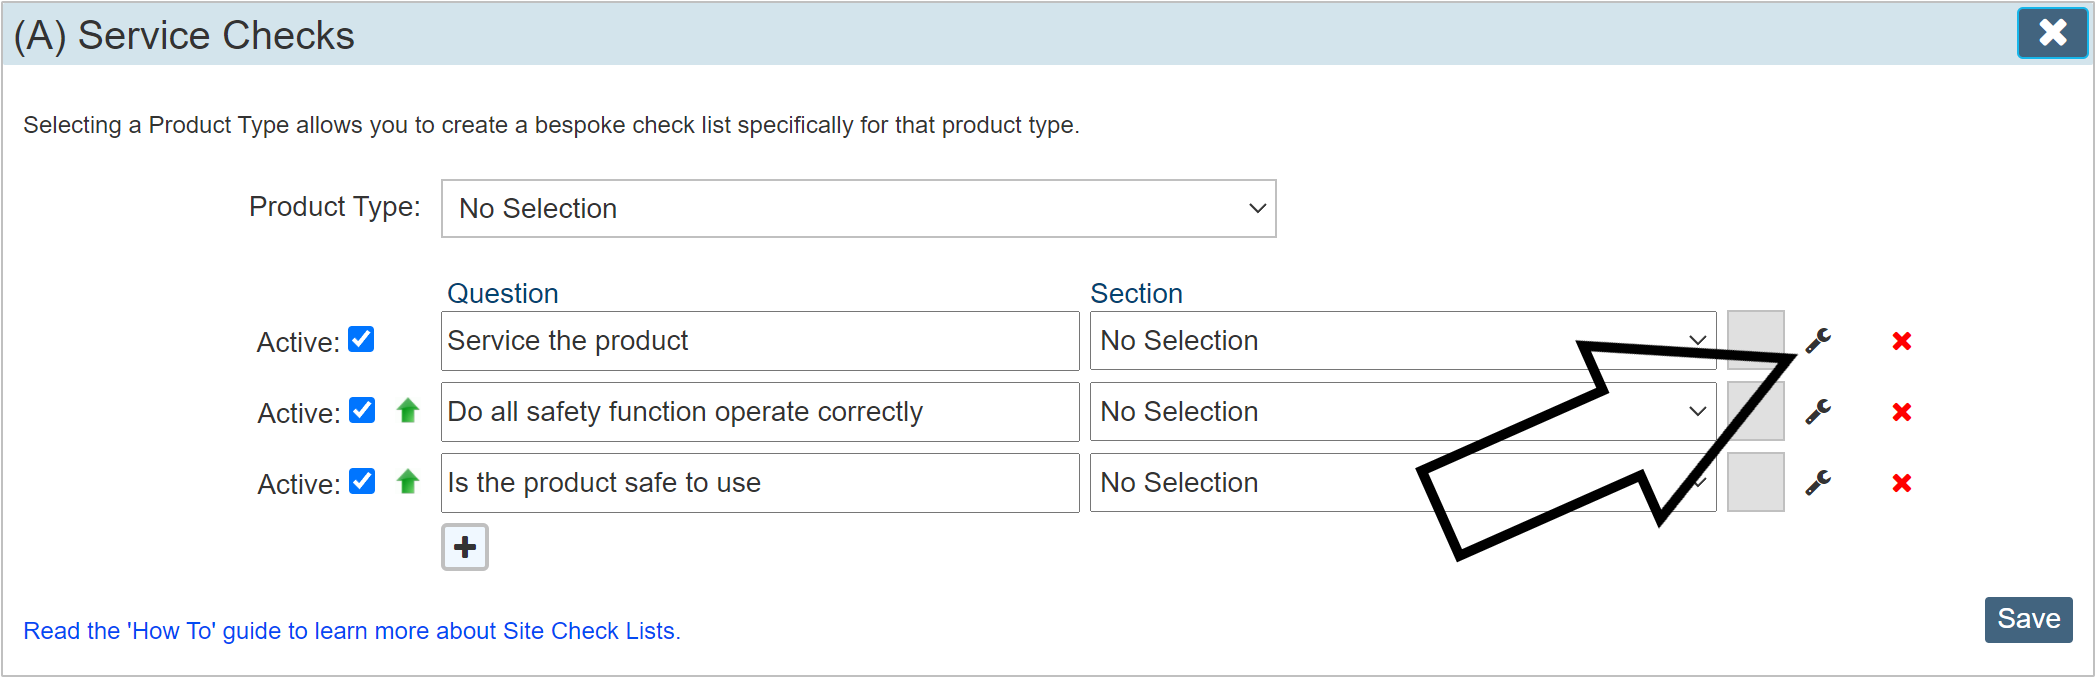
This will open the Month Select dialogue.
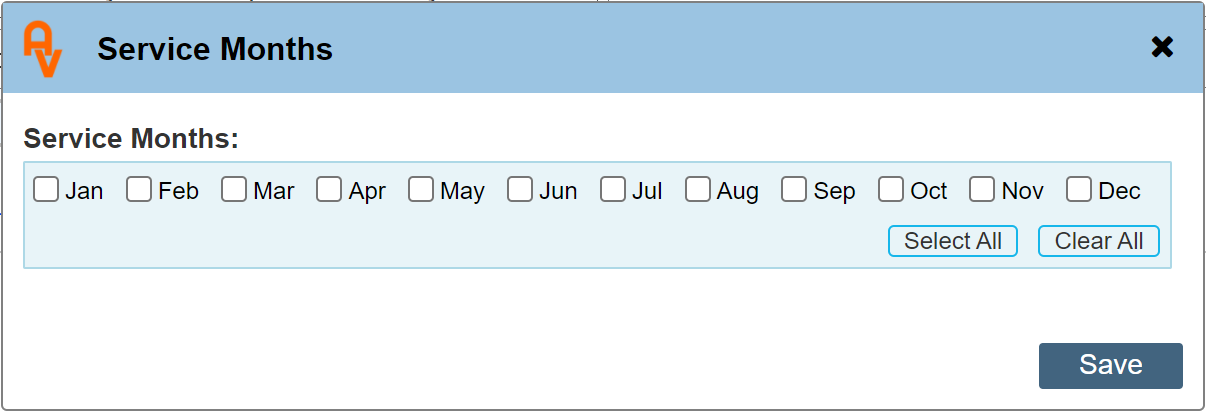
Select the appropriate service months where required.
|
It is important to note that by using the Service Month Filter, all check lists must be assigned a month or selection of months to send the question to the app. If no months are selected, the question will always be sent to the app.
|
Mobile App Questions
When the questions are sent through to the app, the section detail (if selected) is not shown as the questions are the same ones either way. The section colour coding and headings are for display purposes allowing your customer to see the document as you intended when created as a PDF Job Ticket.
Below is an example of questions detailed on the app and how they are displayed. This is an android example, the iOS layout is the same but the colours may differ.
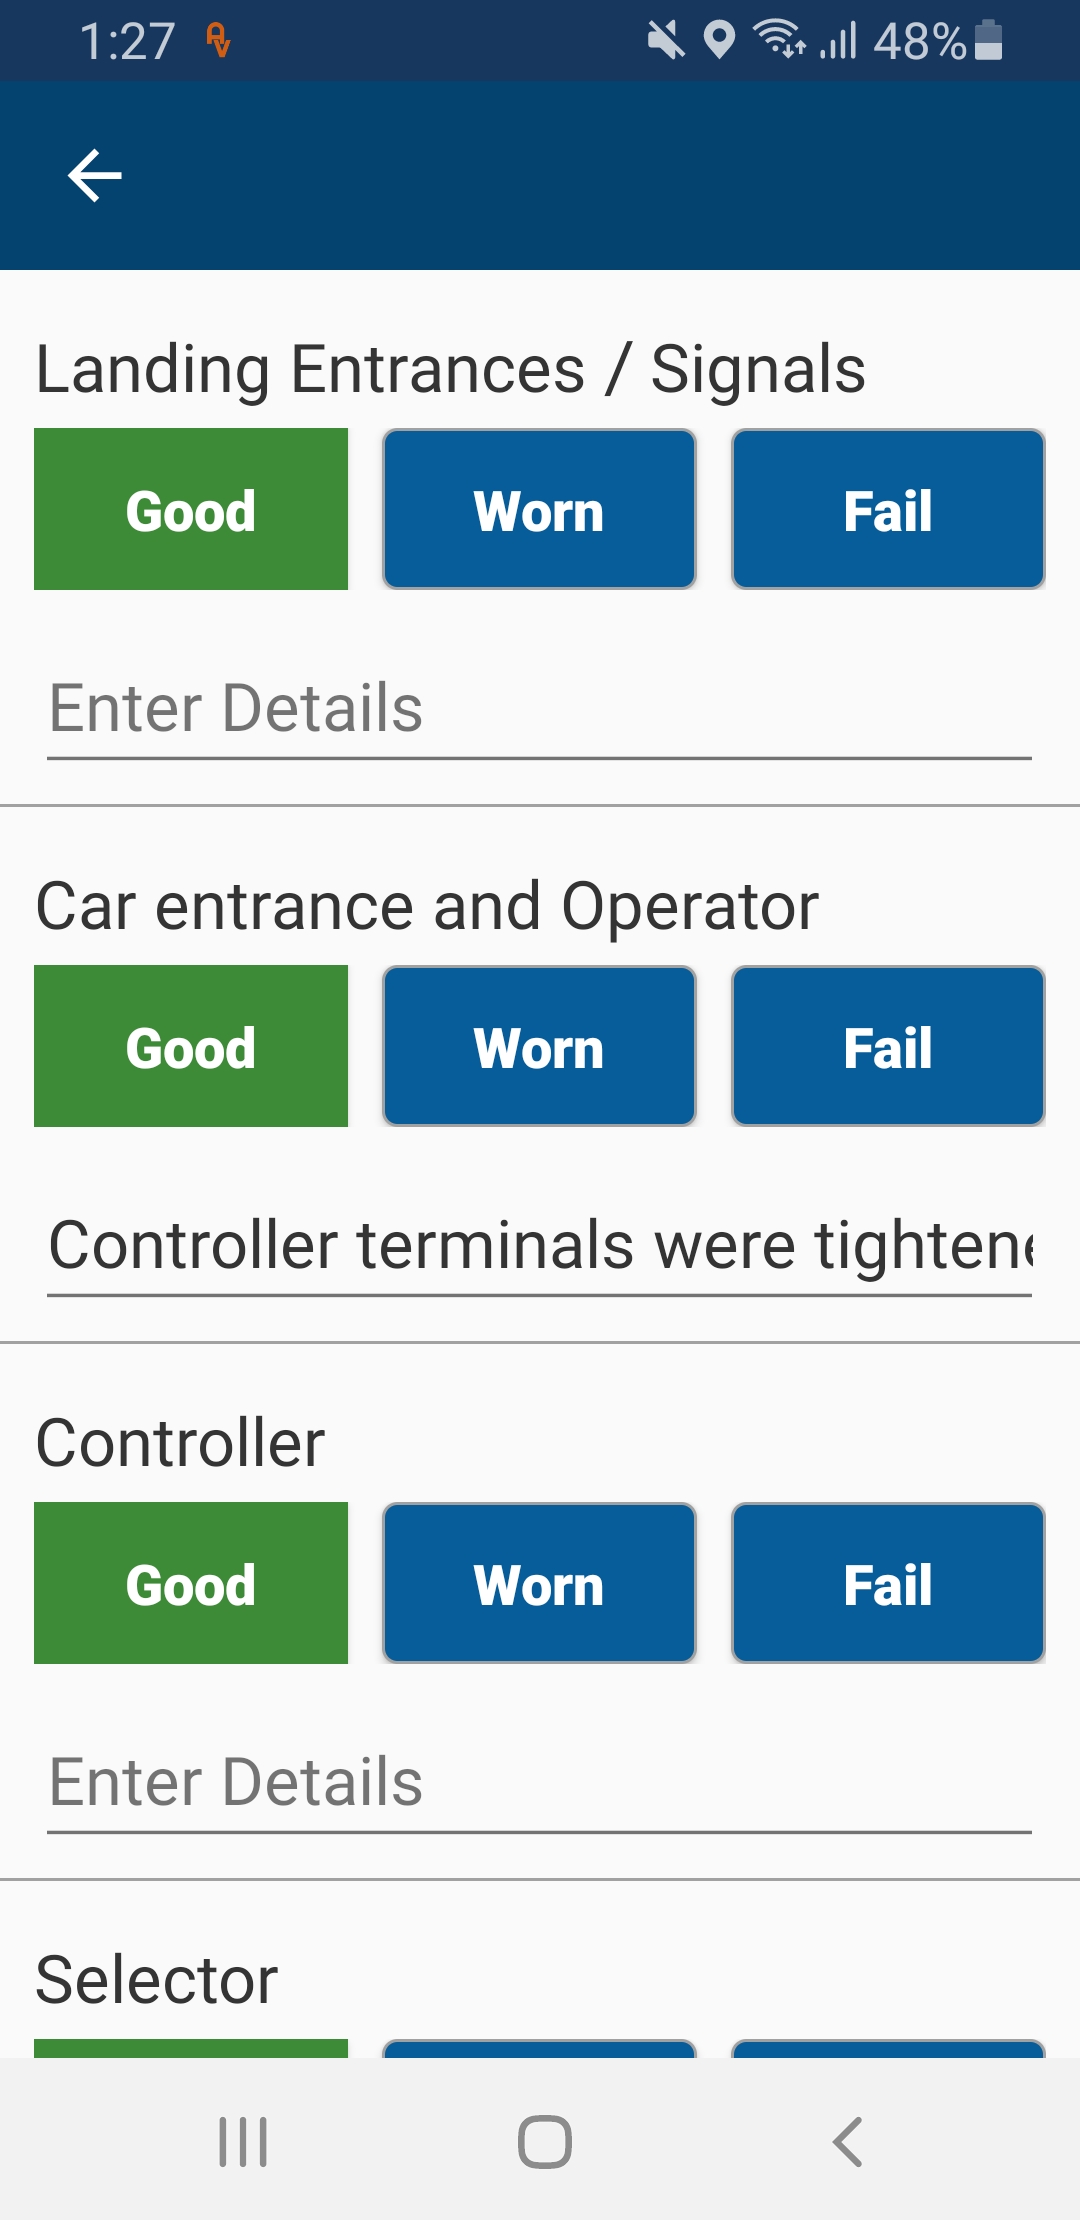
This example shows the 3 'state' toggles, in this case 'Good', 'Worn', Fail' this is the layout for check lists A - D. If lists E or F were selected, the layout omits the 3 'state' buttons. Lists E and F are for when questions and answers only are required.
Note: Questions where the Service month filter has been activated will show on the App prefixed with the month number within brackets to indicate that the question is something that should be done that month as part of a service schedule.
|
It is important to remember that service month filter questions where the filter is active and a month has been selected in the Service Months Selector will only show on the App when the Job Ticket 'Due Date' matches the service month selected. When initially using this option, this particular point may catch you out. The Due Date is the method used to determine which month the list will show. NOT THE BOOKED DATE.
|
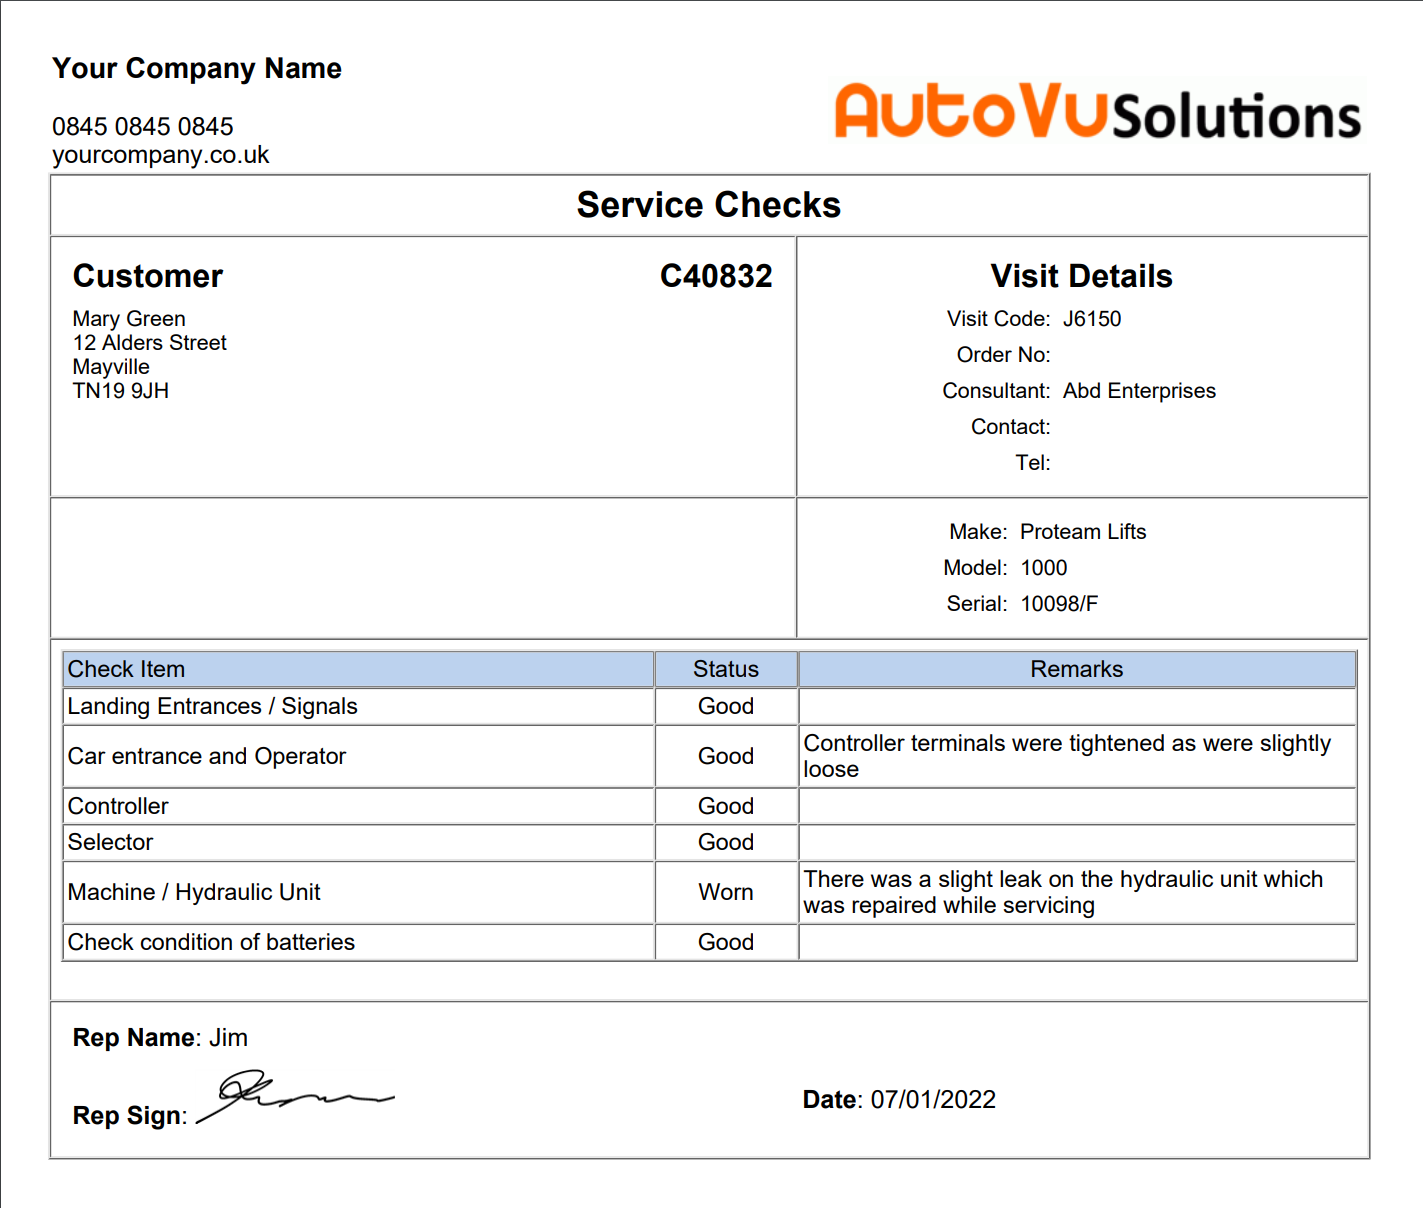
PDF Job Ticket examples
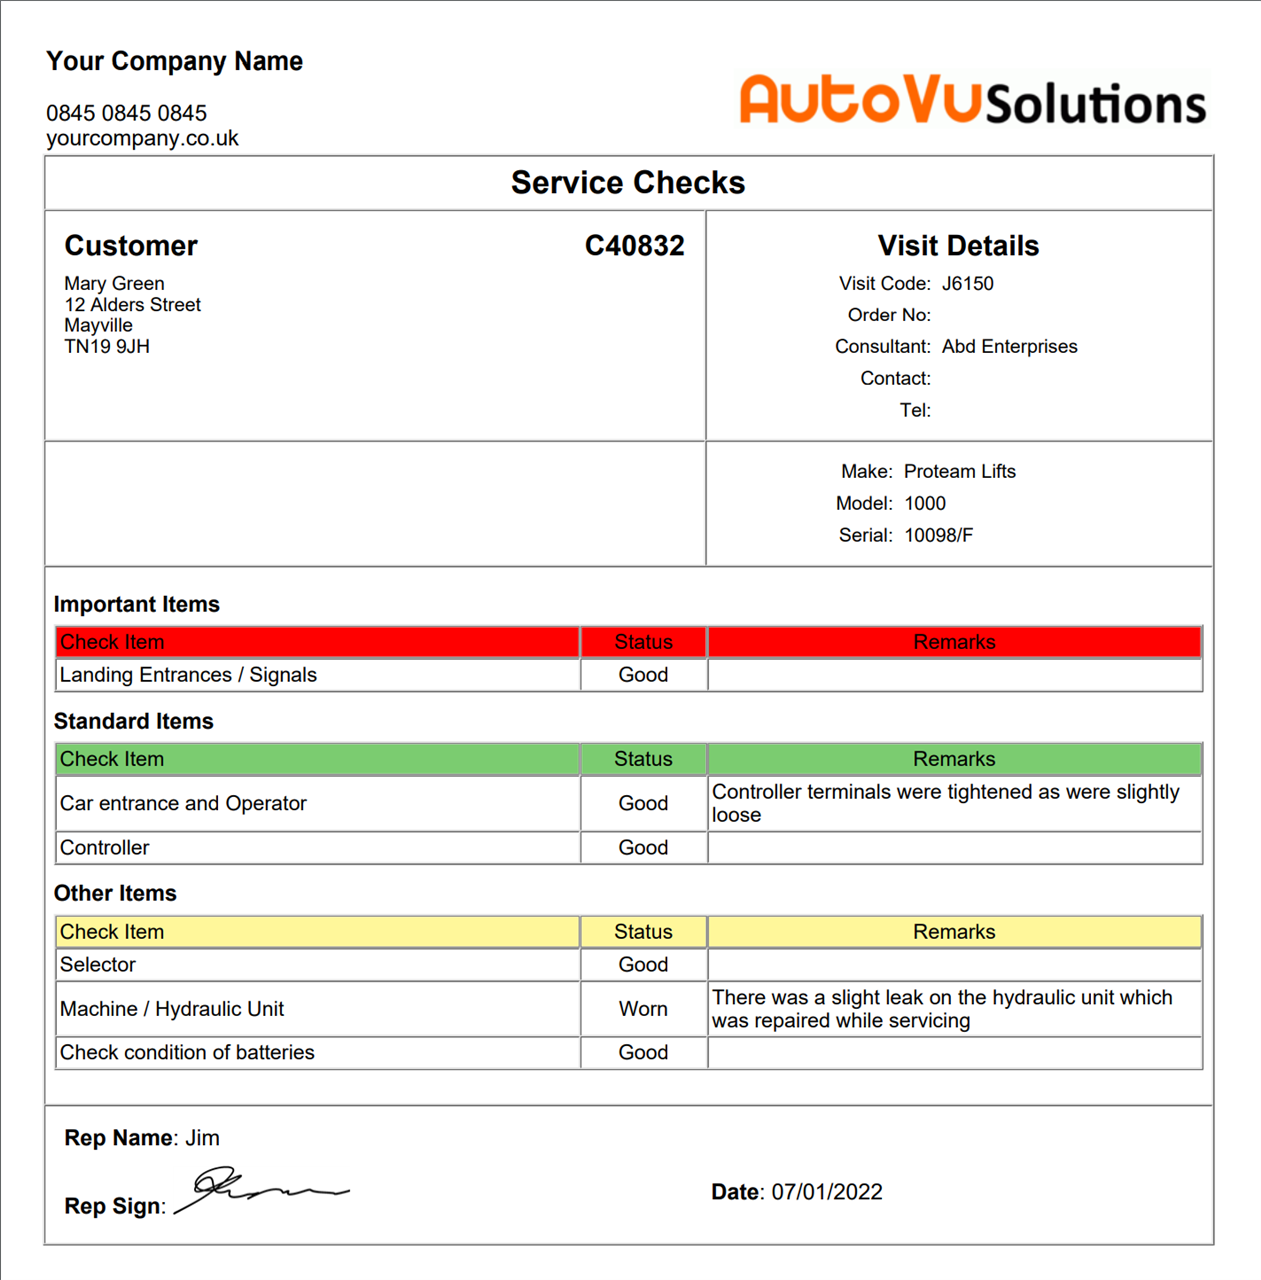
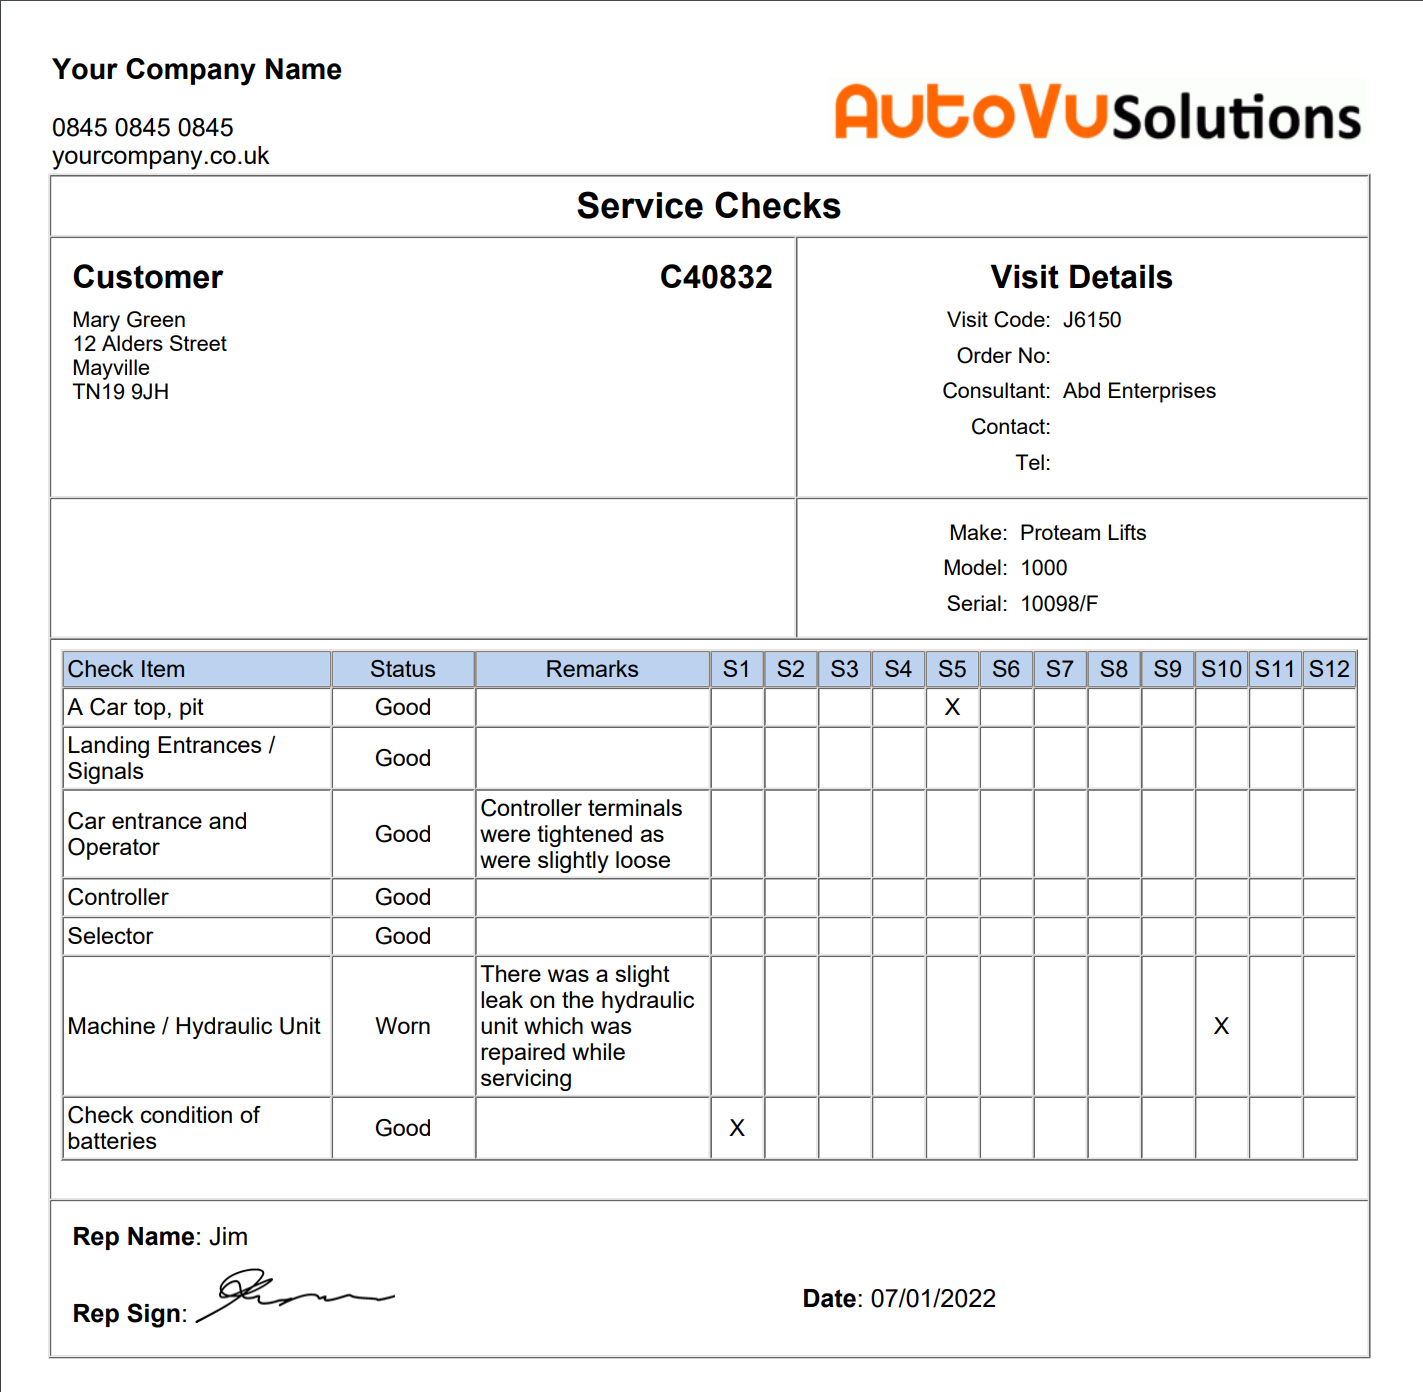
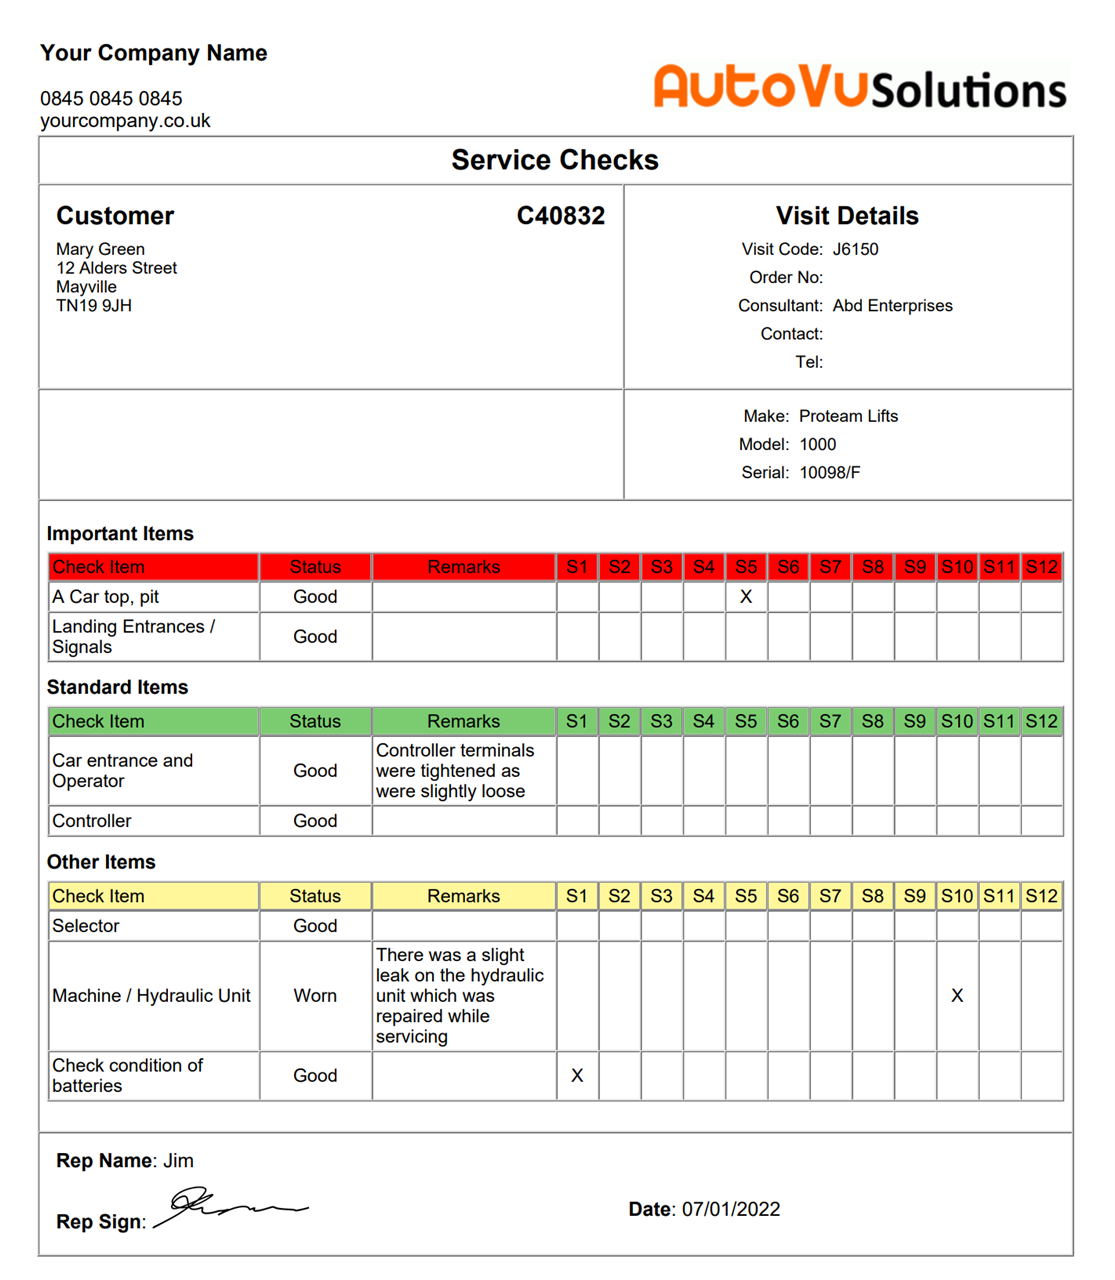
Below we have shown 4 examples on our default service visit second page design. The first image shows the service check list without selecting any sections, the second image shows the same service check list, but this time we have selected 3 section headings. The third image shows the same list but the table shows which service month the item is deemed to be completed. (Service month option is only useful if the Service Month Filter is switched on). Fourth is the same service month option but including the section headings.
This image shows the same list but has been split into the 3 sections selected along with the colour coding and section heading.
To show the Service Month table grid, the HashTag; #AllCheckListsSM# must be used. (or any of the HashTags with a SM suffix)
To show the Service Month table grid, the HashTag; #AllCheckListsSM# must be used. (or any of the HashTags with a SM suffix)
|
These lists are dynamically created and are designed to fit across the majority of width on a page. Creating a list on a field where the available width is less than three quarters of the page may produce undesirable results.
|
Important !
To show Site Check List questions and answers on the final PDF Job Ticket relies on the completion of 3 separate tasks on the system.
1 Define the questions – How to Guide
2 Determine which job tickets they apply to – How to Guide
3 Insert a #HashTag# on the appropriate Job Ticket – How to Guide