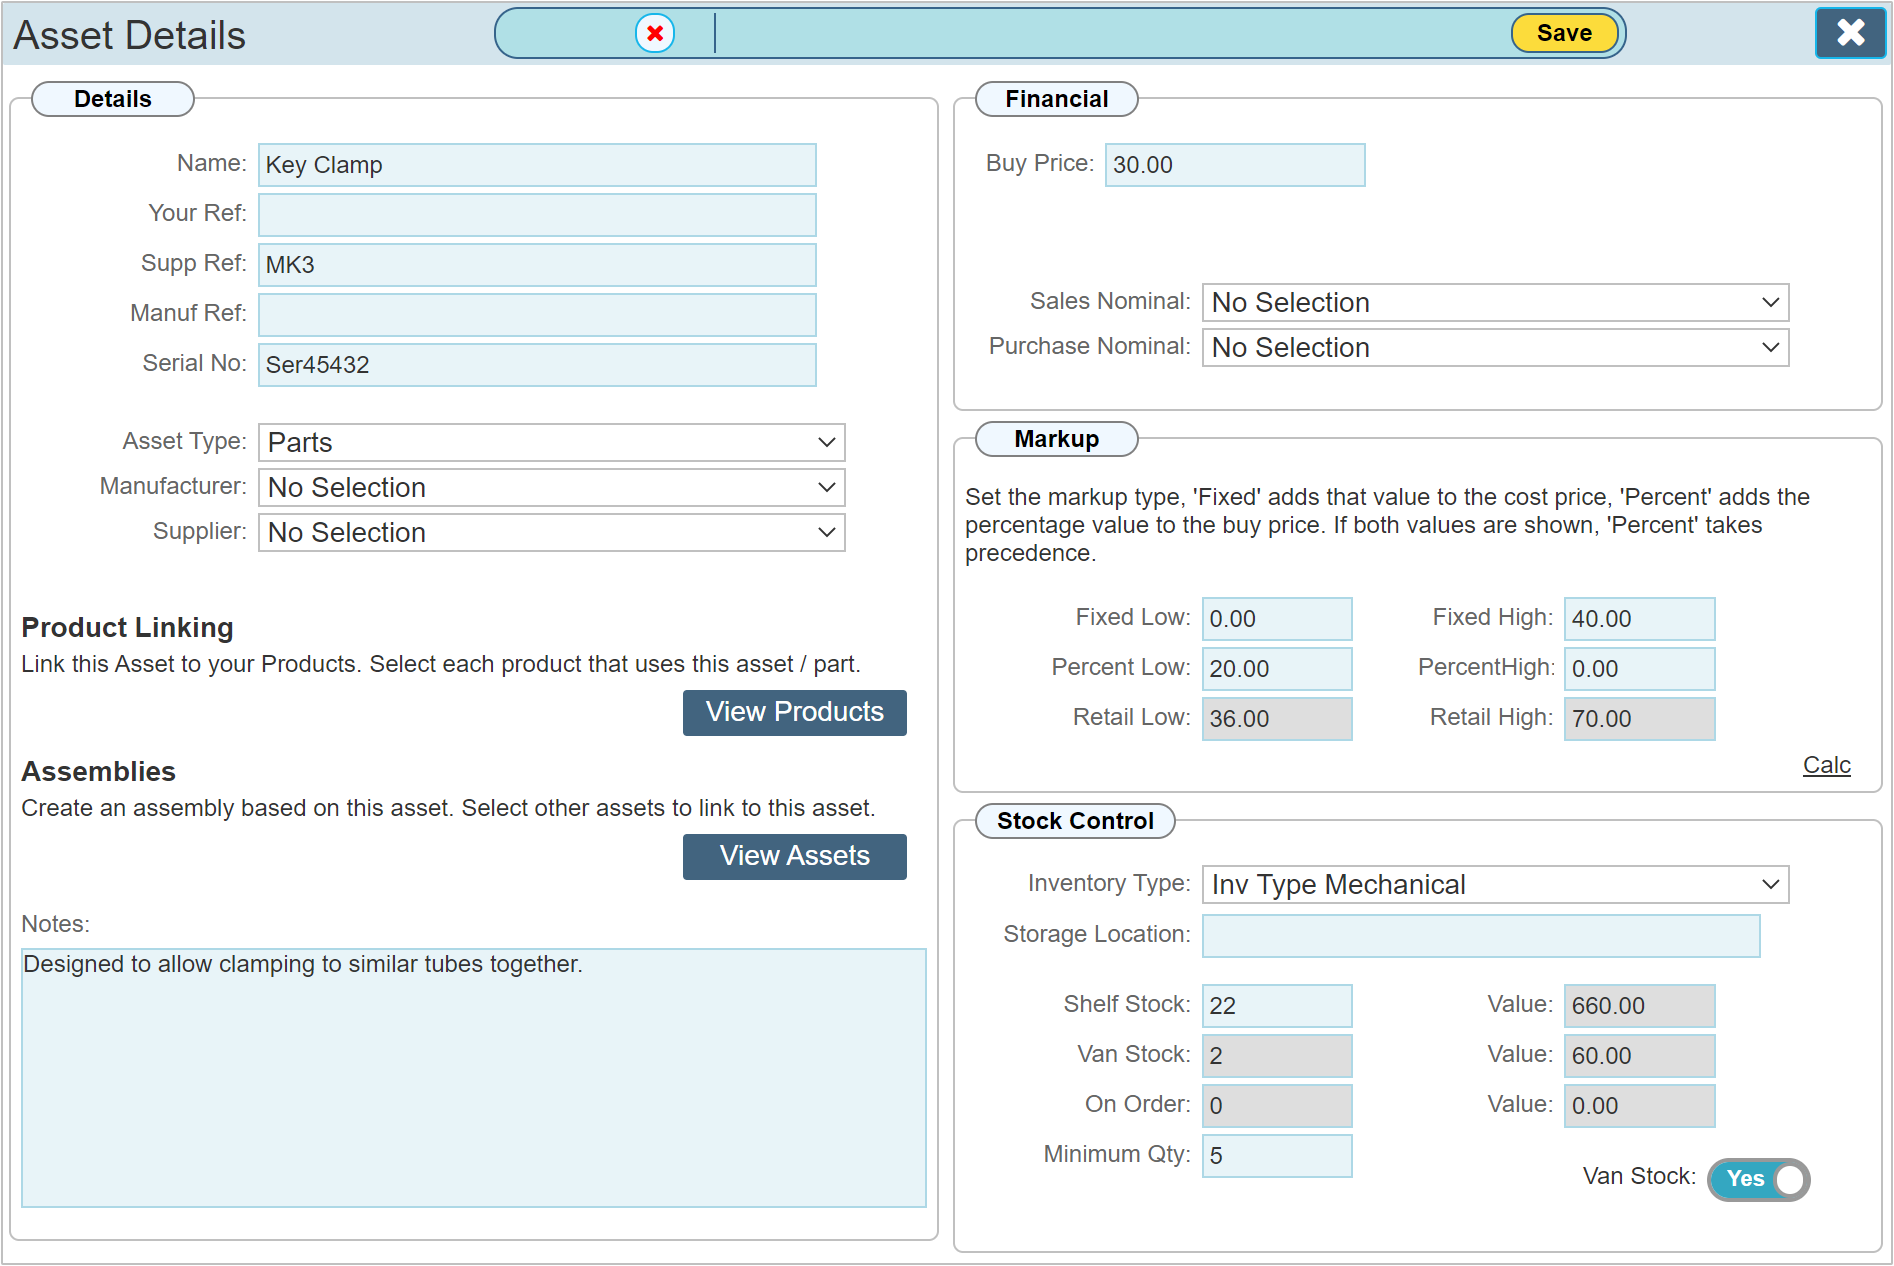
Selecting an 'Asset Type' that is linked to the 'Inventory' category, such as the default type 'Parts' as shown below allows the 'Mark Up' and 'Stock Control' sections to be used.
| Name: |
A unique name for your Asset.
|
| Your Ref: |
An additional ref used by your company (the asset will also be given a unique number by WorkForce Manager that will be prefixed with the letter 'W').
|
| Supp Ref: |
The reference given by your supplier for this asset.
|
| Manuf Ref: |
The manufacturers reference number.
|
| Serial No: |
The serial number of the asset where given.
|
| Asset Type: |
Asset type linked to Inventory
|
| Manufacturer: |
Link the asset to a particular Manufacturer. (Manufacturers appear in this list having first created them. I.E. From the diary page, 'Add New Account' and select 'Company')
|
| Supplier: |
Your Supplier for an Asset may not be the manufacturer, record these details here. (Suppliers appear in this list having first created them. I.E. From the diary page, 'Add New Account' and select 'Company') |
Product Linking
All products that use this asset / part can be linked to a given asset. Click the 'View Products' button to open a dialogue that will allow you to create the links. The below example shows the asset linking dialogue.
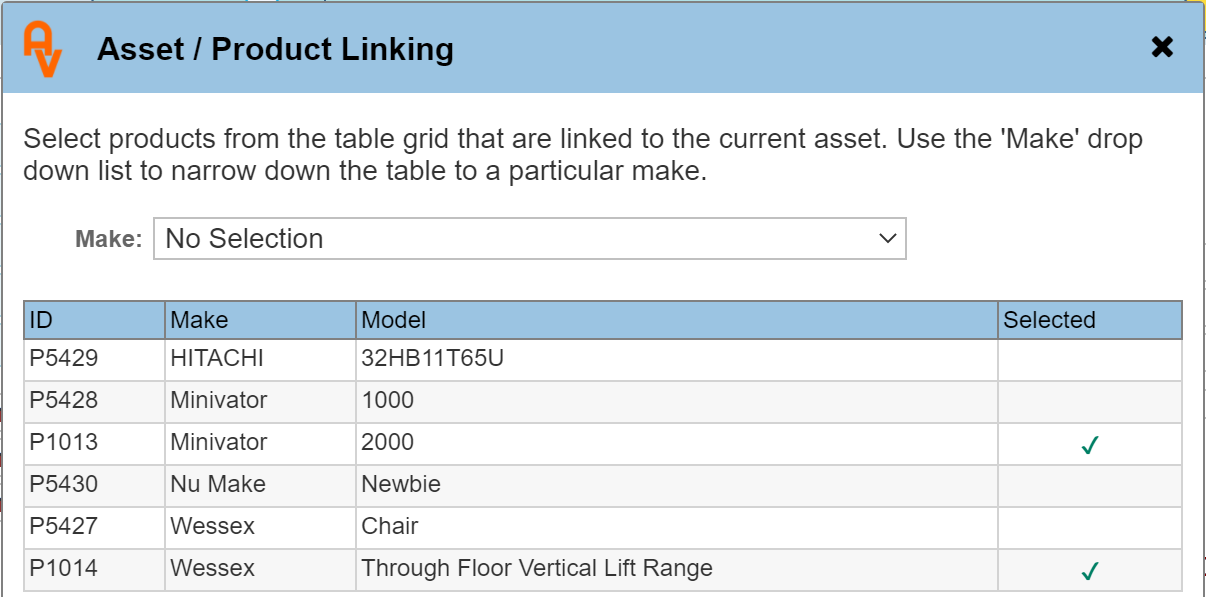
Clicking an entry in the table grid will select that product as linked to the current asset. Clicking an already linked item will unselect / unlink that product. To narrow down the selection rage to a particular make of product, use the 'Make' drop down list to limit the grid to that particular make.
Assemblies
An assembly is a method of grouping several assets into one asset. This is useful for pricing up a particular group, or 'Assembly' of parts into a single asset. Click the 'View Assets' button to open the dialogue. The below example shows the open dialogue with 2 assets already selected.
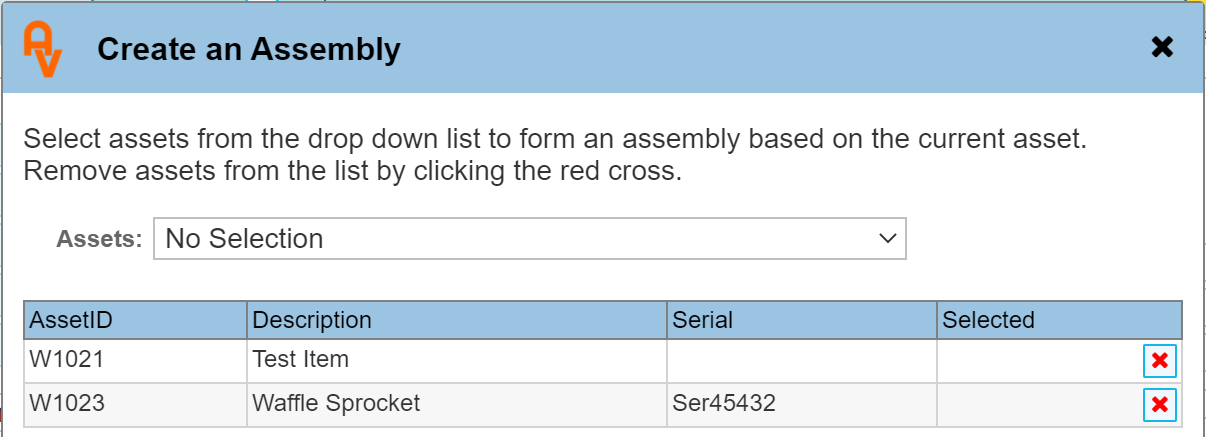
Use the drop down list to select additional assets to be added to the table.
Notes
General description of the asset being recorded.
Active
By default, the asset will be active and available within the system. Selecting and saving the asset an 'Inactive' will remove it from any selections within Workforce Manager.
Financial
| Buy Price: |
The purchase price of the asset excluding any Tax (VAT).
|
| Sales Nom: |
Selecting a Sales Nominal code will automatically use this code when this asset is selected within a Sales Invoice.
|
| Purchase Nom: |
Selecting a Purchase Nominal code will automatically use this code when this asset is selected within a Purchase Order.
|
Markup
Markup determines how the retail price is calculated. Workforce Manager allows 2 tiers of pricing. The low price would indicate the lowest price this item would be sold for, the high price being the highest price it would be sold. E.G. A bulk purchaser may buy at preferential rates whereas someone buying an individual part may pay a higher price. If this does not apply to your business type, simply add the same markup in both instances.
| Fixed Low: |
Adds a fixed value amount to the 'Buy price' to determine the retail price.
|
| Percent Low: |
Adds 'x' percent to the 'Buy price' to determine the retail price. (if a 'Fixed Low' value has also been entered, the Percent Low price will override this.)
|
| Fixed High: |
Adds a fixed value amount to the 'Buy price' to determine the retail price.
|
| Percent High: |
Adds 'x' percent to the 'Buy price' to determine the retail price. (if a 'Fixed High' value has also been entered, the Percent High price will override this.) |
If you do not intend to use markup prices and only want to indicate the Retail Price. Enter your retail price into the 'Buy Price' field and do not enter any values for markup.
Stock Control
| Inventory Type: |
Further subdivide the asset into Inventory Types. By default the list will be empty. The values are entered by visiting the 'Custom Values' section and selecting the option 'Inventory Type' and adding in the values where required.
|
| Storage Location: |
Where can this asset be found in your warehouse.
|
| Shelf Stock: |
How many of these items are currently in stock within your warehouse.
|
| Minimum Qty: |
The minimum stock quantity before a re-order is placed replenishing stocks.
|
| Van Stock: |
Toggling this control to 'Yes' indicates that this asset will be used by 'on site' operatives and will be available for selection within the Engineer App.
|
The greyed out values within the 'Stock Control' section are calculated automatically by the system based on current asset usage, van allocation and parts that are on order.