This guide details how we can record the details of a product asset, from those details we can then create a purchase order.
If we open the Asset Manager by clicking the 'Assets' button on the top menu bar, from here we can click 'Add' to create a blank asset page (as detailed on the Assets Guide)
Start by giving your new asset a name.
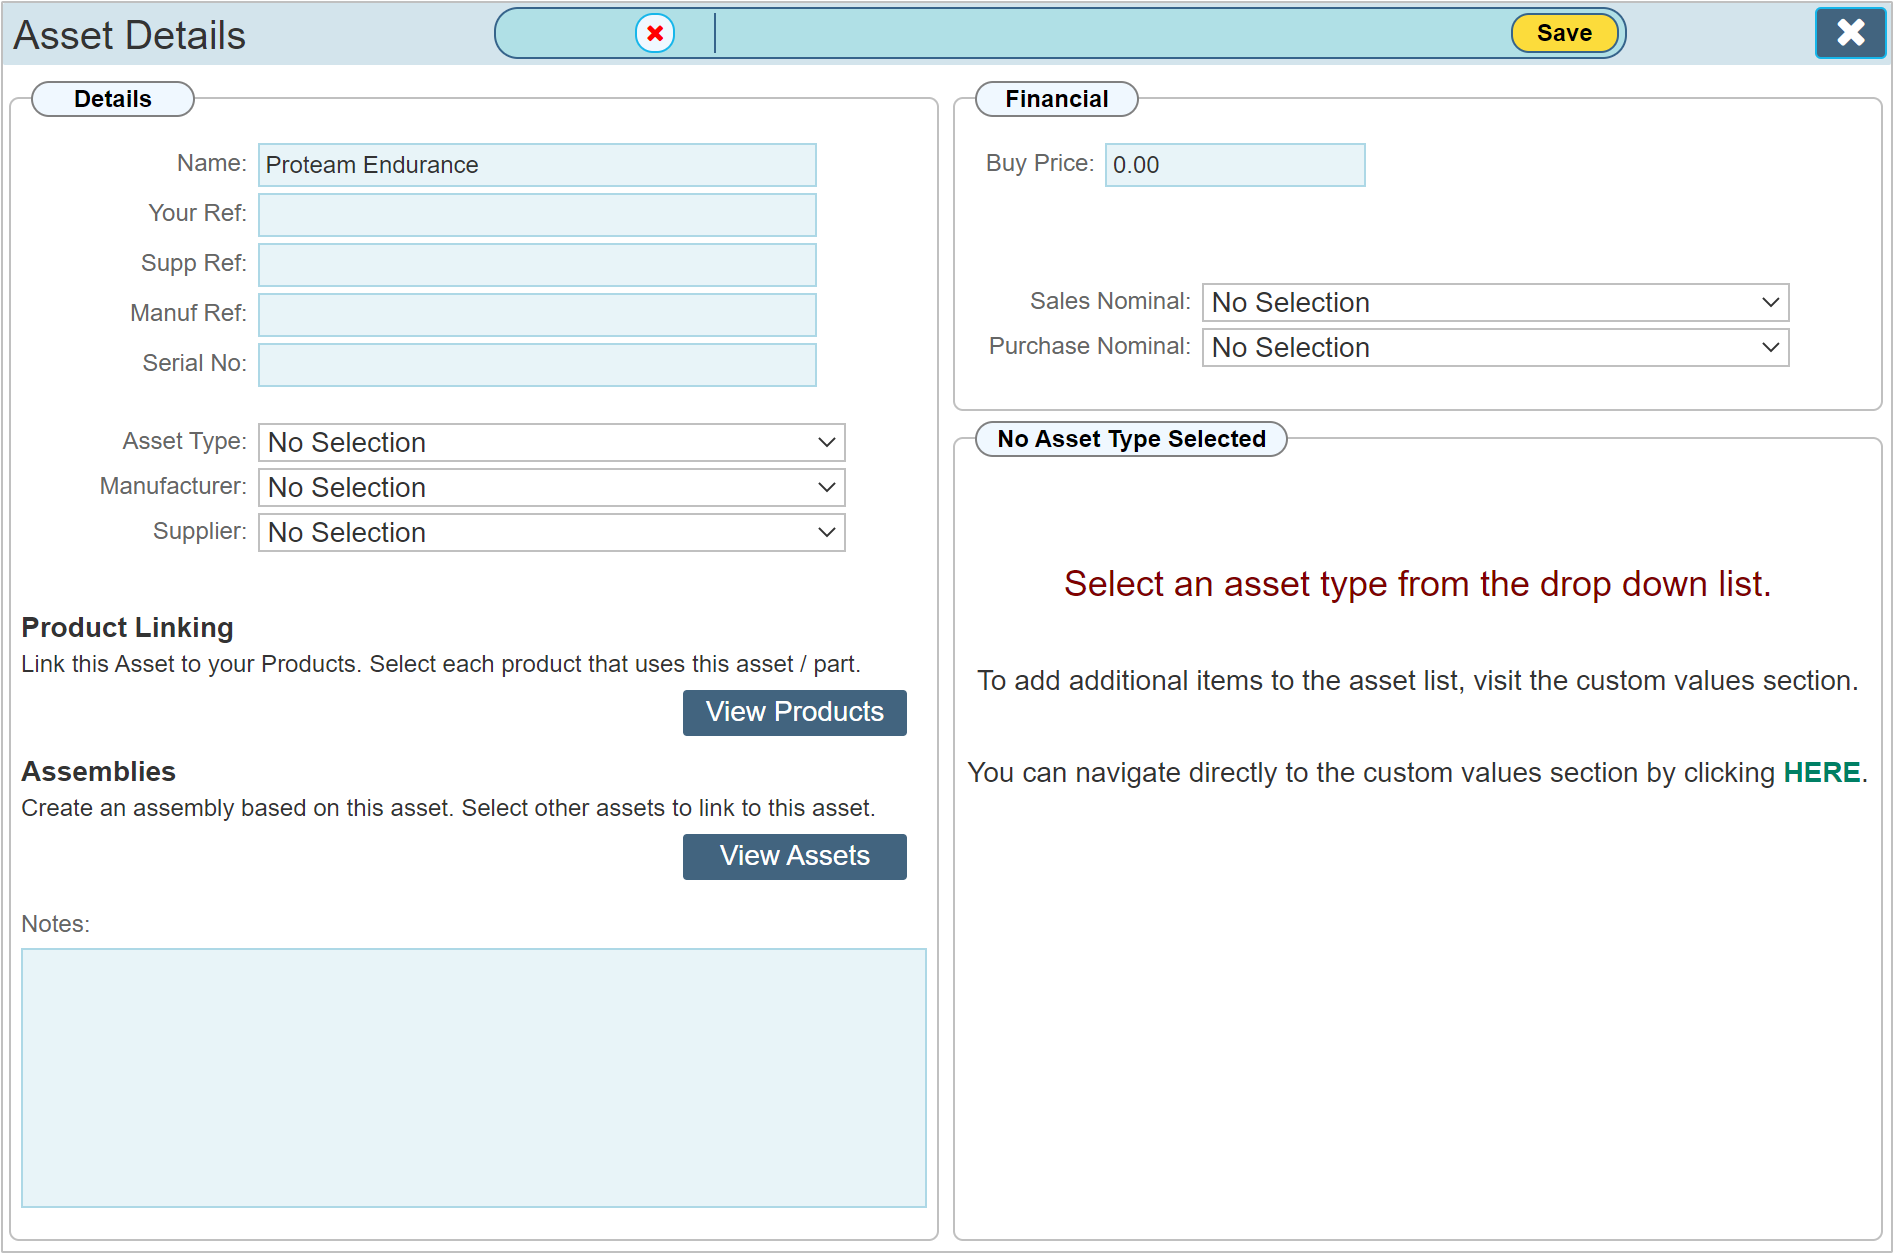
Select an Asset Type that is based on a product. In this instance we are going to select an asset type 'Stairlift'. Read the general how to guide on 'Assets' to learn how to add your own asset type names.
|
Product based asset types can be selected as a hire item.
|
Once the asset type has been selected, the panel on the right that states 'No Asset Type Selected' will change to 'Product', because our Stairlift selection has been categorised as a 'Product' when we originally created it.
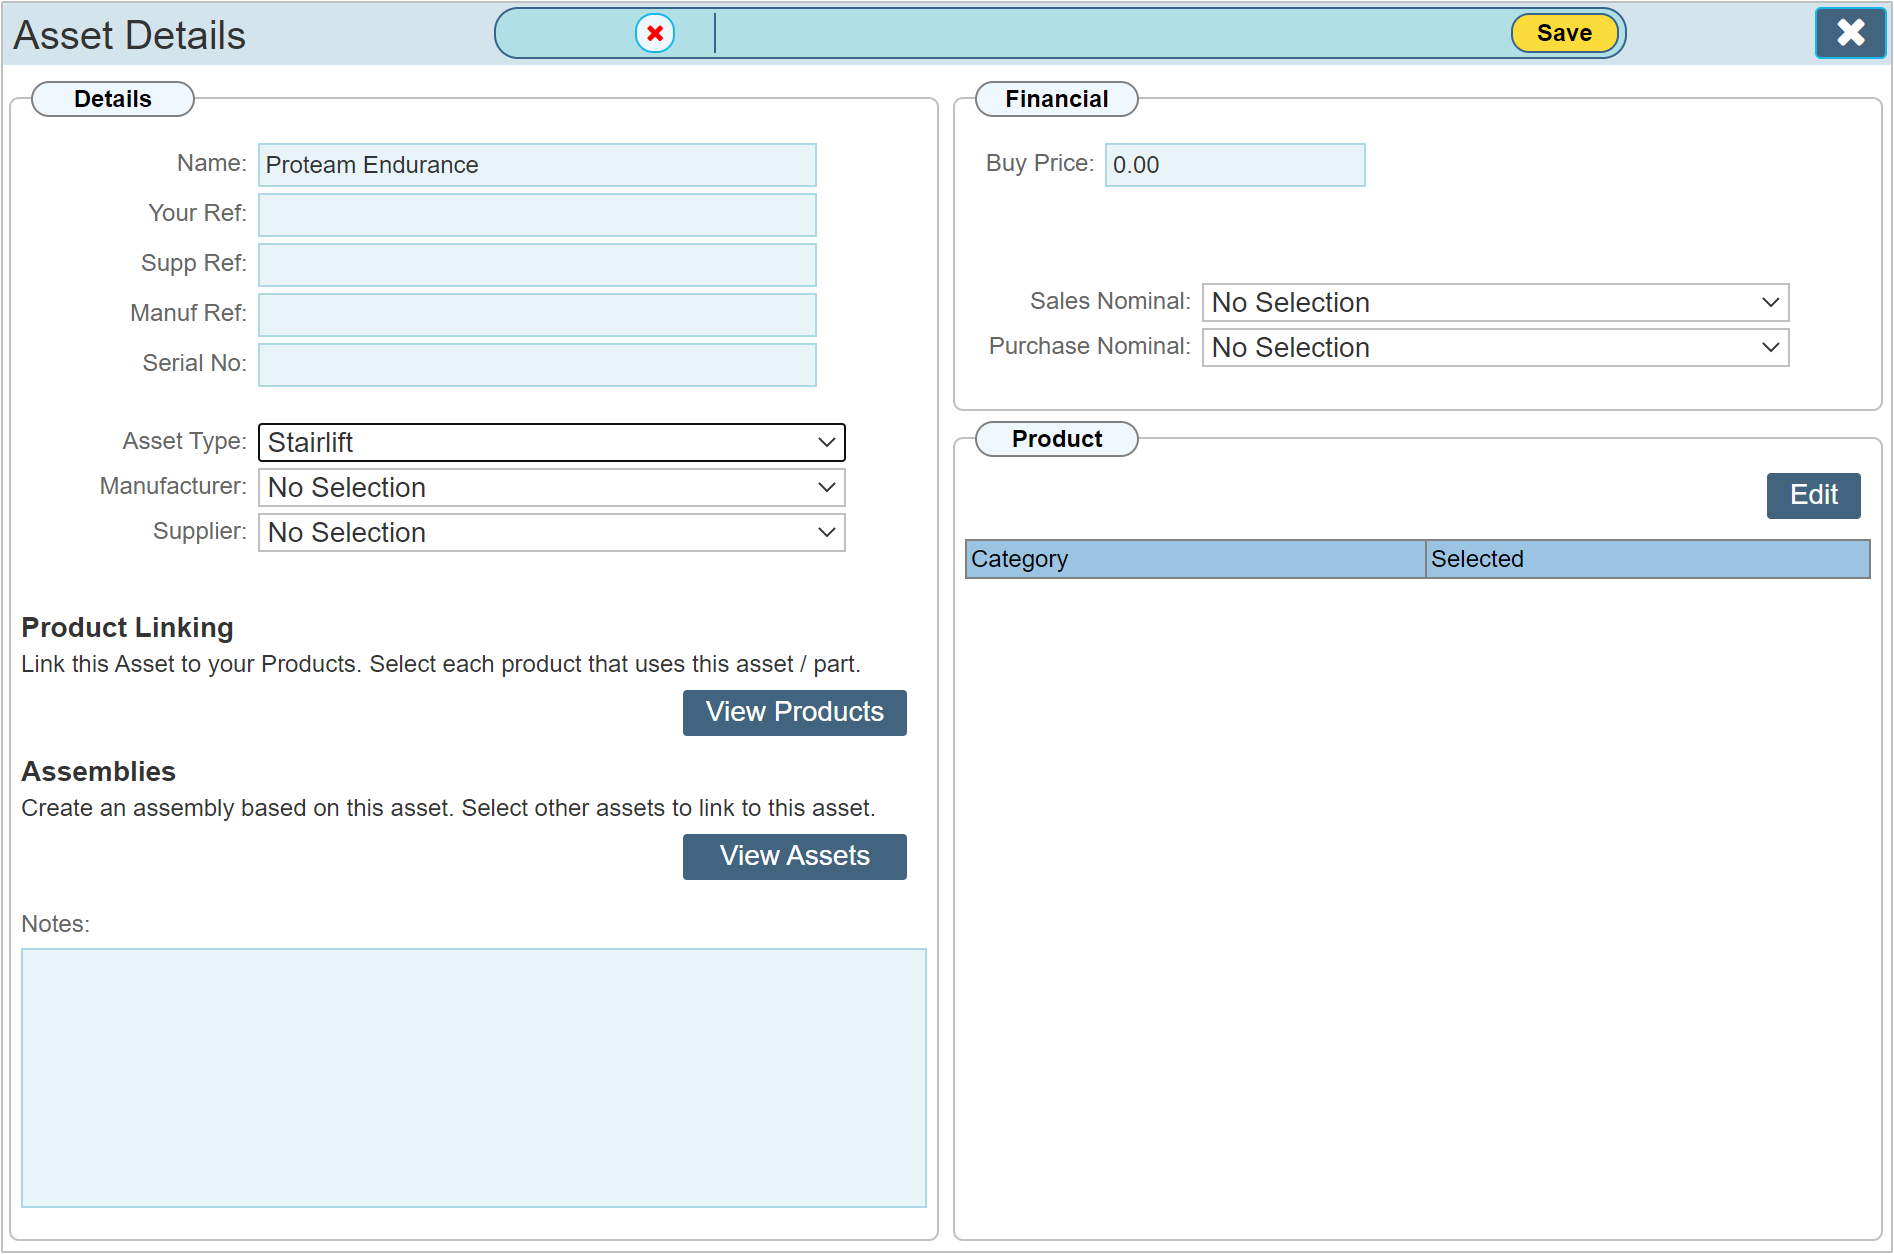
The Product section will be empty at this stage, click 'Edit' to open the Specification Editor.

We will select our product from the Make / Model drop down lists to populate the Attributes list
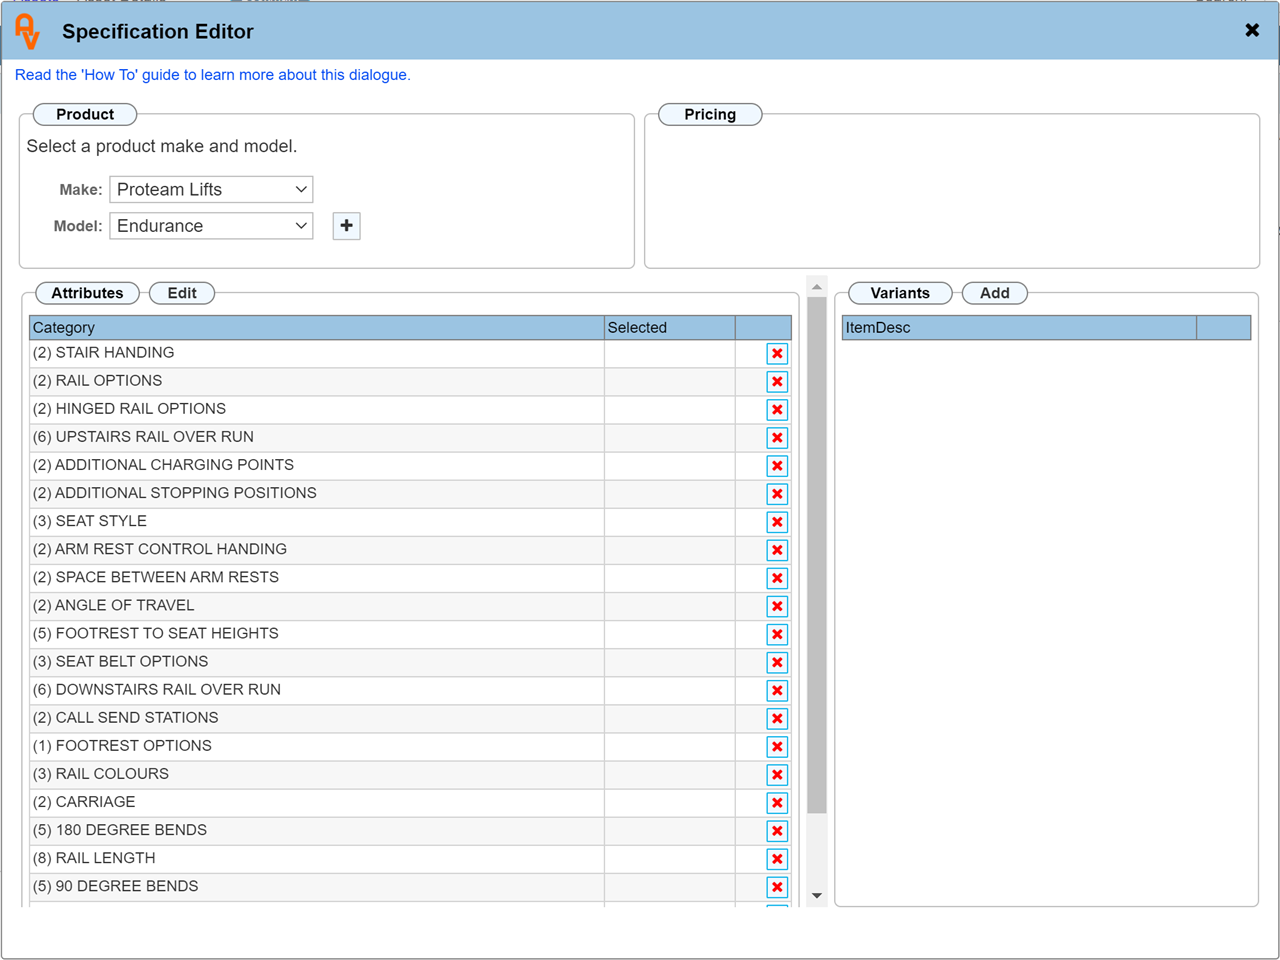
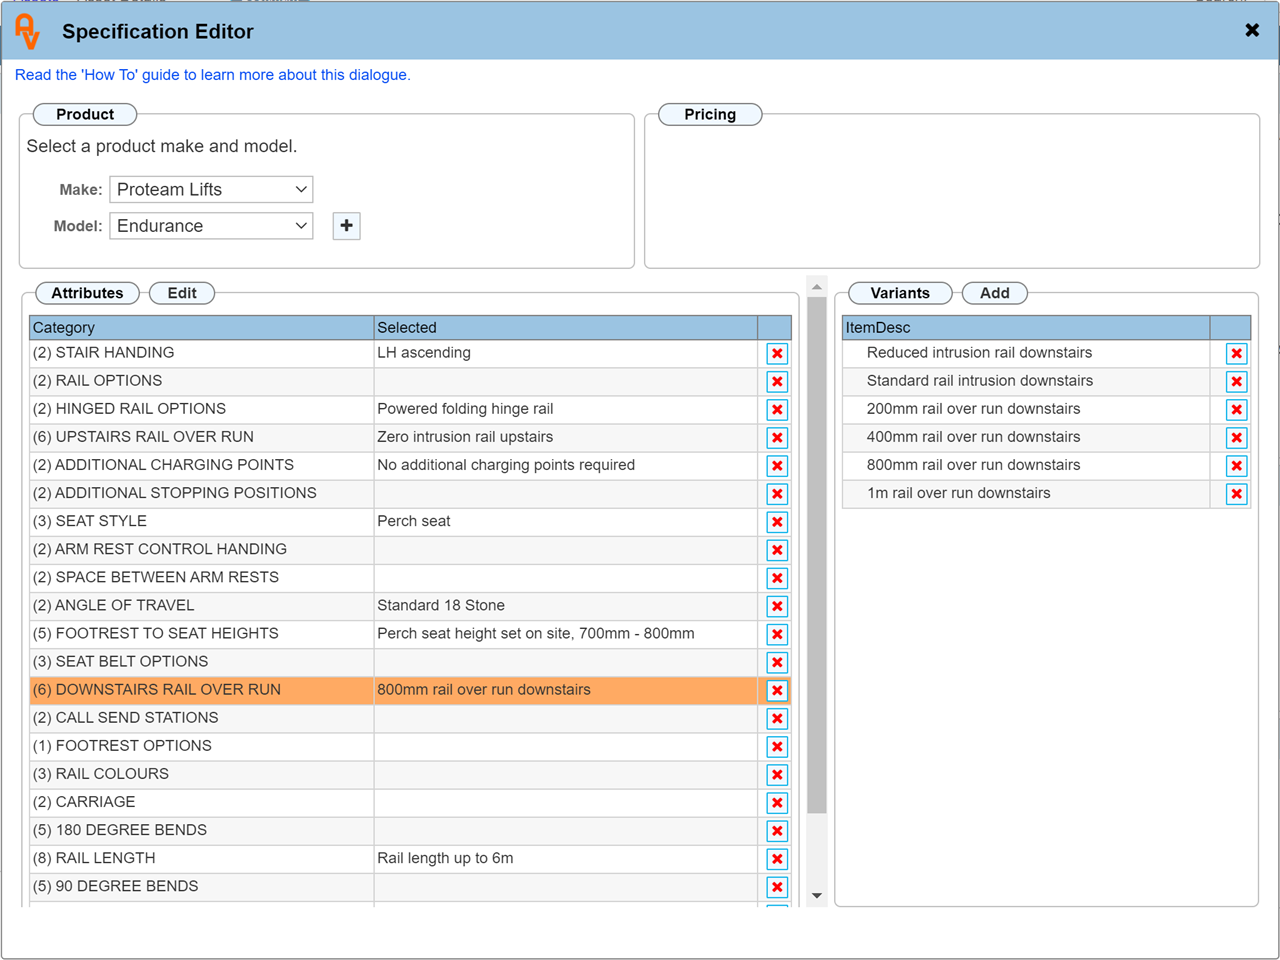
If we click on each Category item, it will open a list of possible selections in the Variants panel. We can select each one to build up a full specification.
The products, attributes and variants within the list are reliant upon you entering the data beforehand either within the 'Products' tab on the top menu bar, or you may create them directly from here. See further on in this guide for the advanced editor section detailing how to add your own products, attributes and variants.
Once the above dialogue is closed, the details are then listed in the product panel.
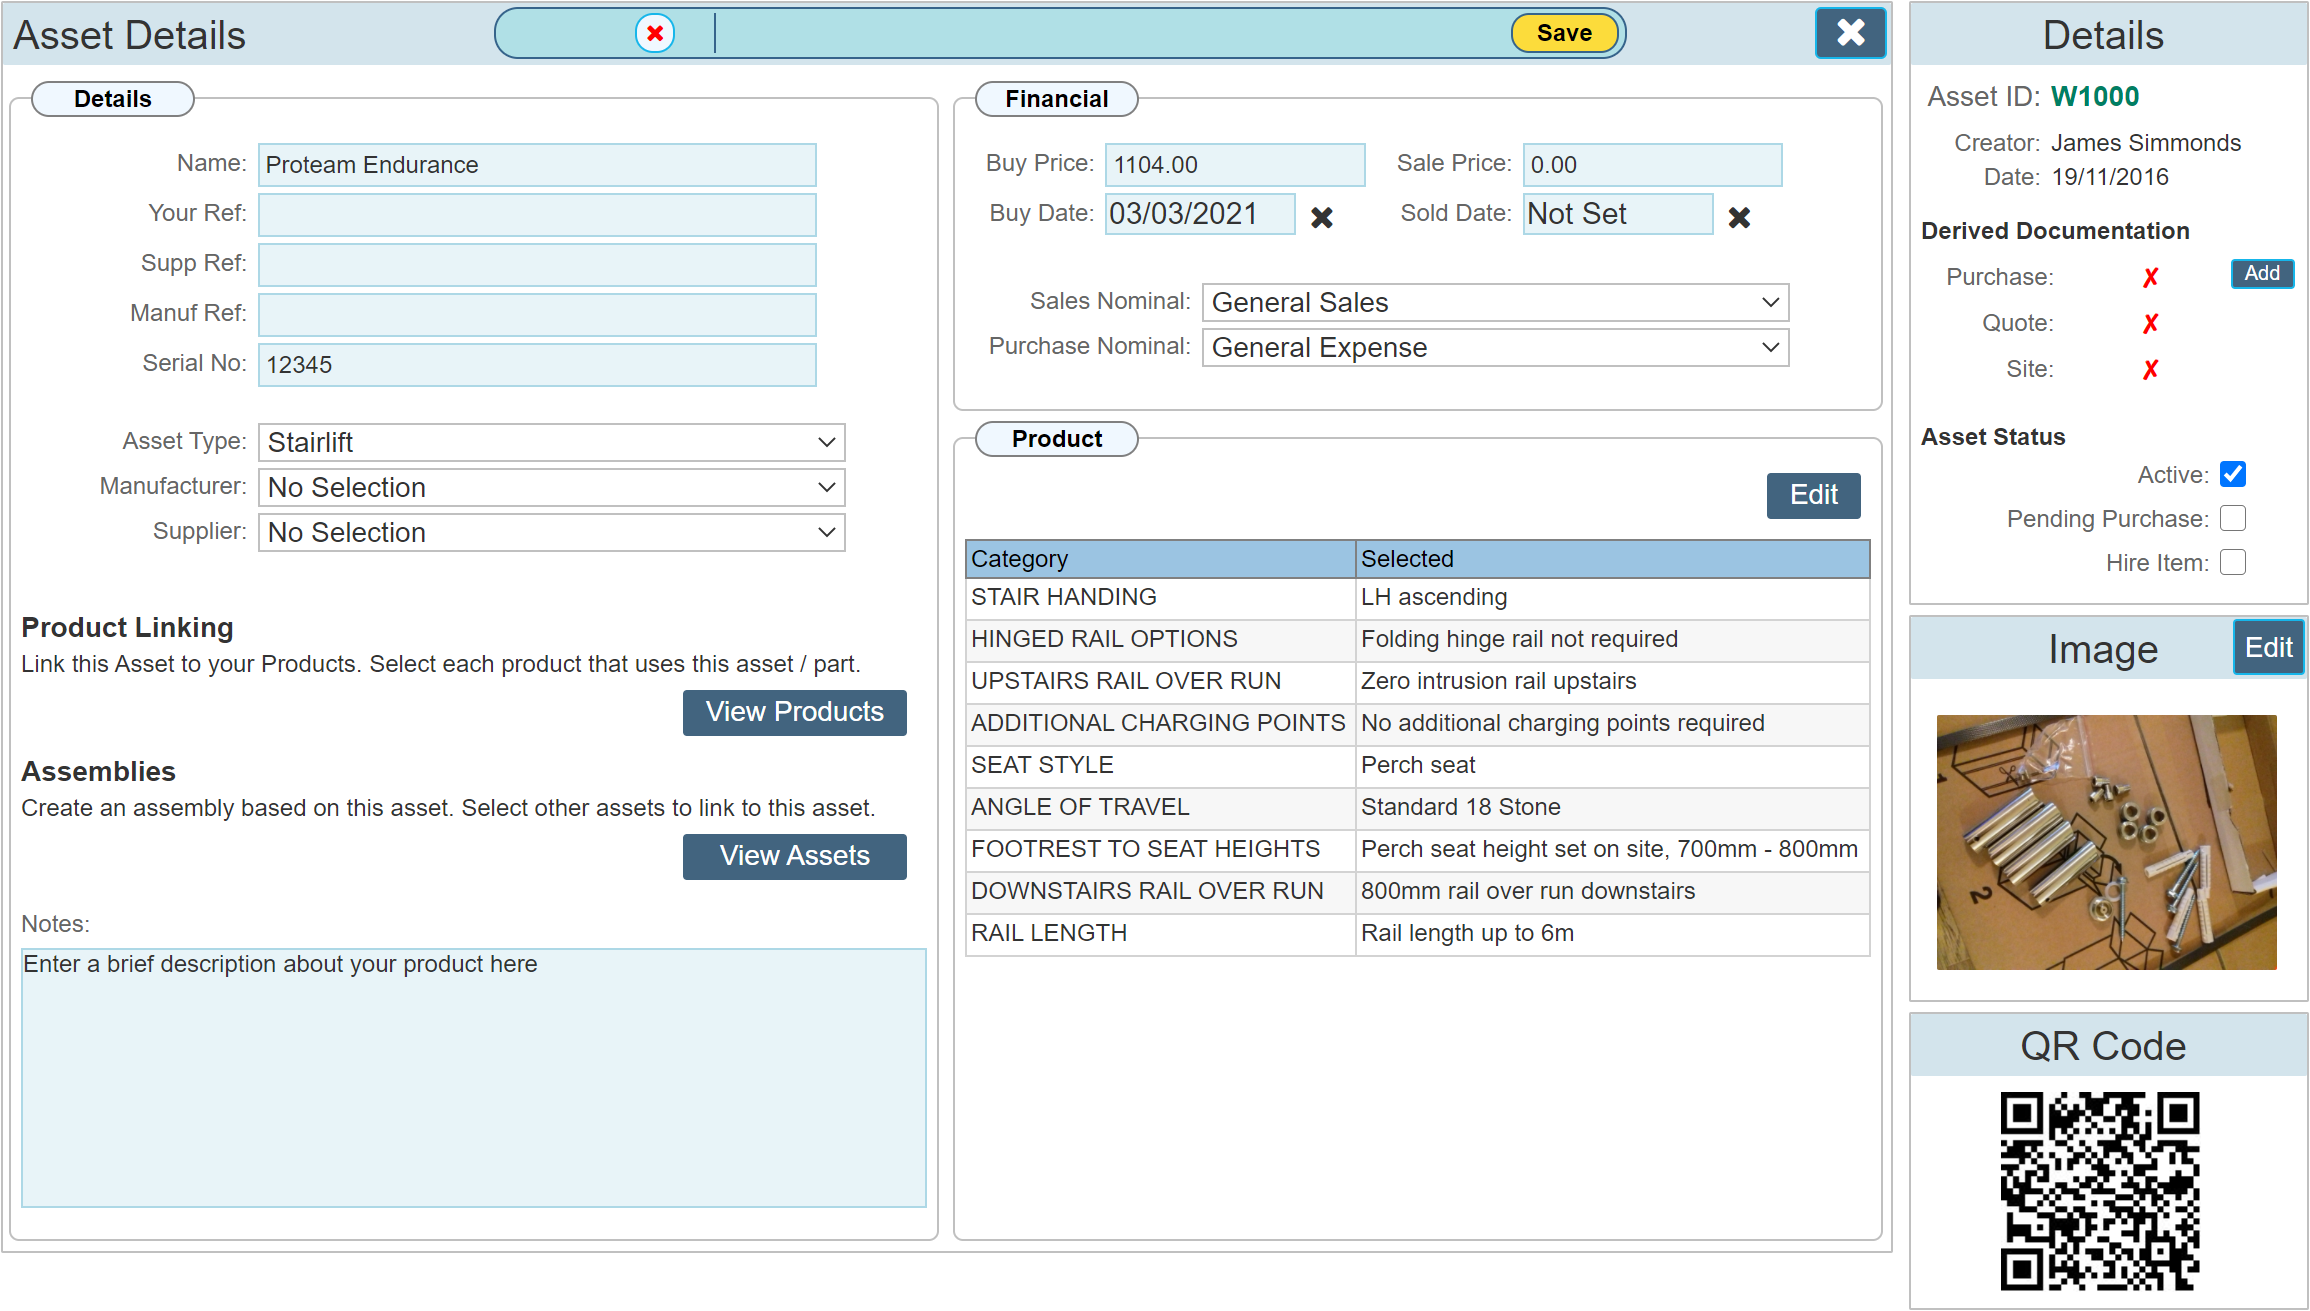
Here you can see the Product Panel populated with the selected variants. We have expanded the view to include the RH menu column. (forgive us the image, clearly not a stairlift!, but you will get the idea)
What we will focus on is the Derived Documents panel. In this instance, we have the ability to create a derived Purchase Order by clicking 'Add'

Clicking confirm will create a purchase order based on the details provided during the set up of the product including who supplies it and the cost price of all the variants. The term 'Pending' within this dialogue refers to the checkbox shown in the RH menu of our Asset, in the section 'Asset Status'. A 'Pending Asset' is one which it not currently in stock. I.E. its on order. The Pending Asset checkbox will automatically be checked when you first create the PO, and subsequently 'Un-Checked' when you mark the PO as delivered by entering a delivery date.
Purchase Nominal
If you have set up nominal codes within the custom values section, you can tell workforce Manager which sales and purchase nominal as associated with this asset by selecting it from the drop down list. In this instance, this will then cascade down to the Purchase Order when created.
The below example shows our purchase order.
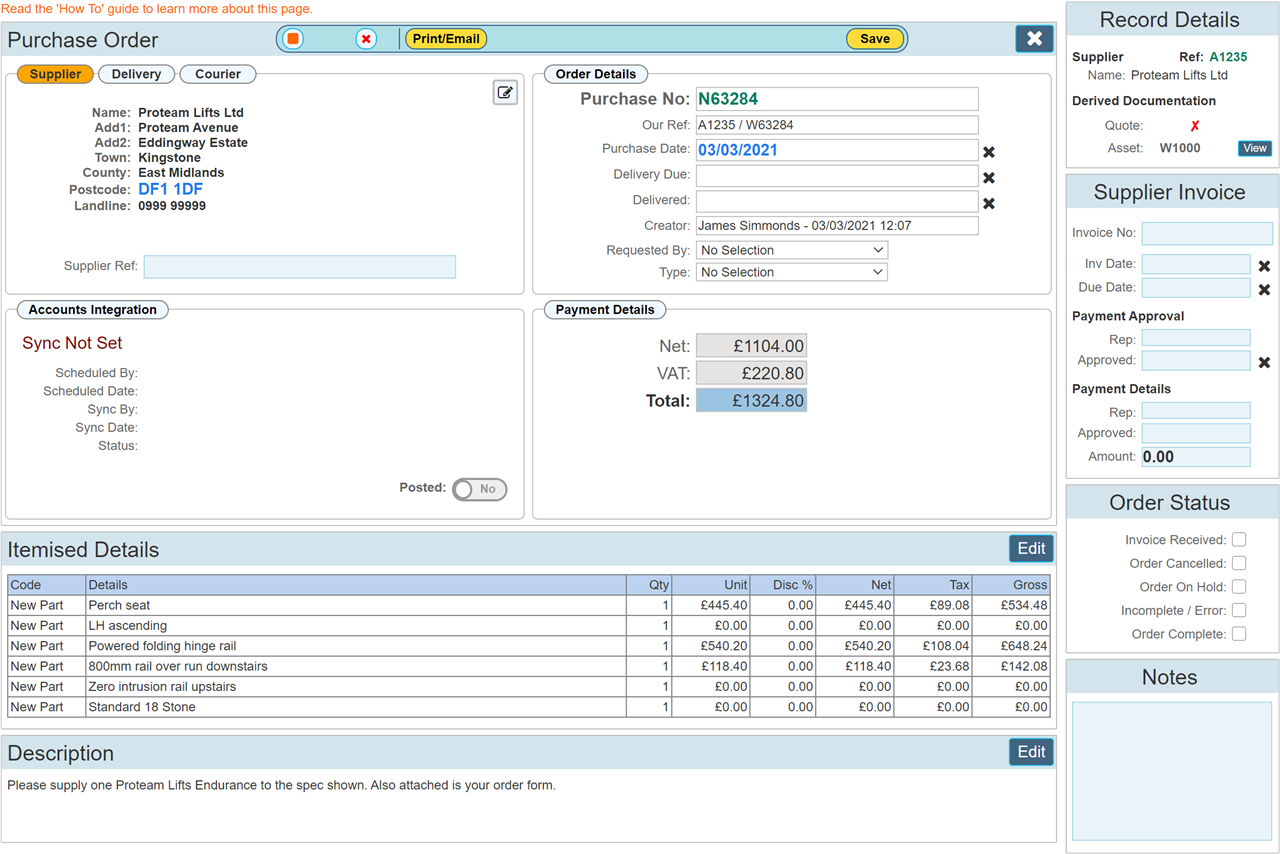
You may notice that there are fewer items in the PO list than there are in the Products Panel. This is because we can specify at the time of setting up the product which variants will show on the PO.
At the top right of the PO, we can see the 'Derived Documentation section lists our asset. We can click this to go back to our Asset. Before we do this, we will mark the PO delivered by entering a date in the Delivered field.
We can now see that the Buy Price and Buy Date fields are populated with the details from the PO.
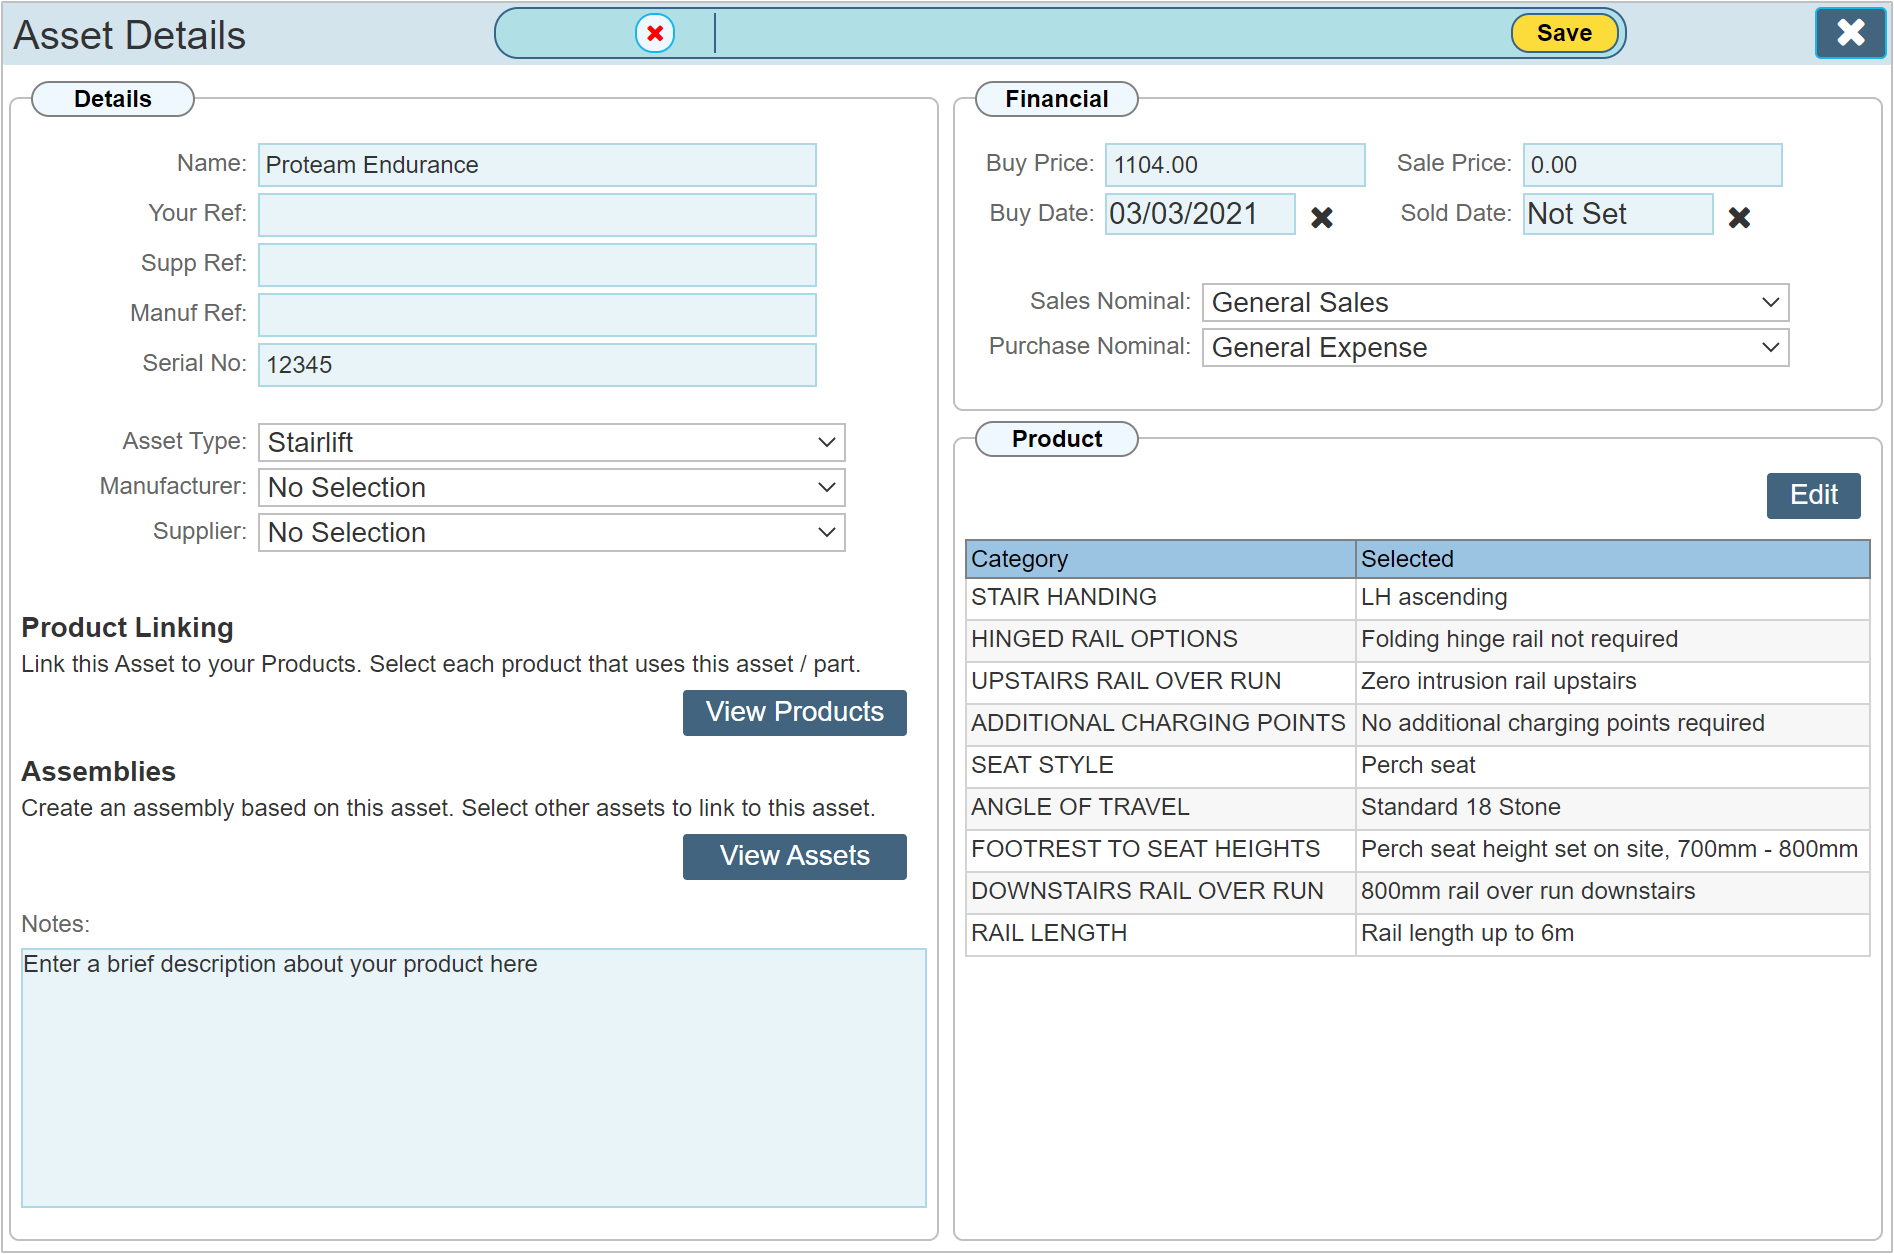
This asset will now be available for selection within a Site Record.
Advanced options
The above, details how to use the basic functions with the default template. Below we explore the advanced features.
Adding a New Product
When first using the Specification Editor, you may not have set up any products. Ideally, these would be set up in the Products Section, you may however create them directly from the Specification Editor.
Open the Specification Editor dialogue by clicking 'Edit'. Within the 'Product' panel locate the + symbol next to the Model drop down list. Click this to open the 'Product Details' dialogue as shown below.
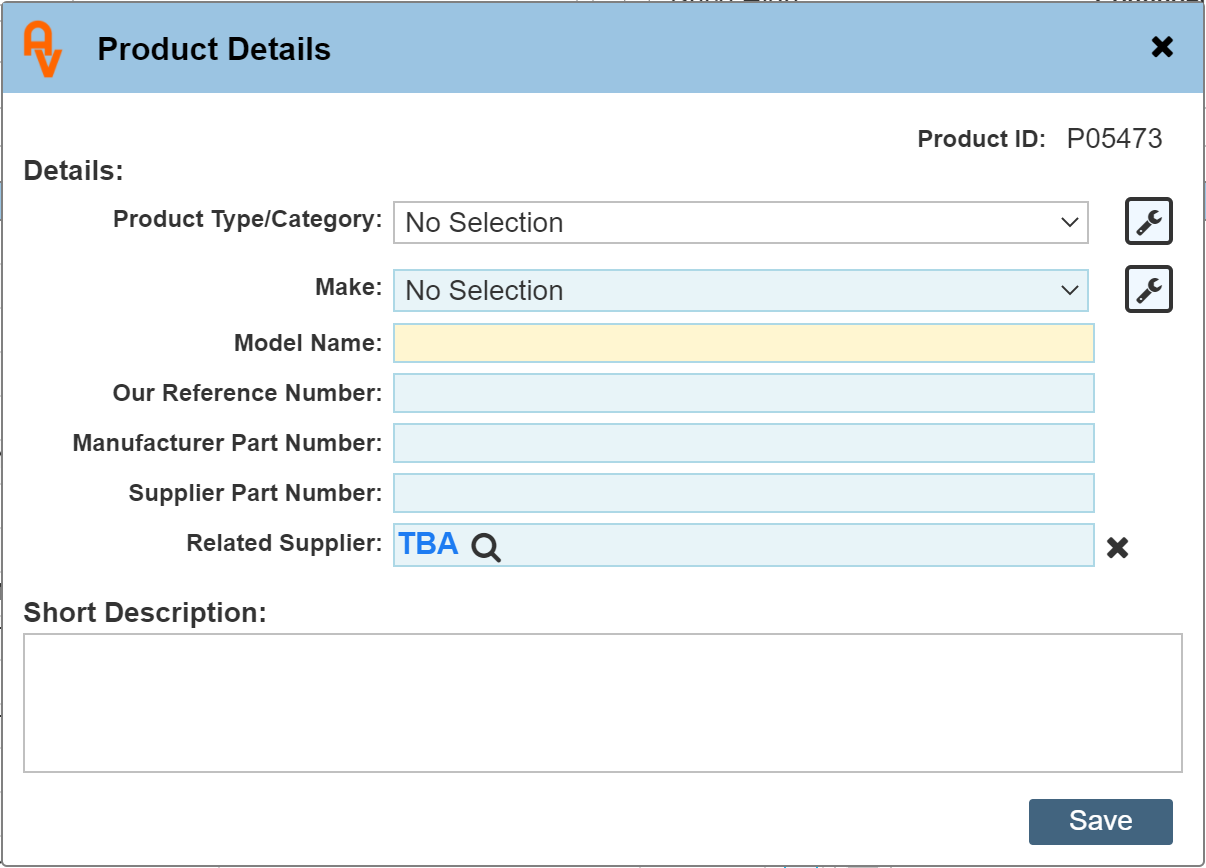
The advanced details regarding this dialogue are covered within the Products How To guide, for this tutorial, we will assume some knowledge exists regarding this dialogue.
Product Type/Category
This drop down lists each of the product types currently up up on the system. Essentially, a product type is the mechanism used to determine which list of the Specification Editor Attributes to use. I.E. for our example product above, we selected a 'Proteam Lifts - Endurance' (a made up name), this product is a stairlift and is linked to the 'Stairlift' Product type.
Once a product type has been created, your products are linked to them so that each time you open the Specification Editor and select a particular make and model, the correct list of attributes are shown. The product type is also linked to Service Check Lists as used by your service technicians whilst out on site using the mobile App. The Product Type in this scenario is used to determine which set of product service questions are prompted to the technician.
You may add a product type directly from the Specification Editor.
Make
Each product is associated with a Make, this is essentially the manufacturer of your product, never the supplier. You may add a product make directly from here by clicking the 'Spanner' icon.
Model Name
The name as given by the manufacturer for this product.
Our Reference
If you use your own references for each product, enter this here.
Manufacturer Part Number
The reference number given by the Manufacturer (if known).
Supplier Part Number
The reference number given by your Supplier (if known).
Related Supplier
This allows you to link this product to a supplier record within Workforce Manager (recommended).
Short Description
Describe where required what this product is / does.
Editing the Attributes List
Once a product make and model has been selected, the list of available attributes is shown within the Attributes panel. This list can be edited by clicking 'Edit' as shown at the top of the panel. Below is our example attributes panel in edit mode.
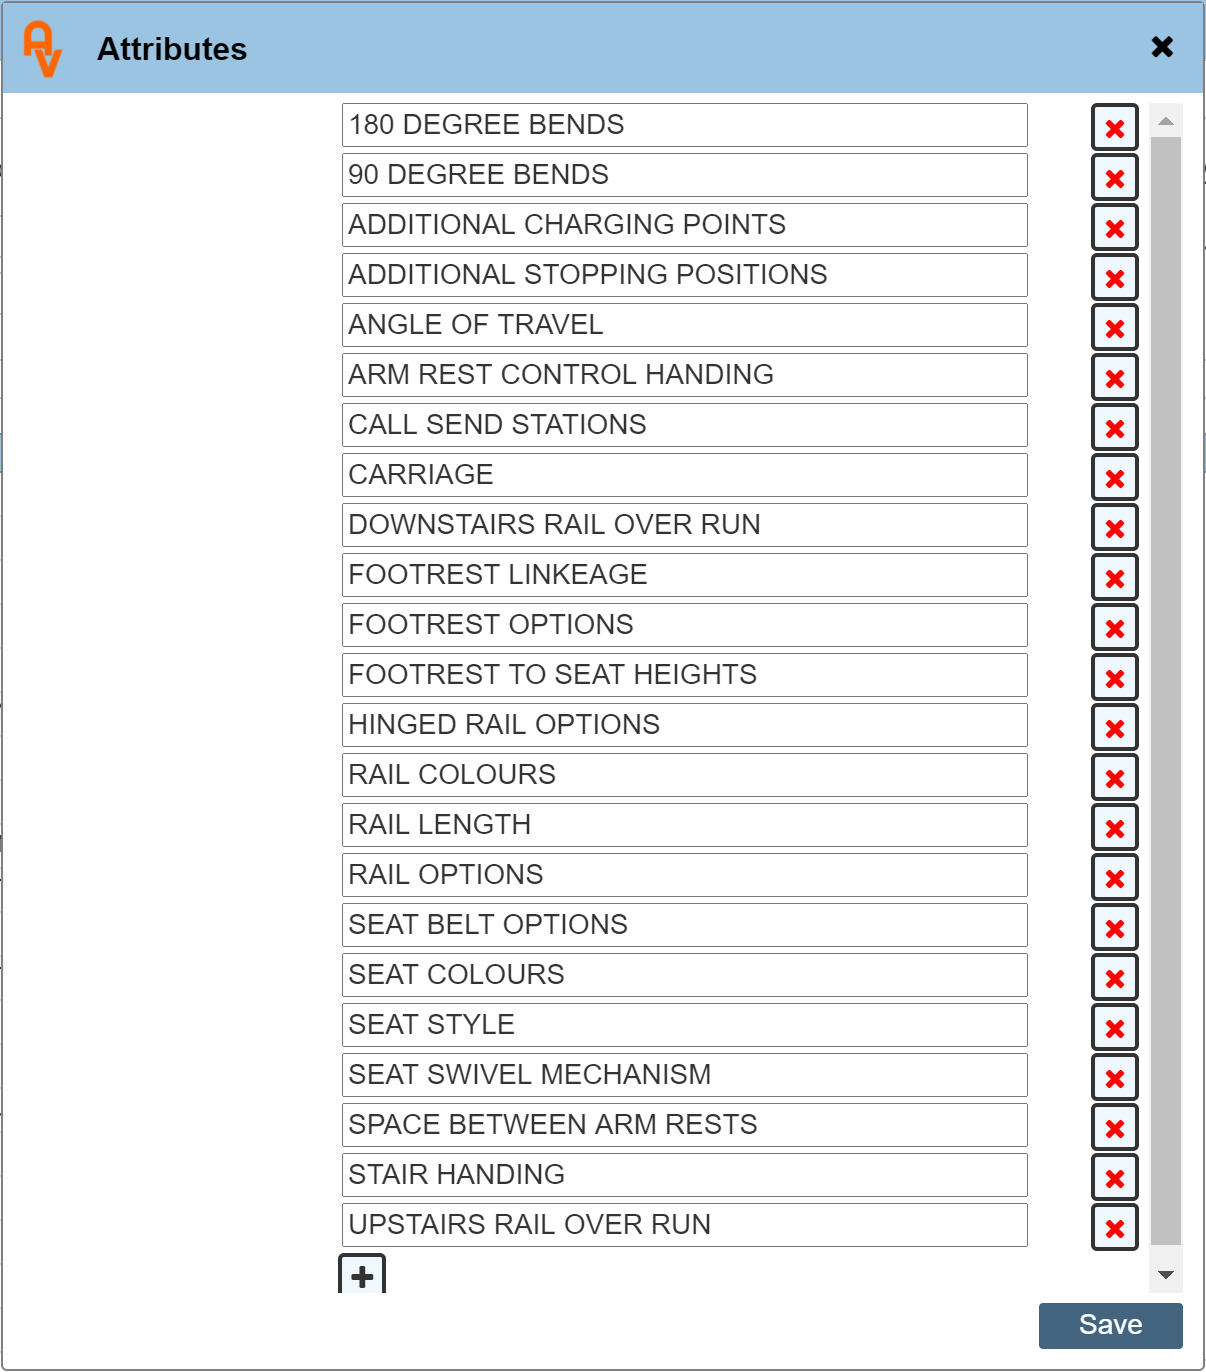
There may not be any attributes in your panel when first getting started. Clicking the + symbol shown there at the bottom of our list will allow you to add an new attribute. A blank line will appear allowing you to type in your new attribute name.
Click 'Save' to save your new attribute. This new attribute will be applied to the Product Type assigned to the current product and will be available within any new Specification you may create that has a product using the same Product Type.
You may 'Delete' an attribute, but unless you have just added it, we strongly advise against deleting an attribute in case it has been used previously within another Specification in the past. The rule of thumb here is that if the Attribute shows that there are some Variants assigned to it (the number in brackets on the main Attributes List), DO NOT DELETE IT.
|
Do not delete an attribute if variants have been assigned to it. It may have been used in previous Specifications.
|
Adding a Variant
Once an attribute has been selected, you may add additional Variants to it by clicking the 'Add button at the top of the variants panel. The below dialogue shows the options available for adding variants.
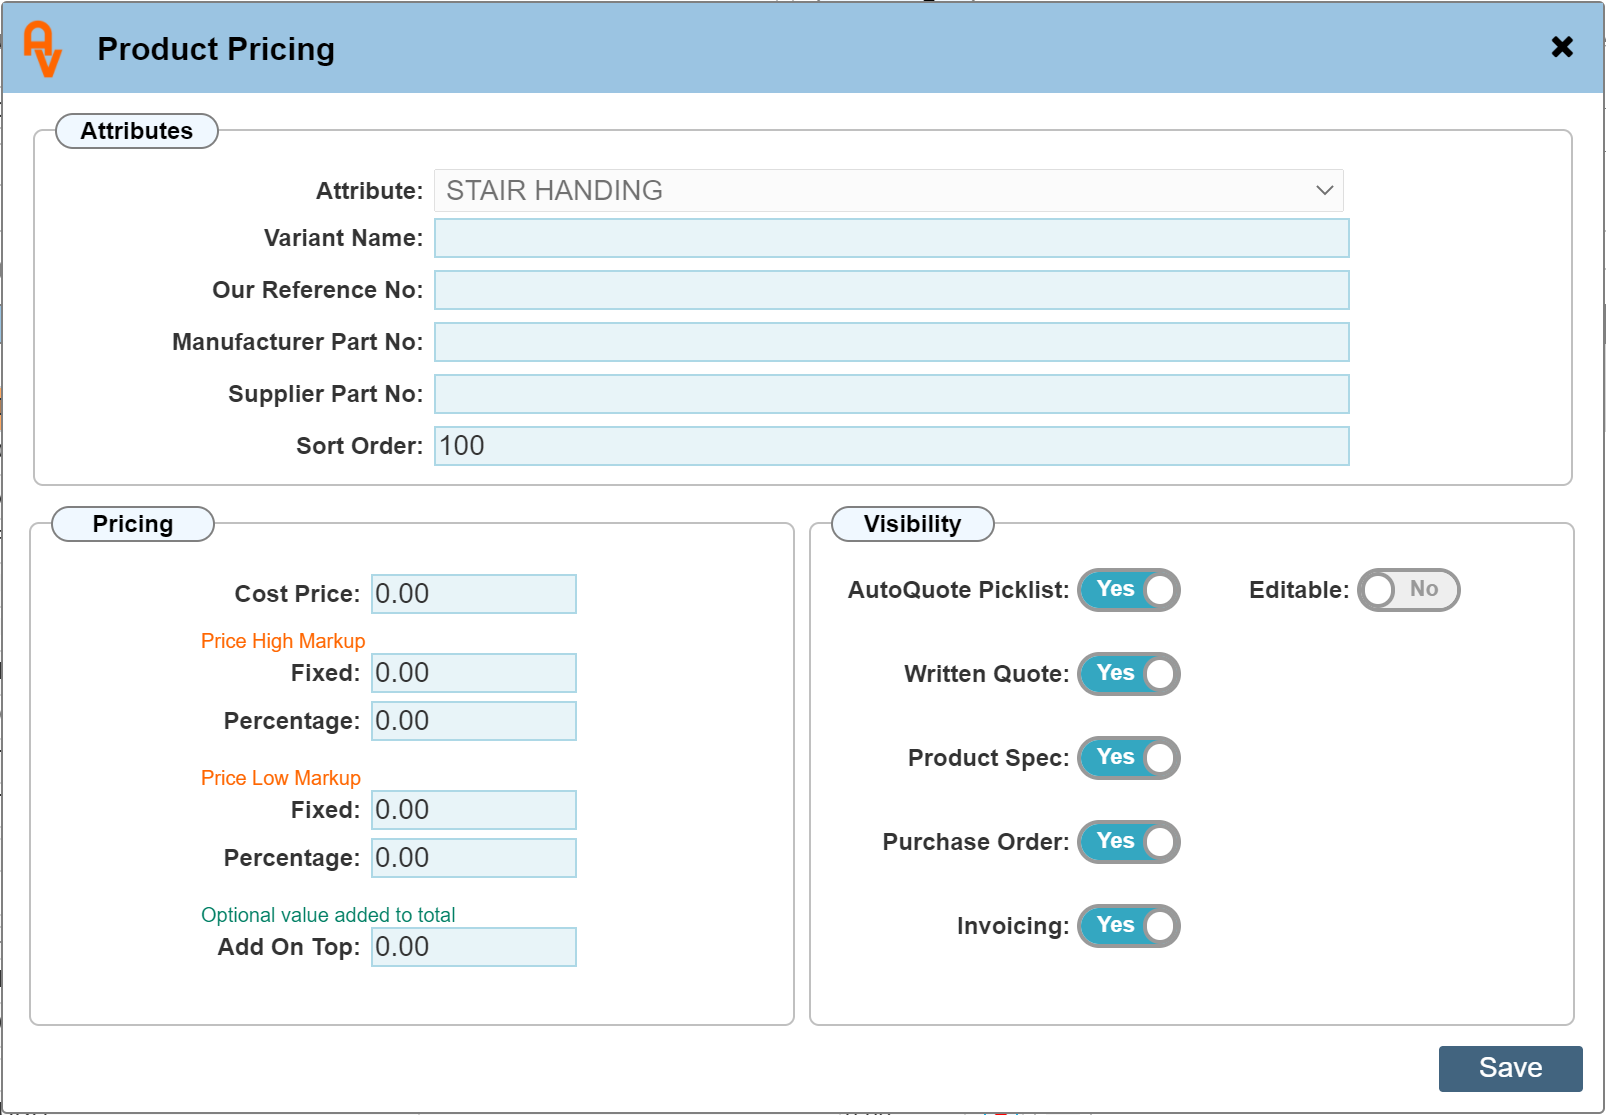
The options here are covered more thoroughly within the Products Section. We will discuss the main options here.
Variant Name
Give this variant an suitable name. I.E. in the above dialogue example, the greyed out 'Attribute' name for this variant is 'STAIR HANDING'. this would mean we are going to add a variant of either 'LH' or RH'.
Sort Order
Entering a number here simply makes sure the sort order of your variants is listed exactly how you want them. You may leave this as it is, should this not be a requirement.
Cost Price
This is the price of this variant option should one apply. in this example, the cost of a LH lift over a RH lift one would assume does not make a difference to the price. further, the handing of the lift in question would be covered in the main item price. It is OK to leave the pricing section with zero's if no cost applies.
Mark Up
The mark up section allows you to state how the sale price of your products / asset variants is calculated. Some companies use a fixed price mark-up modal, whereas others use a percentage mark-up. Enter the values as required. If you happen to add both a fixed mark-up and a percentage mark-up, the percentage value will override the fixed. I.E. Percentage mark-up takes precedence over fixed.
Add On Top
Even though the mark-Up price covers the general pricing of your product, the Add On Top figure is simply an additional amount that you add. I.E. This may be an item that you have priced up with a percentage value from a sales point of view, but you also want to include a fixed additional amount, I.E. installation costs.
Visibility
The visibility panel details where this variant will be shown throughout the various sections within Workforce Manager.
Editable
If you select the 'Editable' toggle, when selecting a variant that has the 'Editable' toggle set, you will be prompted to edit the string before it is selected. E.G. in our example, there is an attribute called 'Rail Length' there are options for rails lengths up to a given length, priced accordingly. Once the variant has been Saved, the below image shows the editable variant dialogue after clicking the variant within the variants panel.
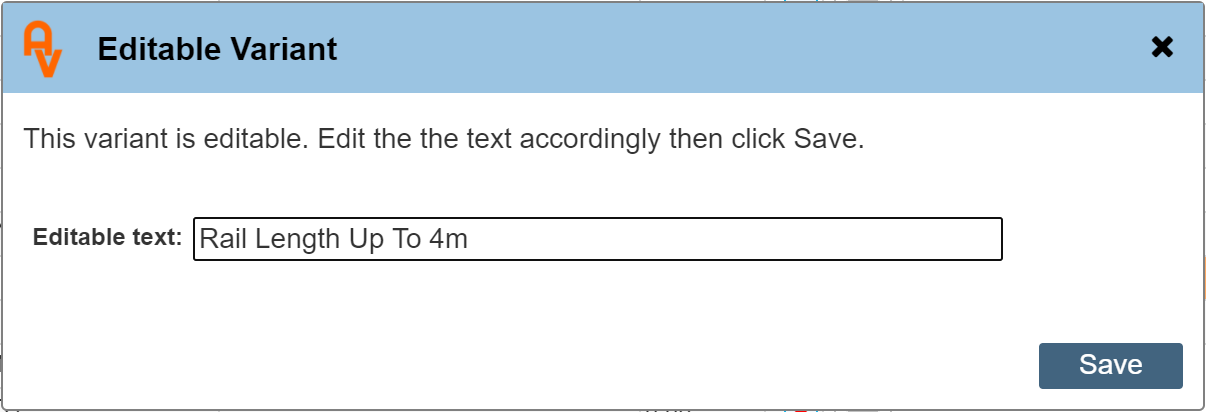
Edit the text to show the precise details required. Click Save to include the edited variant within your quote.
Deleting a Variant
The red cross to the right of each variant allows you to delete the variant from its attribute. As with deleting the Attributes, great care must be taken to make sure this variant has not been used in an existing Specification previously.
|
Do not delete a Variant unless you are 100% sure it is OK to do so. It may have been used in previous Specifications.
|
It is important to note that it is possible to set the system to prevent deleting Attributes and Variants. Contact us through support if you wish us to do this.